Many friends have probably experienced OpenWrt, right? Have you felt its powerful and outrageous features due to its open-source and customizable nature while building your own “super router”? However, with the freedom that open-source brings, users also need to take on more security responsibilities. In this series, we will discuss the security hardening of OpenWrt, especially focusing on firewall configuration, to help everyone better protect their networks while enjoying their experience.
Why is Security Hardening Necessary?
Many people use OpenWrt directly after installation; the default configuration does work, but there are many security risks:
- SSH is open by default, which may be vulnerable to brute-force attacks;
- Weak passwords can easily be exploited by attackers;
- Firewall rules are too broad, leading to internal network exposure;
- Unclosed services may pose potential risks.
The core goal of hardening is to: reduce the attack surface + strengthen access control. Refer to the public server security protection guide: Don’t let hackers target you!
Basic Hardening Measures
1. Change Default Username and Password
The default user for OpenWrt is root. It is recommended to create a regular user for daily management and disable root direct login. If you find it troublesome, you can compromise by restricting root to key-based login only.
# Modify /etc/ssh/sshd_config

PermitRootLogin prohibit-password
This option has several values, which differ as follows:
| Value | Meaning |
yes |
Allows root login by any method (password or key) |
no |
Disallows root login |
without-password (old version) |
Only allows key-based login, disallowing password login |
prohibit-password (new version) |
Only allows key-based login, disallowing password login (similar to without-password but more modern) |
forced-commands-only |
Only allows key-based login and execution of specified commands, prohibiting all other cases |
The above configuration options exist only in OpenSSH. Some versions use Dropbear to provide SSH services, and its configuration file is /etc/config/dropbear, which is relatively lighter than OpenSSH. If you really dislike command-line methods, it is recommended to use the LuCI interface to complete these configurations without worrying about the underlying options.
The so-called LuCI interface is actually the web management interface of OpenWrt, which occupies little resources and can run on low-performance routers; different functional modules can be installed as needed; and it has a Chinese interface, making it easy for ordinary users to get started:
- LuCI = Lua Configuration Interface
- Lu → Lua language (this interface is written in Lua + uhttpd, where uhttpd is a lightweight HTTP server)
- CI → Configuration Interface
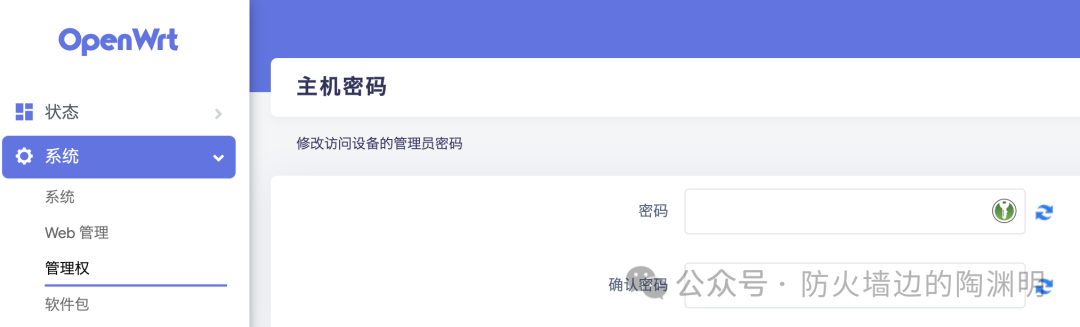
Change the strength of the root password by using a password generator to create it; after all, you don’t need to memorize it, so make it a bit complex! Something like this: 2W>?:U<ZQouWYxtpnkq
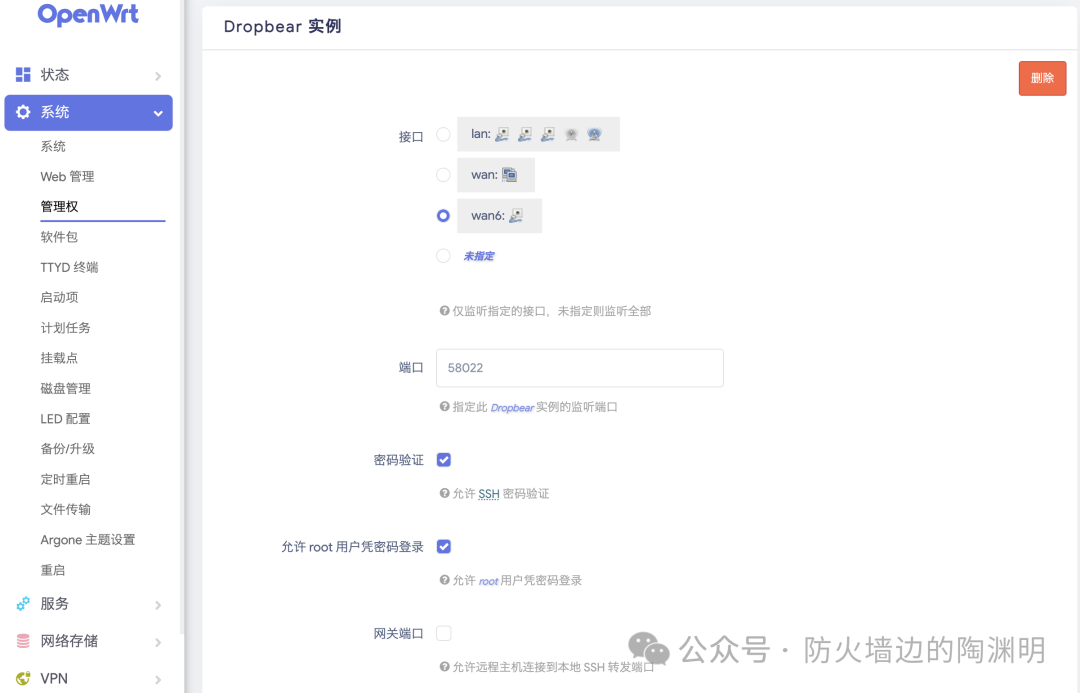
- Interface: The listening port determines which
IPaddress to connect through; it is best to listen only on thelanport, i.e., the internal network address - Port: Change to a high random port, such as:
58046 - Password authentication: Uncheck, all users must use key-based login
- Allow
rootuser to log in with a password: Uncheck - Gateway port: Uncheck
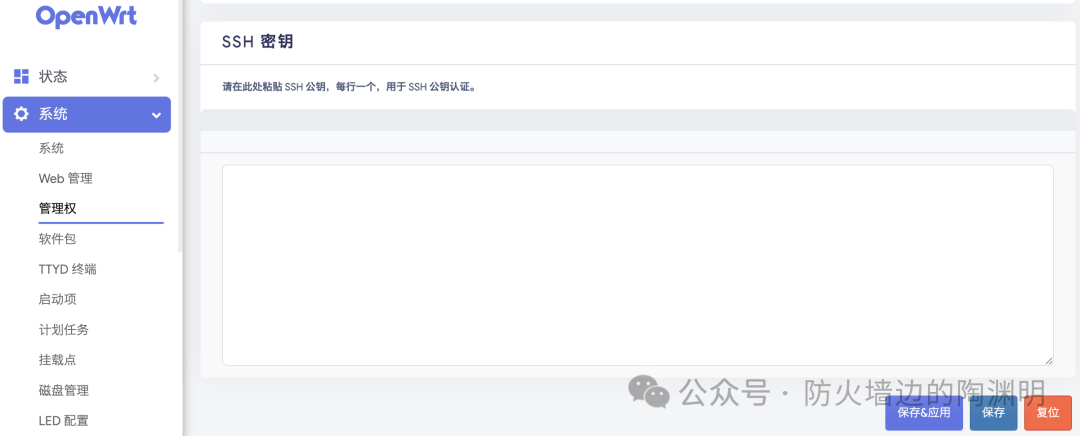
For key authentication configuration, simply paste the public key content from your local client. For key generation, refer to the article “From Zero to Mastery: OpenSSH File Transfer, Proxy, Tunnel, All in One!” for passwordless login.
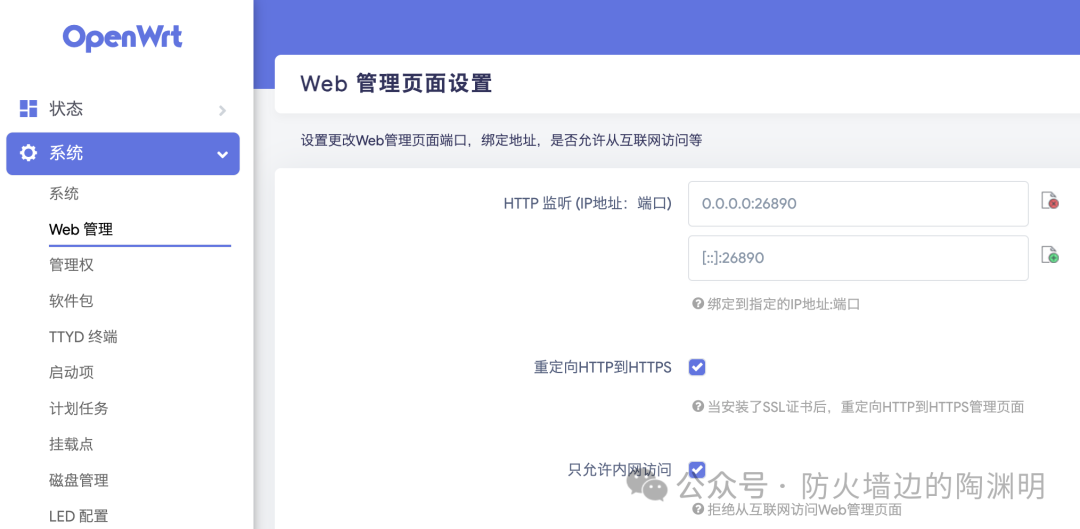
2. Restrict Management Port Access
Change the listening port for HTTP, which defaults to 80, to a high random port; check Force redirect to HTTPS; check Allow access only from the internal network.
Change the listening port for HTTPS, which defaults to 443, to a different one, and add certificate configuration. For certificate application, refer to the revolutionary free SSL certificate provider: Let’s Encrypt, which has made HTTPS popular.
# Modify configuration file /etc/config/uhttpd

config uhttpd 'main'
        list listen_https '0.0.0.0:26891'# Change the default 443 port
        list listen_https '[::]:26891'# Change the default 443 port
        option home '/www'
        option rfc1918_filter '1'
        option max_connections '100'
        option cert '/root/.acme.sh/yourdomain.cer'# Set your own certificate path
        option key '/root/.acme.sh/yourdomain.key'# Set your own certificate path
        option cgi_prefix '/cgi-bin'
        list lua_prefix '/cgi-bin/luci=/usr/lib/lua/luci/sgi/uhttpd.lua'
        option network_timeout '30'
        option http_keepalive '20'
        option tcp_keepalive '1'
        option ubus_prefix '/ubus'
        list index_page 'cgi-bin/luci'
        option max_requests '50'
        option script_timeout '3600'
        option redirect_https '1'
        list listen_http '0.0.0.0:26890'
        list listen_http '[::]:26890'

config cert 'defaults'
        option days '730'
        option key_type 'ec'
        option bits '2048'
        option ec_curve 'P-256'
        option country 'ZZ'
        option state 'Somewhere'
        option location 'Unknown'
        option commonname 'OpenWrt'

# After modification, restart the service
/etc/init.d/uhttpd restart
Combining DDNS, subdomains, and using KeePassXC for automatic filling of high-strength passwords creates a solution that balances security and convenience.
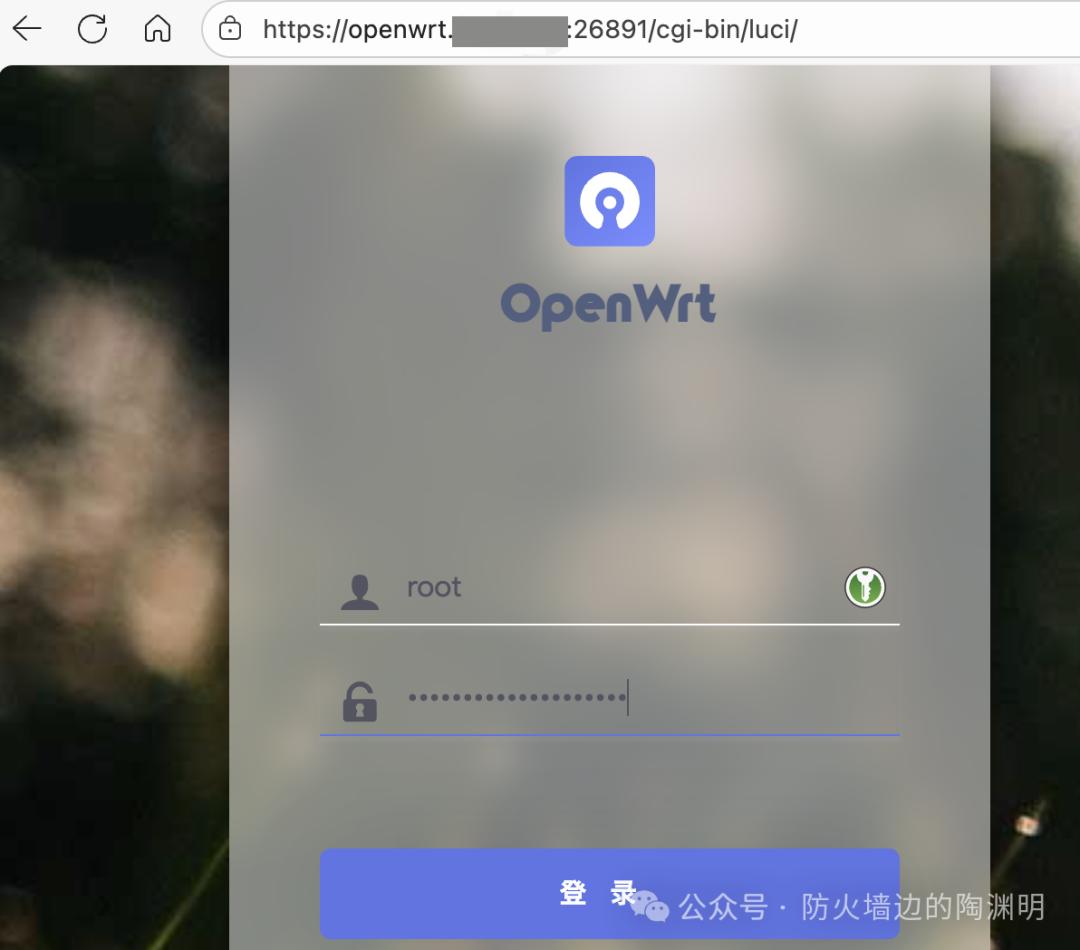
For related solutions, please refer to: Subdomain with reverse proxy: Access internal services easily! GitHub stars 23K+! Why has the open-source software KeePassXC attracted so much attention?
3. Update System and Plugins
- Use official sources or trusted third-party sources
- Regularly run
opkg update && opkg upgradeto avoid vulnerabilities being exploited
With the above basic settings, your OpenWrt can already withstand 80% of common attacks. In the next issue, we will delve into the configuration of the OpenWrt firewall, so don’t miss it, remember to follow us!
#OpenWrt #SecurityHardening