01
Overview
1.1 Introduction
Summer is here, and the weather is a bit hot. Let’s make a small fan with the micro:bit to help cool us down.
1.2 Course Objectives
- 【Scientific Knowledge】Understand the difference between analog signals and digital signals.
- 【Programming Knowledge】Master the use of functions.
- 【Hardware Knowledge】Master the control methods of motors, including: forward, reverse, stop, accelerate, and decelerate.
02
Item List
|
Small particle building blocks |
Several |
|
micro:bit main board |
x 1 |
|
micro:bit expansion board |
x 1 |
|
Motor driver module |
x 1 |
|
M motor |
x 1 |
|
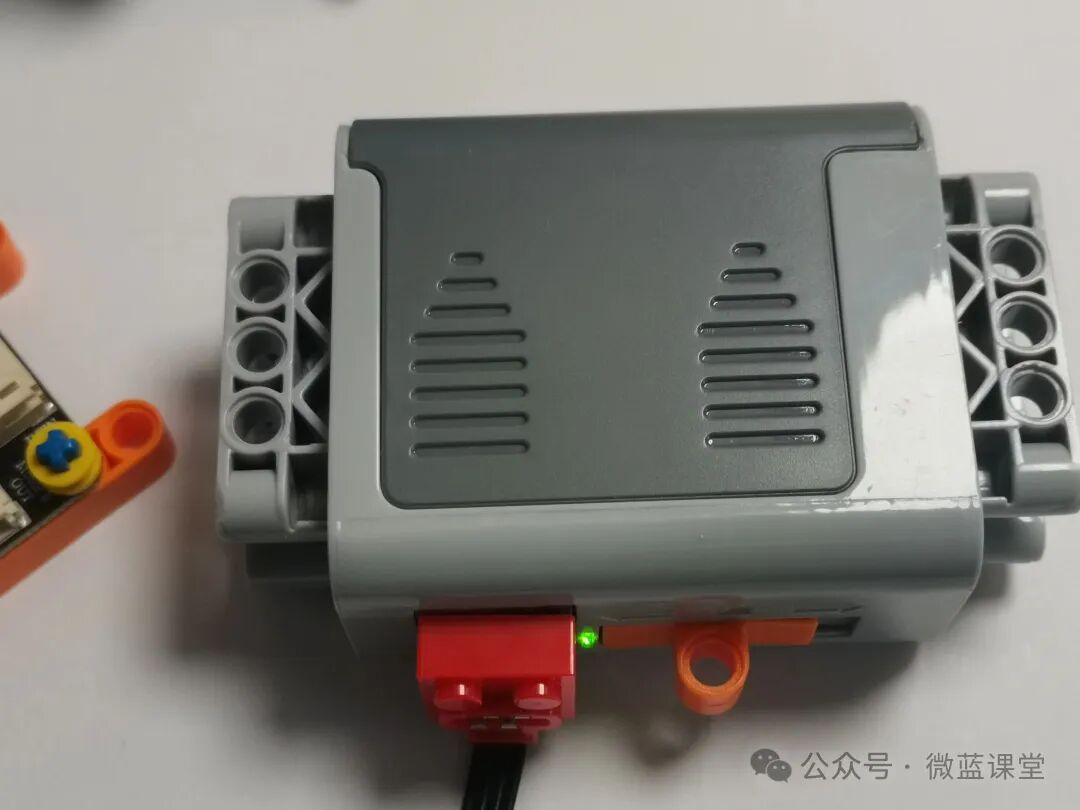
5V power box |
x 1 |
|
Power cable |
x 1 |
|
2P DuPont wire |
x 2 |
03
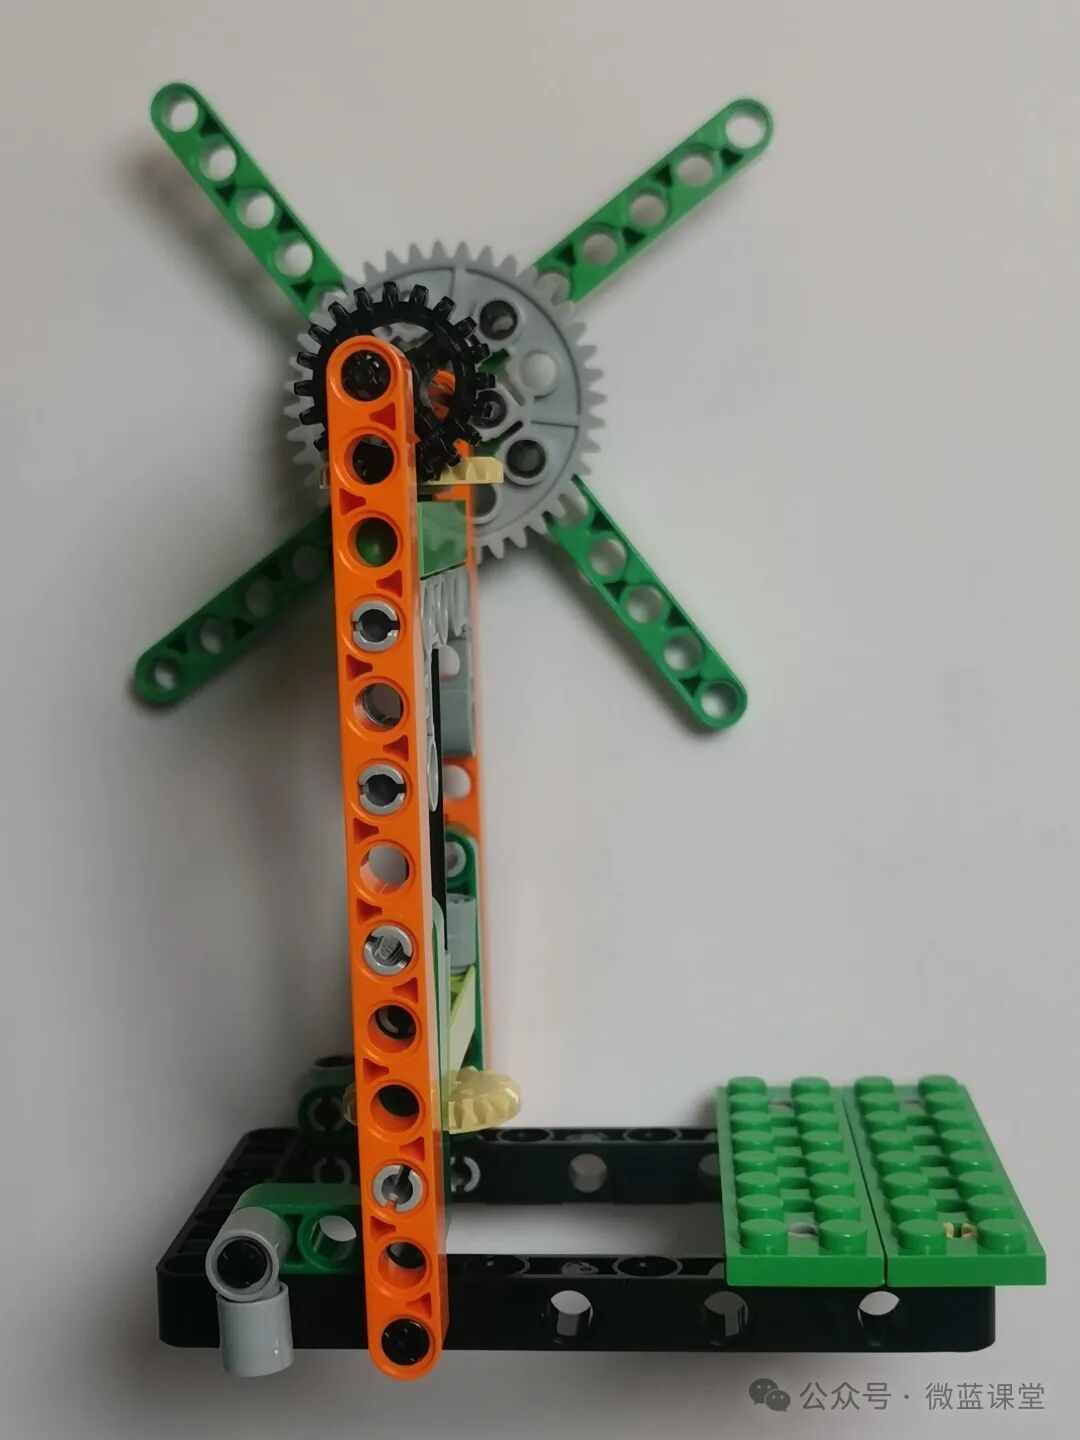
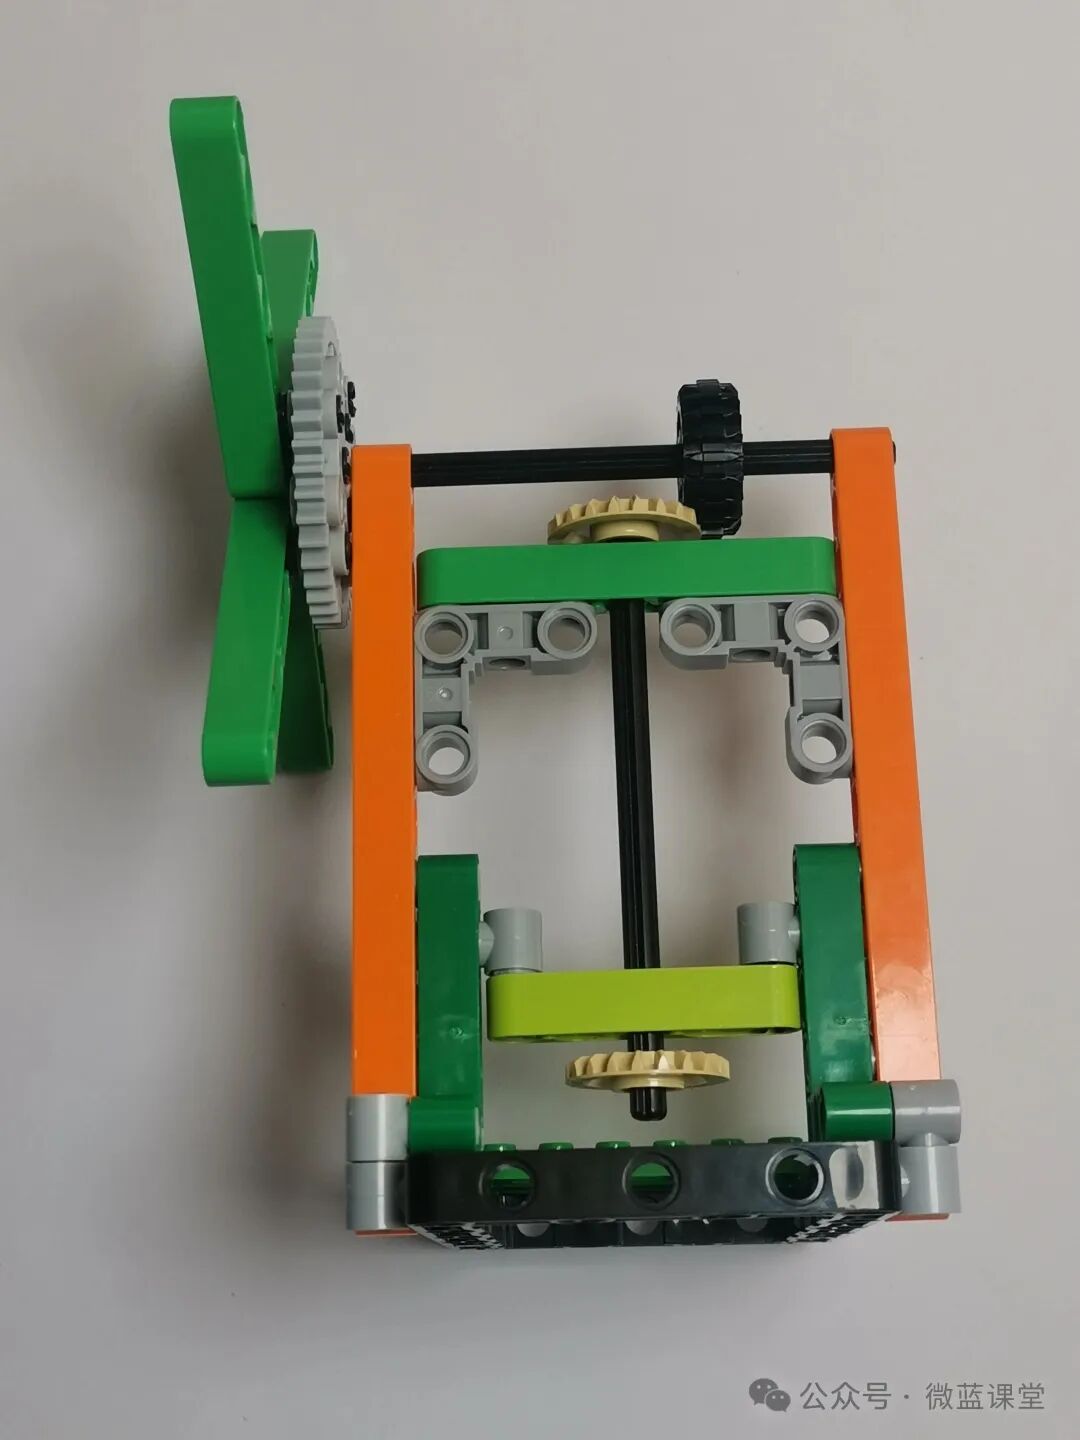
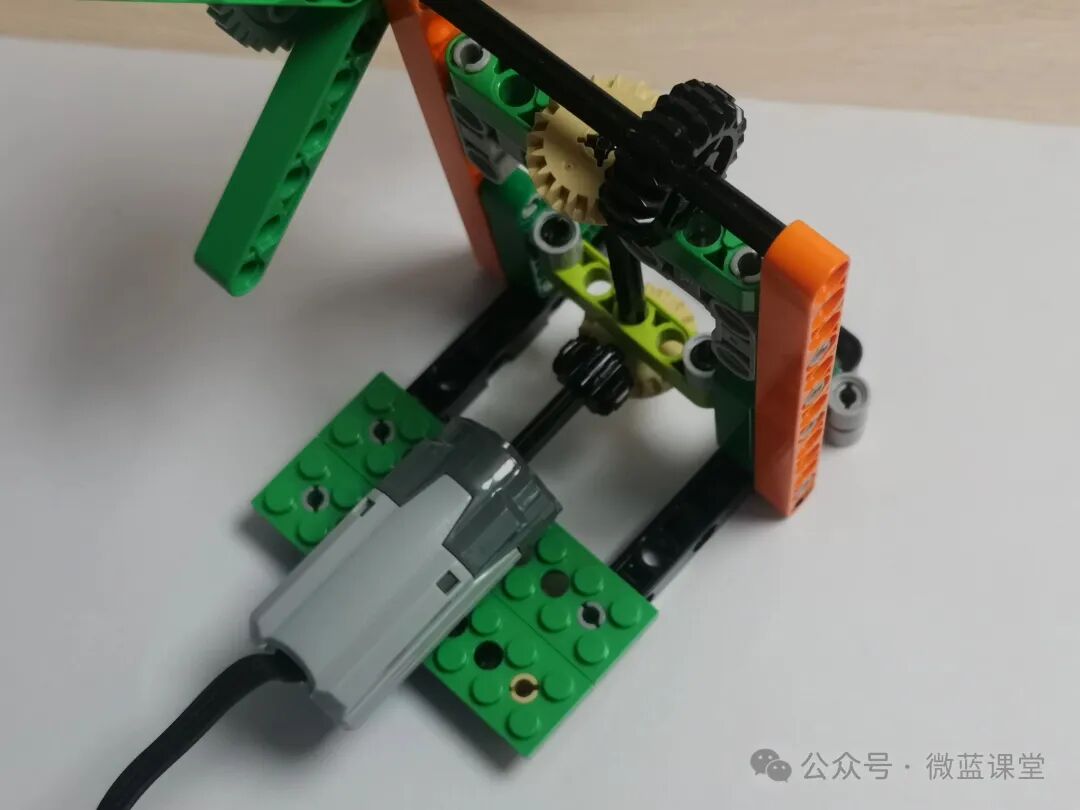
Assembly Process
04
Program Explanation
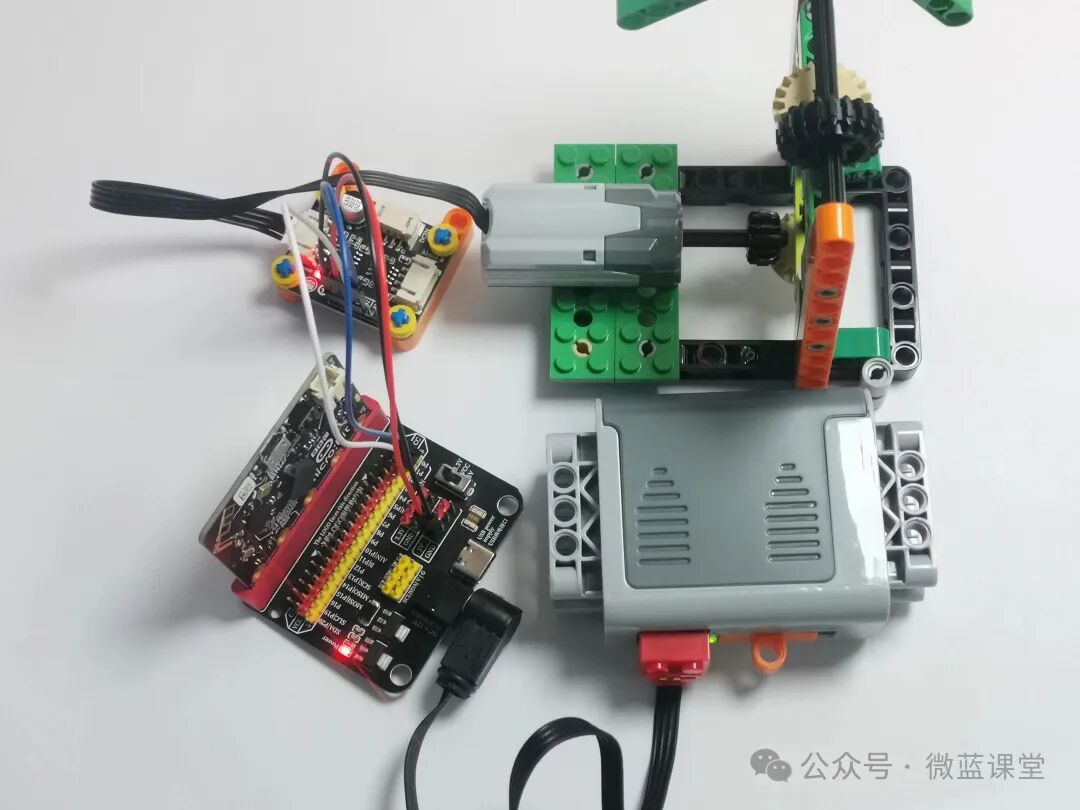
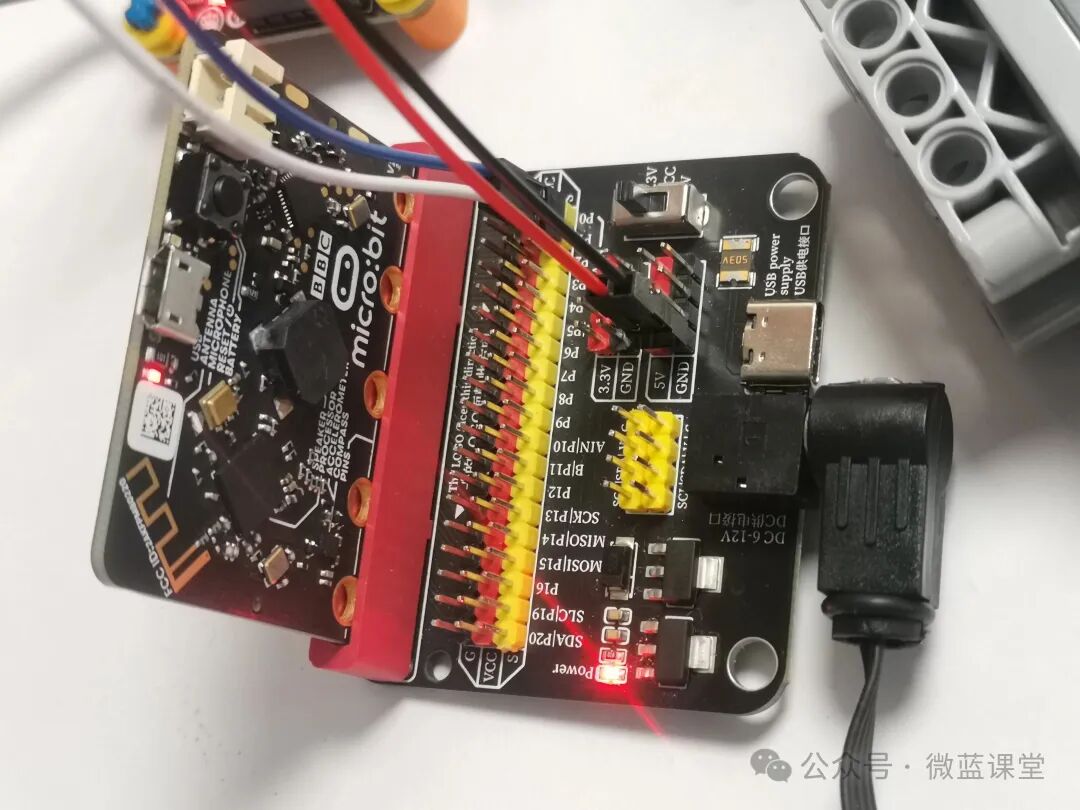
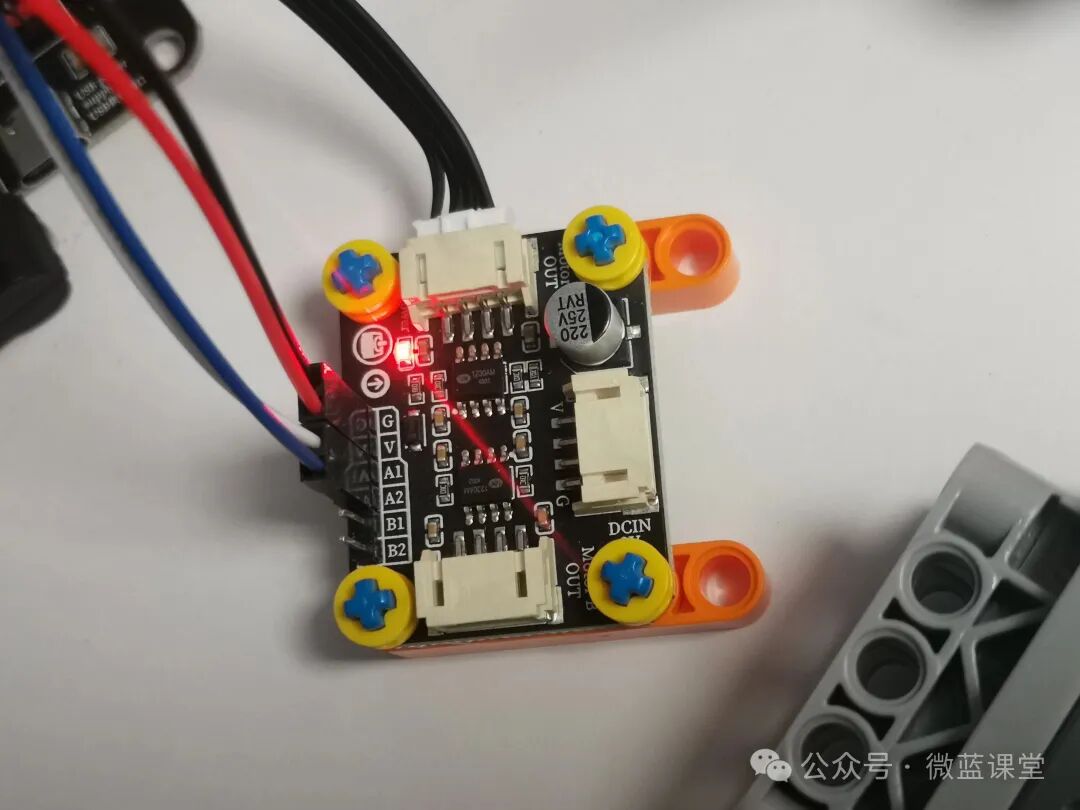
4.1 Wiring
- LEGO power cable: One end is a LEGO quick connector, connected to the power box; the other end is a DC head, plugged into the DC port of the expansion board.
- Red and black 2P DuPont wire: One end connects to the power of the expansion board, red connects to 5V, black connects to GND; the other end connects to the motor driver module, black connects to G, red connects to V.
- Blue and white 2P DuPont wire: One end connects to the P0 and P1 pins of the expansion board; the other end connects to the A1 and A2 pins of the motor driver module.
- The motor plug: Insert into the MotorA interface of the motor driver module.
Note: The red connects to the positive terminal, and the black connects to the negative terminal; do not connect them incorrectly, as it may damage the main board. If it feels hot, quickly cut off the power.
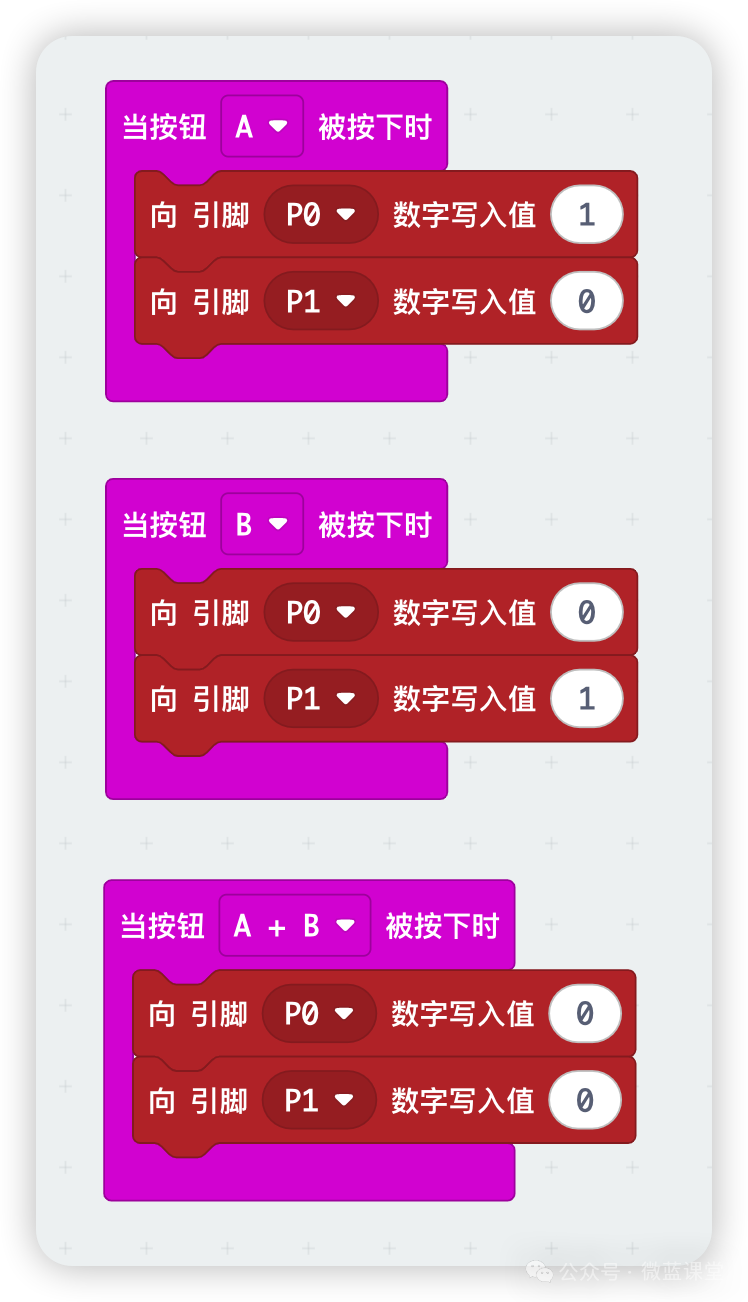
4.2 Program 1: Make the Fan Spin
Program Explanation:
By sending corresponding signals to A1 and A2, the motor will start running.
Forward: Write digital signal 1 to P0, and digital signal 0 to P1.
Reverse: Write digital signal 0 to P0, and digital signal 1 to P1.
Stop: Write digital signal 0 to P0, and digital signal 0 to P1.
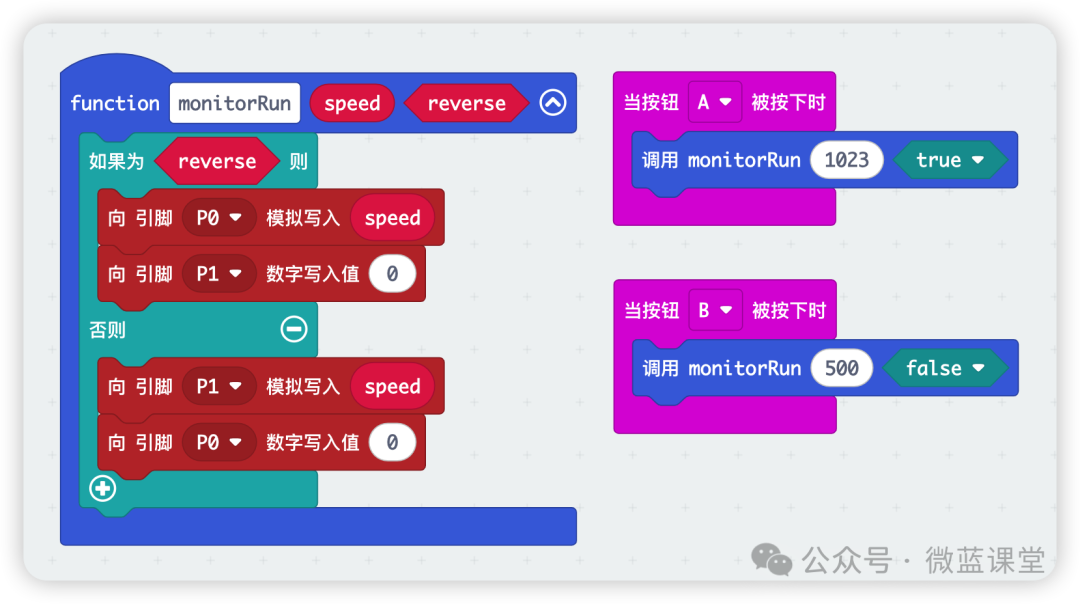
4.3 Program 2: Control the Speed of the Fan
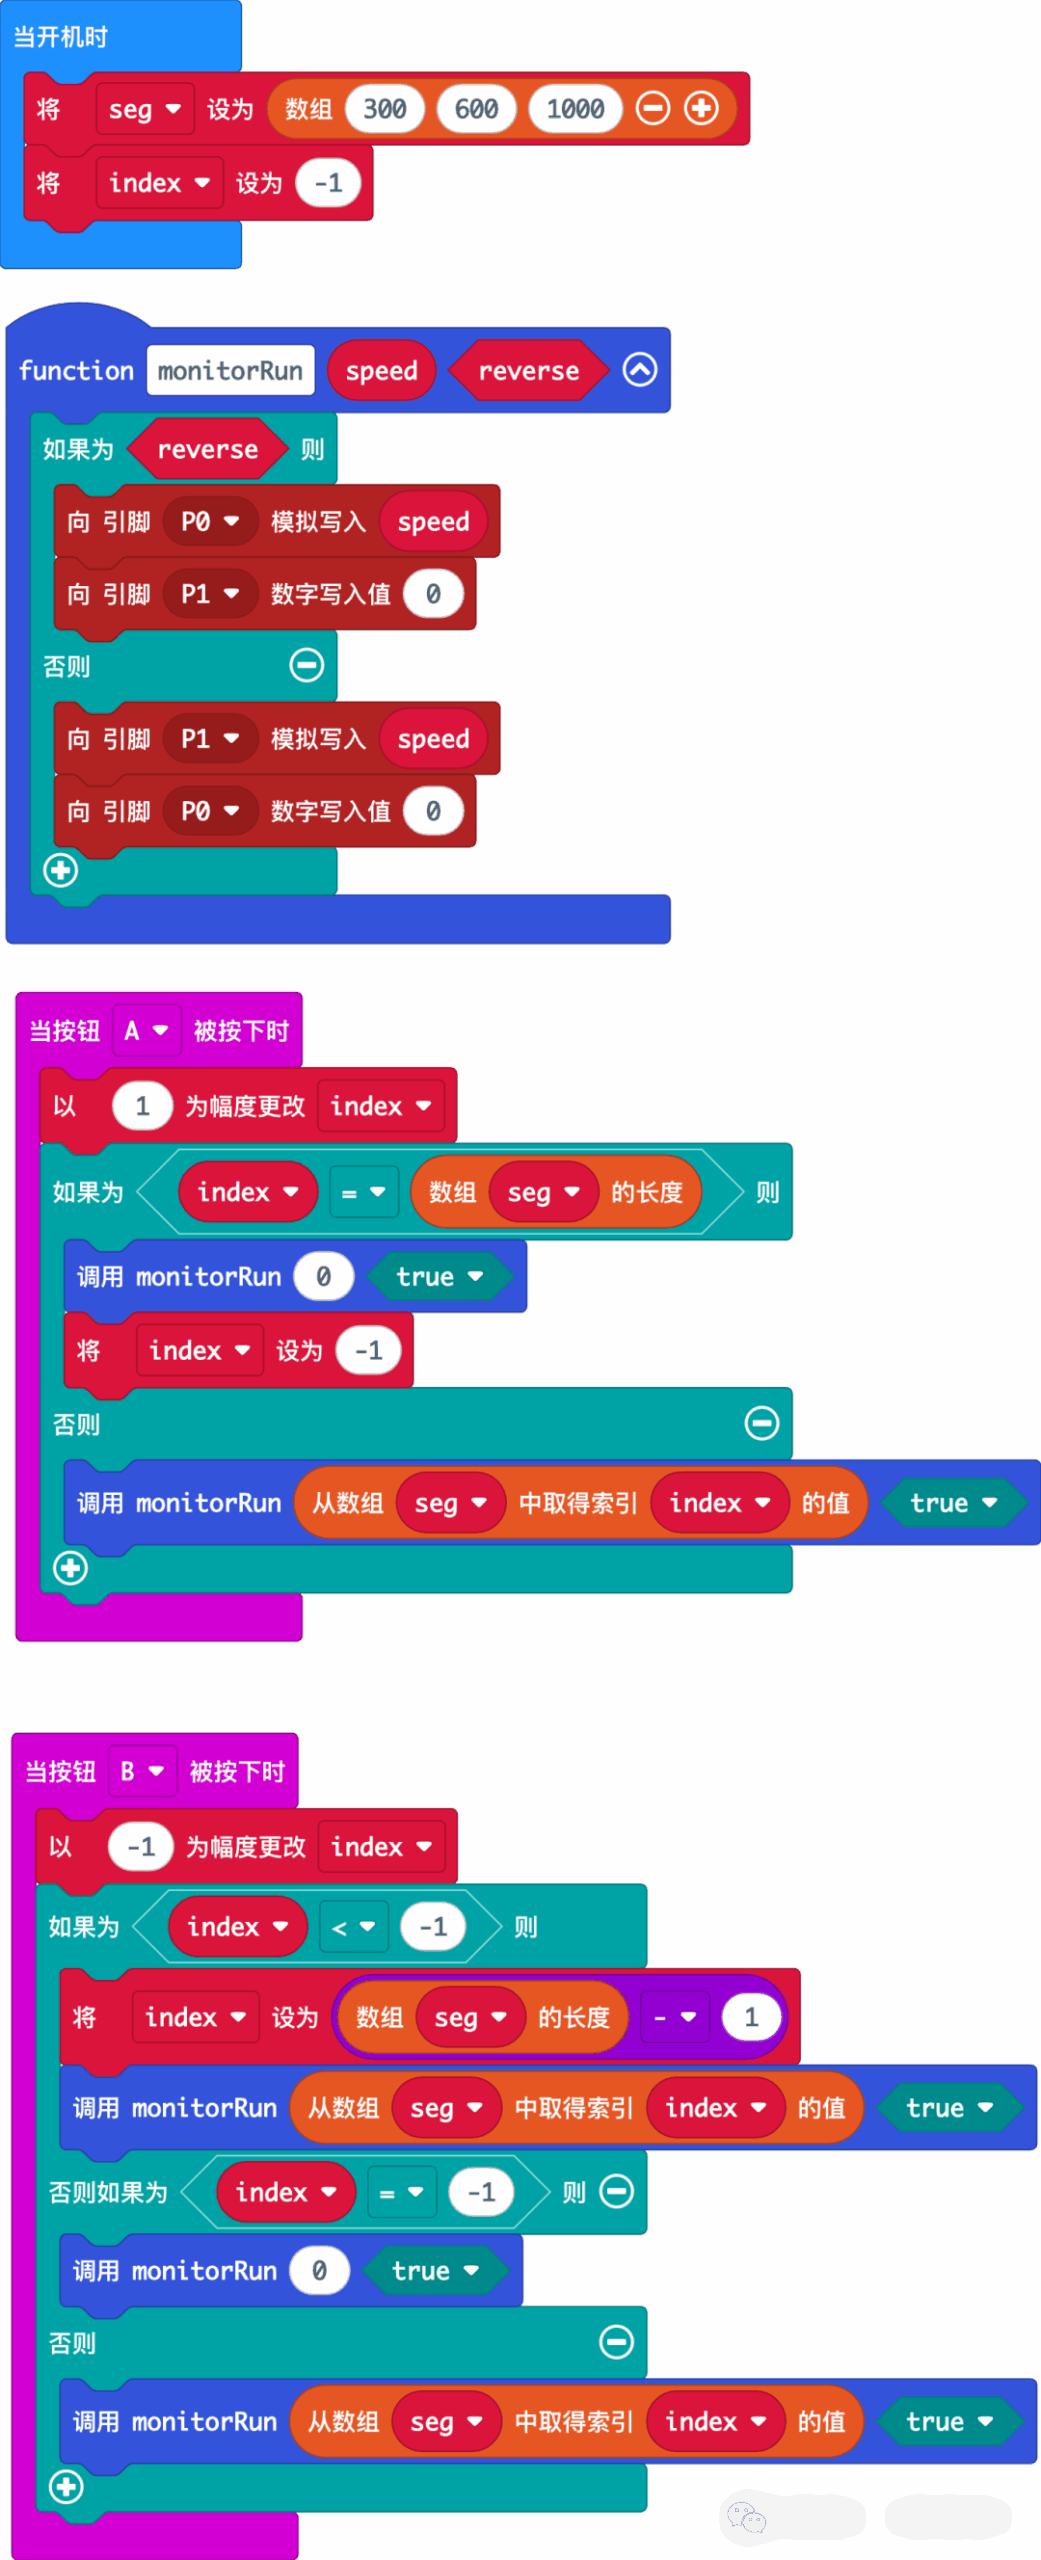
4.4 Program 3: Three-Speed Fan
Set three speed values: low speed = 300, medium speed = 600, high speed = 1000.
The default start is -1, and the fan does not spin.
When button A is pressed, the gear increases by 1, and the speed increases; when in high speed gear, pressing button A again stops the fan.
When button B is pressed, the gear decreases by 1, and the speed decreases; when in low speed gear, pressing button B again stops the fan.
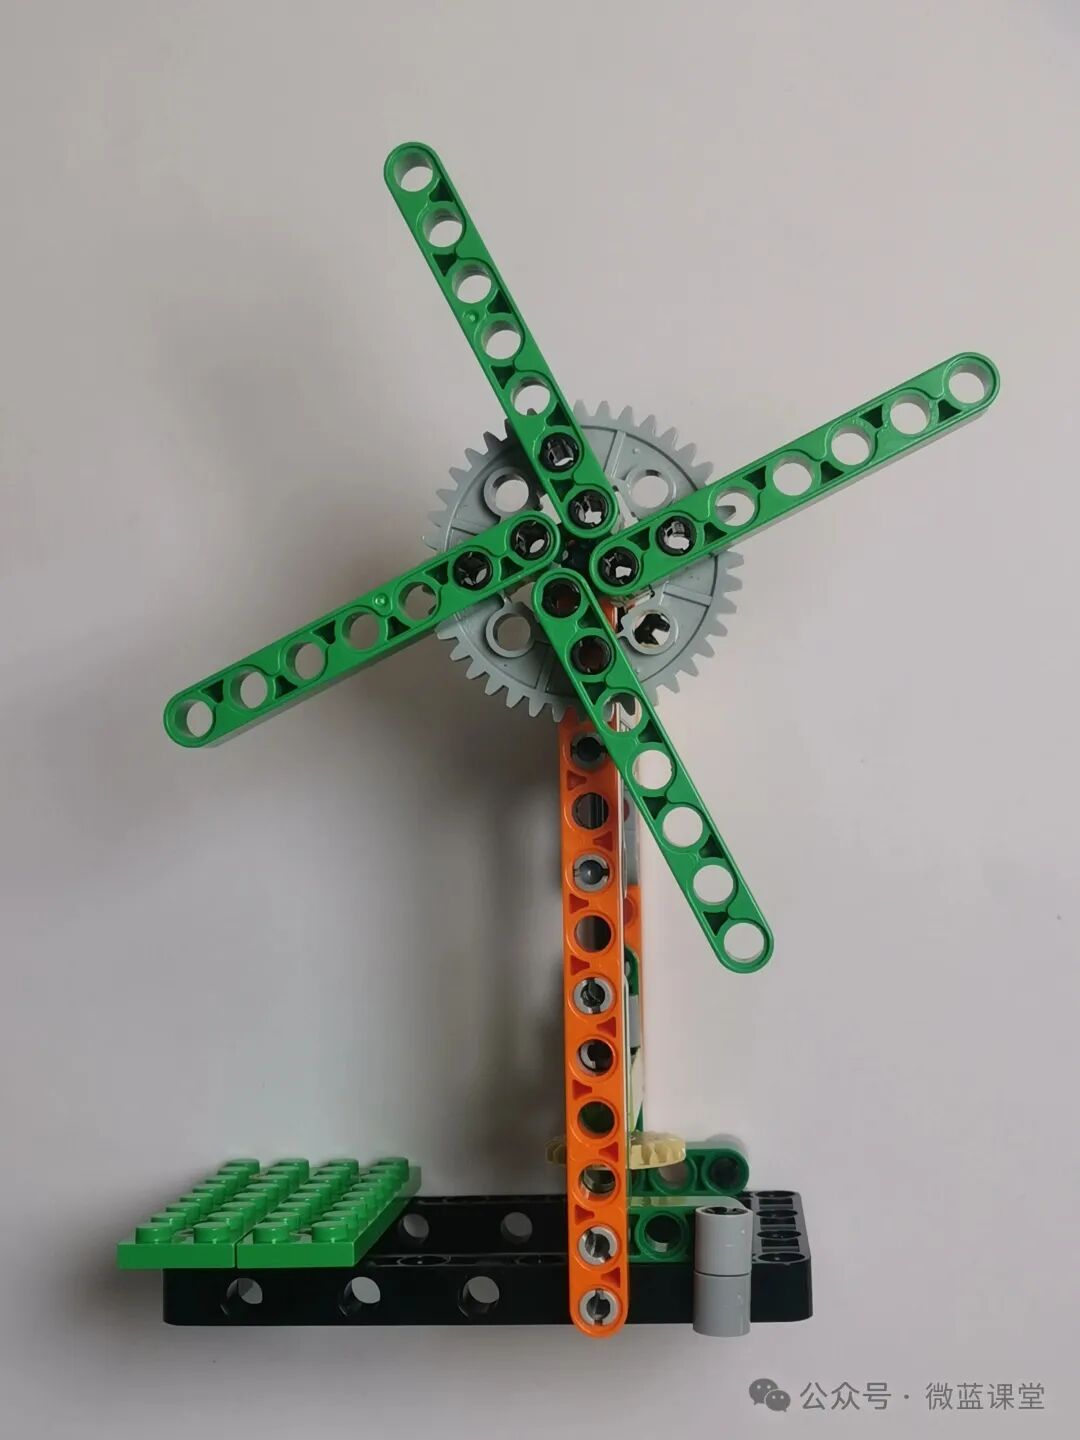
05
Product Display
Students who need accessories can go to my Taobao store with the same name to purchase.