Introduction
To learn Linux, we first need to install a Linux system. Since most students have Windows installed on their computers, we will set up a convenient Linux development environment using the combination of “Virtual Machine + Ubuntu (Linux System) + SSH + VSCode”.
Computer Configuration Requirements
- • Memory: Recommended 4GB or more (8GB is better)
- • Disk Space: 50GB – 100GB of free space
- • System: Windows 10/11 64-bit
Why is such a configuration necessary? A virtual machine runs another computer within your computer, so sufficient resources are needed to ensure smooth operation.
Virtual Machine Installation
There are many types of virtual machine software, with VMware and VirtualBox being the most commonly used. We will demonstrate using VMware.
Download VMware from the official website: https://www.vmware.com/products/workstation-pro/workstation-pro-evaluation.html
We will demonstrate using VMware 16, which can also be downloaded from my cloud drive: https://pan.baidu.com/s/19ZV-GgRWw0gLbut39tzdUA?pwd=2va1 Extraction code: 2va1
There are no special notes for installation; just install it to your desired location according to your habits. After installation, click on the application to open it.
When you first open it, you will generally be prompted to add a license. You can refer to the following: Latest VMware 16 Pro License Keys:
ZF3R0-FHED2-M80TY-8QYGC-NPKYF
YF390-0HF8P-M81RQ-2DXQE-M2UT6
ZF71R-DMX85-08DQY-8YMNC-PPHV8
Ubuntu Installation
We will demonstrate using Ubuntu version 22.04 (other versions can also be used).
Download link: https://pan.baidu.com/s/1sIFO__8JkOv0N7MUEvWBnA?pwd=pf2u Extraction code: pf2u
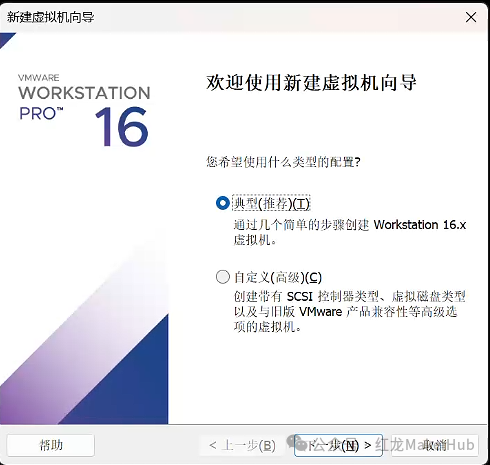
Open the virtual machine you just installed, click “File”, then create a new virtual machine, and select typical installation:
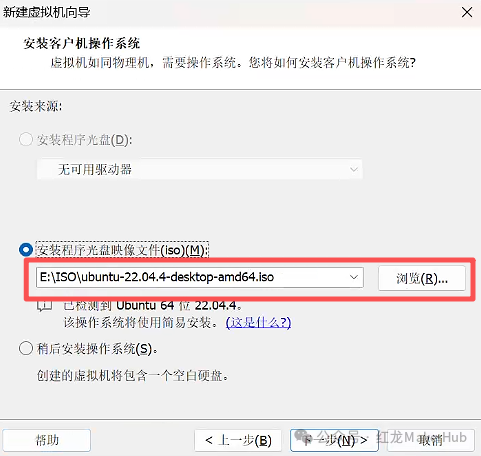
Select the downloaded image, set the username and password. This username will be used to log into Ubuntu, so make sure to remember it.
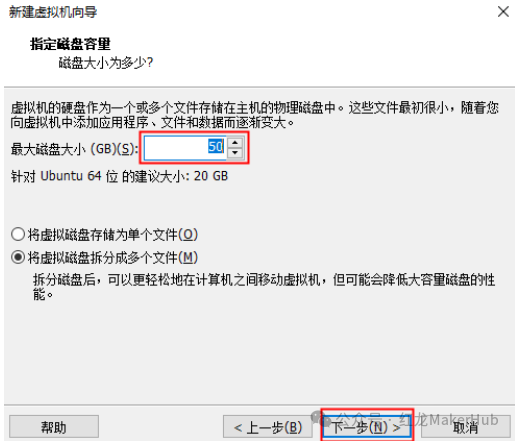
Modify the virtual machine name and installation location. The installation location needs to have sufficient disk space, at least 50GB, and it is best to use an all-English path for the installation location.
Then wait for the installation to complete:
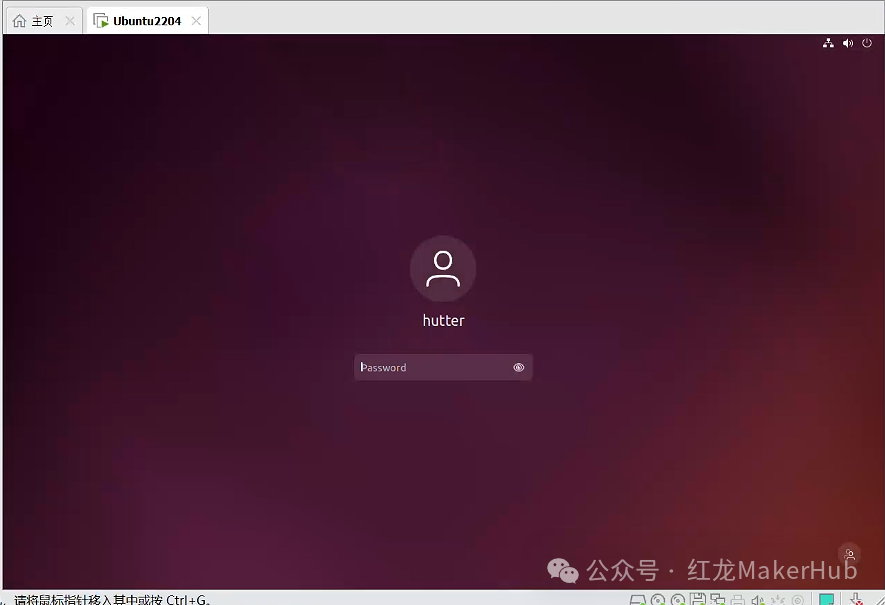
After logging in, if the system prompts whether to update the system and software, click “Do not update”.
Generally, after the installation is complete, you can drag files from Windows to Ubuntu. If this does not work, you need to reinstall open-vm-tools.
You can open the terminal by pressing Ctrl+Alt+T and execute the following three commands:
sudo apt-get autoremove open-vm-tools
sudo apt-get install open-vm-tools
sudo apt-get install open-vm-tools-desktop
If it still does not work, you can also transfer files using shared folders.
Setting Up SSH Remote Development Environment
Why use SSH + VSCode?
Writing code directly in the virtual machine is very inconvenient:
- • ❌ No code completion
- • ❌ No error prompts
- • ❌ Copying and pasting is troublesome
- • ❌ Debugging is difficult
Solution: Use VSCode on Windows to remotely connect to Ubuntu, achieving the best of both worlds!
Step 1: Install SSH Service on Ubuntu
# 1. Install network tools (to check IP address)
sudo apt update
sudo apt install net-tools

# 2. Install SSH server
sudo apt install openssh-server

# 3. Start SSH service
sudo systemctl start ssh
sudo systemctl enable ssh  # Set to start on boot

# 4. Check if SSH is running
ps -e | grep ssh

# 5. View Ubuntu's IP address
ifconfig
Step 2: Install VSCode on Windows
Download VSCode from the official website: Visual Studio Code – The open source AI code editor
Version Notes:
- • Ubuntu 18.04: VSCode version ≤ 1.85.2
- • Ubuntu 20.04/22.04: Latest version of VSCode can be used
After downloading, simply double-click the installation package to install it, with no special notes.
Step 3: Configure VSCode for Remote Connection
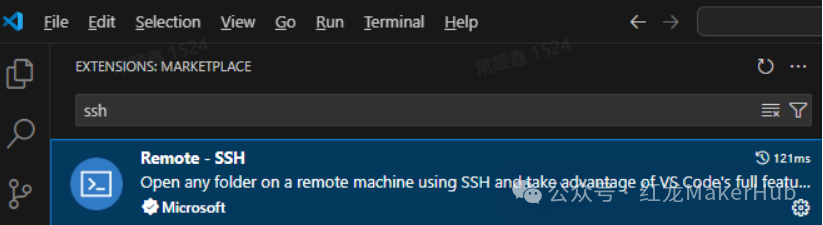
Search for “Remote – SSH” in the VSCode extension store and install it:
Add Ubuntu Host Configuration:
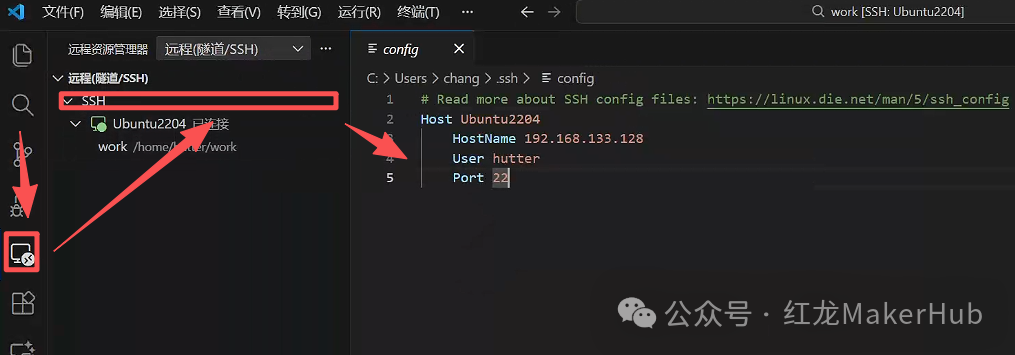
Host Ubuntu2204               # This name can be anything
    HostName 192.168.200.136  # Replace with your Ubuntu IP
    User hutter               # Replace with your username
    Port 22
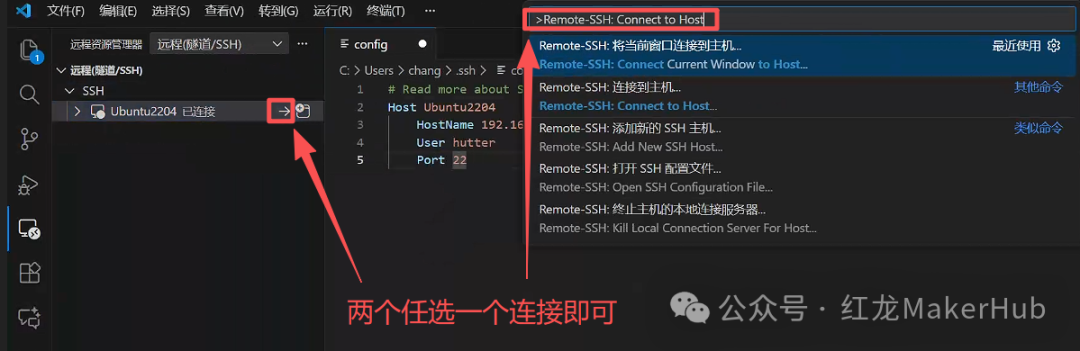
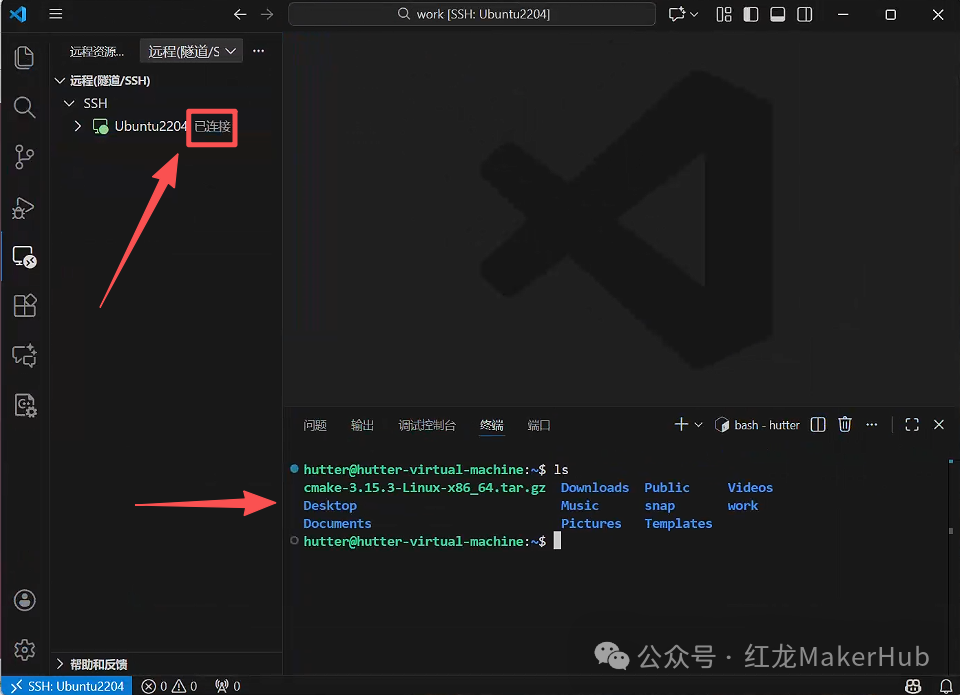
Connect to Ubuntu:
- • Press
<span>F1</span>to open the command palette - • Type “Remote-SSH: Connect to Host”
- • Select the configured
<span>Ubuntu2204</span> - • Enter the password (your Ubuntu login password)
🎉 Congratulations! Development Environment Setup Complete
You can now work in:
- • Windows: Using the familiar VSCode interface
- • Linux: Code actually runs and compiles in Ubuntu
Conclusion
Through the combination of “Virtual Machine + Ubuntu + SSH + VSCode”, we have created a convenient and professional Linux development environment. You can now:
- • ✅ Work in a familiar Windows environment
- • ✅ Enjoy a complete Linux development experience
- • ✅ Utilize powerful code editing features
- • ✅ Easily compile and debug
Related articles recommended:
Introduction to Linux System Programming: Write Your First Hello World Program from Scratch
Common Linux Commands: Essential Guide from Beginner to Efficient DevelopmentDetailed Notes from Zero to Advanced in C++ (Basic Edition)Git Installation and Configuration Tutorial (Beginner Friendly)