Follow our business 👇 Scan to subscribe
1. Signal-to-Noise Ratio (SNR): Why Are Some Photos Clean in Low Light While Others Are Full of ‘Snow’?
You have definitely encountered this situation: when taking night scenes under streetlights, some smartphones can reproduce the warm light of the streetlight, with even the texture of the leaves clearly visible; while others are full of graininess, and faces look like ‘mosaics’—the secret lies in the ‘SNR’.
What exactly is SNR? Simply put, it is the ratio of ‘useful image signal’ to ‘useless noise’ in the image. It’s like listening to someone speak in a library versus a market: the library has less noise (high SNR), so you can hear the key points even if they speak softly; the market has a lot of background noise (low SNR), and even if the person shouts, you can’t catch the key points.
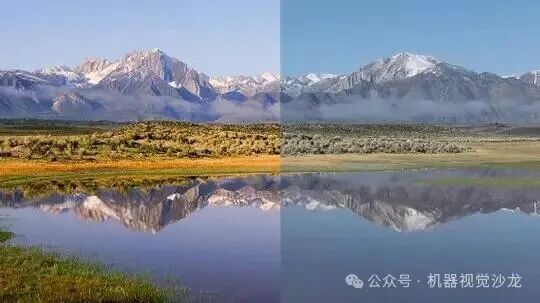
For sensors, this ratio directly determines the ‘purity’ of the image quality:
- High SNR = Detailed images without noise, preserving details even in low light. For example, the Sony IMX989 sensor can capture the shiny color of skewers in a night market without turning the background neon lights into a blur, and even the wood grain on the skewers can be seen clearly;
- Low SNR = Full of ‘snowy dots’, color distortion, and loss of details. Early budget surveillance cameras are a typical example; at night, the images captured are so poor that you can’t even tell if a car is black or white, let alone recognize the license plate.
Why do people always ask about SNR first? Because it is the ‘baseline’ for image quality—no matter how high the resolution or frame rate, if the SNR is poor, the result will be ‘garbage images’. It’s like buying a camera with ultra-high pixels, but everything you shoot has noise; no amount of pixels will help.
2. Dark Current: Why Do Cameras Show ‘Ghost Highlights’ After Long Use?
One day, an astrophotography enthusiast complained: “After setting up the camera for 1 hour to capture star trails, suddenly many white dots appeared in the image, as if stars were ‘colliding’ with the lens.” This is not a camera malfunction; it’s the dark current causing the ‘damage’.
What is dark current? Even in complete darkness (for example, when the lens is covered), the sensor generates a weak current due to its own heat, which appears in the image as white ‘thermal noise’—it is only related to temperature and has nothing to do with light exposure.
Here’s a real example:
- Low dark current sensor: For instance, the Nikon Z7 II sensor, when capturing star trails for 1 hour, still produces a clean image with smooth star trails and retains details of the distant Milky Way;
- High dark current sensor: Some older industrial cameras, when operating in high-temperature environments for 2 hours, produce images of parts filled with white highlights, completely obscuring scratches on the parts, making it impossible to determine if they are qualified.
So if your device needs to operate for long periods (like 24-hour surveillance) or in high-temperature environments (like car engine compartments or steelmaking workshops), you must pay close attention to dark current—if this parameter is not up to standard, the image quality will inevitably degrade over time.
3. Frame Rate (FPS): Why Are Some Videos Smooth While Others Are ‘Choppy’ When Capturing High-Speed Motion?
When watching live sports, you may notice that some cameras can clearly capture the moment athletes sprint, even showing sweat flying; while others have severe motion blur, making athletes look like they are ‘floating’—this is the difference in frame rates.
What is frame rate? It is the number of images the sensor can capture per second, measured in ‘frames per second (fps)’. It’s like flipping through a comic book: flipping 20 pages per second results in choppy motion; flipping 60 pages per second makes the motion smooth as if it were ‘alive’.
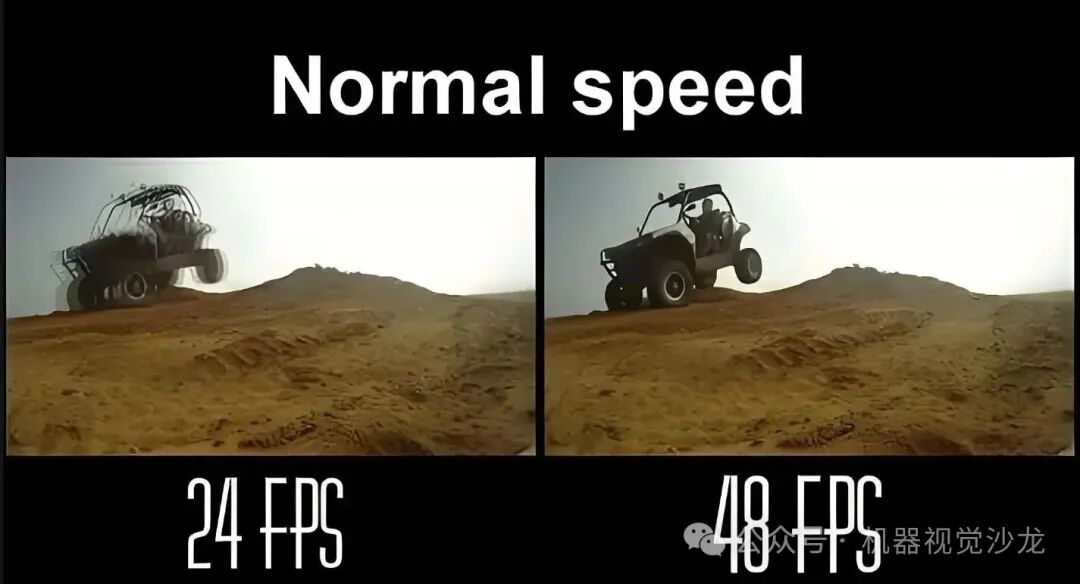
For devices, frame rate directly determines whether they can capture dynamic details:
- High frame rate = Accurately freezing high-speed moments without motion blur. For example, the Basler acA2500 camera, commonly used in industrial inspection, can reach 120fps, capturing parts moving 3 meters per second on the production line, clearly showing whether screws are installed correctly without missing any defects;
- Low frame rate = Choppy images with motion blur, leading to loss of key information. Early dash cameras had a frame rate of only 15fps, making the footage of a car changing lanes look like a ‘slide show’, and you couldn’t even see the other car’s license plate, making it impossible to use as evidence in case of an accident.
If you need to capture high-speed objects (like in assembly line inspection, traffic monitoring, or sports events), make sure to choose a sufficient frame rate—otherwise, the ‘choppiness’ may not just be in the footage, but also in critical judgment.
4. Resolution & Pixel Size: Why Does 48 Million Pixels Not Capture as Clearly as 12 Million Pixels?
“Your camera only has 12 million pixels, while the one next door has 48 million; the image quality must be poor!” This sounds reasonable, but it is actually a big misconception—the quality of an image is not solely determined by ‘higher pixels’, but also by ‘pixel size’.

First, let’s understand two key concepts:
- Resolution: The total number of pixels on the sensor (for example, 12 million = 4000×3000), determining how large the image can be displayed and how much detail can be cropped;
- Pixel size: The physical size of each pixel (for example, 1.4μm, 2.0μm), which you can think of as a ‘small bucket for light’—the larger the bucket, the more light it can hold, resulting in cleaner image quality.
Here’s a real comparison:
- One smartphone uses a 48 million pixel sensor, but the pixel size is only 0.8μm; when taking landscape photos on a cloudy day, the image is noisy, and all dark details are lost;
- Another smartphone uses a 12 million pixel sensor with a pixel size of 2.0μm; when taking the same landscape photo on a cloudy day, it can reproduce the layers of the sky and retain the texture of the ground leaves, resulting in a clean and transparent image.
So when choosing a sensor, don’t blindly pursue high pixels—if your scene requires low-light shooting (like night scenes or indoor surveillance), prioritize ‘large pixel size’; if cropping is needed later (like in landscape photography or industrial precision inspection), then balance high resolution with pixel size to find the key point.
5. Dynamic Range: Why Do Some Cameras Capture Both Bright and Dark Areas While Others Are ‘Black and White’ in Backlight?
When driving into a tunnel, you may have encountered situations where some car cameras can clearly see both the strong light outside the tunnel and the road inside; while others either show a completely white outside or a completely black inside—this is the ‘dynamic range’ difference.
What is dynamic range? It is the range of ‘the brightest light’ and ‘the darkest light’ that the sensor can simultaneously capture. It’s like human eyes being able to see the leaves in the shade under sunlight; while a sensor with poor dynamic range is like eyes suddenly moving from bright to dark, needing time to adjust, during which nothing can be seen.
For devices, this range directly determines whether they can produce usable images in complex lighting conditions:
- High dynamic range = All details of bright and dark areas are preserved, even in backlight. For example, the Onsemi AR0234 sensor can recognize faces in backlight scenes, clearly showing facial features without turning the background sun into a ‘light spot’, significantly improving recognition accuracy;
- Low dynamic range = Either overexposed highlights or completely black shadows. Early security cameras are a typical example; when capturing pedestrians in backlight, faces appear completely white, making it impossible to identify them, losing the purpose of surveillance.
So if your device is used in complex lighting scenarios (like in-car imaging, outdoor surveillance, or backlight detection), the dynamic range must be up to standard—it is the key to ensuring ‘usable images under any lighting conditions’.
A Table to Understand Core Sensor Parameters: From Meaning to Application, All at a Glance
Finally, I have compiled a summary table of parameters to help you quickly match parameters to scenarios:
| Parameter Name | Core Meaning | Key Focus | Typical Application Scenarios | Trade-offs Between Parameters |
|---|---|---|---|---|
| Signal-to-Noise Ratio (SNR) | Ratio of useful signal to noise | Whether the image is clean and noise-free in low light | Consumer cameras, night vision surveillance, low-light detection | High frame rate (short exposure) may reduce SNR |
| Dark Current | Noise generated by sensor heat in the absence of light | Whether there are ‘hot spots’ under long-term/high-temperature conditions | Astrophotography, 24-hour industrial surveillance | Longer exposure times make dark current noise more apparent |
| Frame Rate (FPS) | Number of image frames captured per second | Whether high-speed motion is captured without motion blur | Assembly line inspection, traffic snapshots, high-speed photography | High resolution often reduces frame rate |
| Resolution & Pixel Size | Total number of pixels & size of individual pixels | Whether details are sufficient and how it performs in low light | Precision inspection, landscape photography, smartphone cameras | Higher pixels may lead to smaller individual pixel sizes |
| Dynamic Range | Range of light captured simultaneously | Whether good images can be produced in backlight/high-contrast scenes | In-car imaging, outdoor surveillance, backlight detection | High sensitivity may sacrifice dynamic range |
Ultimately, caring about these parameters essentially boils down to three questions: How small of a detail can this product see? How fast of an object can it capture? Can it operate stably in complex environments (low light, high temperature, backlight)? Understanding these 5 metrics will allow you to make precise judgments like an ‘insider’ when selecting visual equipment next time—after all, parameters are not just numbers, but a manual of the product’s ‘true capabilities’.
For project evaluation, please scan to add WeChat: note the evaluation project
Recommended Popular Articles: Click to directly access related articles:
001: After five years in the industry, a brief discussion on how to master machine vision
002: Practical PPT sharing | Application of 3D machine vision technology in smart manufacturing!
003: Main parameters of industrial cameras [Machine Vision Hardware]
004: Senior vision engineer organizes 39 questions about industrial cameras (Part 2) Like and save!
005: Machine vision accelerates the transition from 2D to 3D
006: Common solutions for frame loss in industrial cameras
007: Ten popular algorithms in artificial intelligence, explained in simple terms
008: Eight lighting techniques from Japanese lighting experts (in-depth article)
009: Analysis of common causes of misjudgment in machine vision
010: Methods and applications of three-dimensional imaging in machine vision