Skip to content

Due to the unavailability of STM32 chips, we have to use domestic alternative chips. This article uses the GigaDevice GD32F103C8T6, so it’s necessary to download the corresponding MCU firmware library and device library from the official website. Then I found that the examples in the firmware library are written in Keil4 projects, so compatibility must be achieved to open the Keil4 project.
The device, peripheral, and toolchain information called by the Keil5 project is included in the Pack, but the file paths used by the Keil4 project and the Keil5 project are different.
There are two methods to achieve compatibility:
 Method 1: Upgrade the Keil4 project files to Keil5 version (recommended). Note: After changing the project properties settings, it will no longer be possible to open and compile with Keil4.
 Method 2: Install the GigaDevice patch Keil4_GD32F1x0_ADDON.exe to load the related files.Note: This method will not change the project properties, and you can still open and compile with Keil4.
Below I will introduce the specific steps for these two methods.
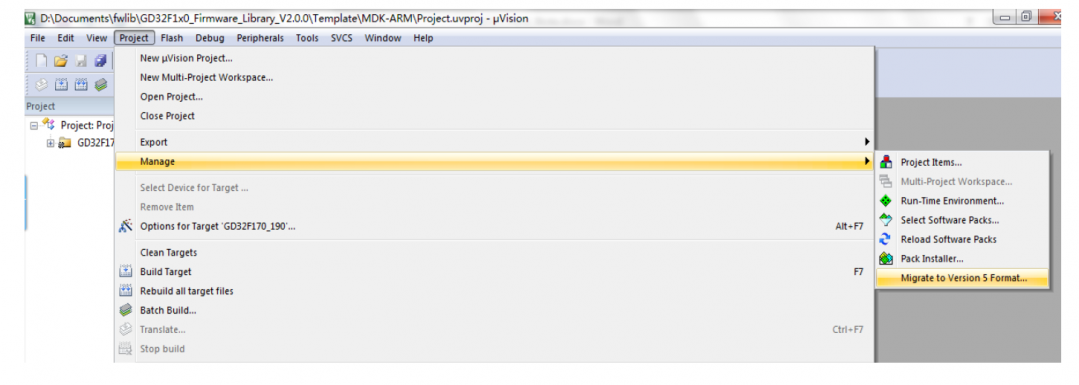
First, open a project created by Keil4 directly with Keil5.
As shown in the figure below, select Manage from the Project menu, then click Migrate to Version 5 Format.
Method 2: Install the GigaDevice patch Keil4_GD32F1x0_ADDON.exe to load the related files.Note: This method will not change the project properties, and you can still open and compile with Keil4.
Below I will introduce the specific steps for these two methods.
First, open a project created by Keil4 directly with Keil5.
As shown in the figure below, select Manage from the Project menu, then click Migrate to Version 5 Format.
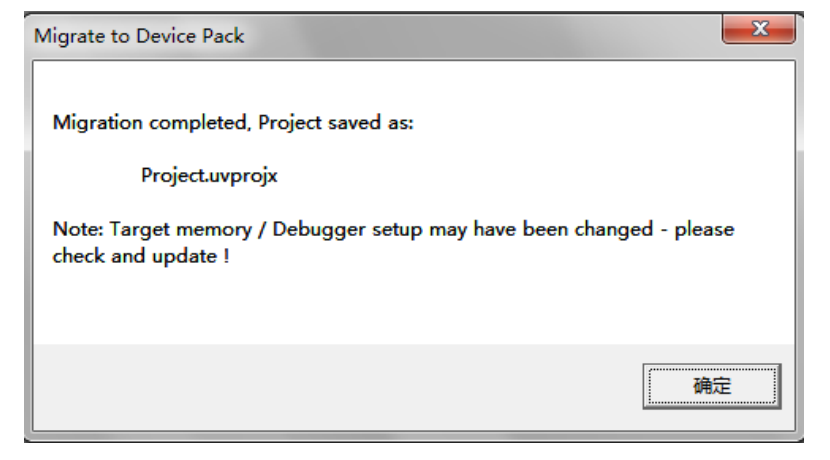
A prompt will pop up as shown below:
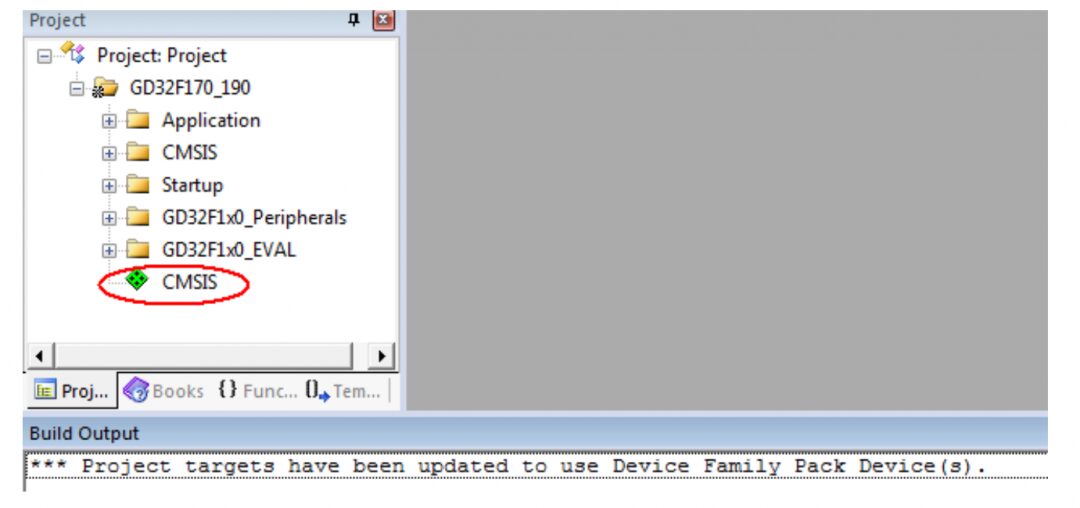
After clicking OK, the CMSIS component will be added in the Project tab, and the Build Output window will print a success message as shown below:
For Keil v5.13 and v5.14 versions, after upgrading to Keil5 project, you also need to enter the RTE environment and check the CORE in the CMSIS component, as shown in the figure below:

At this point, the compatibility is complete!
Download the Keil4_GD32F1x0_ADDON.exe file from the GigaDevice official website (http://www.gd32mcu.com/documents), as shown in the figure below:
Install this file in the Keil_v5 installation directory, as shown in the figure below:

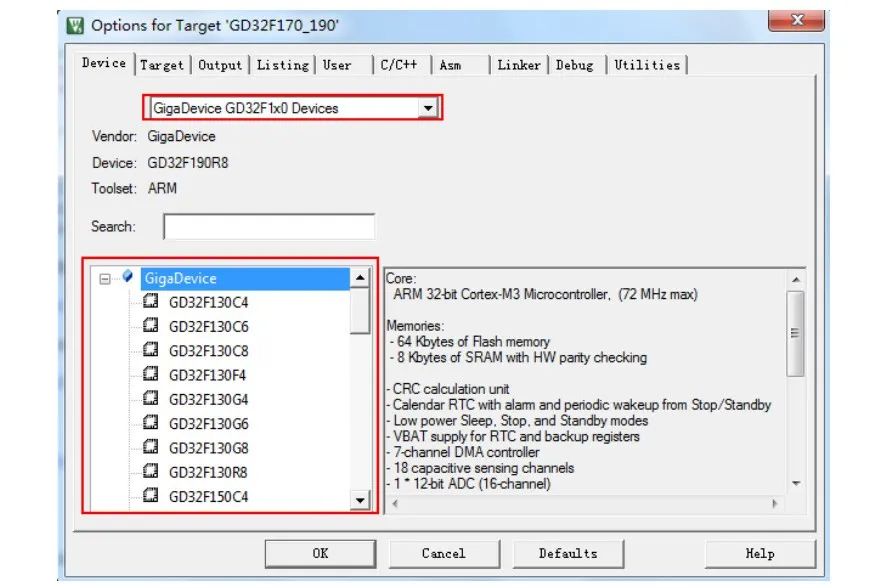
Then, open a project created by Keil4 with Keil5, and select GigaDevice GD32F1x0 Devices in the Device section of Options for Target.
At this point, you can see the selection of GigaDevice 1×0 series products, as shown in the figure below. Select the required chip model and click OK.
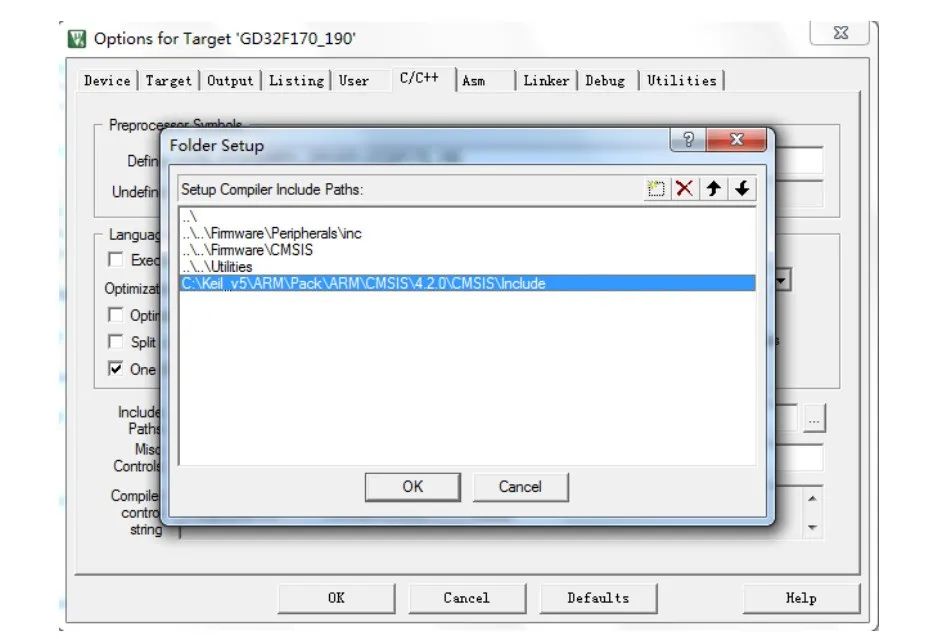
Compile the project, which may result in errors, as shown in the figure below:

The error is caused by the different paths of the core_cmInstr.h file in Keil5 and Keil4. You can add the path of core_cmInstr.h in the C/C++ section of Options for Target, as shown in the figure below:
At this point, the compatibility is complete!
If anyone needs to view the original images and code, please click the “Read the Original” link at the bottom for download.
Amazing! Capacitor Version Stonehenge
Deconstructing a Visual Air Fryer (with Circuit Analysis)
Beware of Many Images! DIY a Tesla Coil
21ic Exclusive “Cultivation Manual” | Must-Read Electronics Public Account | Electronic “Design Tips”
What is the difference between you and a senior engineer?
Join the technical exchange group and face-to-face with experts