Follow+Star Public Account Number, don’t miss the wonderful content
Author | strongerHuang
WeChat Public Account | strongerHuang
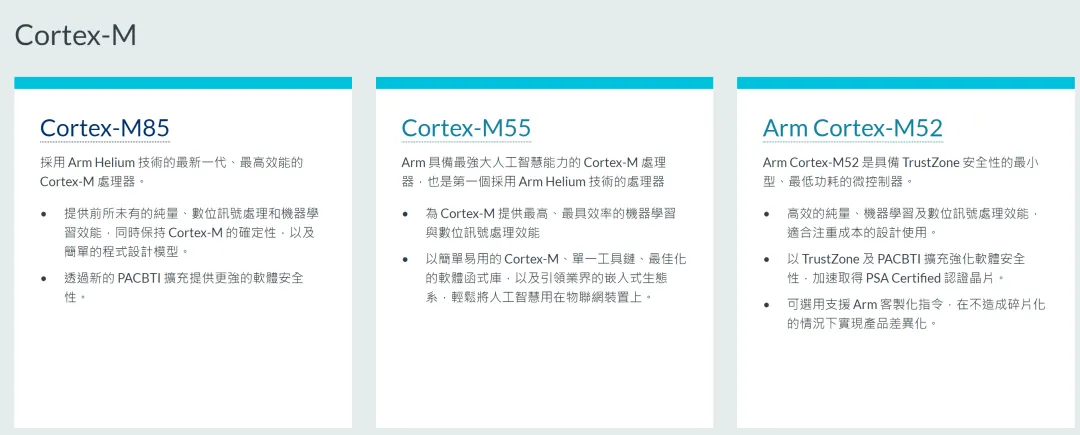
In the past two years, the MCU industry has also started to get competitive, with major manufacturers launching various high-performance MCUs.
As of now (April 2024), the “strongest MCU” has to be the Cortex-M85 core MCU (the Cortex-M85 is currently the strongest Cortex-M core).
Speaking of Arm Cortex-M core MCUs, the most commonly used development tool is still Arm’s own Keil. That’s right, Keil is currently the most mainstream tool for developing Arm MCUs, and no one can argue with that.
So, what is the experience of developing the Cortex-M85 MCU with Keil? Here, I will lead everyone to experience it.
This article combines the Renesas Cortex-M85 MCU RA8D1, Keil MDK, and Renesas’s own code initialization tool (Smart Configurator) to describe how to quickly light up an LED on the Cortex-M85 MCU using Keil MDK.
Renesas’s code initialization tool, also known as Release RA Smart Configurator, abbreviated as RASC, is similar to many other MCU manufacturers’ code initialization (or graphical configuration) tools. It allows you to create (generate) a Keil MDK software project with just a few simple mouse clicks.
Main contents of this article:
-
Download and install Keil MDK and the associated software package Packs
-
Download and install RASC and the associated FSP software package
-
Generate Keil MDK project using RASC
-
Write application code in Keil MDK and generate Hex
Download and Install Keil MDK and Associated Software Package Packs
Keil MDK v6 was actually released when Keil Studio was launched, but the vast majority of people are still using Keil MDK v5.
Because MDK v6 is not as user-friendly as people expect, you can refer to the video I shared earlier:
1. Download Keil MDK and Software Packages
You can download the latest Keil MDK from the official website. As of now (April 2024), the latest version is V5.39, available at:
https://www.keil.com/download/product/
Select Keil MDK, fill in the relevant information to download. If you find it troublesome, you can reply with “Keil” on my public account 【strongerHuang】 to get the download link.
The software package Packs can be downloaded from the Keil official website:
https://www.keil.arm.com/devices/
Or download from Renesas’s official website:
https://github.com/renesas/fsp/releases
2. Install Downloaded Keil MDK and Software Packages
Installing the exe file on Windows is very simple, just click next and follow the prompts.
The installation process will not be described here; you can refer to my:Keil Series Tutorial: Introduction, Download, Installation, and Registration
Download and Install RASC and the Associated FSP Software Package
1. Download RASC Installation Package
I recommend that everyone download it from the official website or the official GitHub:
https://github.com/renesas/fsp/releases
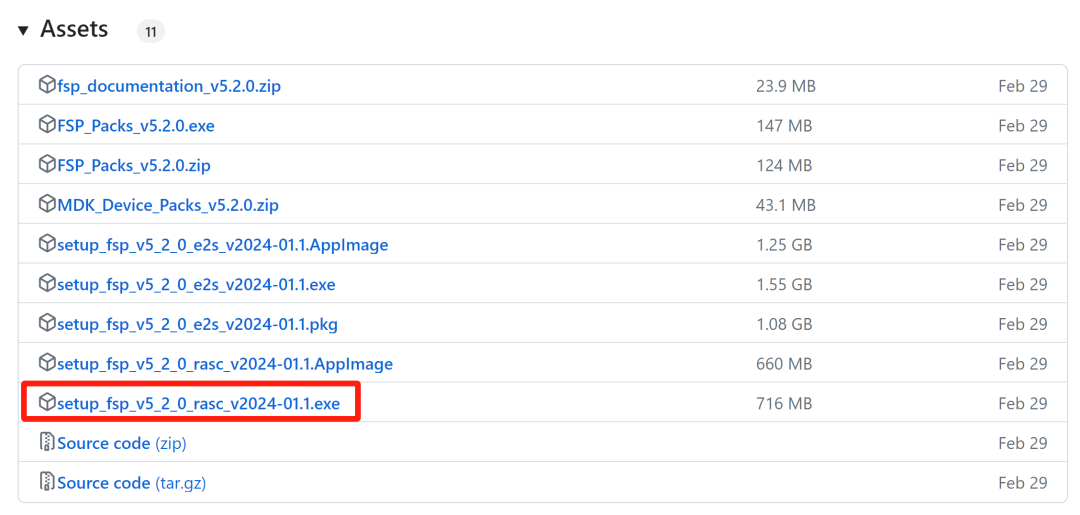
For Windows, download the corresponding exe installation file. The RASC installation package actually includes the FSP software package, which will also be installed together.
Similarly, installing the exe file in a Windows environment is very simple; just follow the prompts and click next.
Generate Keil MDK Project Using RASC
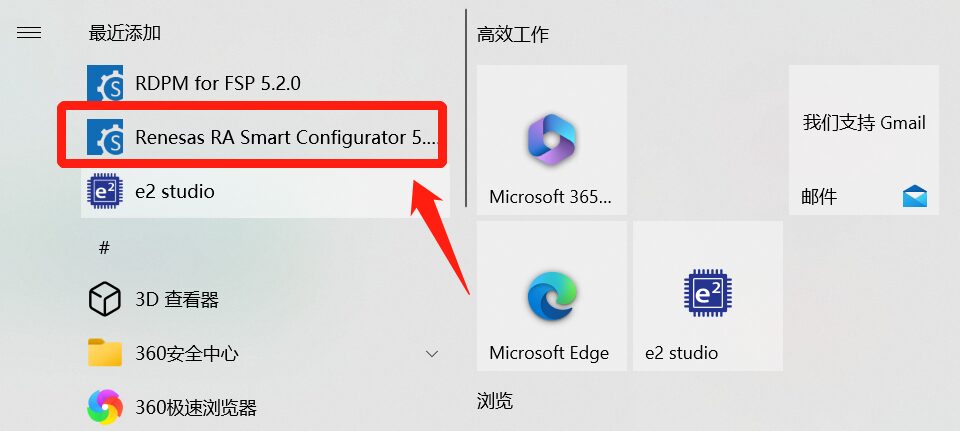
Find and open the installed RASC tool: Renesas RA Smart Configurator in the Windows menu.
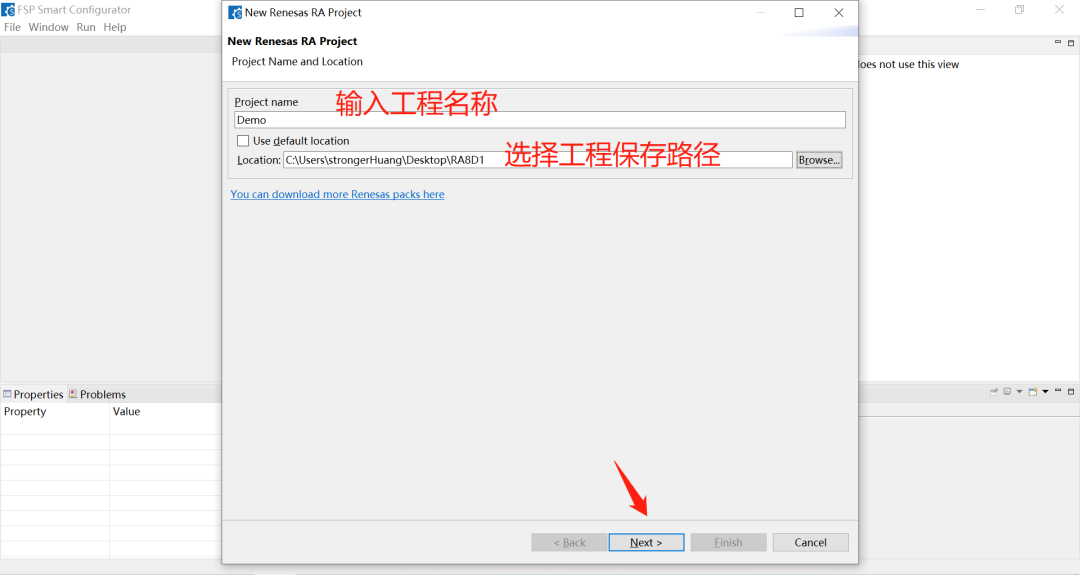
Input the project name, select the project save path, and click next:
Select the MCU type, then select the IDE and compiler type, and click next:
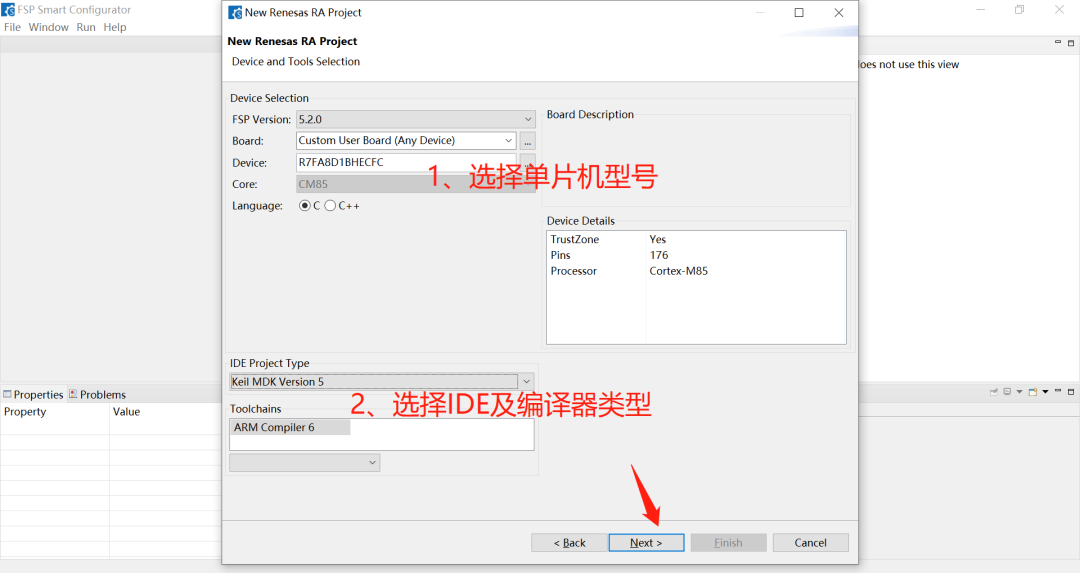
We are just doing a simple demo, not using TrustZone or RTOS.
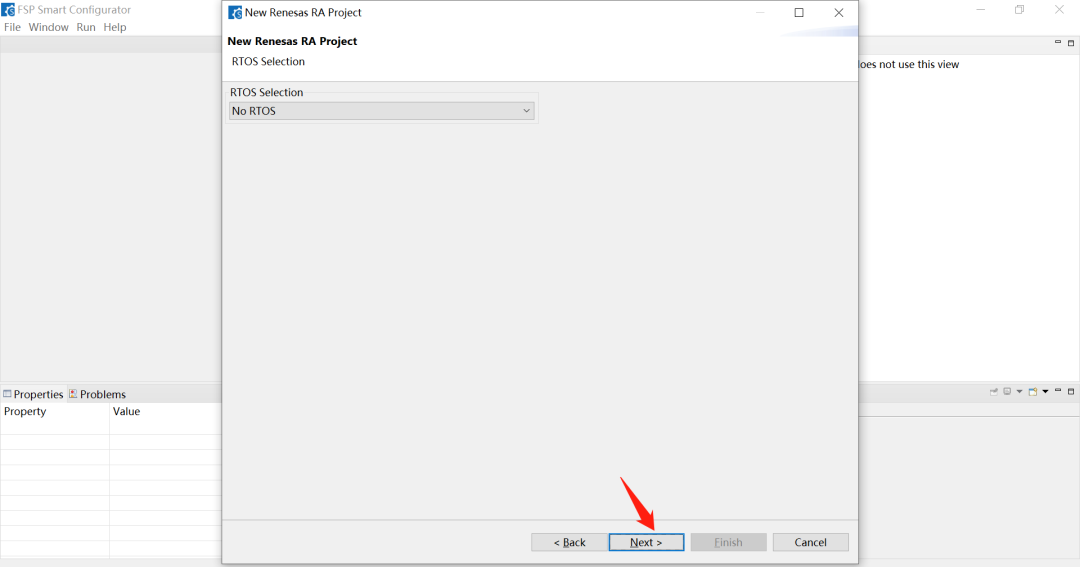
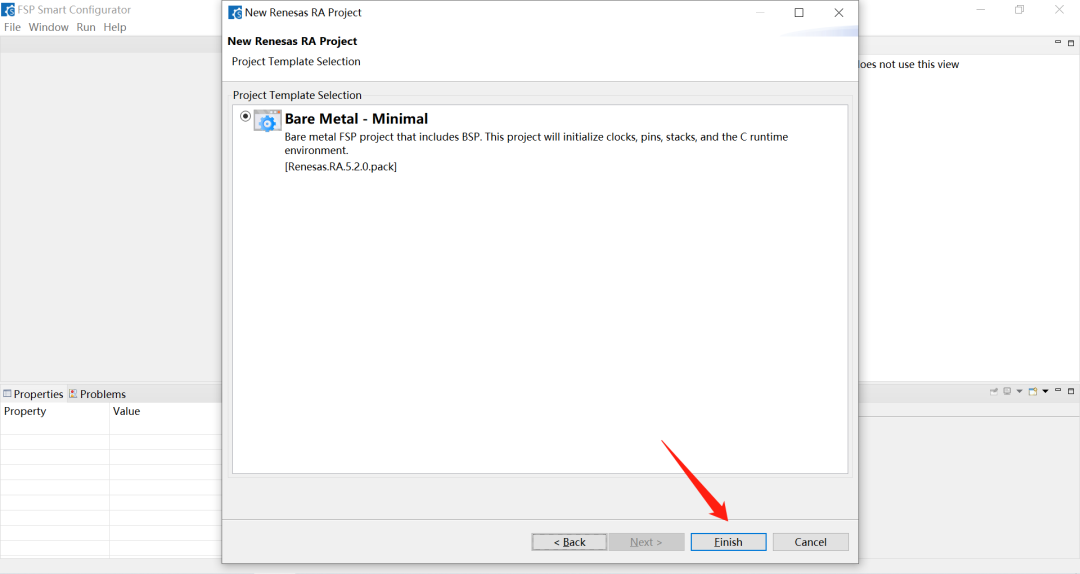
Select the simplest project template to enter the graphical configuration interface:
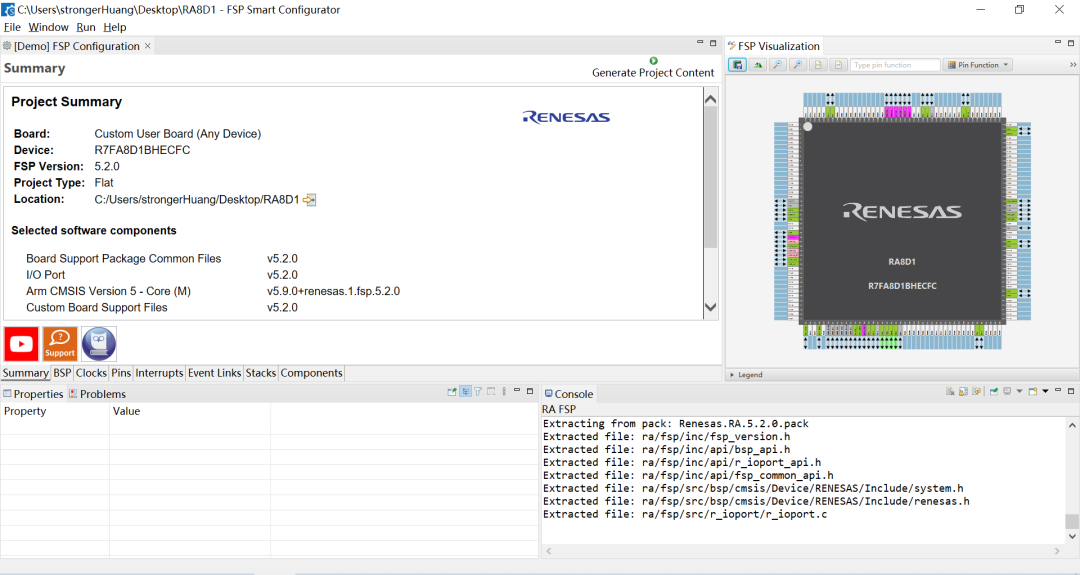
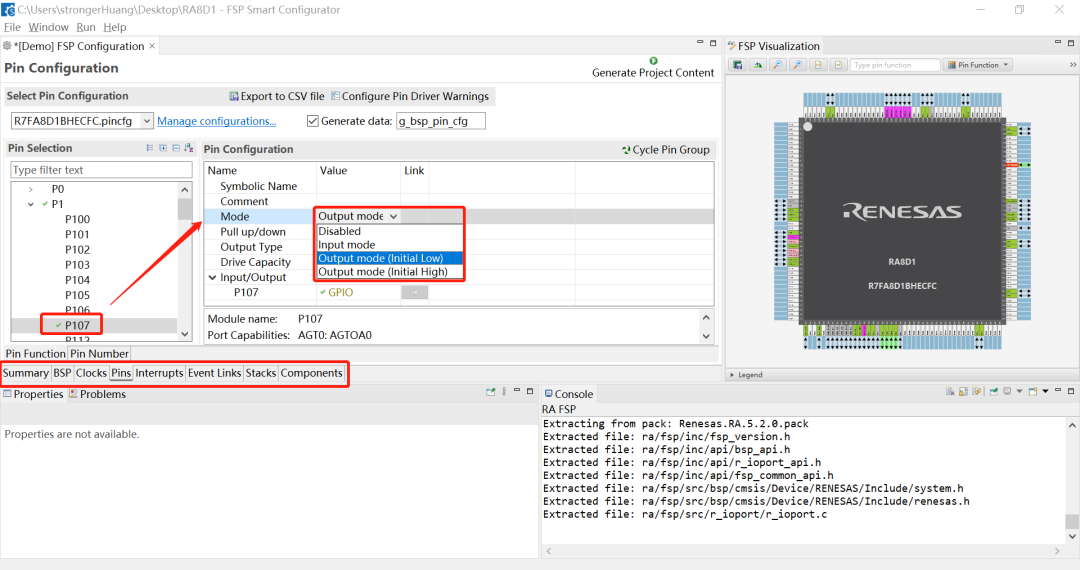
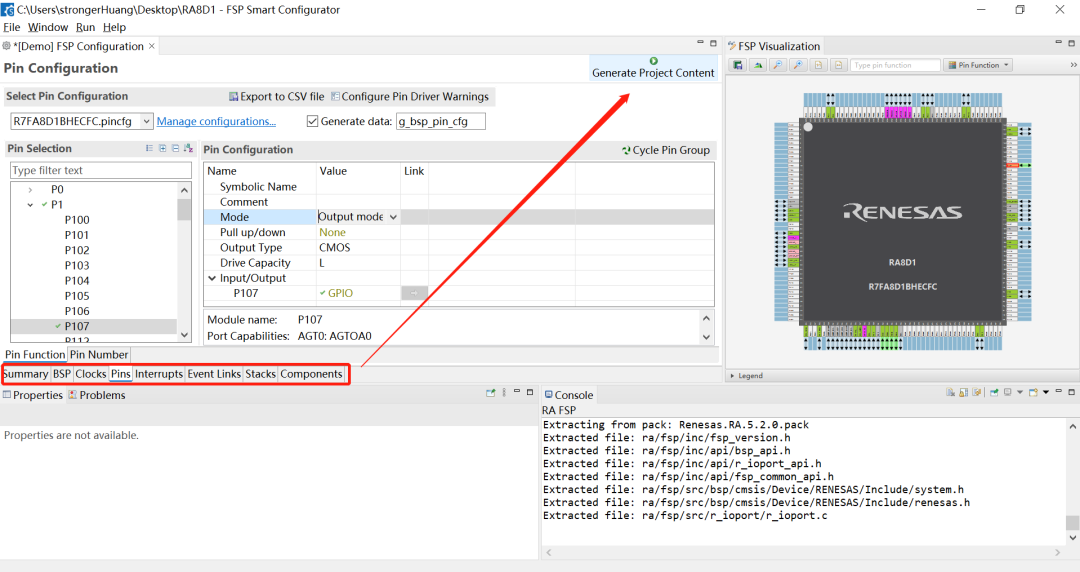
The interface has many configuration options; we mainly configure pins (I/O), for example, configure the LED pin P107 as output mode:
Many options can be left as default. After configuration, click the 【Generate Project】 button in the upper right corner:
Then, in the path where we saved the project, we can see the generated Keil project. If you have installed the Keil software and the software package as described above, you can directly double-click to open the project:

If everything is normal, you can write your own application code, then compile and generate hex:
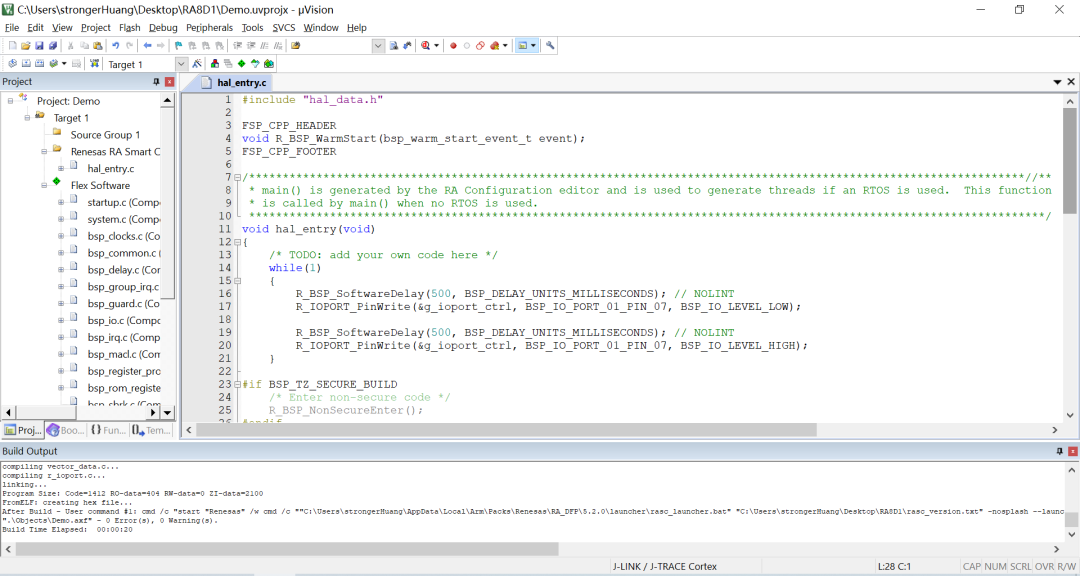
At this point, connect the development board, download the program, and you will see the LED blinking.
You will find that today’s tools are becoming increasingly “advanced”, and lighting an LED is no longer so complicated; it only takes a few mouse clicks to fulfill many people’s “lighting dreams”.
However, on the other hand, to deeply understand or reduce bugs in future projects, it is still necessary to understand many underlying technologies.
● Column “Embedded Tools”
● Column “Embedded Development”
● Selected Tutorials from Embedded Column
Follow the public account Reply “Join Group” to join the technical exchange group according to the rules, reply “1024” to see more content.
Click “Read Original” for more sharing.