Want to dive into the world of audio playback in electronic products? To help you get started, we recommend the HSC001 module. This is a 24-bit audio player with many excellent features: size, price, etc. You can use it for various purposes: playing music in elevators, generating sounds for various devices, and more. In this post, we will learn how to set up the HSC001 module and play audio files.
Required Components
● HSC001 Serial Audio Player Module
● Arduino Uno R3 Development Board
● Micro USB OTG Cable
● Jumper Wires
Introduction to the HSC001 Module
The HSC001 is a playback chip that can handle MP3 and WAV files. It also supports USB/SPI FLASH and FAT16/FAT32 file systems. You can control it via a serial port. Some of its features include:
● Play music using simple commands over the serial port
● User-friendly
● Play songs from SPI FLASH
● Directly download to SPI FLASH from USB
● Reliable
This chip is a fully customized product that provides an affordable solution for playing audio files.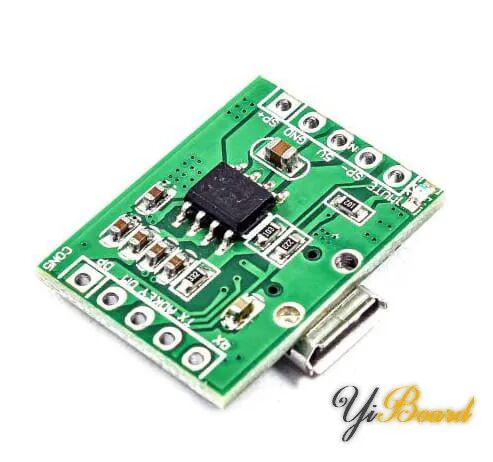
Pin Distribution of the HSC001 Module
The HSC001 audio playback module has a total of 10 pins, and here are the definitions of each pin:
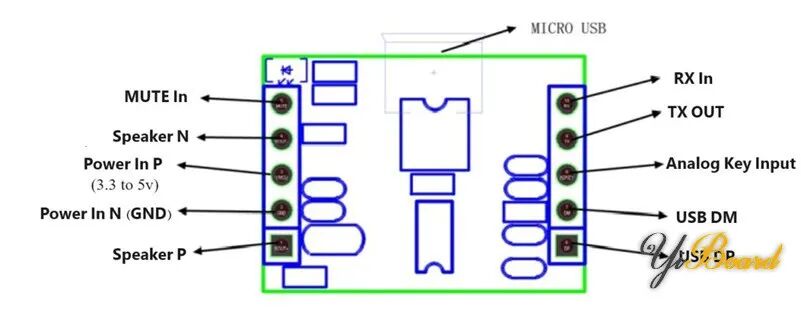
● SP+: Positive terminal of the amplifier (maximum speaker power of 3W)
● GND: Ground
● VDD: Module power supply (3.3V to 5.4V)
● SP-: Negative terminal of the amplifier (maximum speaker power of 3W)
● MUTE: Mute output
● DP: USB-DP pin
● DM: USB-DM pin
● ADK: ADK button
● TX: Serial UART data output – TTL level (3.3V)
● RX: Serial UART data input – TTL level (3.3V)
Playing Audio Files Using the HSC001 Module and Arduino
Now let’s play audio files stored in the flash memory connected to the module. To do this, you need to send relevant commands to the module via the serial port.
The protocol and related commands can be found in the module datasheet on the product page.
Each command sent to the module should have the following format:
● Start bit (0x7E) + Data length (Len + CMD + para1 + para2) + CMD + para1 + para2 + End bit (0xEF)
● Len: Length of Len and subsequent bits, excluding the end bit
● CMD: Command word, such as play, pause, volume, etc.
● Para1: The first parameter of CMD
● Para2: The second parameter of CMD
For example, the following command plays the first file stored in the flash memory:
7E04410001EF
In this command, the data length is 4, represented as [04 41 00 01].
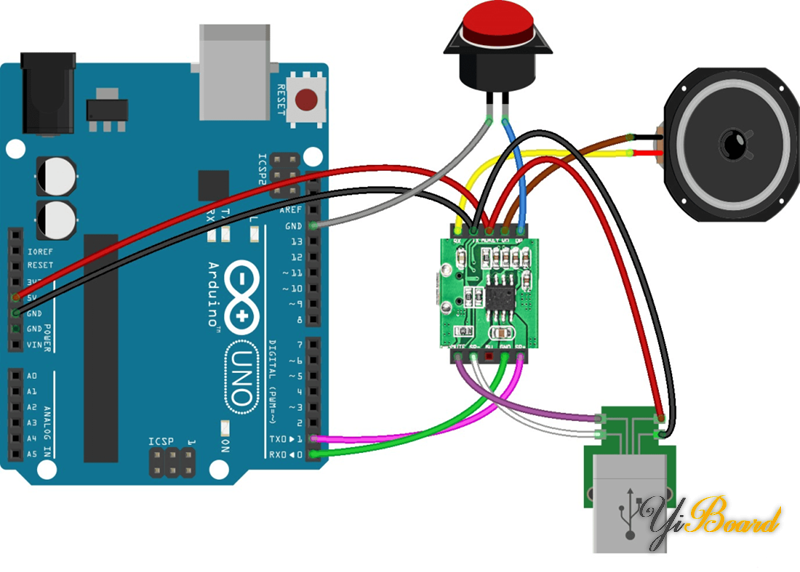
Hardware Connections
Connect the components as shown below. Then use the OTG cable to connect the flash memory containing the audio files supported by the module (named 0001, 0002…) to the module.
Code
Copy the following code into the Arduino IDE and upload it. This code will play each audio file stored in memory for 10 seconds, then move to the next file.
byte currentSound = 0x01;void setup() { // start serial port at 9600 bps: Serial.begin(9600); //while (!Serial) { // ; // wait for serial port to connect. Needed for native USB port only //}void loop() { Serial.write(0x7E); Serial.write(0x04); Serial.write(0x41); Serial.write(0x00); Serial.write(currentSound); Serial.write(0xEF); delay(10000); currentSound = currentSound + 0x01; if(currentSound > 10) currentSound = 1;}
Code Explanation
First, define a variable in the code to store the current file number being played.
byte currentSound = 0x01;Then enable serial communication at a baud rate of 9600 bps.
Serial.begin(9600);Next, select the file to be played. In these commands, the start bit (0x7E), data length (0x04), file selection request (0x41), the thousands and hundreds of the file number (0x00), the tens and units of the file number (currentSound), and the end bit (0xEF) are sent to the module. If the module successfully receives and executes the command, it will respond with “OK” in the serial port.
Serial.write(0x7E);Serial.write(0x04);Serial.write(0x41);Serial.write(0x00);Serial.write(currentSound);Serial.write(0xEF);Delay for 10 seconds.
delay(10000);Increment the file number by 1.
currentSound = currentSound + 0x01;if(currentSound > 10) currentSound = 1;That’s all for setting up and playing audio files using the HSC001 module and Arduino development board. If you have any questions, feel free to reply below this post.