Hello everyone! Here, I will discuss two methods, which are technically one method. One is automatic, and the other is manual.
1. Prepare the Hardware
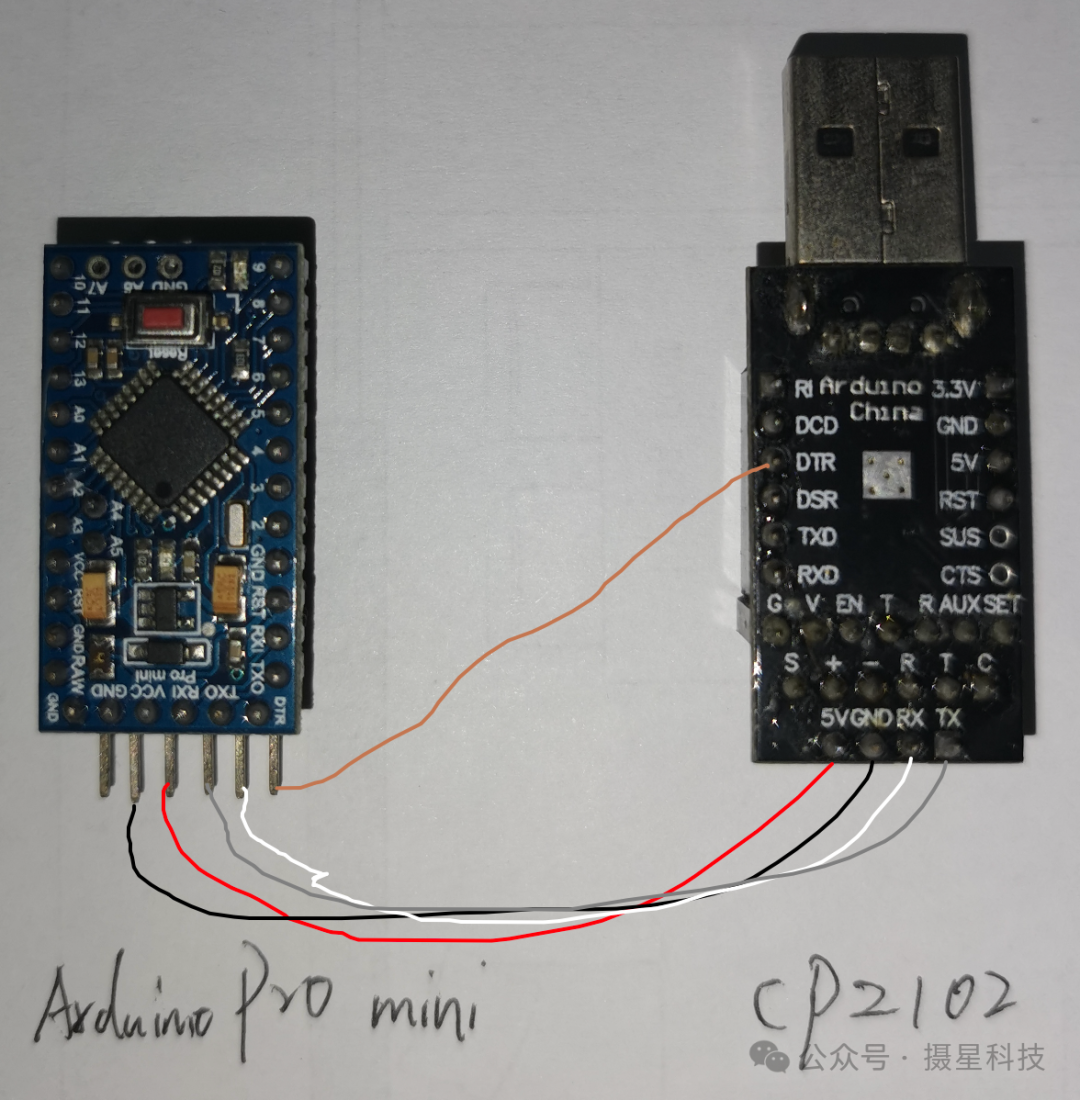
- • Arduino Pro Mini development board
- • USB to TTL serial module (CP2102) as ISP programmer
- • Several Dupont wires For example,

2. Connect the Wires
- • When using the USB to TTL module, the connection method is:
This step distinguishes between automatic and manual
- • If the module has a DTR pin, it can be connected to the Pro Mini’s DTR pin via a capacitor for automatic reset; if there is no DTR, the Reset button must be pressed manually.
- • Module TX → Pro Mini RX
- • Module RX → Pro Mini TX
- • Module 5V → Pro Mini VCC (note voltage matching)
- • Module GND → Pro Mini GND
3. Software Setup
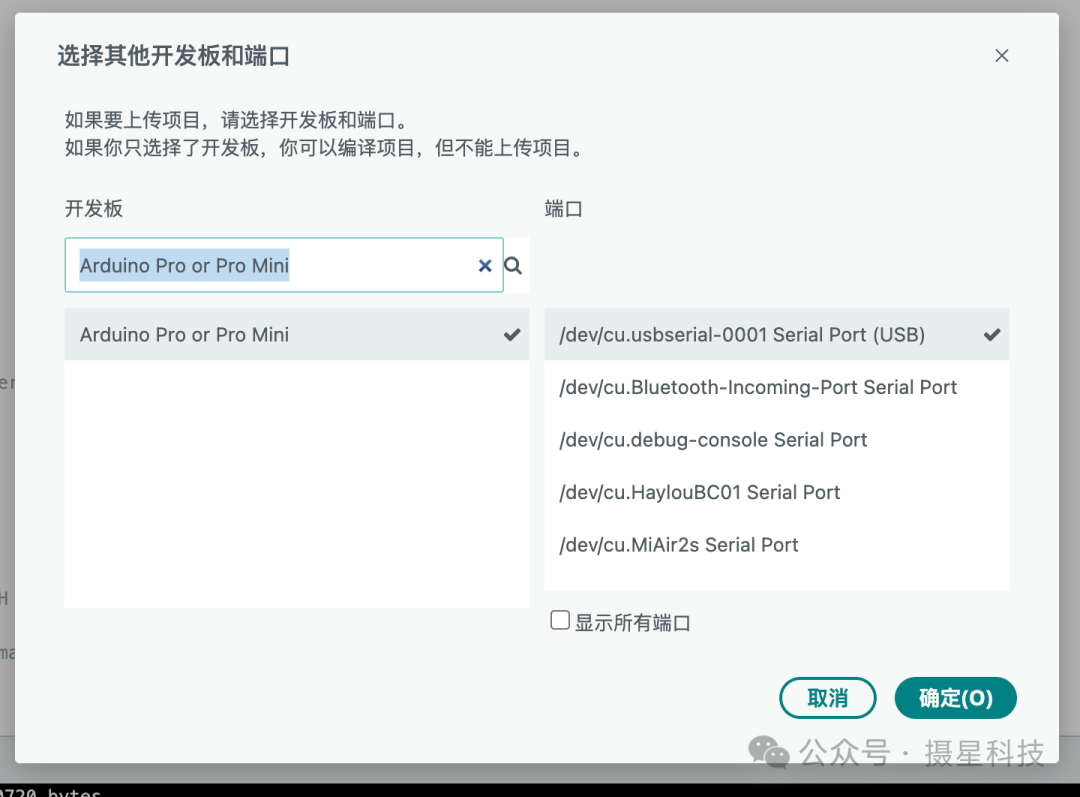
- • Open the Arduino IDE, select the board as “Arduino Pro or Pro Mini”, and choose the corresponding voltage and frequency model (e.g., 5V 16MHz or 3.3V 8MHz).
- • Select the correct COM port corresponding to the USB to TTL module.
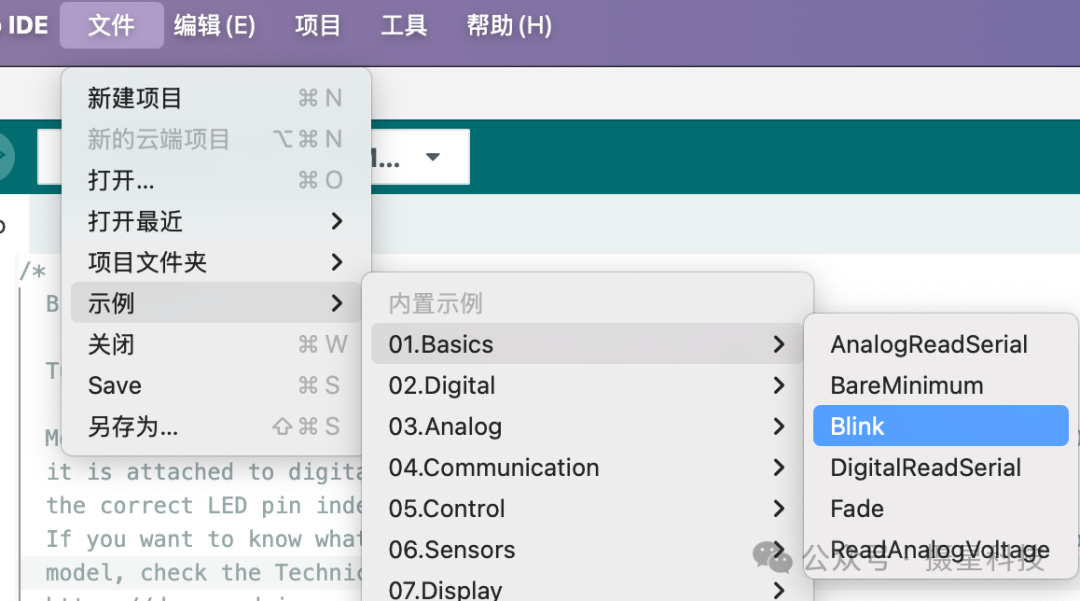
4. Upload the Program
Open the Blink project in “File” – “Examples”.
- • When uploading the program using the USB to TTL module, if there is no DTR pin, you need to manually press the Reset button on the Pro Mini when the IDE shows “Uploading”.
- • If there is a DTR pin, it will automatically upload successfully.
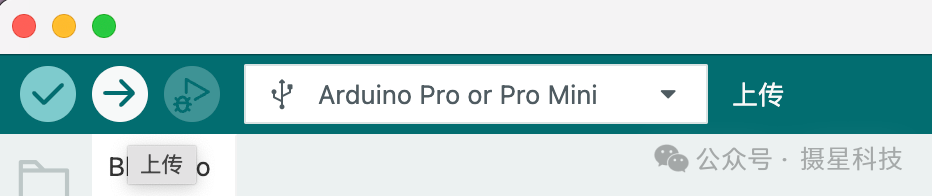
From personal experience, in manual mode, after clicking upload, when the following window pops up in the lower right corner of the IDE, immediately press the reset button for a higher upload success rate; otherwise, an error will occur, and you will have to start over.

Error message:
avrdude: stk500_recv(): programmer is not responding
avrdude: stk500_getsync() attempt 1 of 10: not in sync: resp=0x00
Error message:

About the DTR Pin
In the TTL serial module,The DTR (Data Terminal Ready) pin primarily serves as a control signal to notify the connected device that the “host is ready for communication”. Specifically:
- • The DTR signal is used for handshaking and initializing communication between devices, indicating that the data terminal device (usually the computer side) is in a state to receive data, allowing external devices to start data transmission or perform specific operations.
- • During the programming process of microcontrollers like the Arduino Pro Mini, the DTR pin of the USB to TTL module is usually connected to the reset (RST) pin of the Pro Mini through a capacitor. When the DTR signal is pulled low, it triggers a reset on the Pro Mini, putting it into bootloader mode, thus achieving automatic reset and entering programming mode, eliminating the need to manually press the reset button.
- • In addition to automatic reset, DTR can also be used in scenarios such as smart device configuration, where the computer triggers device initialization through the DTR signal, and the device then responds to the computer via the DSR signal, forming a two-way handshake.
- • DTR, along with RTS, CTS, DSR, and other signals, forms a set of control signals in RS-232 serial communication, used for flow control and status indication, but DTR primarily indicates that the “terminal device is ready”, serving as a readiness signal sent from the host to the peripheral.In summary:The DTR pin in the TTL serial module acts as a control signal indicating that the host is ready, commonly used for triggering automatic reset and device initialization handshakes, especially during programming of the Arduino Pro Mini, where the DTR signal automatically pulls the reset pin low, enabling program uploads without manual button presses.
Alright, that’s the most commonly used methods for programming the Arduino Pro Mini, suitable for beginners and advanced users alike. Feel free to discuss any questions in the comments! Thx