I was introduced to Linux through Armbian, which runs on the ancient Fexun N1, a small box with 2GB of RAM and 8GB of eMMC.Armbian is a branch of Debian that can be used as a Linux server and to run Docker. After getting it, I played with it for a long time and couldn’t put it down.
Hardware
Fexun N1, OECT
Here I will introduce the N1; I will work on the OECT when I have time.
The Fexun N1 has a quad-core Amlogic S905D CPU, 2GB of RAM, and 8GB of eMMC storage.
System
Armbian
Download:https://github.com/ophub/amlogic-s9xxx-armbian/releases
Armbian is based on Debian and Ubuntu, so there are two different series codes that are consistent. The latest versions are Trixie and Noble. According to those who have installed it, Trixie has some issues, so it is recommended to install the Bookworm version.
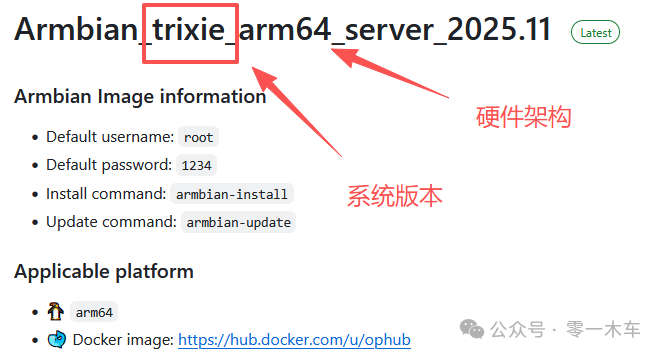

We will use this version, with arm64 corresponding to the N1 hardware architecture.
We need a USB drive writing tool, Rufus, to write the Armbian image to the USB drive.
Download link:https://rufus.ie/
Ophub’s Armbian is a relatively stable version that supports the N1.
Installation
Now let’s install Armbian. If the system has already been installed, we can boot directly from USB. If it’s the first installation, some processing is required. I will only discuss USB boot installation here.
1. The N1 has two USB ports; connect a USB keyboard to the port far from the HDMI port, and insert the USB drive with the written image into the other port. Connect the display and power on. The screen will first show the boot screen, then enter the Armbian system from the USB drive.
2. Log in to Armbian with username root; password 1234.
Here you will be prompted to change the password and create a regular user. If you do not want to create one, press Ctrl+C to skip.
(I hesitated for a long time during my first installation, not knowing what to do.)
3. After entering the system, we need to write the system to the N1’s eMMC.
Execute the command armbian-install in bash.

Follow the prompts to enter “101” to select the file system and input “1” (select ext4).

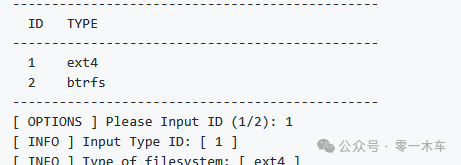
The Armbian system will start copying to eMMC, which takes about 2-3 minutes. After the writing process is complete, follow the prompt to enter the command poweroff to shut down, remove the USB drive from the box, and power it back on to enter your newly installed Armbian system. The flashing process is complete.

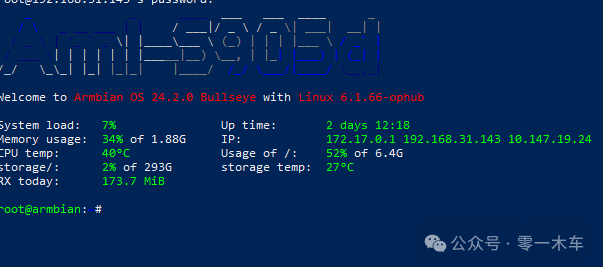
The system looks like this after installation is complete.
Applications
1. After installing Armbian, it cannot be used yet because “The official update source (ports.ubuntu.com) used by the Armbian operating system is overseas, and the connection speed is slower compared to domestic mirror sources. It is recommended to change to the mirror source provided by Tsinghua University.”
2. Change the source
Refer to this link to change the source:https://mirrors.tuna.tsinghua.edu.cn/help/armbian/
The Armbian source is changed according to the version of Armbian you are using. For example, if you are using Bookworm, you need to use the corresponding source.
Enter Armbian and execute the following command to change the software source:
nano /etc/apt/sources.list to directly delete or use this format “# comment out the original source”
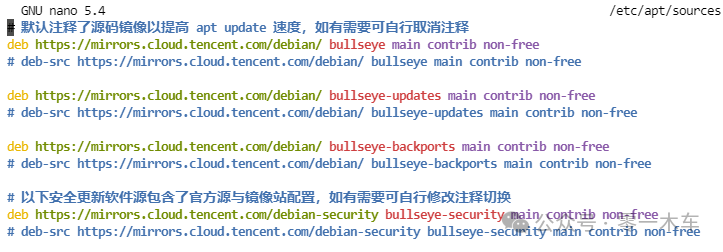
The red “bullseye” matches the source for the Armbian version. When looking for sources, make sure to match the system version.
For performance and storage considerations, it is not recommended to install the software that comes with Armbian. The N1 can connect to a large-capacity hard drive for storage, keeping Docker applications stored on the hard drive.
External Hard Drive
1. Connect the hard drive to the N1 box and enter df -T to check the USB drive directory, which is usually at /dev/sda1.
2. The formatting command is mkfs.ext4 /dev/sda1.
3. Create a new directorymkdir /mnt/disk
4. Mount the hard drive to this directorymount /dev/sda1 /mnt/disk
5. Set it to mount at every boot (my N1 is not set this way; if the power is cut off, it cannot start normally. You need to remove the hard drive, wait for the system to start, and then mount the hard drive. I haven’t had time to try this; stability comes first. The following method is what others have suggested; if it works, please leave me a message.)
Edit vi /etc/rc.local and enter the command mount /dev/sda1 /mnt/disk
6. Migrate Docker
## Stop Docker service docker stop
## Create a new folder in the mounted hard drive directory mkdir /mnt/disk/docker/
## Migrate all Docker files to /mnt/disk/docker/ directory rsync -avz /var/lib/docker/ /mnt/disk/docker/
## Edit /etc/docker/daemon.json configuration file; if this file does not exist, you need to create one nano /etc/docker/daemon.json
## Basic configuration is as follows: {    "data-root": "/mnt/disk/docker/"}
## Start the container service service docker start
<span>From now on, everything you install in Docker will be installed on the external hard drive.</span>
DOCKER
Portainer is a very useful Docker management tool that provides a simple and easy-to-use graphical interface to help Armbian users manage Docker containers and images.
Execute the following command to install the Chinese version of Portainer:
docker run -d -p 9000:9000 \ # You can modify the port here, format is -p<host port>:<container port> --name=portainer --restart=always -v /var/run/docker.sock:/var/run/docker.sock -v portainer_data:/data outlovecn/portainer-cn:latest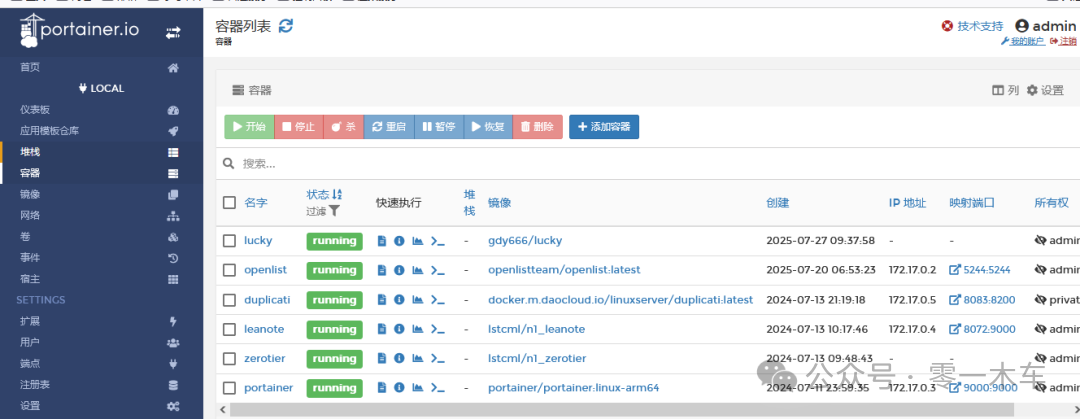
I successfully installed Baota on the N1, but the second time I flashed it, the installation was unsuccessful. Everyone can give it a try.
Now you can happily play with the N1. There are many interesting Docker applications on the forum. If you have any questions, you can ask in the forum or leave me a message.