1. Overview
The specific process for setting up the S32K344 development environment can be divided into the following three steps:
(1) Download the following three installation packages:
S32DS V3.5 Software (SW32K3xx_S32 DS_3.5.0_D2303)
Basic Development Package (4_R21-11_3.0.0_D2303)
RTD Package (4_R21-11_3.0.0_D2303_DS_updatesite)
(2) Install the S32DS V3.5 software, open the S32DS V3.5 software, and load the basic development package and RTD package (SDK).
(3) Import the example project and compile the program.
2. Detailed Process
(1) Downloading the Installation Packages
1) Download the S32DS V3.5 installation package
1. Click the link below:
https://www.nxp.com/design/design-center/software/automotive-software-and-tools/s32-design-studio-ide/s32-design-studio-for-arm:S32DS-ARM
2. Find the download entry for S32DS V3.5 as shown in Figure 1.1.1 and click to enter.
Figure 1.1.1 S32DS V3.5 Download Entry
3. Enter the interface shown in Figure 1.1.2 and click “I Agree”

Figure 1.1.2
4. Enter the download interface for the installation package as shown in Figure 1.1.3, and select the software version marked in red in the image for download.
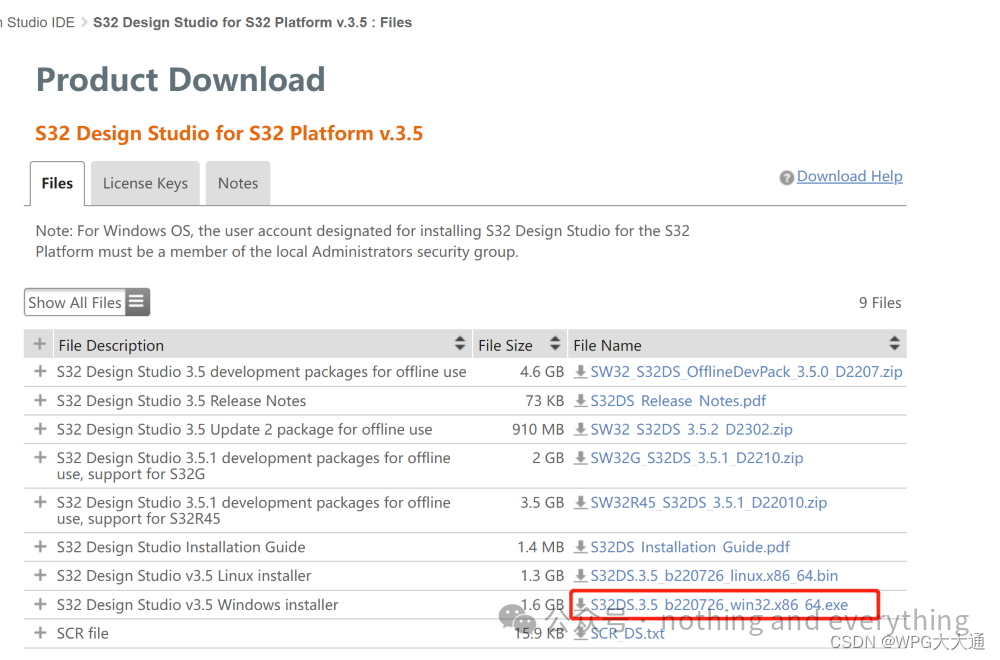
Figure 1.1.3 S32DS V3.5 Installation Package Download Interface
2) Downloading the Basic Development Package
1. Click the link below:
https://www.nxp.com/design/design-center/software/automotive-software-and-tools/real-time-drivers-rtd:AUTOMOTIVE-RTD
2. Sequentially select “My NXP Account -> Software Licensing and Support -> View accounts” to enter the interface shown in Figure 1.2.1, and select the link inside the red box in the image.
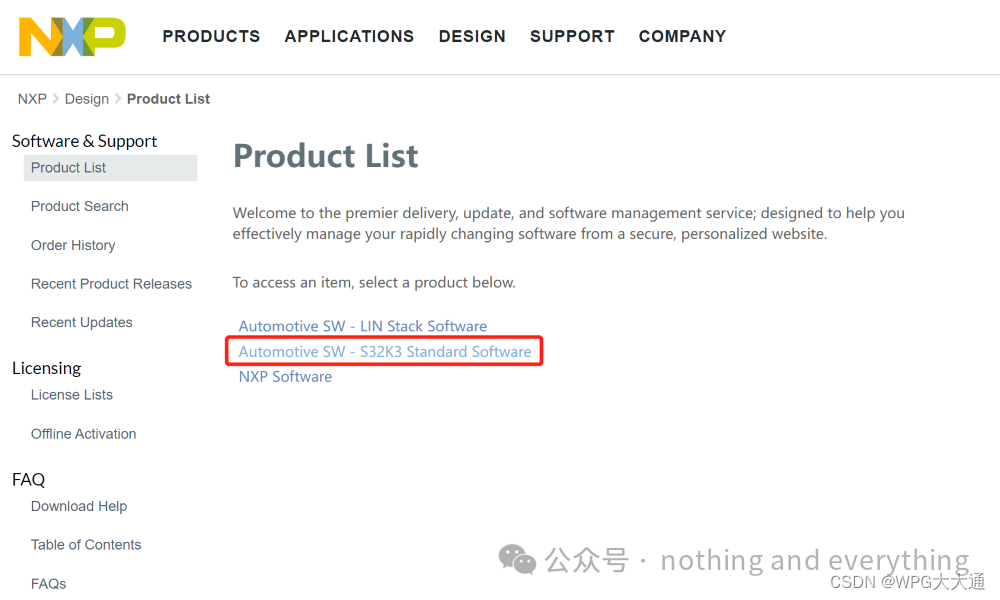
Figure 1.2.1
3. Follow the instructions in the image below.
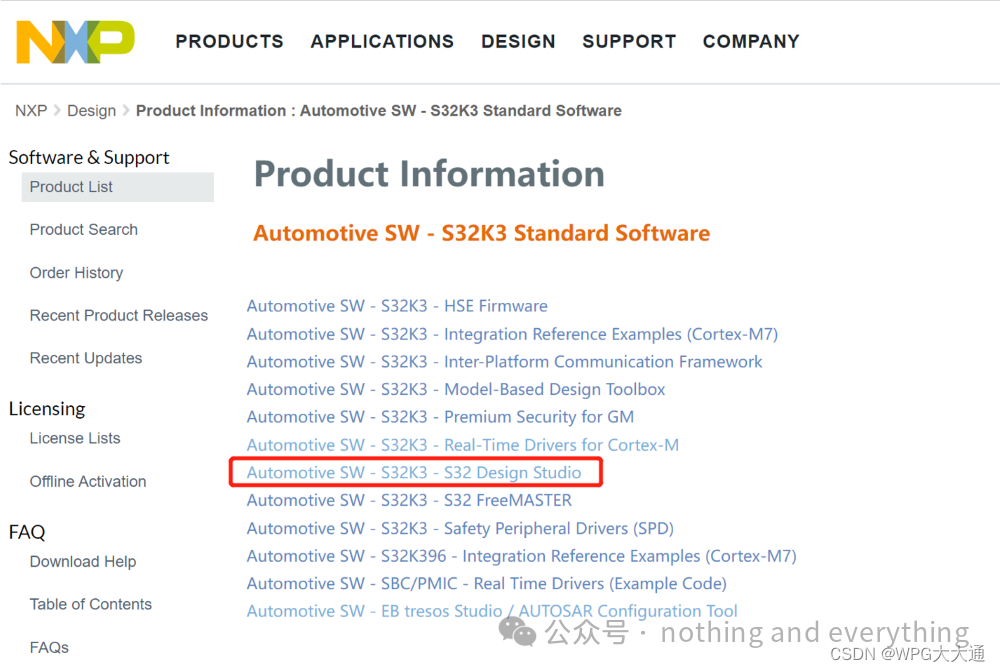
Figure 1.2.2
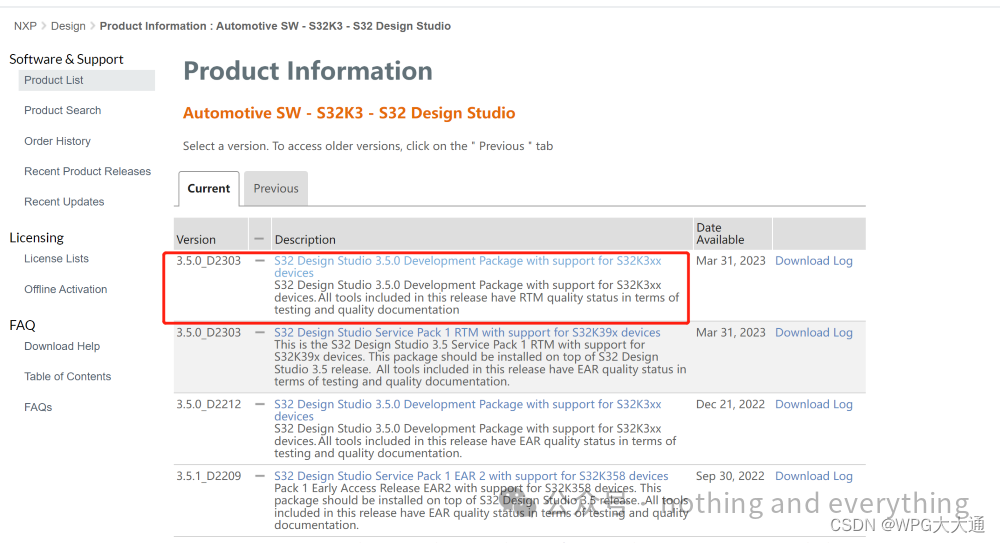
Figure 1.2.3
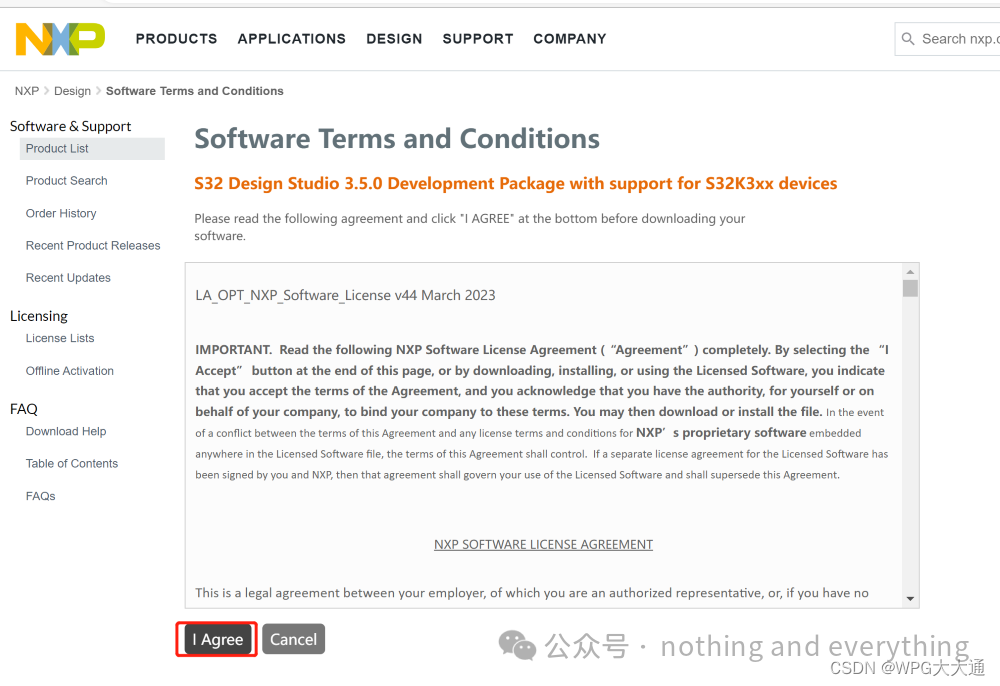
Figure 1.2.4
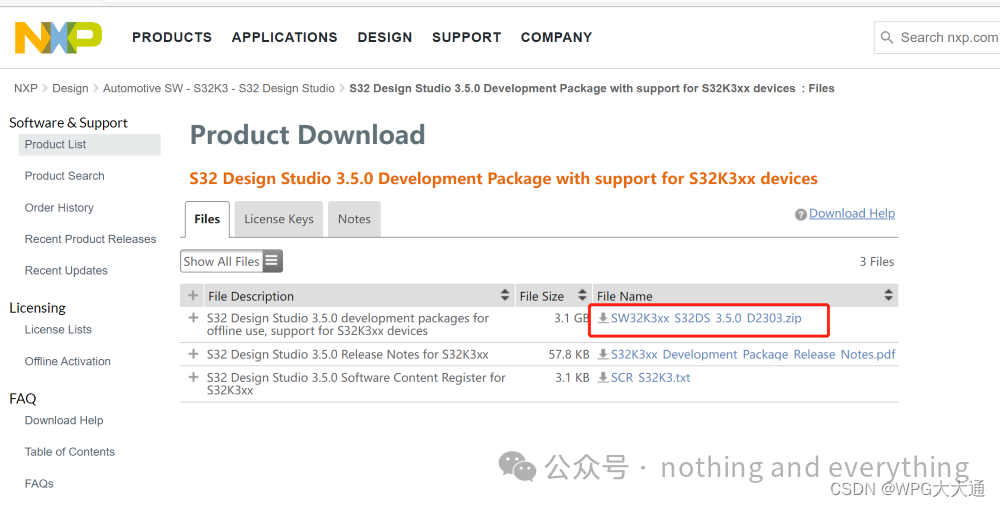
Figure 1.2.5
3) Downloading the RTD
1. In the download interface for the basic development package, return to the interface shown in Figure 1.3.1, and select the link inside the red box in the image.
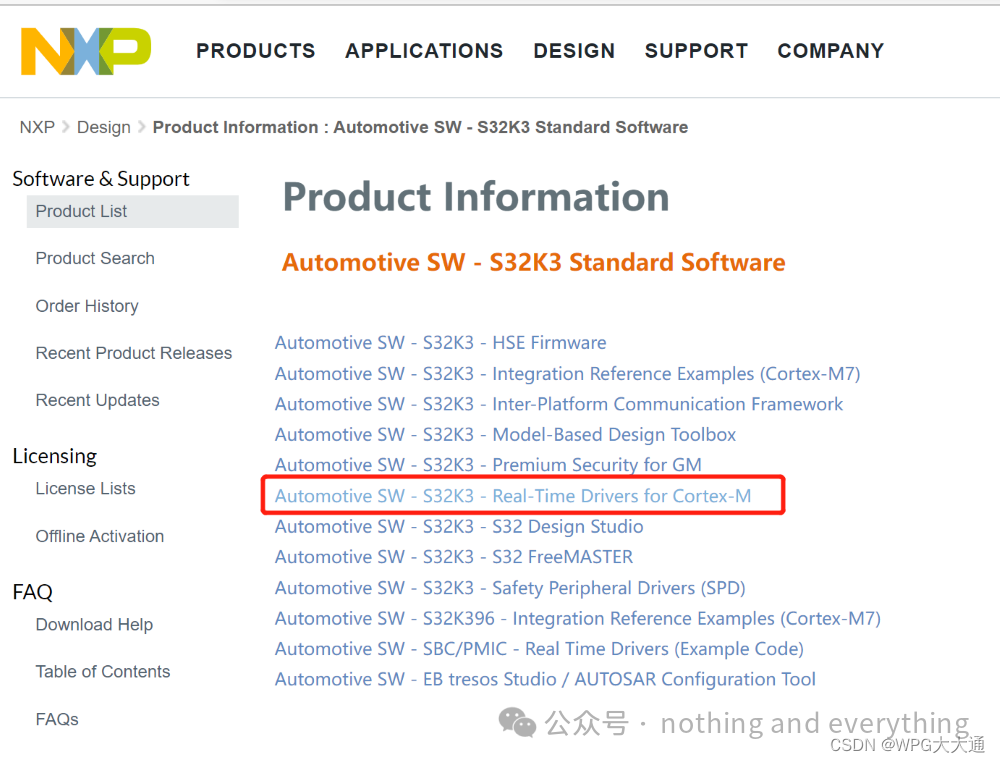
Figure 1.3.1
2. Follow the instructions in the image below.
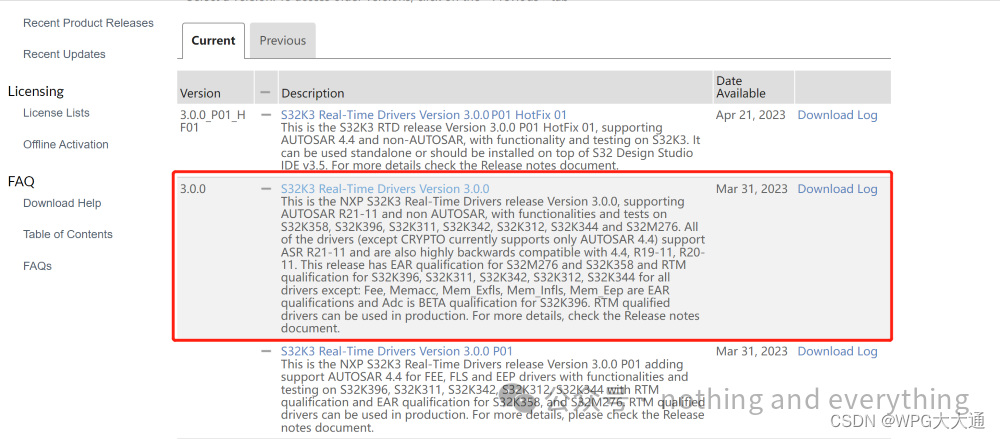
Figure 1.3.2
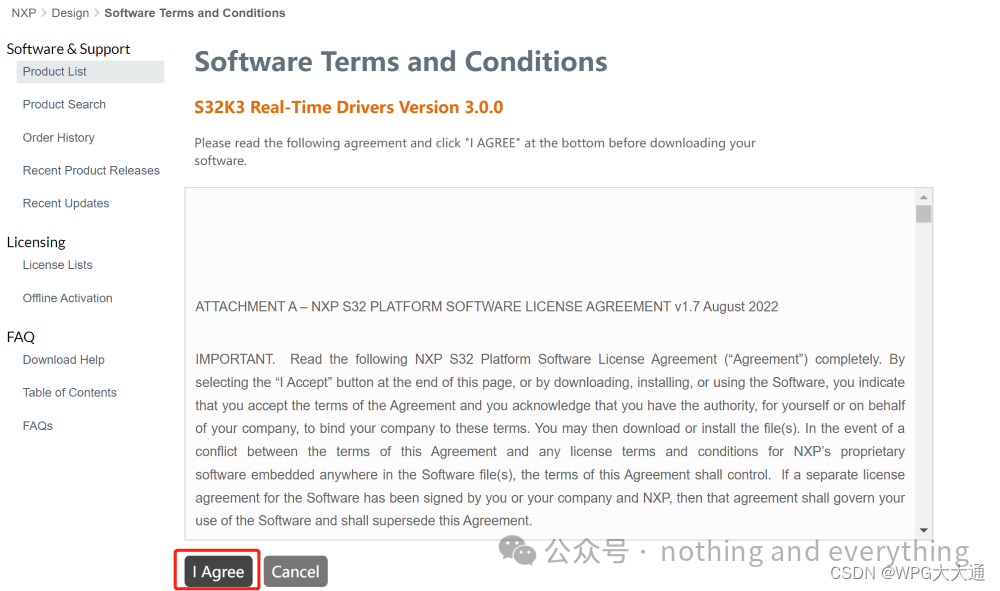
Figure 1.3.3
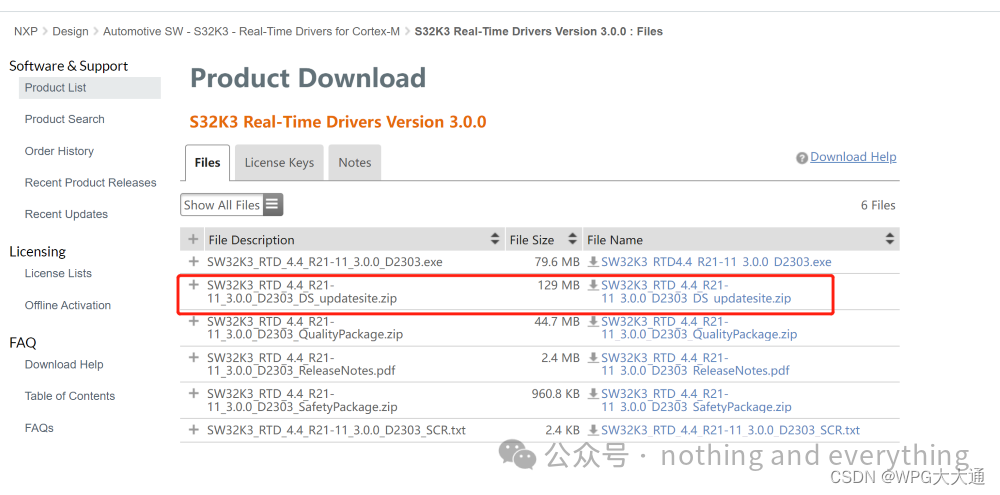
Figure 1.3.4
(2) Software Installation Steps
1) Installation Steps for S32DS V3.5 Software
1. Unzip the S32DS V3.5 installation package and double-click the .exe file as shown in Figure 2.1.1.

Figure 2.1.1
2. Enter the interface shown in Figure 2.1.2.
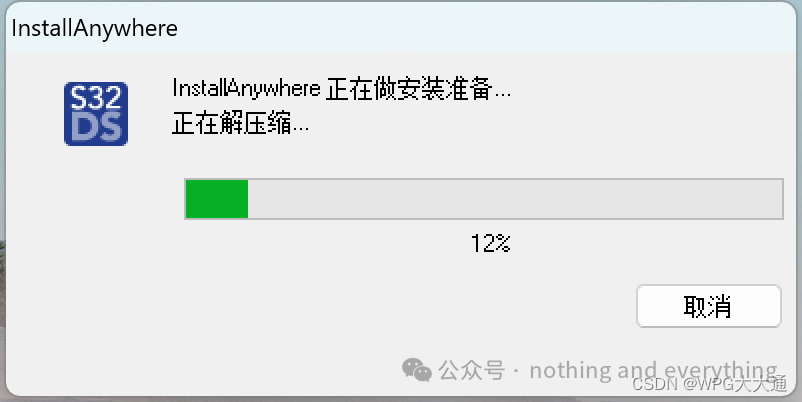
Figure 2.1.2 S32DS V3.5 Pre-installation Preparation Interface
3. Follow the instructions in Figure 2.1.3 and click “Next”.
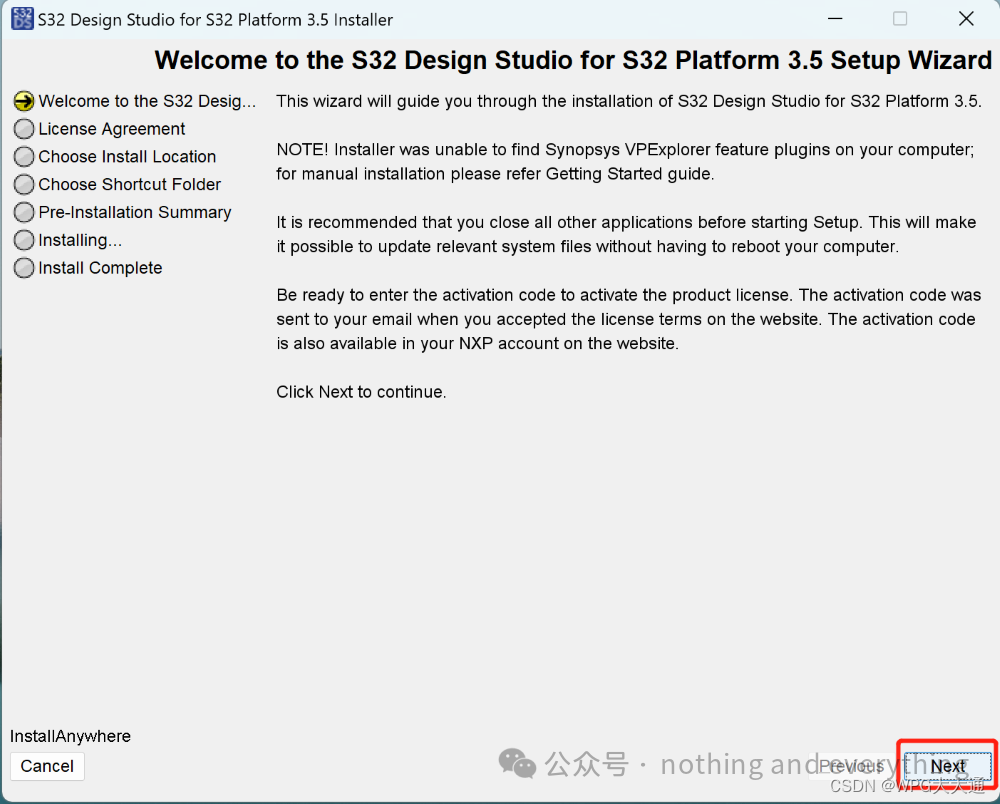
Figure 2.1.3
4. Enter the interface shown in Figure 2.1.4, scroll down to view the license terms, select accept, and click “Next”.
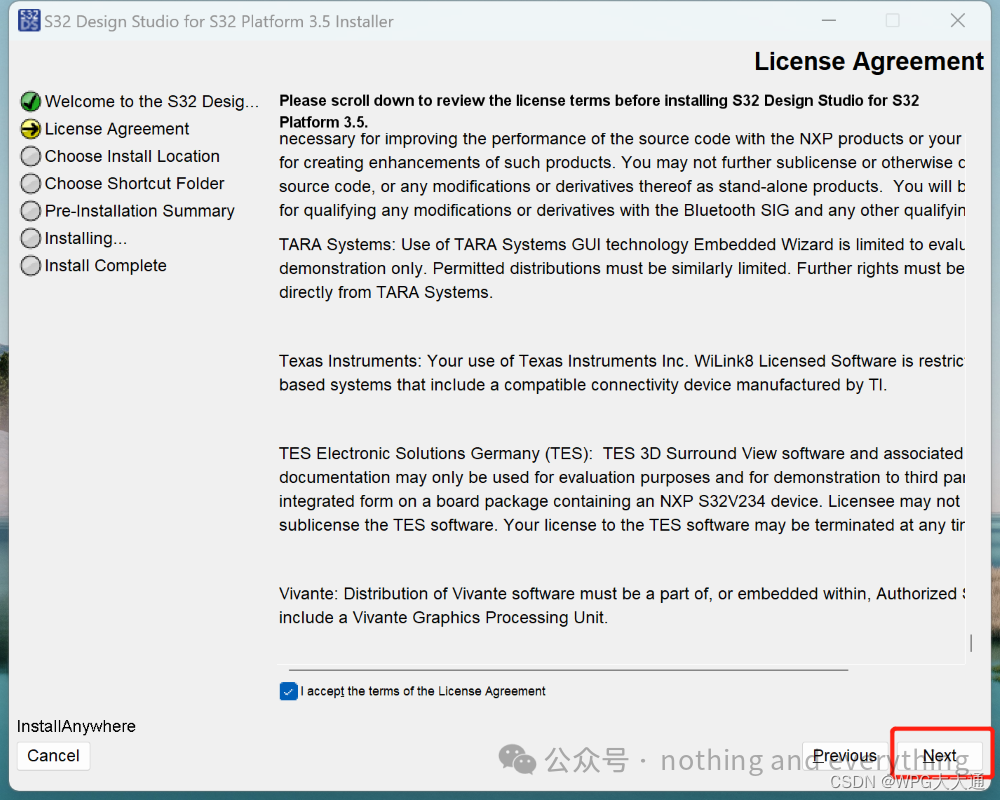
Figure 2.1.4
5. Follow the instructions in Figure 2.1.5 to select the installation path (note that the path should not contain Chinese characters), and click “Next”.
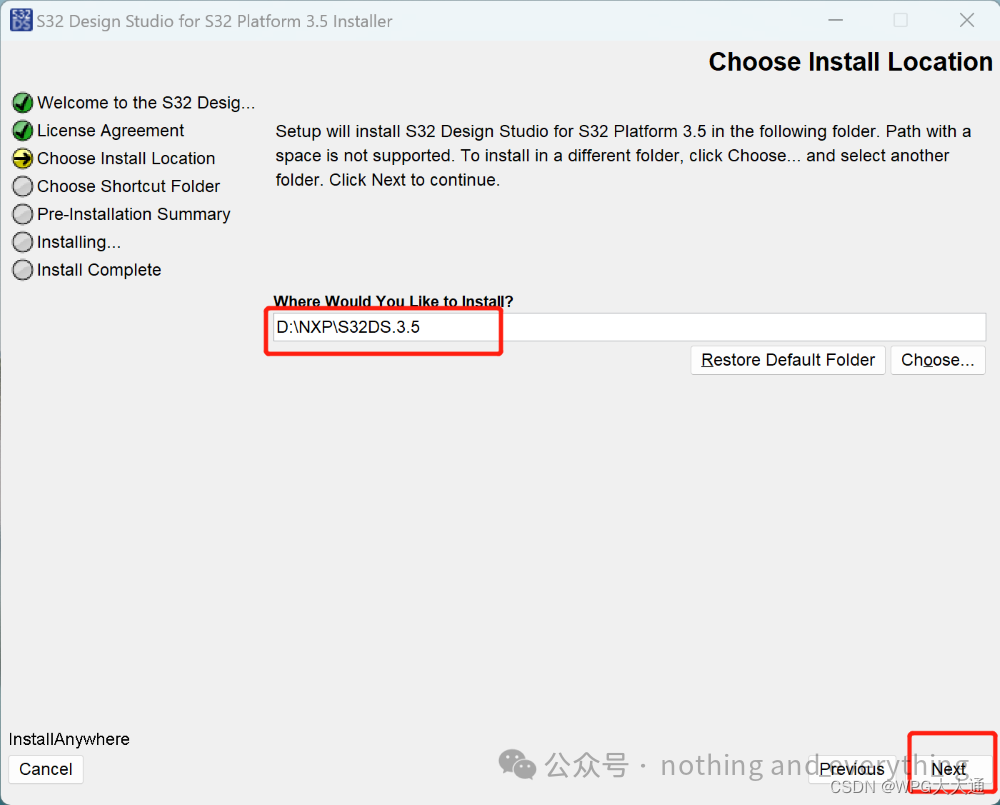
Figure 2.1.5
6. Choose the location for the S32 platform program shortcut; here I choose to place it on the desktop, and click “Next”.
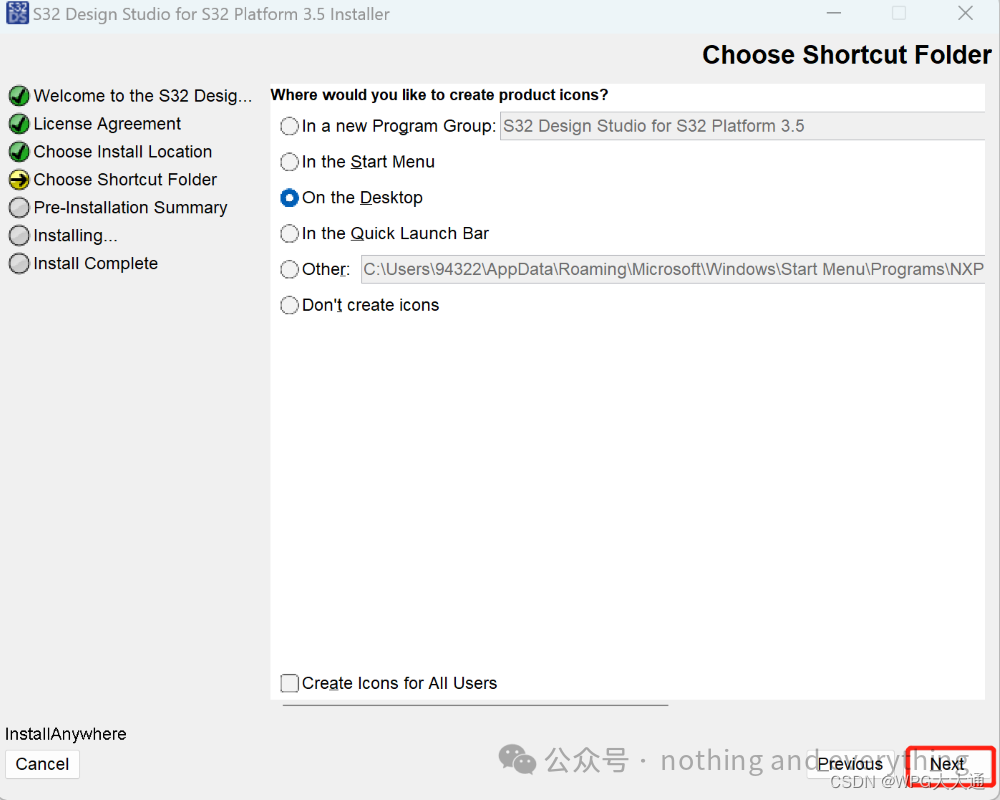
Figure 2.1.6
7. Review the pre-installation summary before installation, and if everything is fine, click “Install” to start the installation.
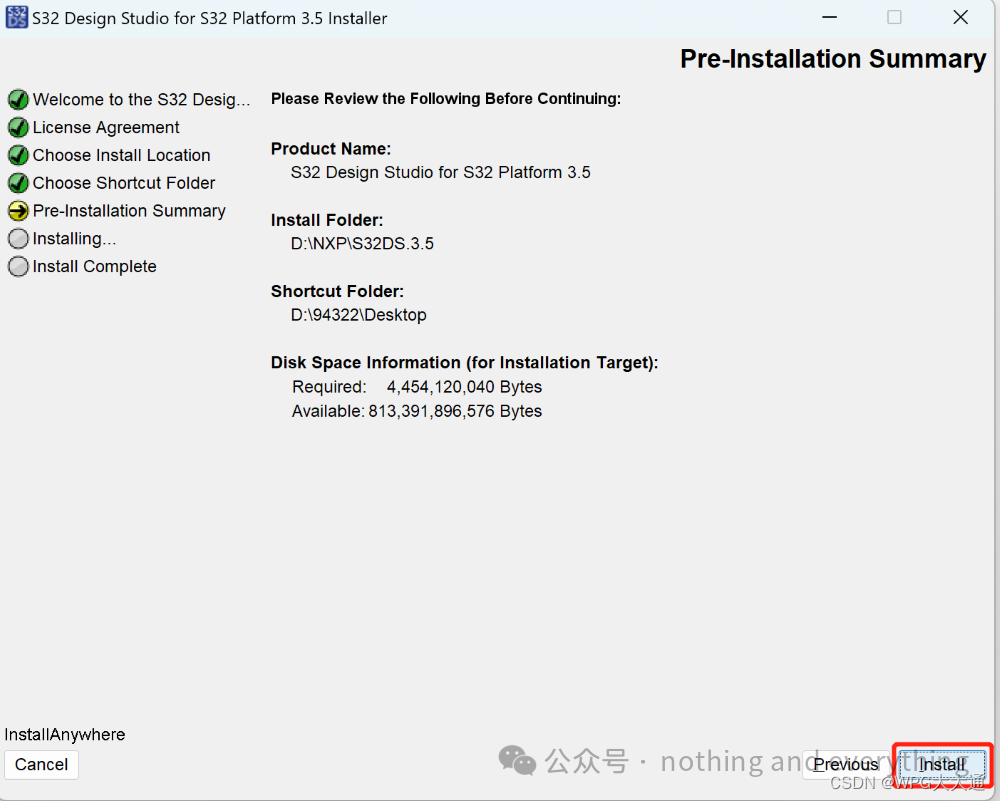
Figure 2.1.7
8. During the installation process, you may see the interface shown in Figure 2.1.8, which indicates that the installer is looking for the S32 Design Studio for S32 Platform license on your computer. If a valid license is not found, the installer will notify you and ask for an activation code to obtain a license, which is the next step.

Figure2.1.8
9. When downloading the S32DS installation package, the activation code will be sent to your corresponding email. Find the activation code, copy it, and click “OK”.
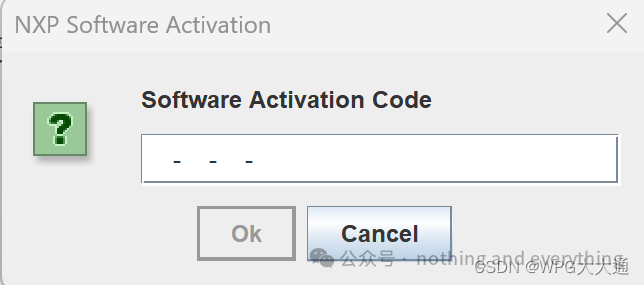
Figure 2.1.9
10. Select online activation, and after successful activation, the installation will automatically continue.
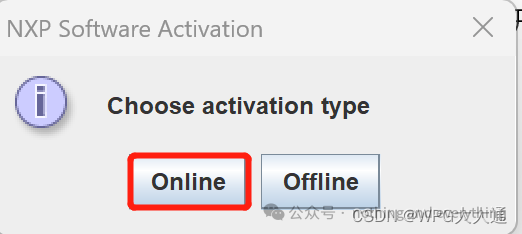
Figure 2.1.10
11. During the installation process, you may be prompted to continue using the installation wizard for specific drivers; select “I Agree” as shown in the image below.
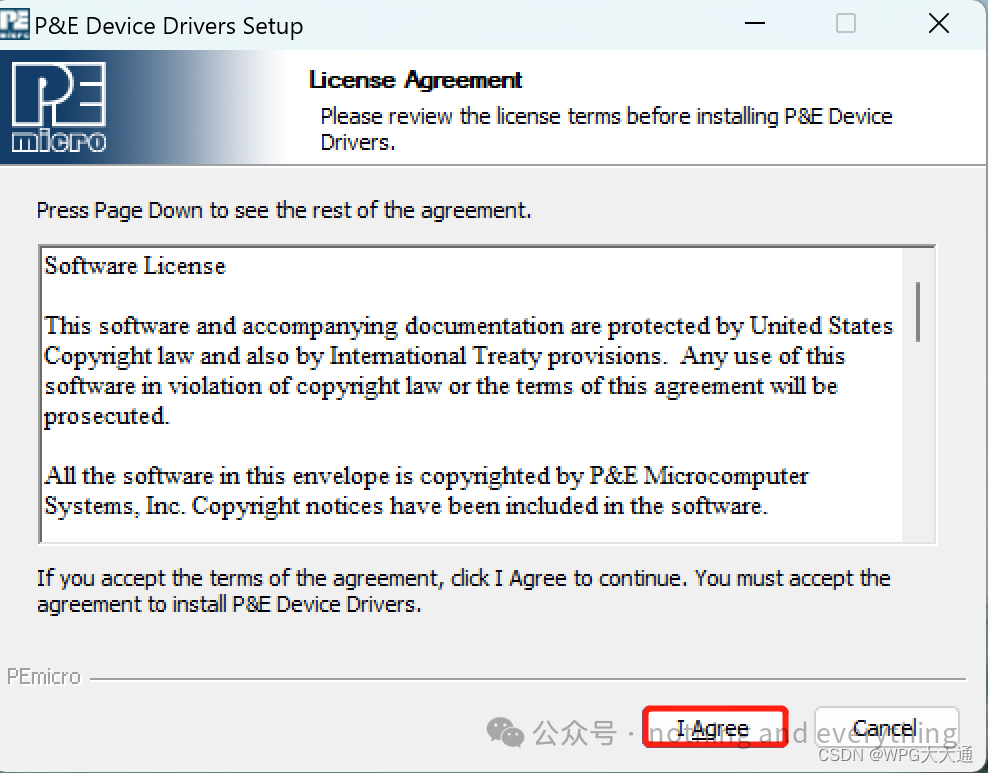
Figure 2.1.11
12. Select the installation path and click “Install”.
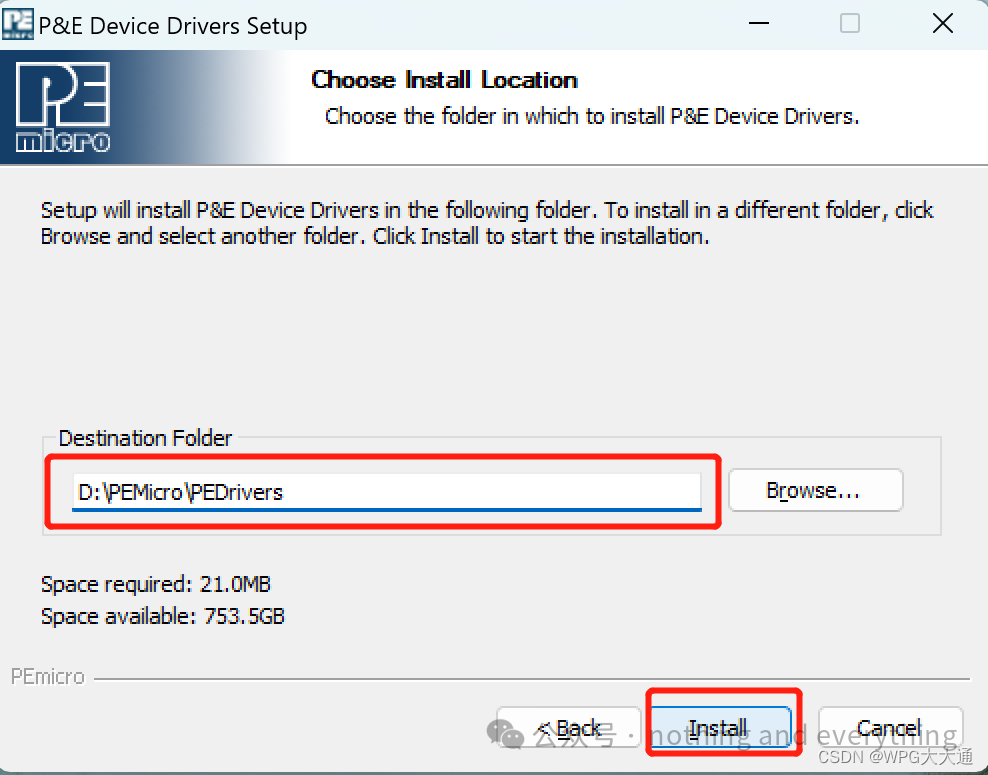
Figure 2.1.12
13. Follow the instructions in the image below.
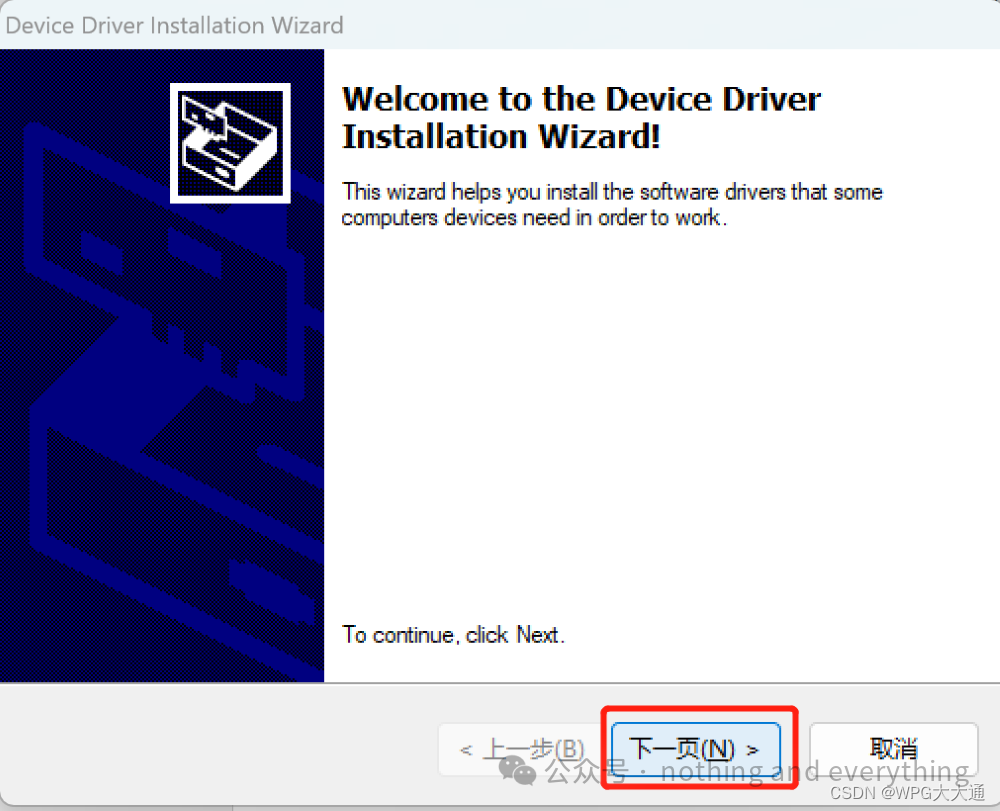
Figure 2.1.13
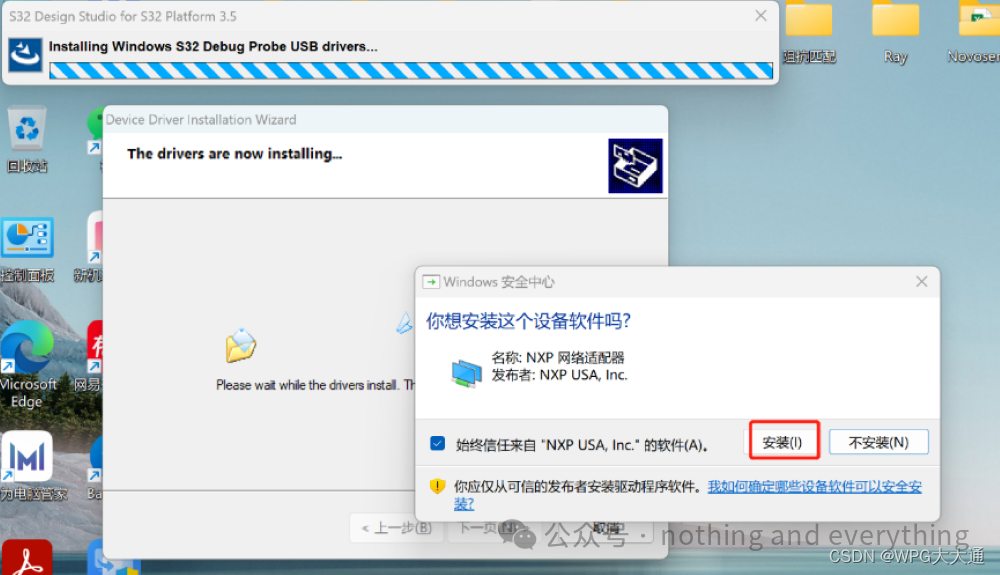
Figure 2.1.14
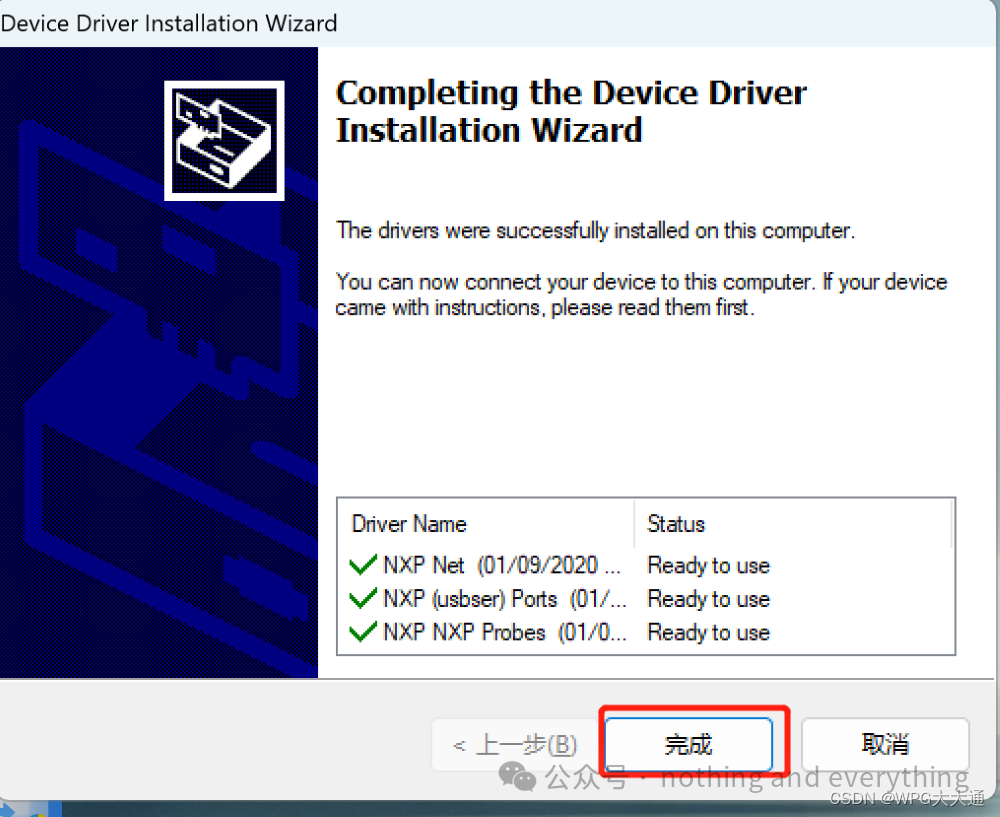
Figure 2.1.15
14. Wait for the S32 Design Studio for S32 Platform installation program to complete the installation and display the installation complete page; click “Done” to finish the installation, as shown in Figure 2.1.16.
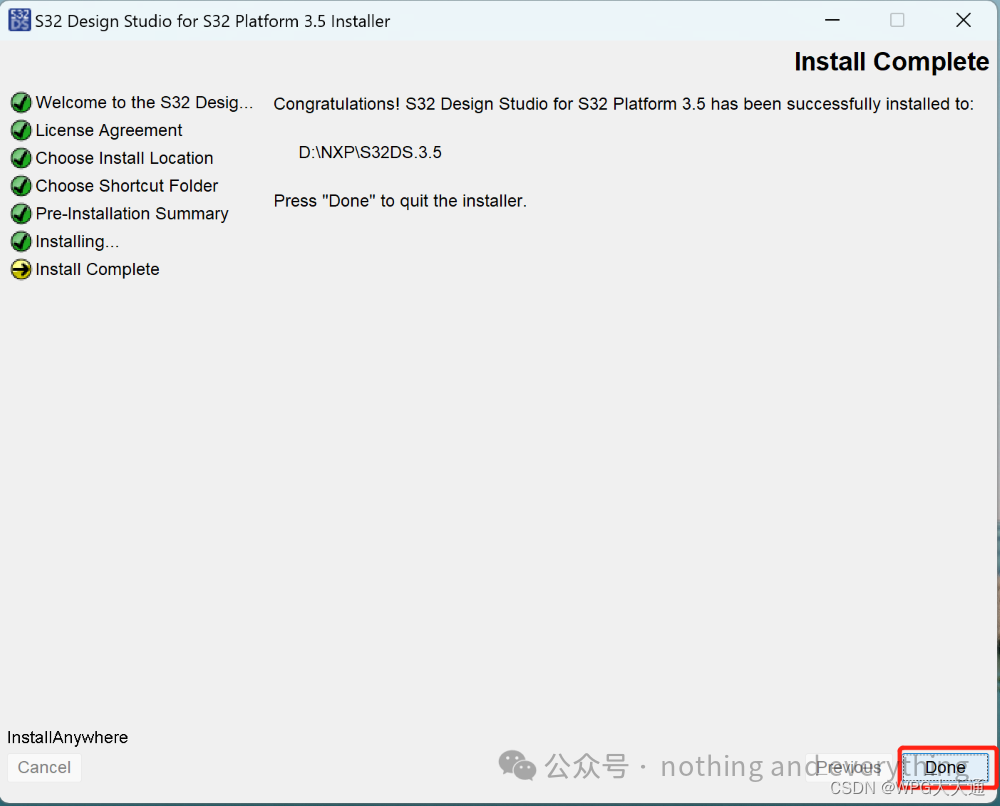
Figure 2.1.16 S32DS V3.5 Installation Complete Interface
2) Steps for Loading the Basic Development Package and RTD Package
[Note] The installation of the basic toolkit and the RTD package must be done in order; first install the basic development package (SW32K3_RTD_4.4_R21-11_3.0.0_D2303), then install SW32_RTD_4.4_R21-11_3.0.0_D2303_DS_updatesite (RTD package). The detailed installation steps are as follows:
1. Open S32DS 3.5. Go to the menu bar “Help” -> “Install New Software” (after each installation package is completed, S32DS needs to be restarted as prompted), and operate as shown in Figure 2.2.1.
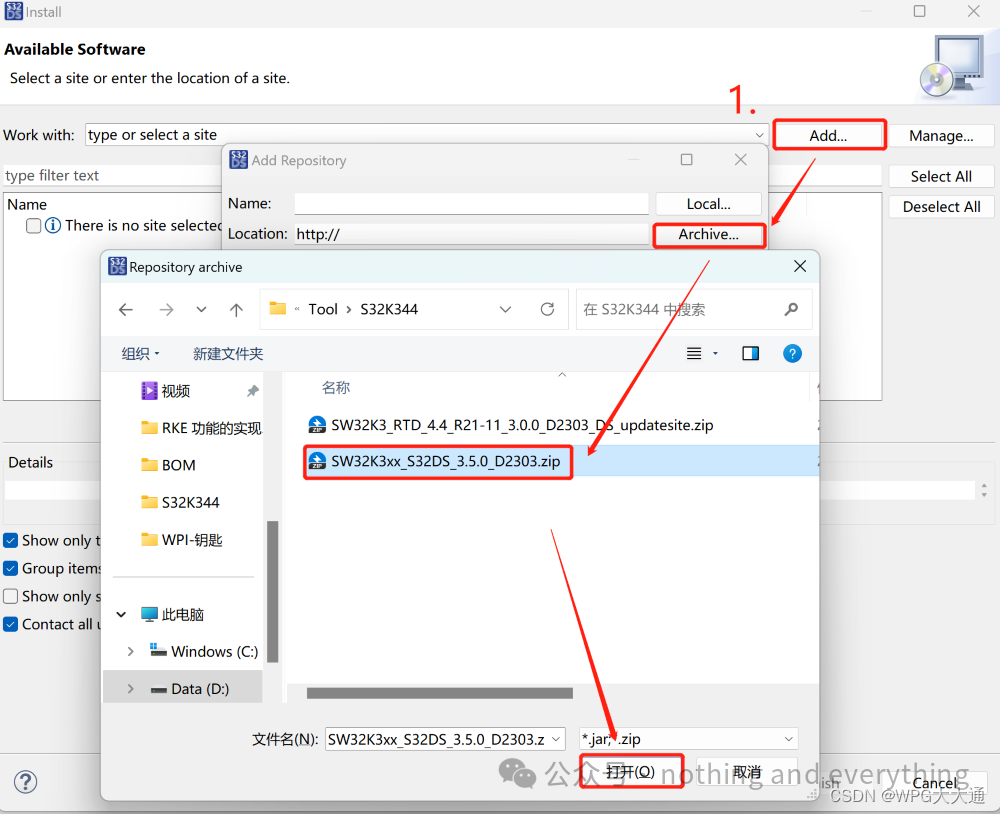
Figure 2.2.1 Loading the Basic Development Package
2. Follow the instructions in the image below.
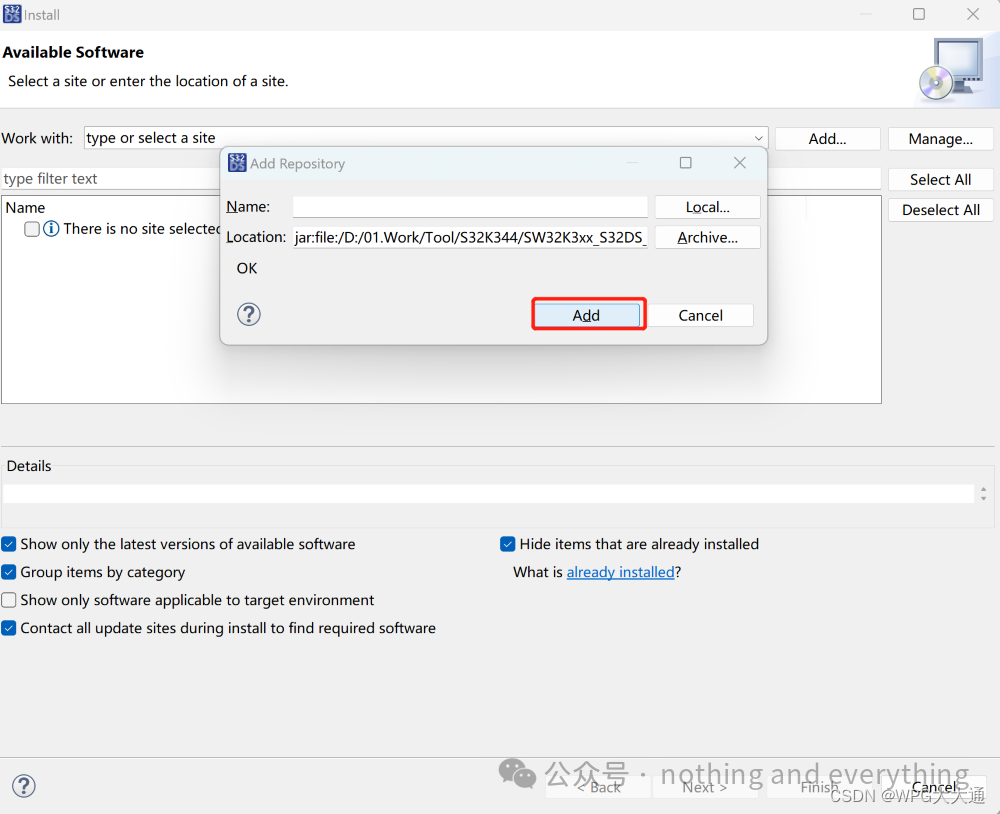
Figure 2.2.2
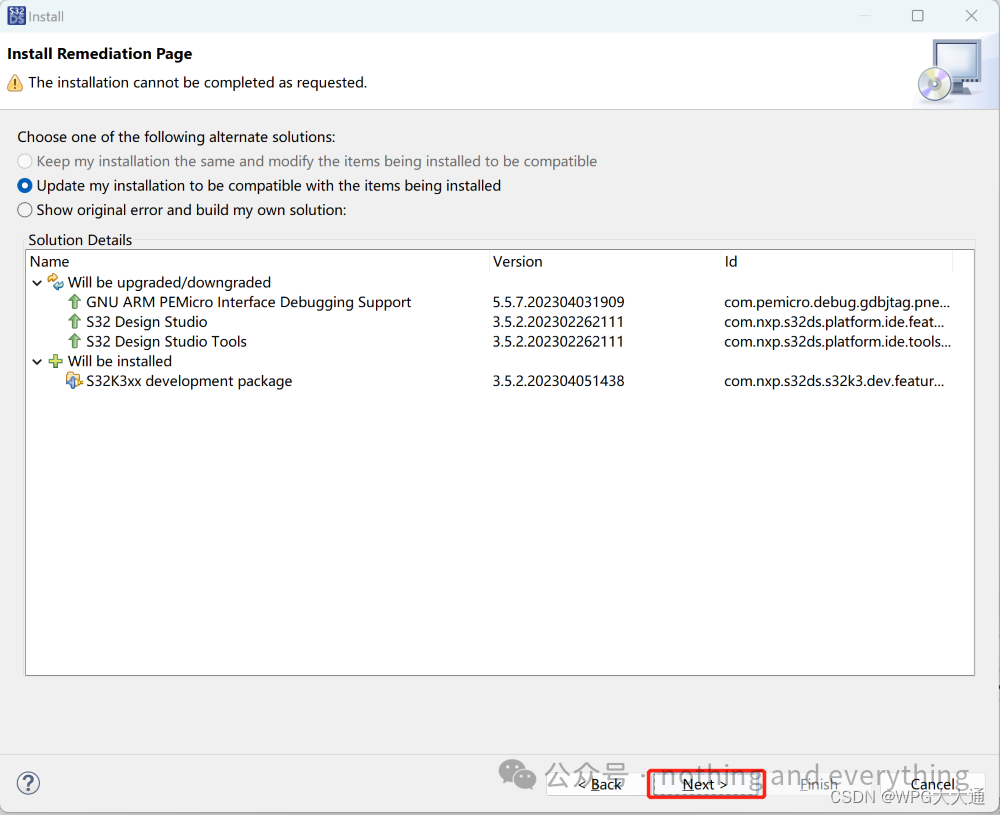
Figure 2.2.3

Figure 2.2.4
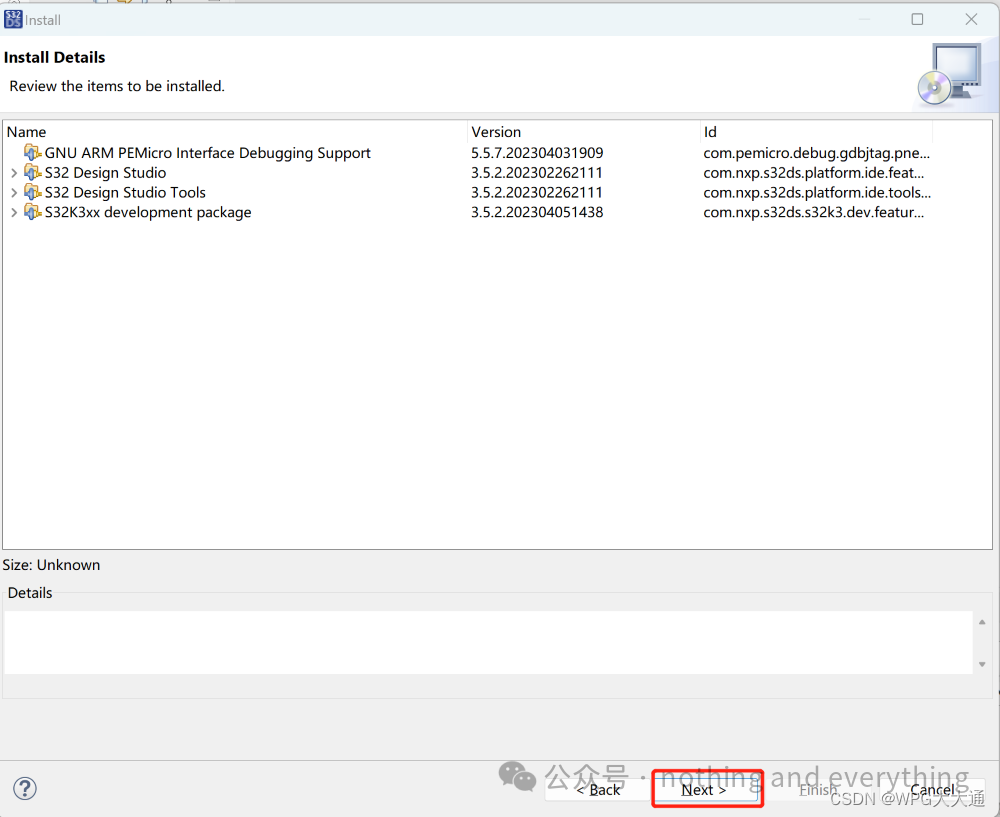
Figure 2.2.5
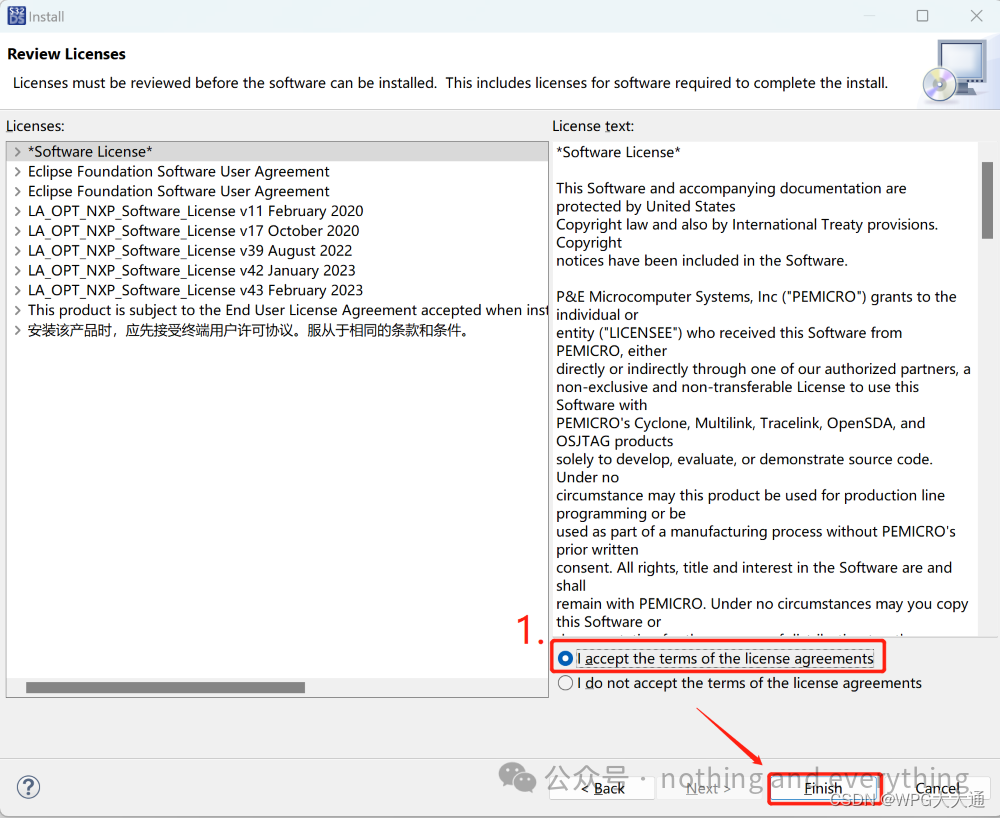
Figure 2.2.6
3. Wait for S32DS to finish installing, then click “Restart Now”; S32DS 3.5 software will automatically restart.
4. Repeat step 1 to load the RTD package, referring to the completion of the basic development package installation for the loading of the RTD package, with the selected items shown in Figure 2.2.7.
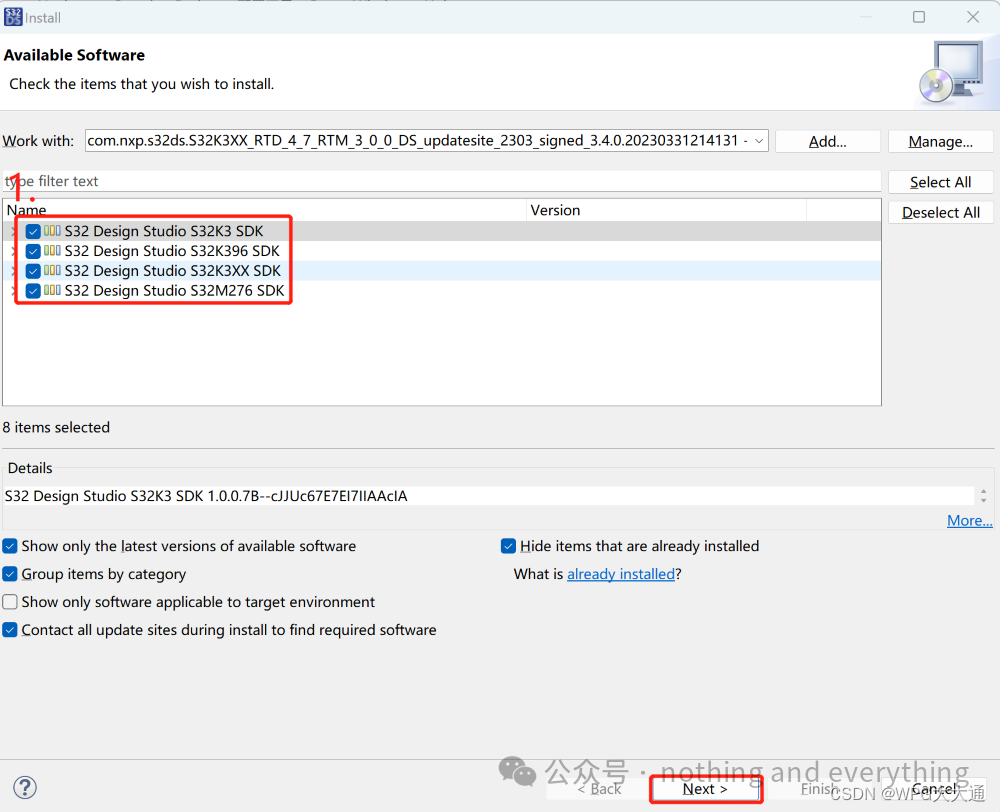
Figure 2.2.7 SDK Selection Interface
3) Import the example program and compile it.
1. Open S32DS 3.5, go to the menu bar “File->New->S32DS Project from Example”, enter the interface shown in Figure 3.1, select the corresponding example (if the S32K344 example does not appear, you need to reload the RTD package), and click “Finish”.
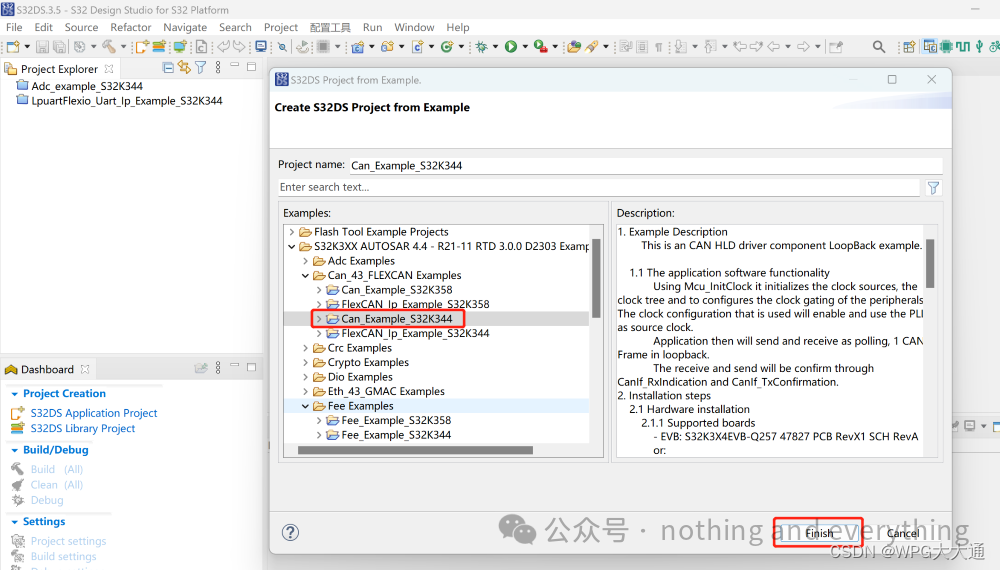
Figure 3.1 Example Program Selection Interface
2. As shown in Figure 3.2, double-click the .mex file to enter the configuration interface.
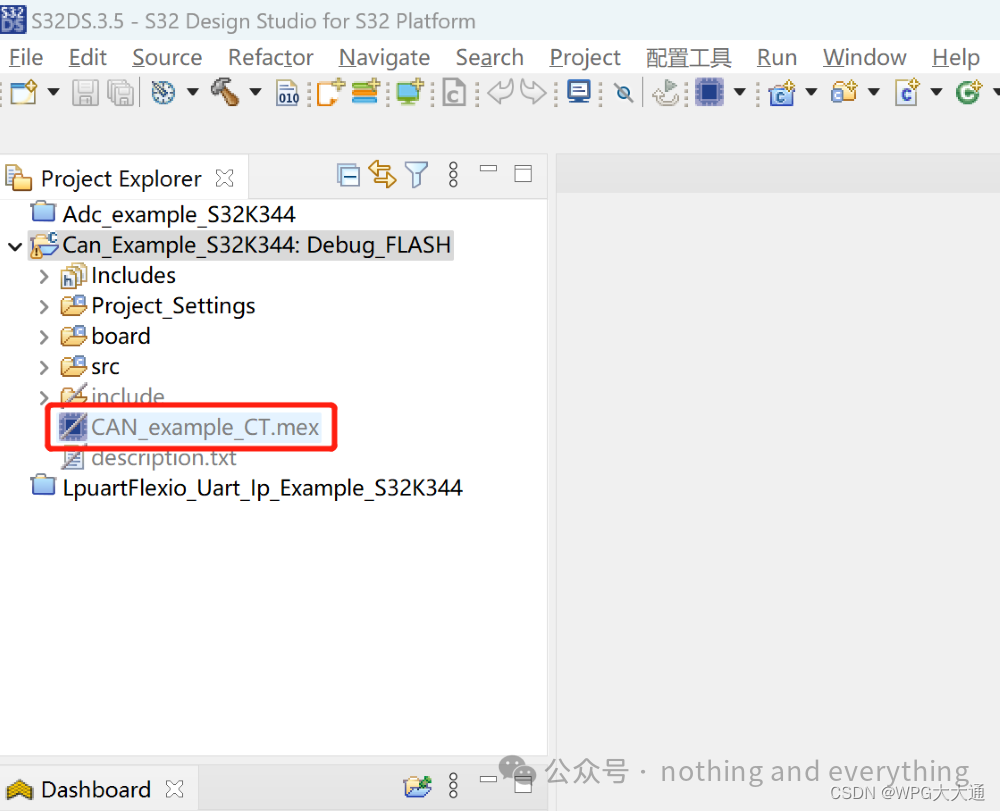
Figure3.2
3. As shown in Figure 3.3, click “Update Source Code”, and in the next interface that appears, click “OK”.
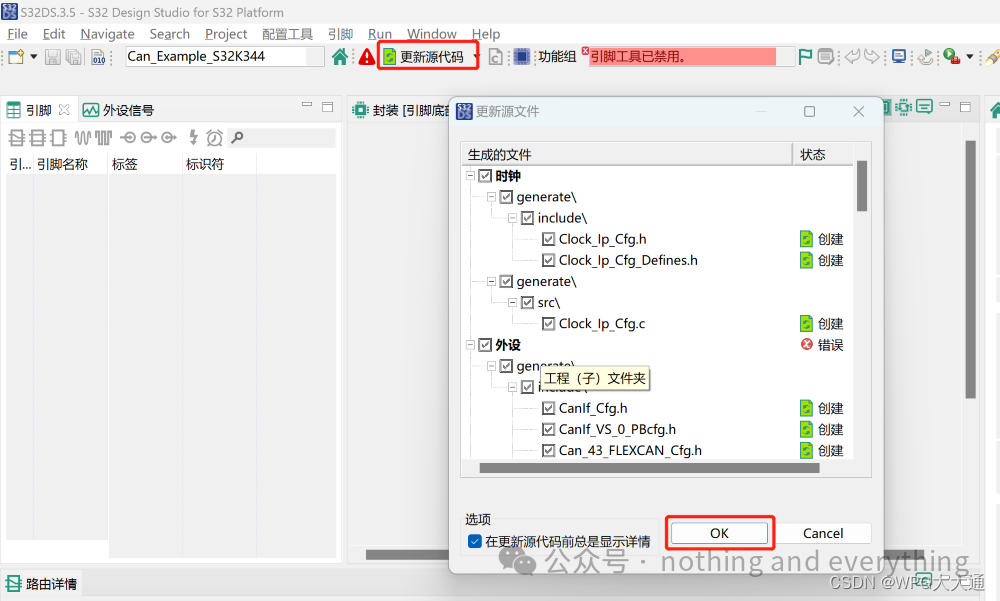
Figure 3.3 Configuration Interface
4. Click the “C/C++” icon in the upper right corner to return to the program writing interface.
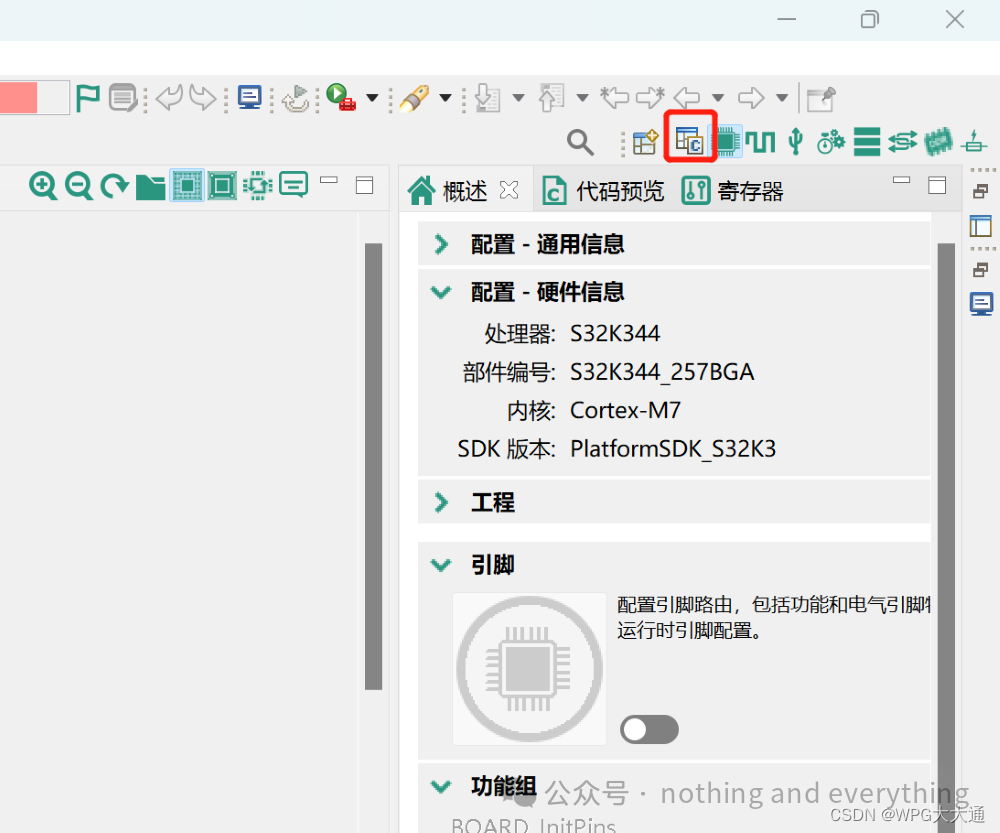
Figure 3.4
5. As shown in Figure 3.5, after updating the source code, some files will be regenerated; click the compile button in the upper left corner, and after a few seconds, the program compilation will be completed as shown in the lower right corner.
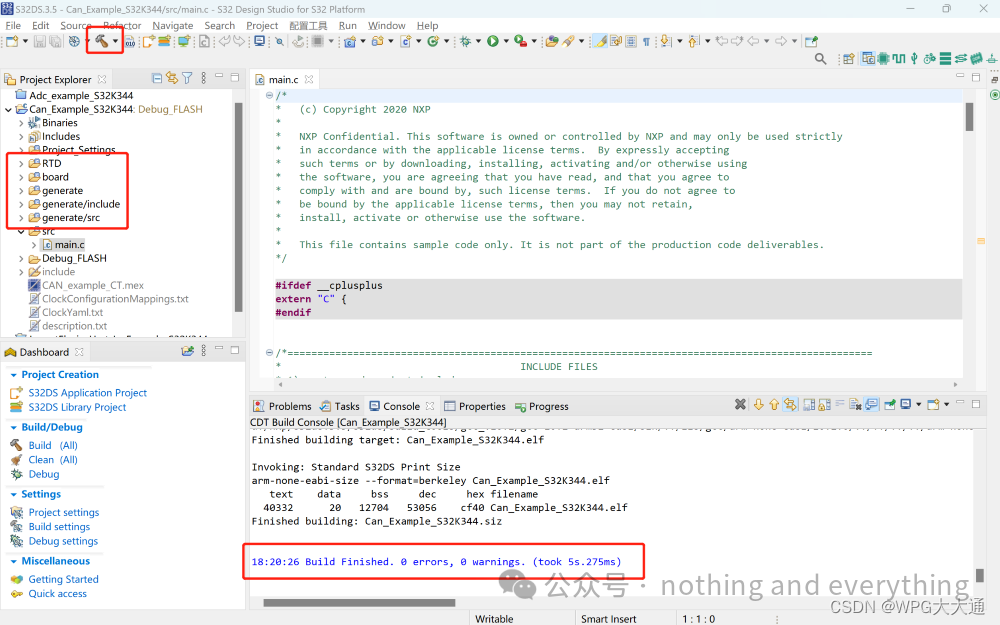
Figure 3.5 Program Compilation Interface
6. At this point, the development environment for the S32K344 has been set up.
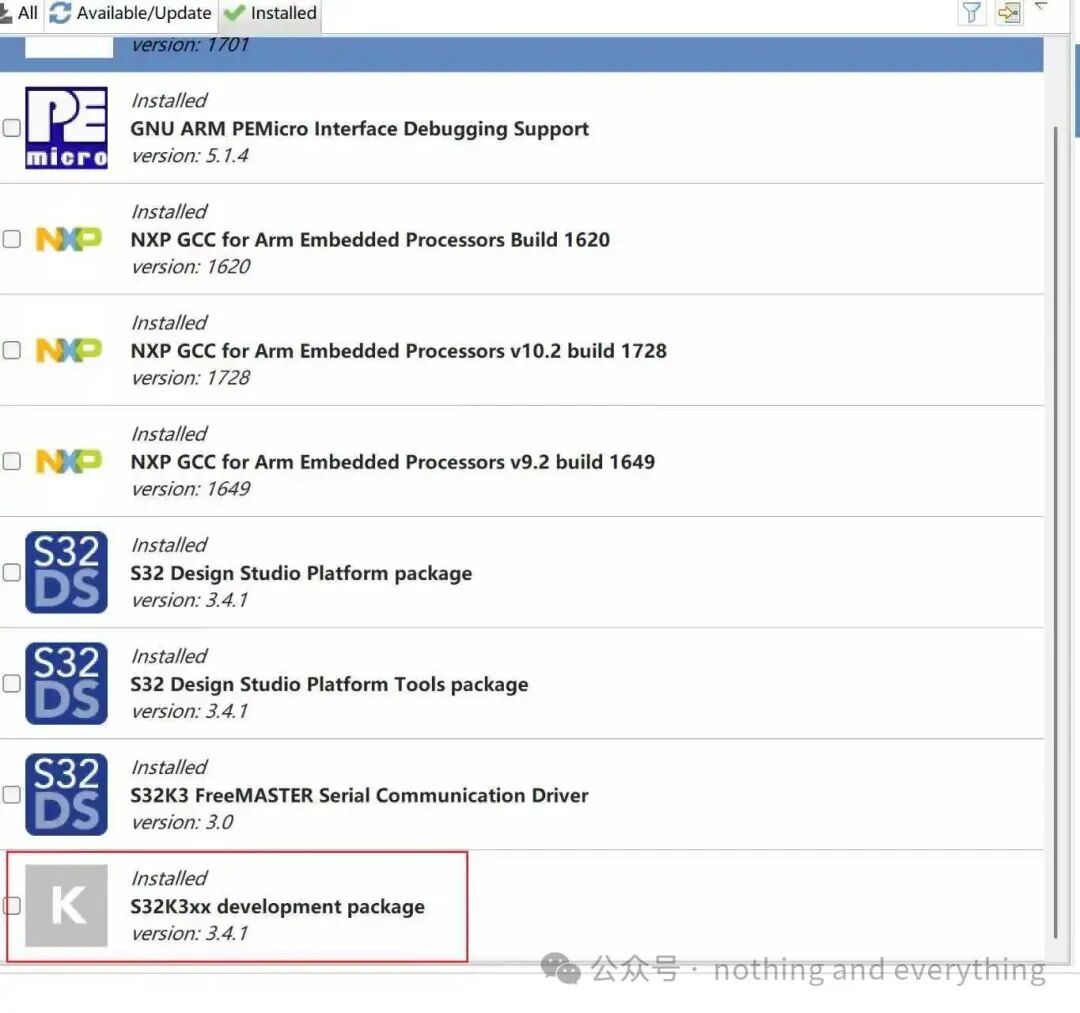 Remember, if you cannot find the example, you can always install updates in available/Update.