Combining Raspberry Pi and Arduino: A Comprehensive Guide

1. Introduction

The Raspberry Pi is an advanced embedded Linux board that can perform complete computer functions. In recent years, due to its affordability and ease of use, the Raspberry Pi has become very popular among developers. Additionally, Arduino is a convenient and flexible embedded development tool that can perform real-time signal acquisition and control. It has also seen significant development and popularity due to its ease of use and development.

2. Positioning

The Raspberry Pi is a complete computer with strong processing

How to Create an OTTO Robot: A Step-by-Step Guide

How to Create an OTTO Robot: A Step-by-Step Guide

OTTO is an open-source small robot, using an Arduino Nano board with an IO expansion board. It is powered by four SG90 9g servos and supports ultrasonic sensors in the standard DIY version. Programming can be done using tools like Arduino IDE or mBlock. It's simple and fun.

All files can be obtained from its official website, including 3D printing model files and installation files, etc. The website is https://www.ottodiy.com/

Creative Kids and Technology: Building Arduino Expansion Boards and Sensors

Creative Kids and Technology: Building Arduino Expansion Boards and Sensors

The little friend Qiu Qiu made

“The Running Box”

Had a lot of fun playing

Creative Kids and Technology: Building Arduino Expansion Boards and Sensors

Feeling happy

Also developed a strong interest in circuit boards

Asked many questions

Wants to make a set by himself

Creative Kids and Technology: Building Arduino Expansion Boards and Sensors

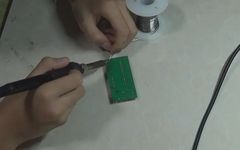
There happened to be

an Arduino expansion board designed by

the students of “Sunshine Little Maker” LEVEL-4

and an empty PCB board

Step-by-Step Guide to Creating Your Own Arduino Nano

Step-by-Step Guide to Creating Your Own Arduino Nano

MAKER: samvanhook / Translated by: Fun Without End Cherry

Since Arduino has officially open-sourced the complete hardware scheme, creating your own Arduino has become possible. All you need to do is prepare the required components, use the PCB files provided below to get the PCB made, and you can solder your own Arduino Nano. If you can modify the PCB files, you can also adjust them according to your needs (a

Create a High-Quality DIY Robot in Just Two Hours!

Create a High-Quality DIY Robot in Just Two Hours!
Buying is convenient, but making is more fun!
I've heard there is a simple and fun robot that even kids can play with?
I've also heard there is an entry-level robot perfect for beginners?
Furthermore, I've heard there is a fully open-source robot that can be quickly made in just two hours?
That's right!
This robot, which has a simple configuration but high aesthetics,
is called Otto!
Create a High-Quality DIY Robot in Just					</div>
									</div>
						
							<div class= 2024-12-29

Four Interesting Open Source Kits to Bring You Back 20 Years

Click the blue text above to follow us and never miss any practical article!

Have you ever thought about using the board at hand to DIY a controller?
Today, we will review four very interesting open source game controller DIY reference designs and kits, allowing players with strong hands-on skills to assemble and customize their own game controllers through DIY.

Four Interesting Open Source Kits to Bring You Back 20 Years Infineon XENSIV Game Controller Four Interesting Open Source					</div>
									</div>
						
							<div class= 2024-12-29

DIY GoPro Wireless Controller with Arduino

DIY GoPro Wireless Controller with Arduino

MAKER: dar_sissau / Translated by: Fun Endless Cherry

In this tutorial, I will show you how to control the GoPro Hero 4 and GoPro Hero Session 5 using an Arduino board. Once you master these skills, you can easily apply them to any model of GoPro, which will be very practical. You can communicate with the GoPro directly using some basic network commands through the Arduino, instead of hacking into the existing controller. You

DIY Otto Robot: A Fun Project for Kids

DIY Workshop | XinCheJian DIY

The DIY Workshop mainly provides works created by XinCheJian members. Through this platform, you can understand the principles behind the works of XinCheJian members and DIY them yourself. On the other hand, you can also purchase corresponding works and kits at reasonable prices. We guarantee that all published works come from XinCheJian members, and we do not accept any commercial works!

XinCheJian DIY is a platform to showcase XinCheJian members' projects. At the same time, people interested

3D Printed Arduino Color Picker

3D Printed Arduino Color PickerMAKERalojz / Translated by:Fun Endless

Today we are going to make a very simple Arduino color picker that can extract colors from real-life objects and display the RGB values of the colors in a simple way.Similar projects include "Making a Color Sorting Machine with Arduino," which interested friends can also check out.
Materials List

3D Printed Arduino Color PickerArduino Mini × 1TCS34725 RGB Color Sensor × 1I2C 16×2 LCD Display × 1Toggle Switch × 1RGB

Arduino: A Development Board Igniting the Global Maker Movement

Arduino: A Development Board Igniting the Global Maker Movement

Click the above "Information Technology Teaching Innovation" to subscribe to this journal

Maker education is the combination of maker culture and education, based on students' interests, using project-based learning methods, advocating creation, encouraging sharing, and cultivating interdisciplinary problem-solving abilities, teamwork skills, and innovation capabilities as a form of quality education. An important technological event of the 21st century—the sign of the rise of the maker movement—was the birth of the first

Back to Top
Product has been added to your cart