Written by: Jiu Ge
In 1977, three mathematicians Rivest, Shamir, and Adleman proposed a new asymmetric encryption algorithm, named after themselves, known as the RSA encryption algorithm. The knowledge of RSA involves advanced mathematics such as number theory and Euler’s function. If you do not have a background in higher mathematics, it is recommended not to delve too deeply. This article focuses on how to use Python to generate key pairs and implement the digital signature process, thereby achieving encryption and decryption of network information.
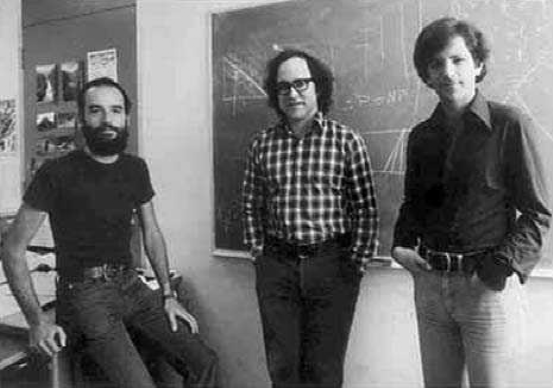
Inventors of the RSA Algorithm: Rivest, Shamir, and Adleman
The RSA algorithm can be summarized in four sentences: Public key encryption, private key decryption, private key signing, public key verification. Encryption is to prevent information leakage, while signing is to prevent information tampering.
For example, if Xiao Jiu wants to send a message “All is well” to Xiao Lan over the internet, to prevent others from accessing this message, Xiao Jiu chooses to use the RSA algorithm for encryption. The steps can be simulated using an online RSA tool as follows:
Step One
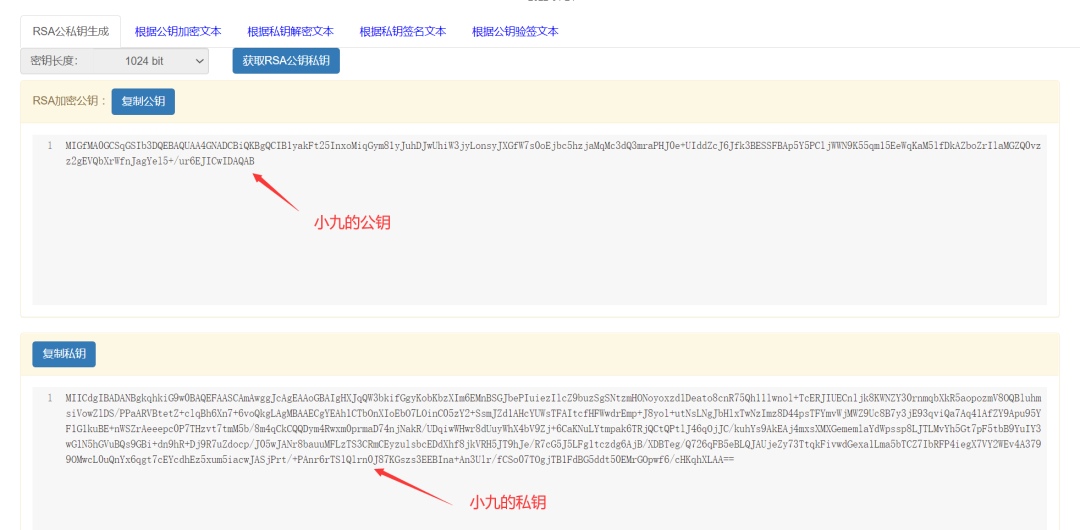
Xiao Jiu and Xiao Lan generate their own pairs of keys (public key and private key) using the RSA algorithm in advance. The public key is used for encryption, the private key is used for decryption and digital signing; the public key is shared with the other party, while the private key is kept secret. The public key and private key are essentially two strings.
(1) Key pair generated by Xiao Jiu:
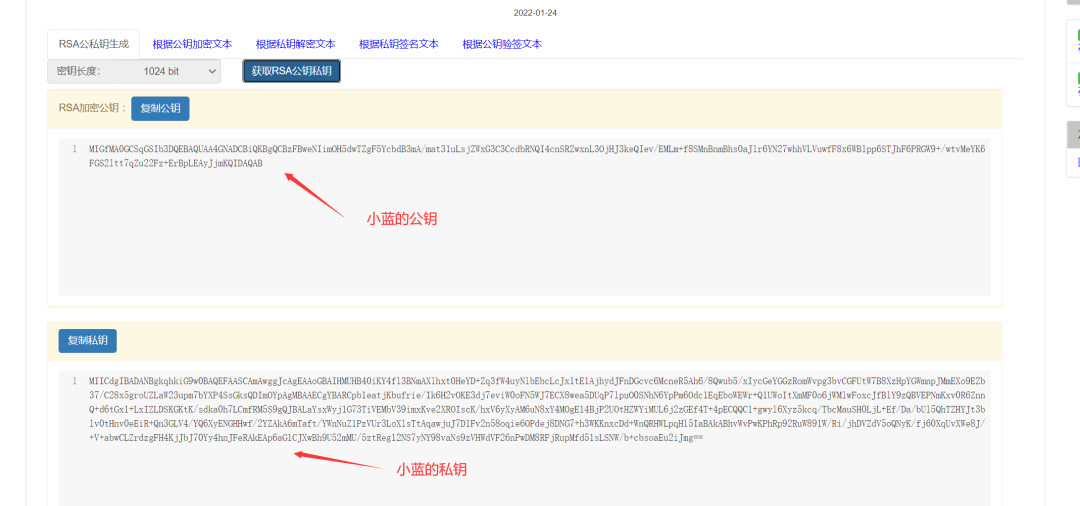
(2) Key pair generated by Xiao Lan
Step Two
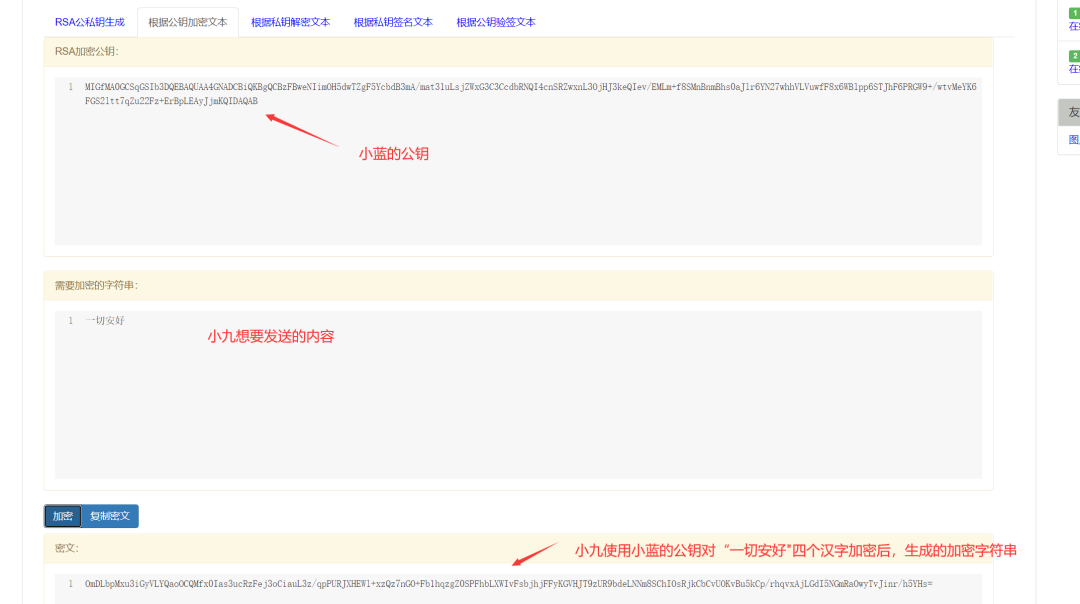
Xiao Jiu wants to send the message “All is well”, so he needs to use Xiao Lan’s public key to encrypt these four Chinese characters. After encryption, he obtains the encrypted text string. This ensures that only Xiao Lan’s private key can decrypt the encrypted text.
Step Three
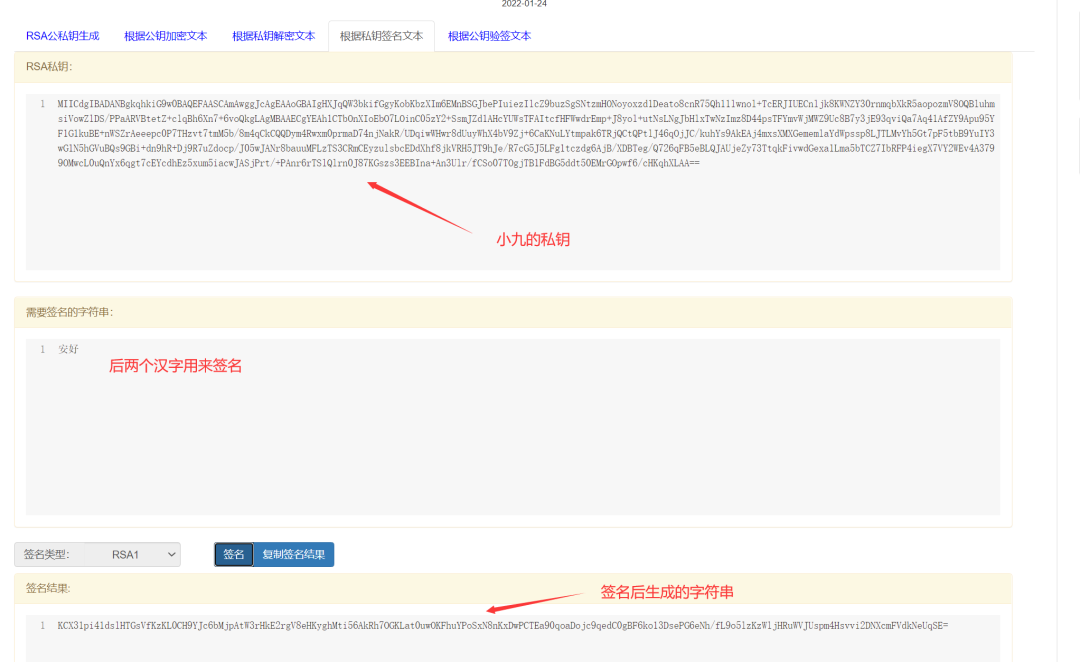
To ensure that the content received by Xiao Lan is indeed sent by Xiao Jiu and not forged by someone else, Xiao Jiu uses his private key along with part of the text from the sent content to generate a digital signature, which is sent to Xiao Lan.
Here, we use the last two characters of the four Chinese characters “安好” as the signature text and agree in advance with Xiao Lan that the last two characters of the sent message will serve as the signature text. In the real world, both parties use digital certificates and the same hash function, but this is just for understanding.
Step Four
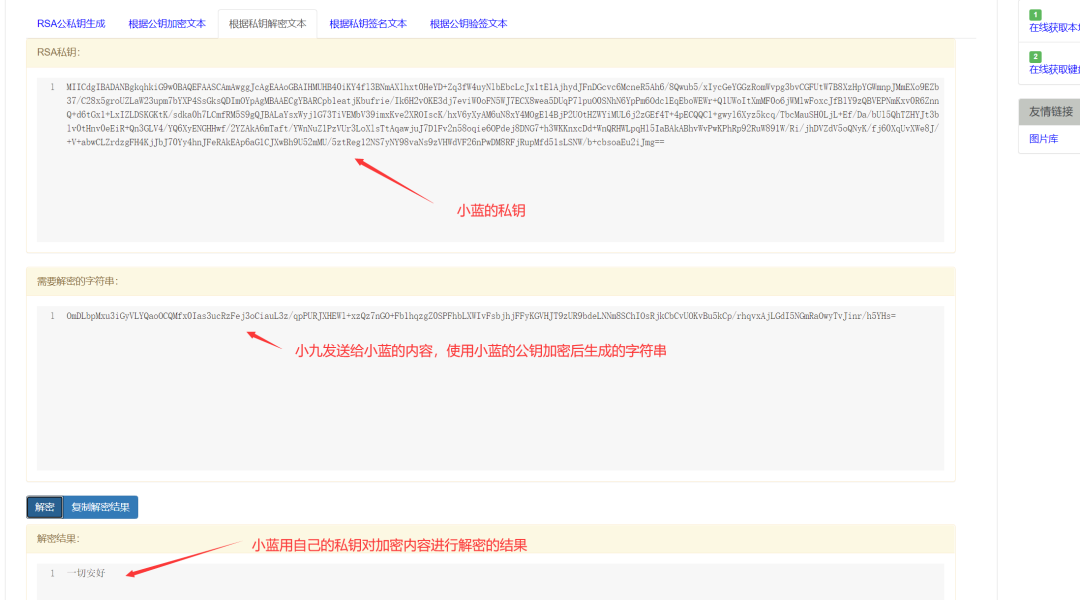
After Xiao Lan receives the encrypted ciphertext and the signature string sent by Xiao Jiu, he first uses his private key to decrypt the ciphertext.
Step Five
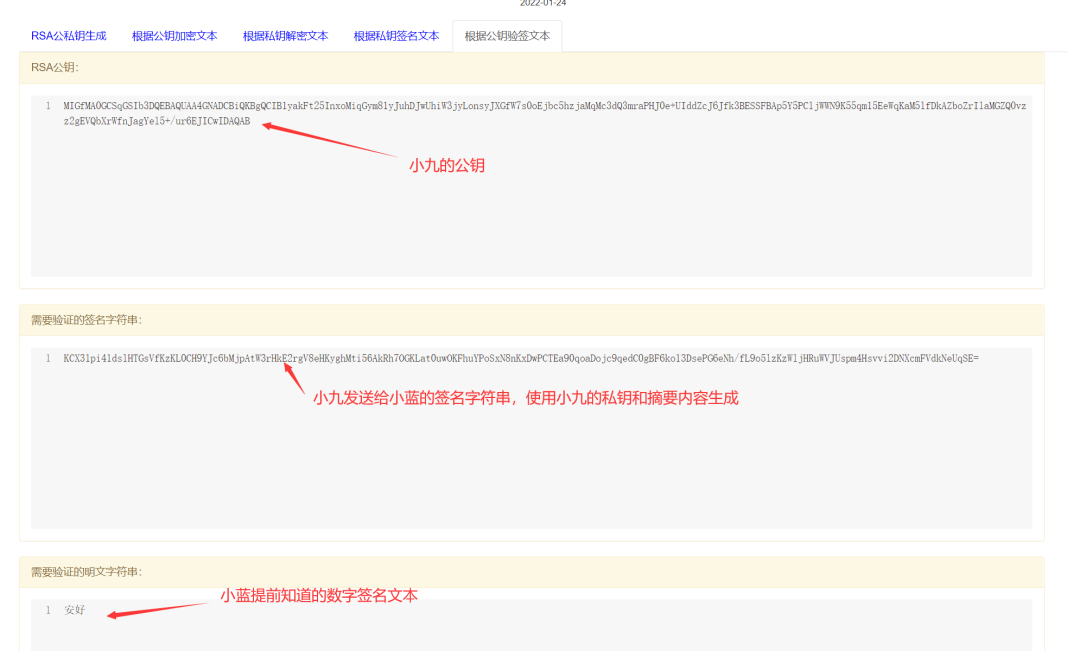
To verify whether the content is indeed sent by Xiao Jiu, Xiao Lan uses Xiao Jiu’s public key to confirm Xiao Jiu’s digital signature content.
Step Six
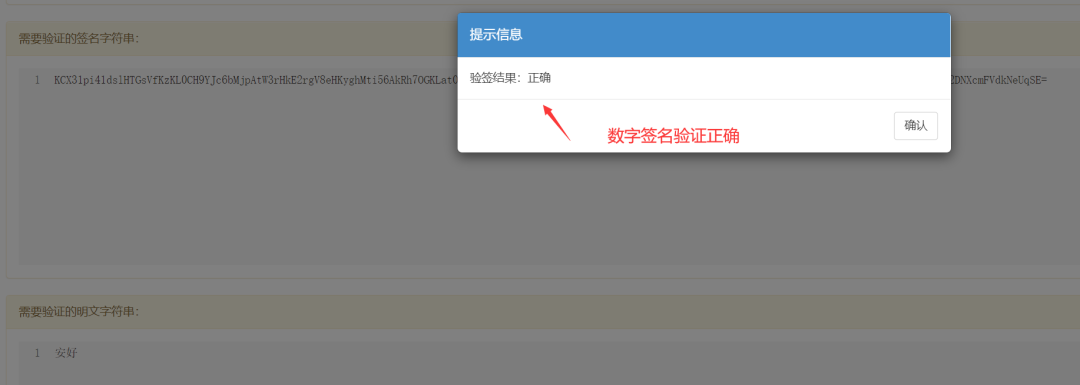
If the digital signature verification is accurate, then Xiao Jiu successfully sends the message “All is well” to Xiao Lan using the RSA algorithm.
This article is a work in progress. If there are inaccuracies or misunderstandings, please feel free to leave a comment for corrections.