By default, if you use a router with an OpenWrt-like system to dial into an optical modem in bridge mode, you will not be able to access the modem’s management page, which can be quite inconvenient. There are many ways to fix this, and here we document a method that only requires a web browser.
Web UI Setup Tutorial
Create a New Interface
Go to “Network – Interfaces” to create a new interface:
- Name Choose any name, for example, “modem”.
- Protocol Select “Static Address”, as the optical modem usually does not enable the DHCP server in bridge mode.
- Device Specify the device corresponding to the WAN port. If you are unsure, you can enter the WAN interface settings to see which physical interface is bound.
As shown in the figure:

Set IP Address
Next, edit the newly created interface. In the “General Settings”, you need to fill in three items:
- IPv4 Address Set it to any address in the same subnet as the optical modem, but do not duplicate with existing devices. For example, if the optical modem is 192.168.1.1, you can set it to 192.168.1.199.
- IPv4 Subnet Mask As the name suggests, the typical home LAN mask is 255.255.255.0.
- IPv4 Gateway Enter the address of the optical modem, which is usually found on the label at the back of the device.
Set Hop Count
Then you also need to modify “Advanced Settings – Use Gateway Hop Count” and enter a relatively large number, such as 100. If this is not configured, you may lose the external network connection.

If you cannot connect to the public network after applying the settings, you can try:
- Confirm that the “Advanced Settings – Use Gateway Hop Count” for the modem interface is filled in.
- Try filling in the “Advanced Settings – Use Gateway Hop Count” for the WAN interface, ensuring it is smaller than the modem, for example, 20.
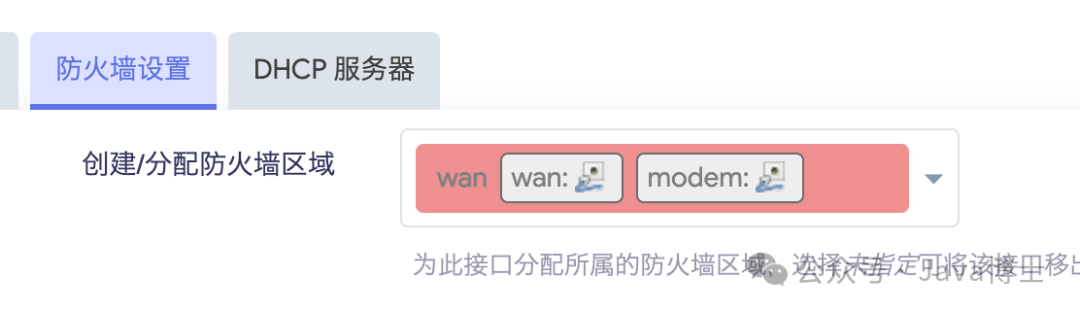
Add to Firewall Zone
Finally, make sure to add the interface to the firewall zone corresponding to the WAN in the “Firewall” settings; otherwise, only the router itself can access the optical modem, and other devices will not be able to.
After all settings are complete, do not forget to save and apply.