AuthorForum Account: A-newFirst of all, I declare that I am just starting to play with IoT, learning about router firmware simulation and vulnerability reproduction. I am a beginner, mainly recording the pitfalls I have encountered.
- Configuring the dependency environment for running simulated firmware
There are also one-click tools like FirmAE, firmware-analysis-toolkit, and firmware-analysis-plus that can simulate some firmware with one click, but many still require manual setup of the simulation environment.For manual setup, you can generally find configurations made by others online and use them with QEMU, or you can find the corresponding images to install the environment with QEMU.I previously used these methods, but it was too cumbersome. If the environment is not set up correctly, I basically wanted to give up.Recently, I discovered a great tool from an article by an expert: Buildroot can compile environments for various CPUs.Download and Install:
wget https://buildroot.org/downloads/buildroot-2025.02.tar.gz
tar -xzvf buildroot-2025.02.tar.gz
cd buildroot-2025.02
Main commands:
make list-defconfigs # View all default configuration filesThe main focus here is on the following QEMU-related configurations:
qemu_aarch64_ebbr_defconfig – Build for qemu_aarch64_ebbr
qemu_aarch64_sbsa_defconfig – Build for qemu_aarch64_sbsa
qemu_aarch64_virt_defconfig – Build for qemu_aarch64_virt
qemu_arm_ebbr_defconfig – Build for qemu_arm_ebbr
qemu_arm_versatile_defconfig – Build for qemu_arm_versatile
qemu_arm_vexpress_defconfig – Build for qemu_arm_vexpress
qemu_arm_vexpress_tz_defconfig – Build for qemu_arm_vexpress_tz
qemu_m68k_mcf5208_defconfig – Build for qemu_m68k_mcf5208
qemu_m68k_q800_defconfig – Build for qemu_m68k_q800
qemu_microblazebe_mmu_defconfig – Build for qemu_microblazebe_mmu
qemu_microblazeel_mmu_defconfig – Build for qemu_microblazeel_mmu
qemu_mips32r2el_malta_defconfig – Build for qemu_mips32r2el_malta
qemu_mips32r2_malta_defconfig – Build for qemu_mips32r2_malta
qemu_mips32r6el_malta_defconfig – Build for qemu_mips32r6el_malta
qemu_mips32r6_malta_defconfig – Build for qemu_mips32r6_malta
qemu_mips64el_malta_defconfig – Build for qemu_mips64el_malta
qemu_mips64_malta_defconfig – Build for qemu_mips64_malta
qemu_mips64r6el_malta_defconfig – Build for qemu_mips64r6el_malta
qemu_mips64r6_malta_defconfig – Build for qemu_mips64r6_malta
qemu_or1k_defconfig – Build for qemu_or1k
qemu_ppc64_e5500_defconfig – Build for qemu_ppc64_e5500
qemu_ppc64le_powernv8_defconfig – Build for qemu_ppc64le_powernv8
qemu_ppc64le_pseries_defconfig – Build for qemu_ppc64le_pseries
qemu_ppc64_pseries_defconfig – Build for qemu_ppc64_pseries
qemu_ppc_bamboo_defconfig – Build for qemu_ppc_bamboo
qemu_ppc_e500mc_defconfig – Build for qemu_ppc_e500mc
qemu_ppc_g3beige_defconfig – Build for qemu_ppc_g3beige
qemu_ppc_mac99_defconfig – Build for qemu_ppc_mac99
qemu_ppc_mpc8544ds_defconfig – Build for qemu_ppc_mpc8544ds
qemu_riscv32_nommu_virt_defconfig – Build for qemu_riscv32_nommu_virt
qemu_riscv32_virt_defconfig – Build for qemu_riscv32_virt
qemu_riscv64_nommu_virt_defconfig – Build for qemu_riscv64_nommu_virt
qemu_riscv64_virt_defconfig – Build for qemu_riscv64_virt
qemu_riscv64_virt_efi_defconfig – Build for qemu_riscv64_virt_efi
qemu_s390x_defconfig – Build for qemu_s390x
qemu_sh4eb_r2d_defconfig – Build for qemu_sh4eb_r2d
qemu_sh4_r2d_defconfig – Build for qemu_sh4_r2d
qemu_sparc64_sun4u_defconfig – Build for qemu_sparc64_sun4u
qemu_sparc_ss10_defconfig – Build for qemu_sparc_ss10
qemu_x86_64_defconfig – Build for qemu_x86_64
qemu_x86_defconfig – Build for qemu_x86
qemu_xtensa_lx60_defconfig – Build for qemu_xtensa_lx60
qemu_xtensa_lx60_nommu_defconfig – Build for qemu_xtensa_lx60_nommu
For example, I have a firmware with an elf file extracted: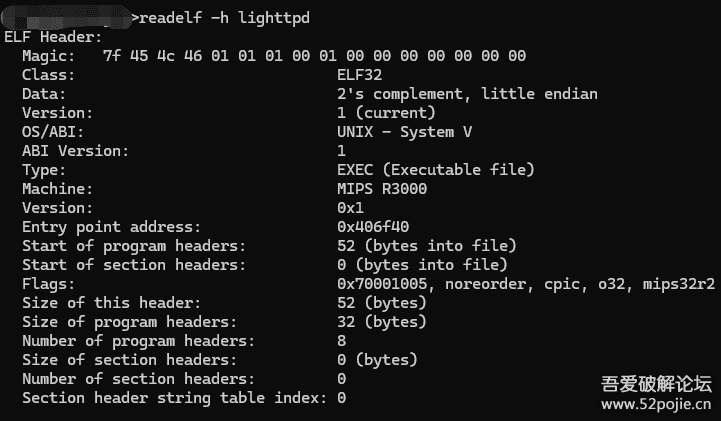
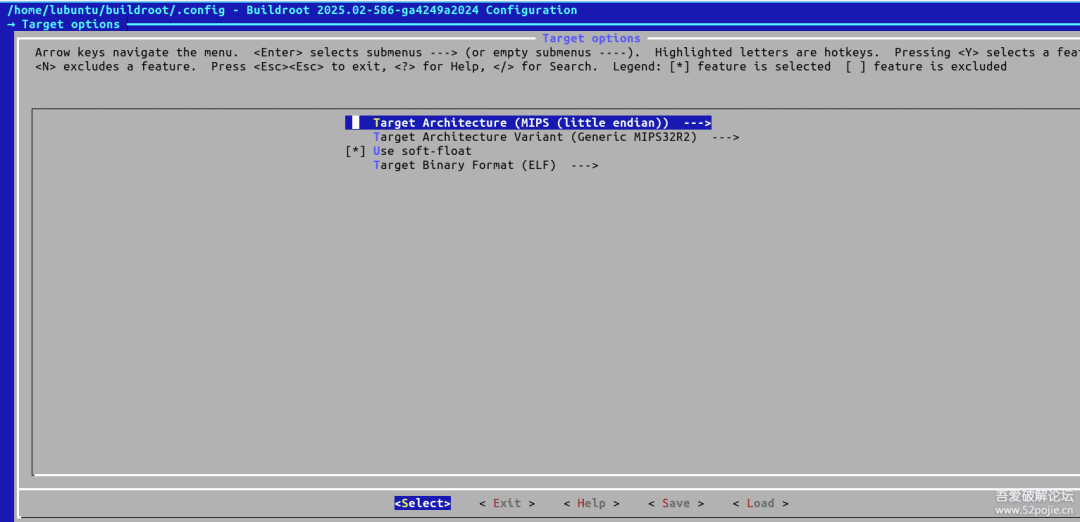
make qemu_mips32r2el_malta_defconfig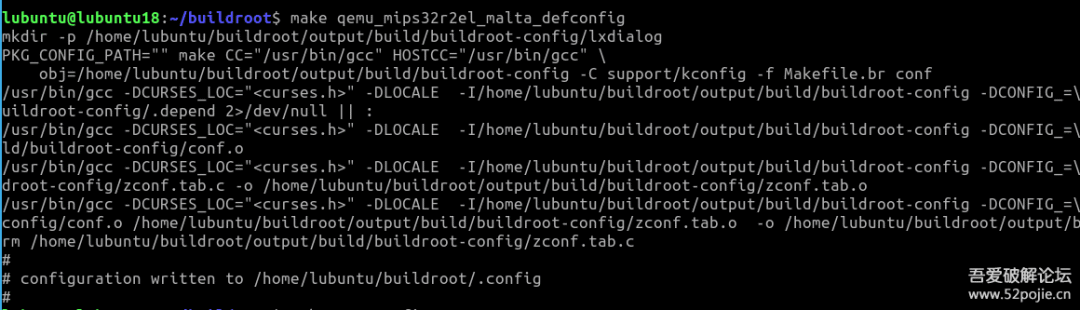
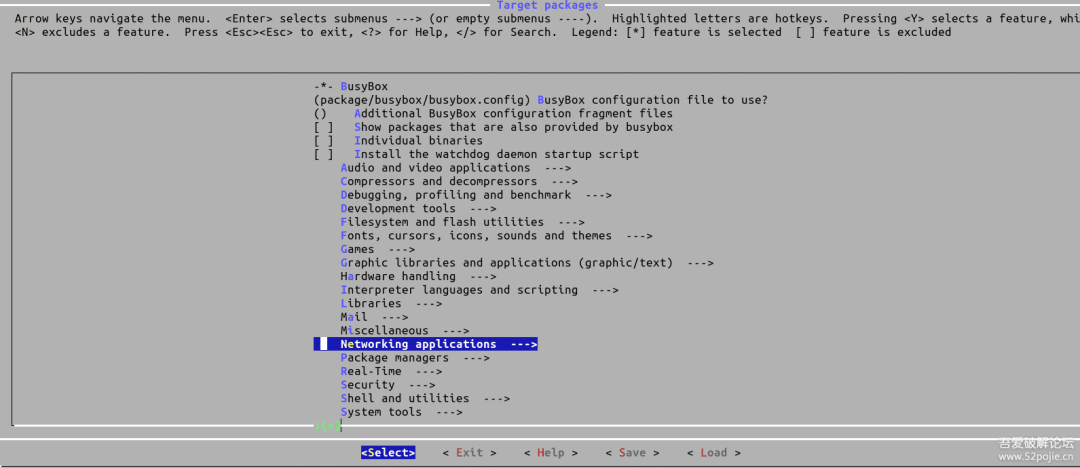
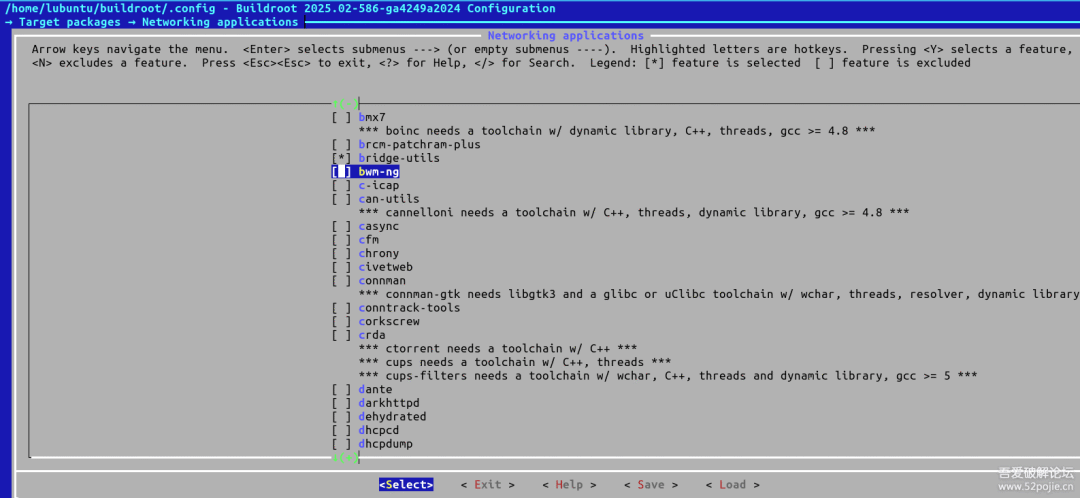
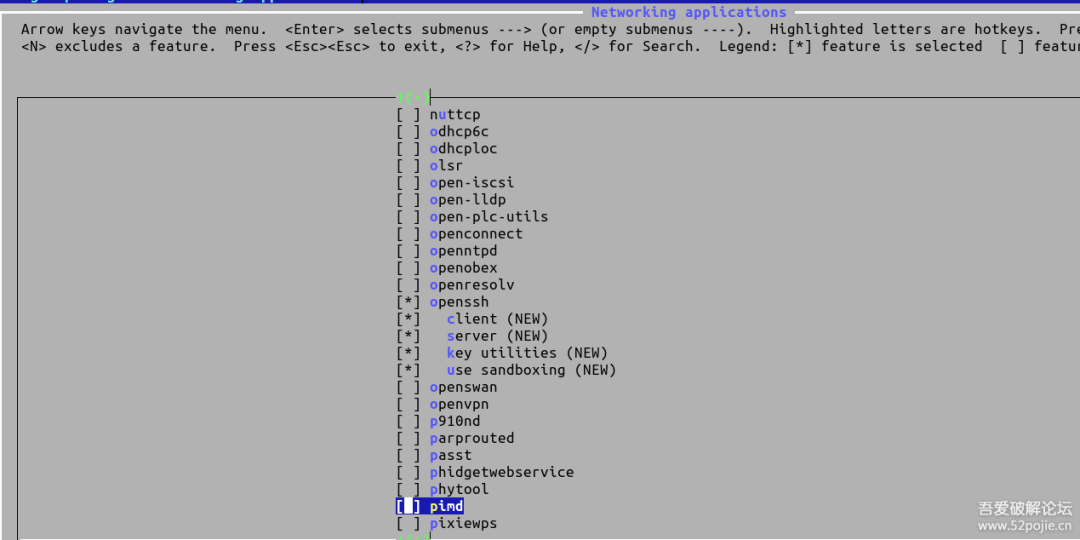
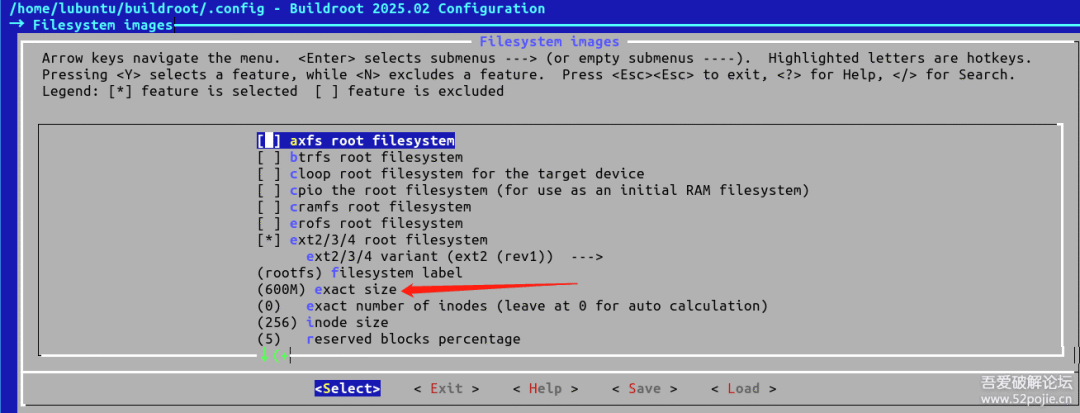
make menuconfig # Other custom settings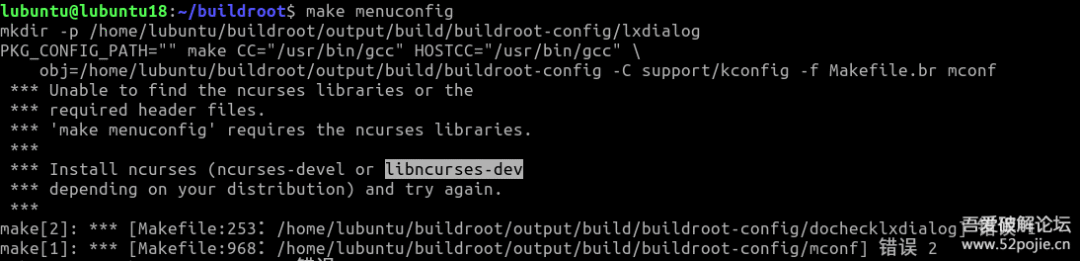
The environment is Ubuntu 20.04, and I need to install libncurses-dev to continue.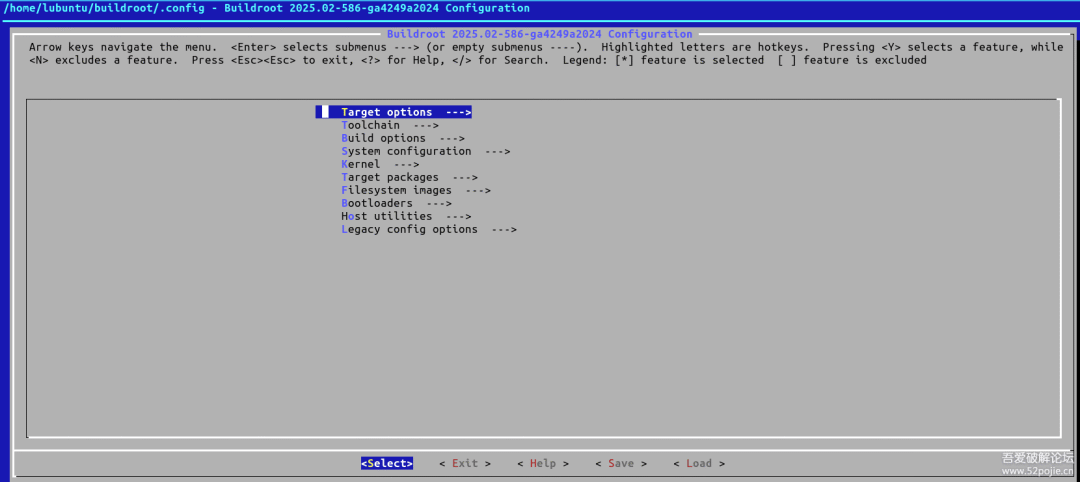

#!/bin/sh
BINARIES_DIR="${0%/*}/"
# shellcheck disable=SC2164
cd "${BINARIES_DIR}"
#mode_serial=false
mode_serial=true
mode_sys_qemu=false
tap_interface="tap"  # Default TAP interface name
tap_ip_host="192.168.100.1"  # Host IP address
tap_ip_guest="192.168.100.2"  # VM IP address
while [ "$1" ]; do    case "$1" in    --serial-only|serial-only) mode_serial=true; shift;;    --use-system-qemu) mode_sys_qemu=true; shift;;    --tap-interface) tap_interface="$2"; shift 2;;    --use-tap) use_tap=true; shift;;    --) shift; break;;    *) echo "unknown option: $1" >&2; exit 1;;    esac
done
if ${mode_serial}; then    EXTRA_ARGS='-nographic'else    EXTRA_ARGS='-serial stdio'fi
if ! ${mode_sys_qemu}; then    export PATH="/home/lubuntu/buildroot/output/host/bin:${PATH}"fi
if ${use_tap}; then    # Create and configure TAP interface    sudo ip link delete "${tap_interface}" 2>&1 /dev/null  # If TAP interface exists, delete it first    sudo ip tuntap add dev "${tap_interface}" mode tap  # Create TAP interface    sudo ip addr add "${tap_ip_host}/24" dev "${tap_interface}"  # Assign host IP address to TAP interface    sudo ip link set "${tap_interface}" up  # Enable TAP interface
    # Configure QEMU to use TAP networking    NET_CONFIG="-netdev tap,id=net0,ifname=${tap_interface},script=no,downscript=no -device pcnet,netdev=net0"else    # Use user-mode networking    NET_CONFIG="-net nic,model=pcnet -net user"fi
exec qemu-system-mipsel -M malta \    -kernel vmlinux \    -drive file=rootfs.ext2,format=raw \    -append "rootwait root=/dev/sda console=ttyS0 ip=${tap_ip_guest}::${tap_ip_host}:255.255.255.0::eth0:off" \    ${NET_CONFIG} ${EXTRA_ARGS} "$@"
You can also optimize this with AI, but there are still issues; it won’t automatically configure the IP. You can manually set a temporary IP each time you start.
ip addr add 192.168.100.2/24 dev eth0 # Simulated environment IP 192.168.100.2
ip link set eth0 up
You can also directly modify the network configuration to set a static IP by changing
# cat /etc/network/interfaces
# interface file auto-generated by buildroot
auto lo
iface lo inet loopback
auto eth0
iface eth0 inet dhcp  pre-up /etc/network/nfs_check  wait-delay 15  hostname $(hostname)
to
auto lo
iface lo inet loopback
auto eth0
iface eth0 inet static    address 192.168.100.2    netmask 255.255.255.0    gateway 192.168.100.1    dns-nameservers 8.8.8.8
With this setup, the virtual machine can communicate with the host machine. If your physical machine is running Linux, this will work. Below is my experience of struggling with Windows, running a virtual machine within a virtual machine is exhausting.
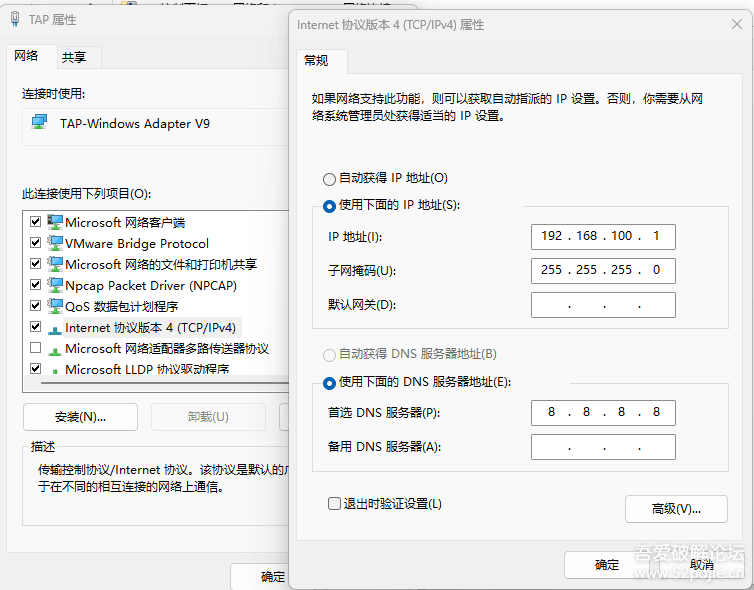
- Running QEMU in a Windows environment
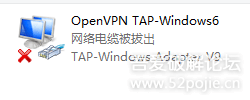
I won’t introduce the installation of QEMU; I will mainly discuss network configuration.Windows requires a TAP virtual network card.You can simply use OpenVPN for this.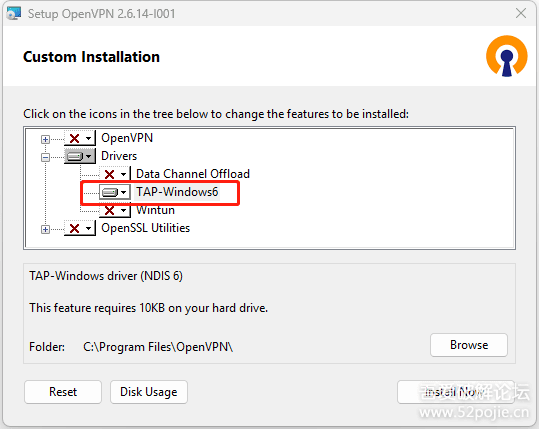
@echo off
cd /d %~dp0
REM QEMU path (please modify according to actual path)
set QEMU_EXE="D:\Program Files\qemu\qemu-system-mipsel.exe"
REM Image file name
set KERNEL=vmlinux
set ROOTFS=rootfs.ext2
REM Network parameters
set TAP_NAME=TAP
set HOST_IP=192.168.100.1
set VM_IP=192.168.100.2
set NETMASK=255.255.255.0
REM Default parameters
set EXTRA_ARGS=-nographic
set NET_CONFIG=-net nic,model=pcnet -net user
REM Parse command line arguments (only supports --use-tap and --tap-interface):
parse_args
if "%1"=="" goto run_qemu
if /i "%1"=="--use-tap" (    set NET_CONFIG=-netdev tap,id=net0,ifname=%TAP_NAME%,script=no,downscript=no -device pcnet,netdev=net0)
if /i "%1"=="--tap-interface" (    set TAP_NAME=%2    set NET_CONFIG=-netdev tap,id=net0,ifname=%TAP_NAME%,script=no,downscript=no -device pcnet,netdev=net0    shift)
if /i "%1"=="--serial-only" set EXTRA_ARGS=-nographic
if /i "%1"=="serial-only" set EXTRA_ARGS=-nographic
shift
goto parse_args
:run_qemu
%QEMU_EXE% -cpu 74Kf -M malta -kernel %KERNEL% -drive file=%ROOTFS%,format=raw ^    -append "rootwait root=/dev/sda console=ttyS0 ip=%VM_IP%::%HOST_IP%:%NETMASK%::eth0:off" ^    %NET_CONFIG% %EXTRA_ARGS% %*
Note that the parameter -cpu 74Kf may need to be adjusted sometimes.
To allow the QEMU virtual machine to access the internet, you also need to modify the sharing settings of the physical network card.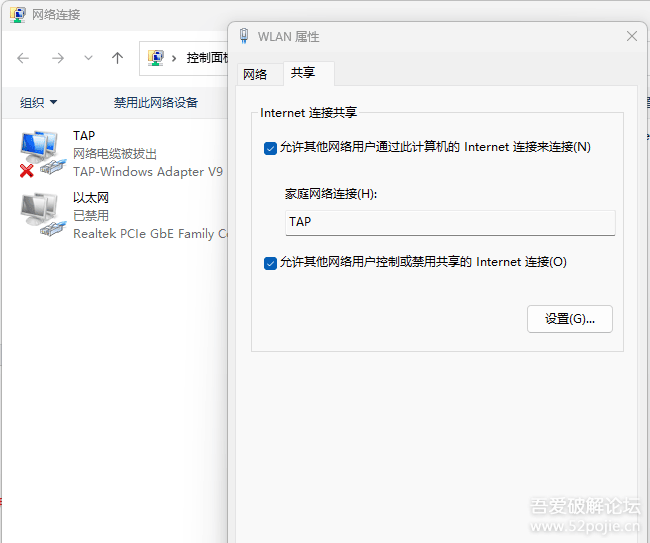
# cat /etc/resolv.conf
nameserver 8.8.8.8
nameserver 114.114.114.114
– Official Forum
www.52pojie.cn
👆👆👆
Public AccountSet as “Starred”, so youwon’t miss new notifications such as open registration, featured articles, and surrounding activities and other announcements