The M300 development board supports both Nand and eMMC storage. Generally, users prefer to flash the kernel and other system files to Nand for better performance. Using eMMC as external storage, with 8GB of storage space, can provide the M300 with greater data storage capacity. However, the eMMC space is not fully configured in the factory settings. This article demonstrates how to add a partition to eMMC to make better use of resources.Note: In the M300 SDK, after booting, Linux recognizes Nand as the /dev/mtd device and recognizes eMMC as the /dev/mmcblk0 device.Automatically Creating PartitionsThe M300 development board has initialized eMMC and established corresponding partitions at the factory. To modify these partitions, it is necessary to compile the eMMC kernel, which can be done by selecting it during lunch: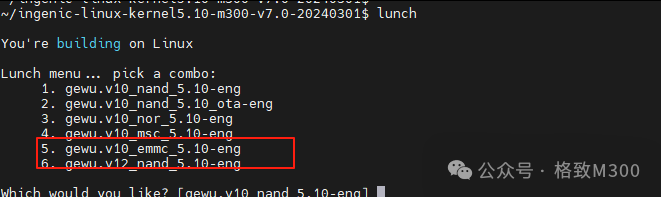 When compiling the eMMC version of the kernel, a corresponding partition handling tool called gpt_creator will be created. This tool generates the corresponding GPT partitions according to the settings in partitions.tab, and later merges with the spl file in the Makefile. When flashed to eMMC, it produces the corresponding partition information. Note: After flashing the eMMC kernel, using Nand to boot will still show the correct partition information.If the eMMC version of the kernel is not used for partitioning, and the nand/nor version is compiled, the process of writing eMMC partition information will not occur. Therefore, the modifications below will not create new partitions. In this case, the gdisk/parted tools can be used to manually partition, as demonstrated at the end of the article.Viewing Current PartitionsAfter connecting to the development board via serial port, execute the following command on the board:
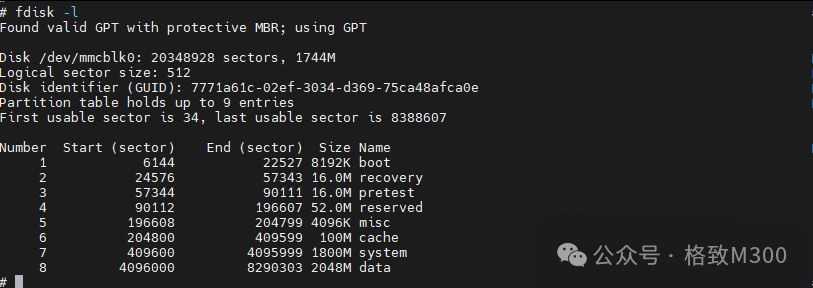 You can observe that a total of 4GB of space has been allocated to eMMC. The analysis of the current eMMC partition on the development board is as follows:
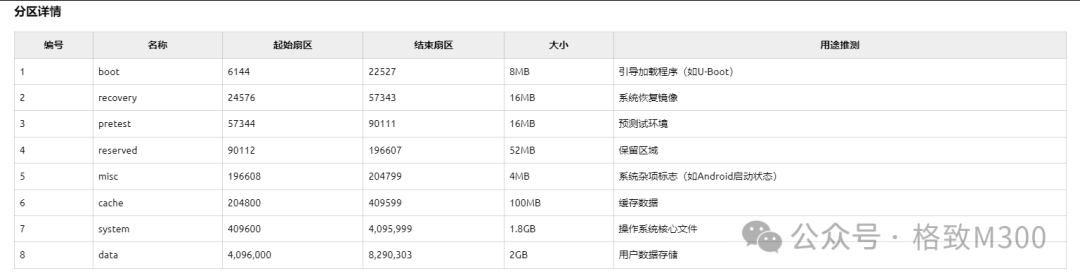 This partition information was created at the factory or during the last flashing of the eMMC version kernel.Adding New Partition ConfigurationOpen the partitions.tab file located in the SDK under u-boot/board/ingenic/gewu/ and modify disk_size = 4096m to 8192m, and add the content highlighted in red in the image below:
The above configuration increases the disk size to 8192M and adds a userdata partition with a starting address of 2000 + 2048 = 4048m and a size of 4048m (approximately 4GB).
Compiling u-boot
Since the configuration file has been reconfigured, it is necessary to clean before compiling. In the SDK root directory, execute:
make uboot-clean
make
After compilation is complete, flash the development board.
Binding Partitions
Use a serial program to log into the flashed development board and execute the following command to view the current eMMC partitions:
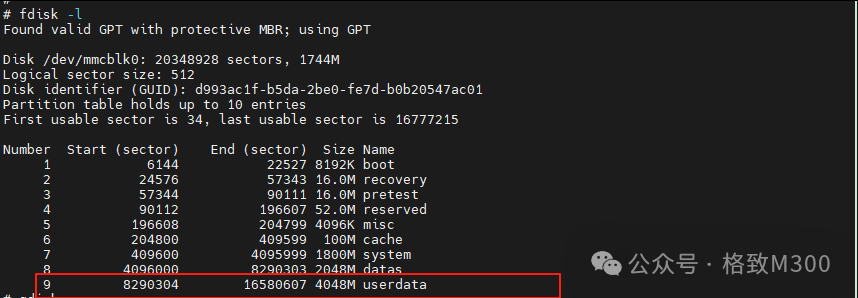
You can observe that the userdata partition has been created. Next, enter the following commands to format and bind:
mkfs.vfat -F 32 -n USERDATA /dev/mmcblk0p9
mount /dev/mmcblk0p9 /mnt
After execution, we can use the df -h command to observe the current available space:

You can observe that /mnt is now available for subsequent use.
Manually Creating Partitions
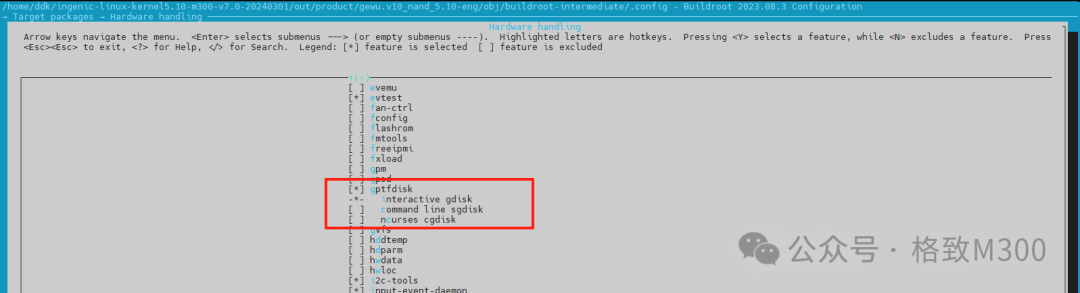
Since it is not possible to create/modify partitions through partitions.tab when booting from Nand, third-party tools are required. The built-in fdisk in the M300 SDK cannot handle GPT format partitions, so gdisk should be selected in buildroot for partitioning.
In the SDK root directory, execute: make buildroot-menuconfig, and inTarget packages → Hardware handling, checkgptfdisk:
After selection, make to compile and generate the image for flashing. Note: During SDK v7.0 compilation, there may be issues with the uuid library, which will be explained in another article due to space limitations.
After flashing is complete, connect the serial port with a USB cable, log into the development board, and execute:
gdisk /dev/mmcblk0
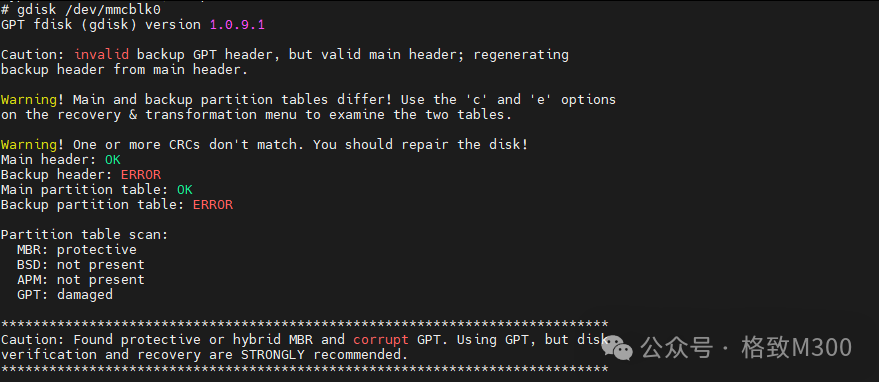
At the command prompt, enter p to print the current eMMC partitions:
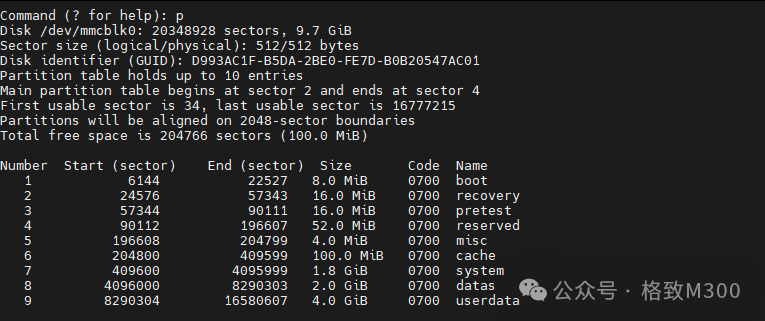
The M300 has allocated these partitions at the factory. In this demonstration, we will first delete all partitions and then allocate a complete partition.
Enter d a total of 9 times to delete all partitions:
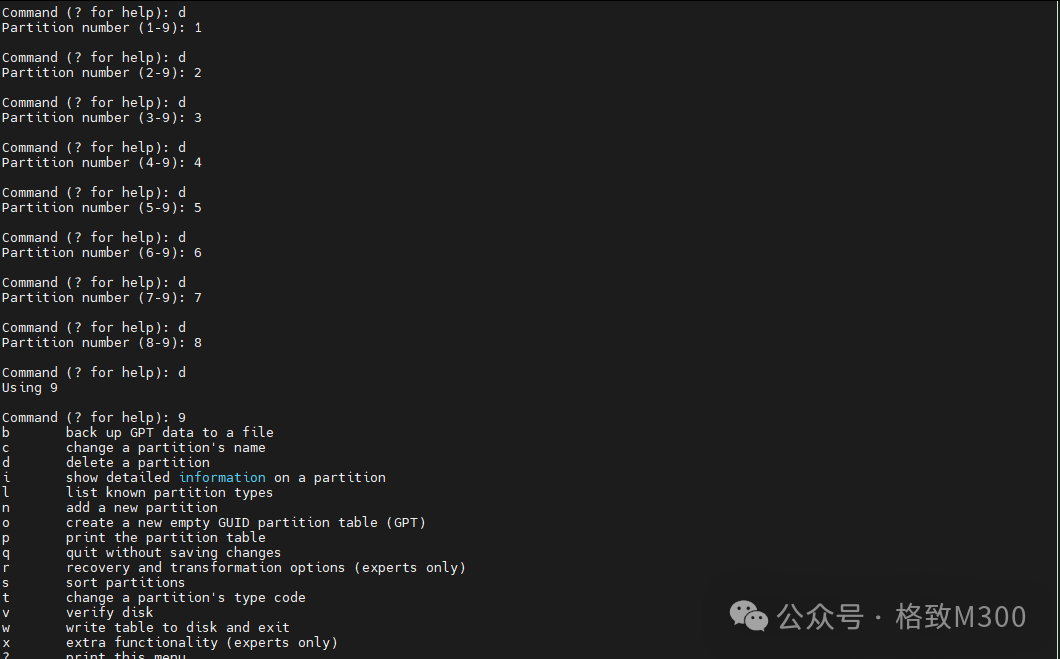
Enter n to create a partition, with the partition format input as 0700 for vfat type:

After creation, enter w to write the disk and exit.

At this point, use fdisk -l to check the current partition status:

You can see that only one partition exists. Subsequently, you can use the following commands to format and bind:
mkfs.vfat -F 32 -n USERDATA /dev/mmcblk0p1
mount /dev/mmcblk0p1 /mnt