Click the above to follow discussions on HVAC-related technologies.
In the documentation for the Python interface of Modelica, the first example is DymolaExample.py.
The syntax for running a .mo file is as follows:
# Call a function in Dymola and check its return value
result = dymola.simulateModel(
“Modelica.Mechanics.Rotational.Examples.CoupledClutches”)
Here, Modelica.Mechanics.Rotational.Examples.CoupledClutches is the fully qualified name of the Modelica model.
If it is a .mo file and the storage path is the project path, for example:
D:\JupyterNotebook\ModelicaPythonexamples\CoupledClutches_copy.mo
Then, DymolaExample.py needs to be adjusted:
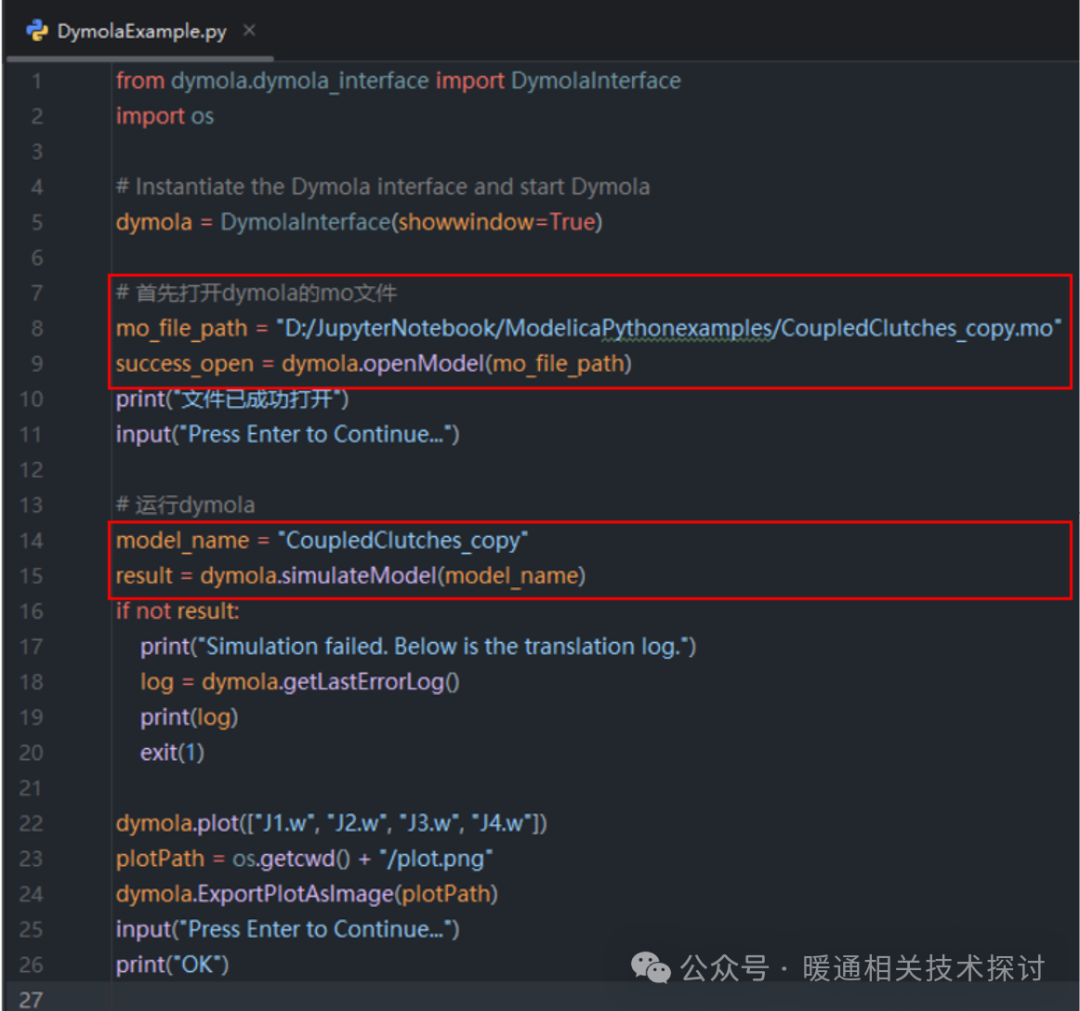
First, you need to open Dymola and load CoupledClutches_copy.mo
Then you can run the file. This process is actually the same as directly using Dymola to complete the simulation.
The following two key interfaces are used:
dymola.openModel( path,
mustRead=True,
changeDirectory=True )
dymola.simulateModel( problem=”,
startTime=0.0,
stopTime=1.0,
numberOfIntervals=0,
outputInterval=0.0,
method=’Dassl’,
tolerance=0.0001,
fixedstepsize=0.0,
resultFile=’dsres’ )
Additionally, the Dymola Python API interface is very similar to Dymola script commands.
I hope the above content can help you!
HVAC design is a friend of time; time helps it settle and refine. Follow me, and let’s be friends with time together.