When doing machine learning, the Python environment is like a clean bench in a laboratory: if the reagents are mixed or the temperature is incorrect, even the best model will not produce stable results.
A project often needs to lock down the Python version, NumPy, PyTorch, CUDA, and dozens of other dependencies. If any one of them is upgraded, it may lead to compatibility errors. Therefore, setting up an independent environment using Anaconda in advance is the simplest and safest step.
The advantages of Anaconda
1. Fast installation: It provides a large number of pre-compiled binary packages.
2. Stable management: conda automatically resolves system-level library conflicts, and if an upgrade fails, you can easily roll back with conda install --revision n.
3. Easy migration: A single environment.yml file can move the entire environment to another computer, achieving “one configuration, everywhere reproducible”.
1. Installing Anaconda
1. We download the installation package from Tsinghua Open Source Mirror (no speed limit)
-
https://mirrors.tuna.tsinghua.edu.cn/anaconda/archive/
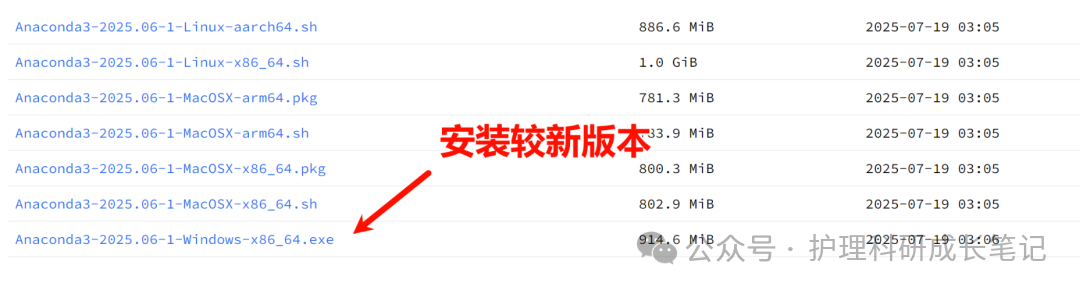
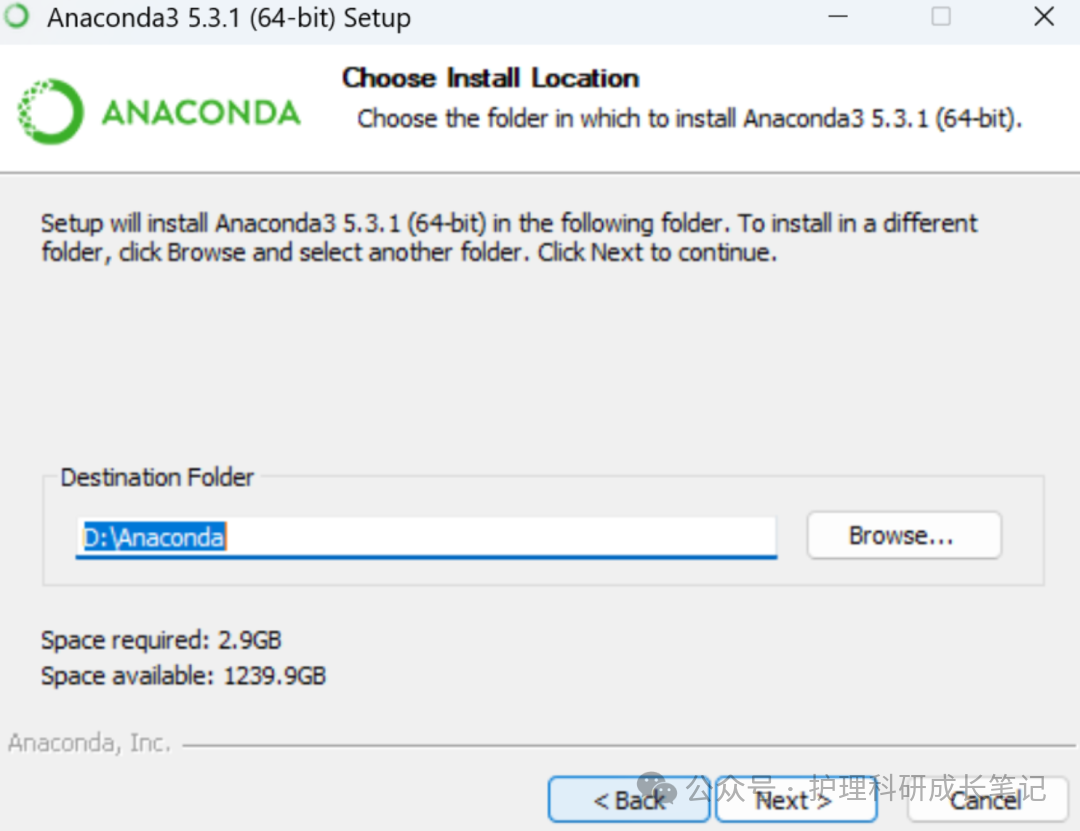
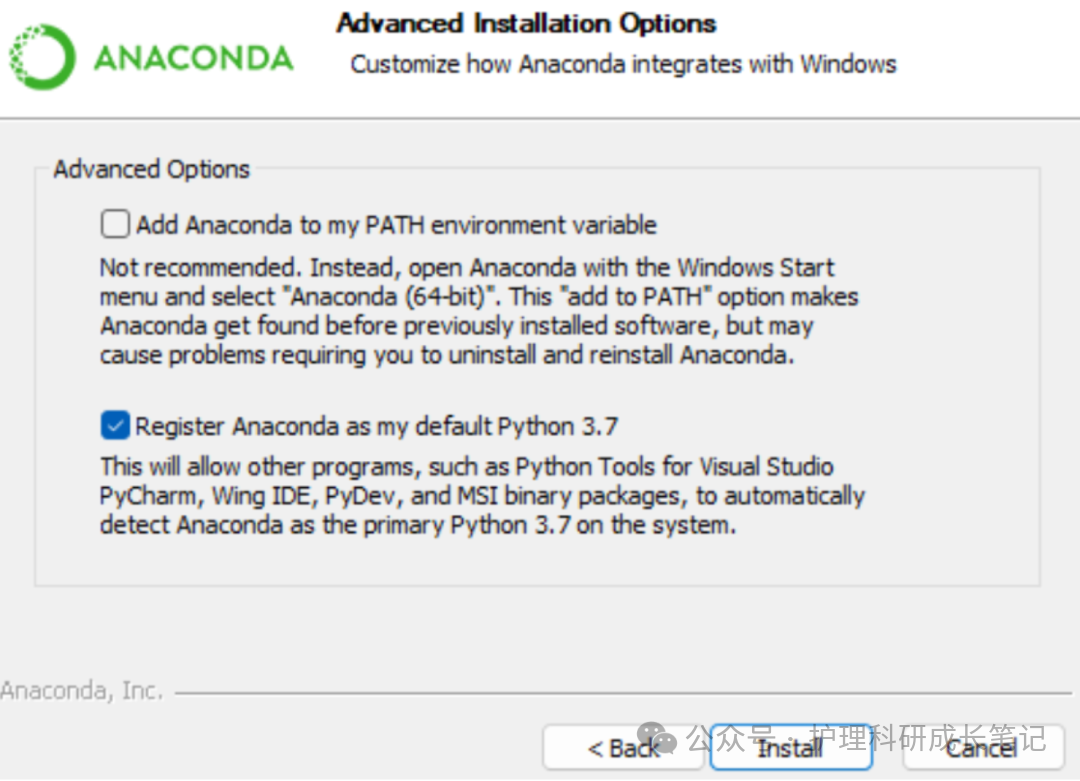
2. Installation
You can change the installation location (English directory, remember it)
2. Configuring Environment Variables
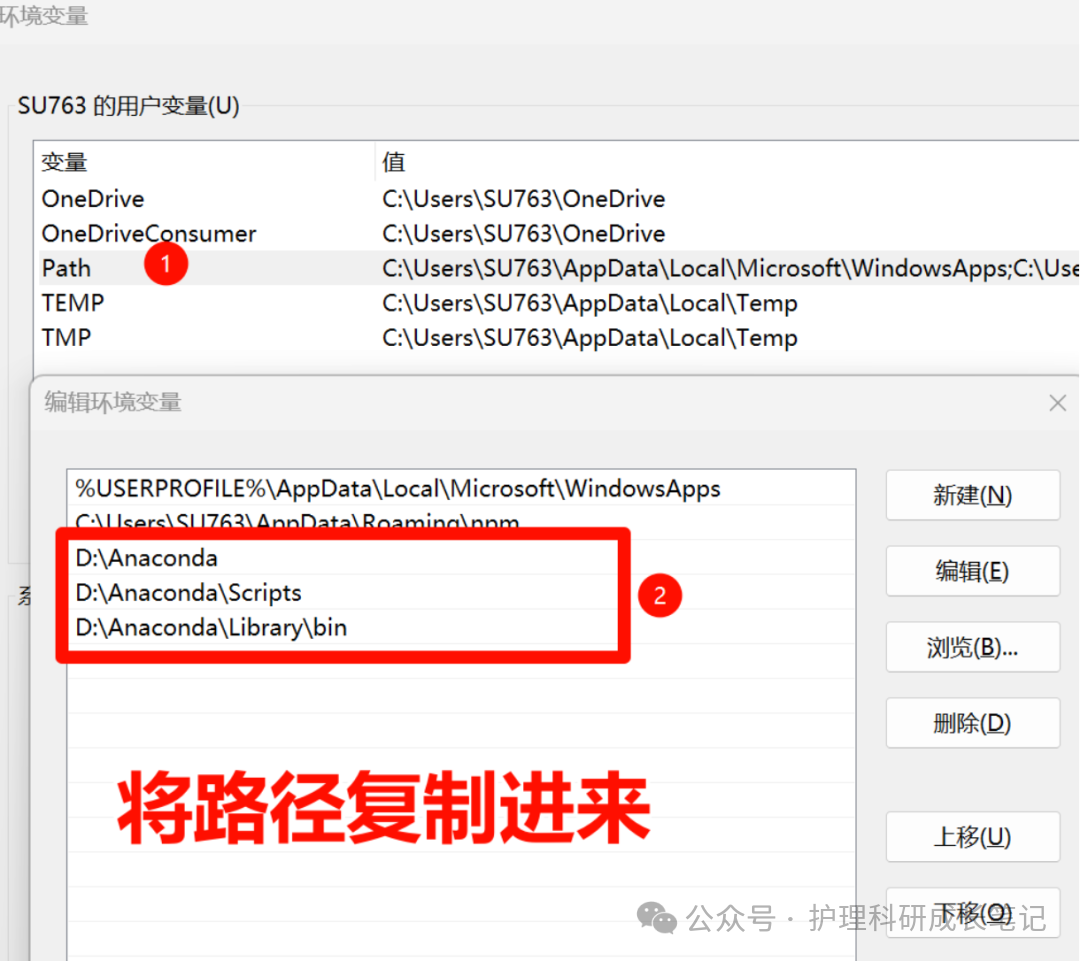
1. Find the three installation paths
-
D:\Anaconda
-
D:\Anaconda\Scripts
-
D:\Anaconda\Library\bin
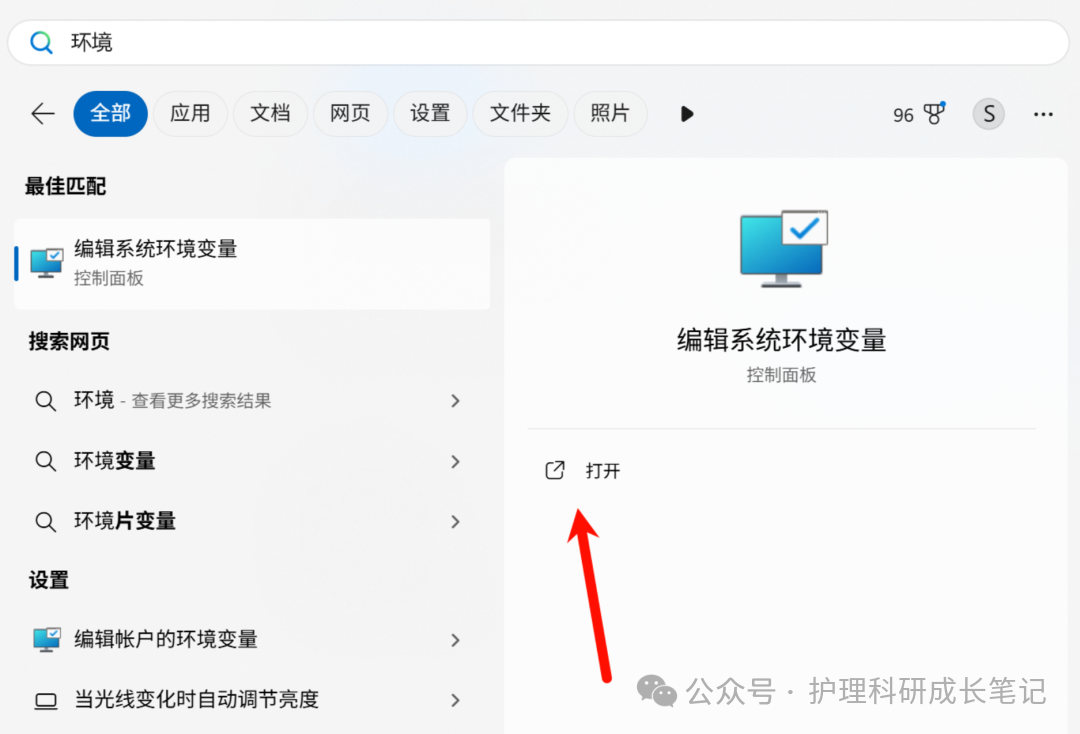
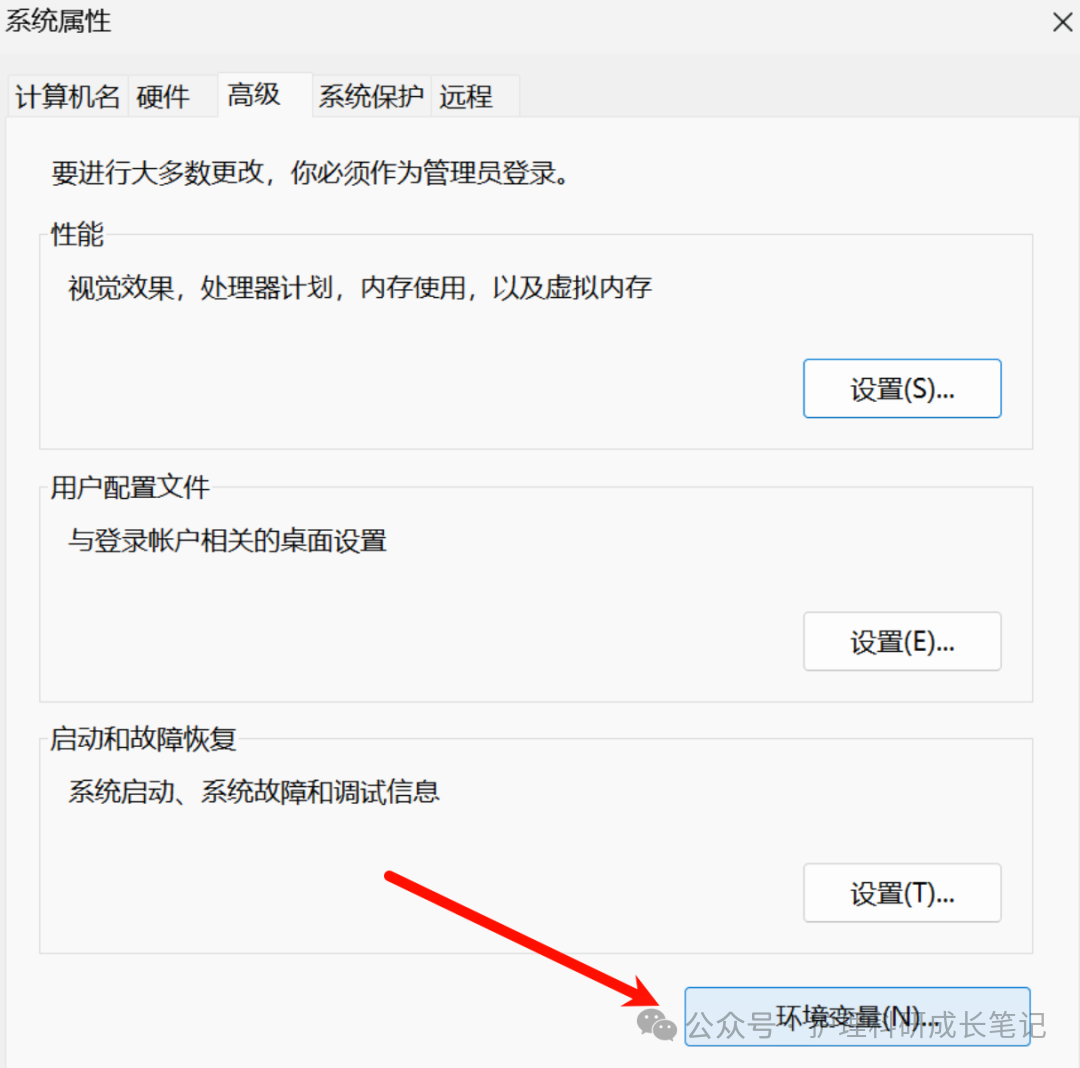
2. Edit system environment variables – Advanced – Environment Variables
3. Verify the environment
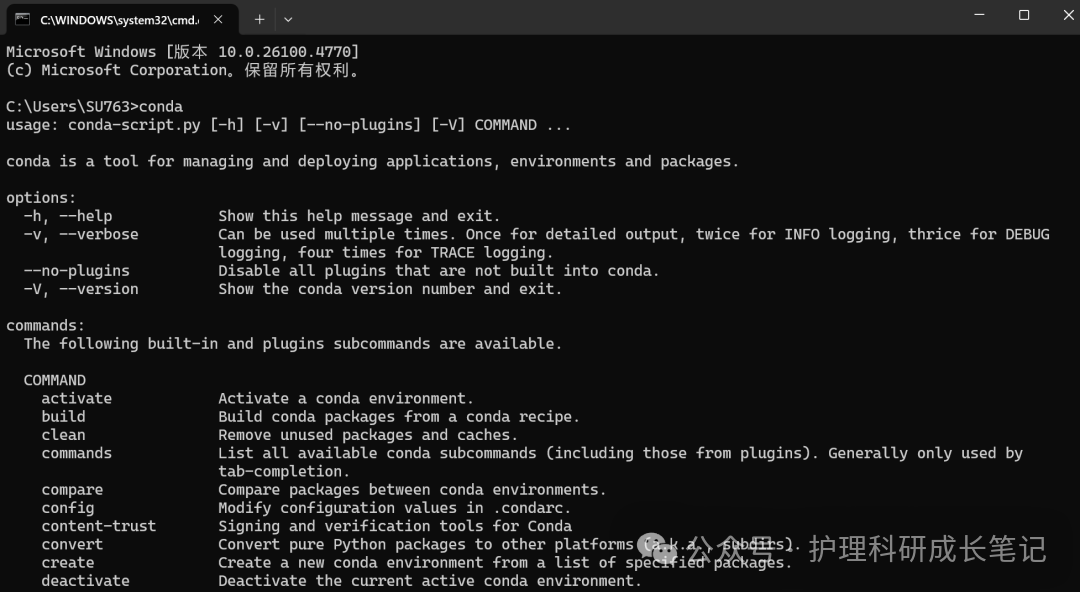
Press win + R, type cmd, enter conda and press enter, success!
3. Configuring the Python Environment
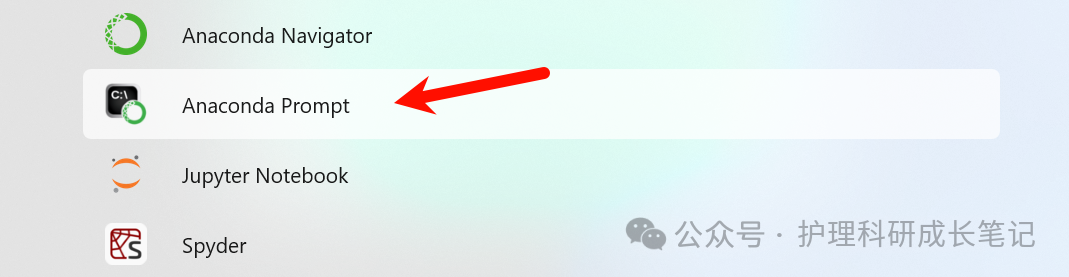
1. Click the Start menu and open Anaconda Prompt
2. Enter the command to create the environment
conda create -n ML python=3.11
conda activate ML-
conda create: Tells conda: “Create a new environment.” -
-n myml: -n is short for name, naming the environment ML (can be changed).
-
python=3.11: Specifies the Python version in this environment as 3.11, conda will automatically download the corresponding interpreter and base libraries.
-
conda activate myml: Activates (enters) the newly created myml environment. After activation, the terminal prompt will show (myml), and commands like python, pip, jupyter will point to the independent copies of this environment, avoiding pollution of the system or other projects.
4. IDE Installation
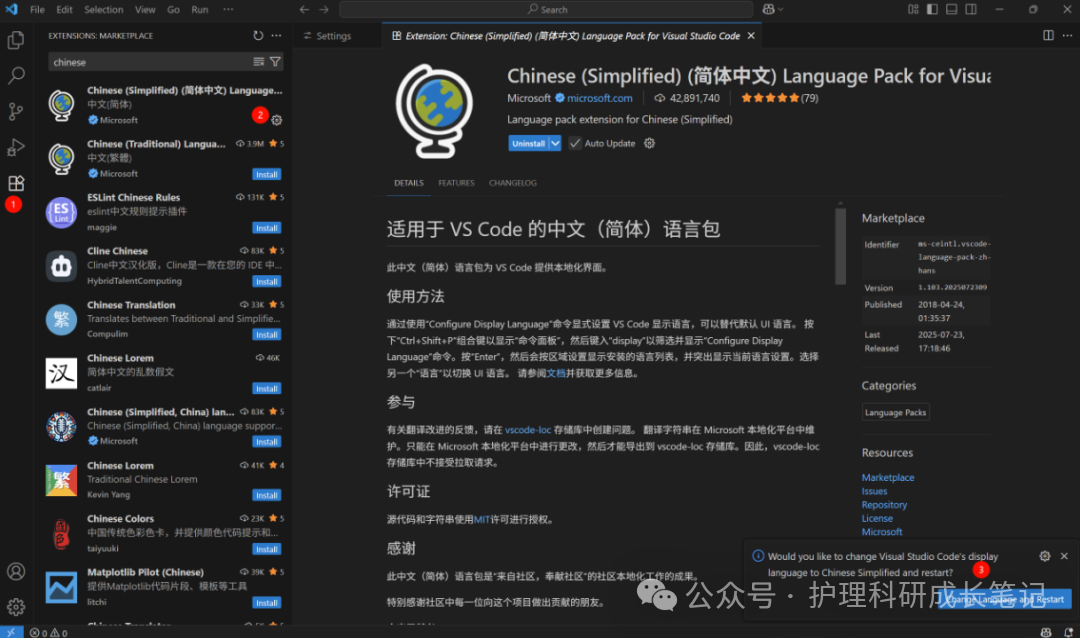
Finally, you can use the IDE that comes with Anaconda for code editing, or install an IDE (like VSCode) to serve as the coding environment, setting the language to Chinese, taking VSCode as an example.
-
Download and install VSCode, search for Chinese in the left plugins, and install the Chinese language pack.
-
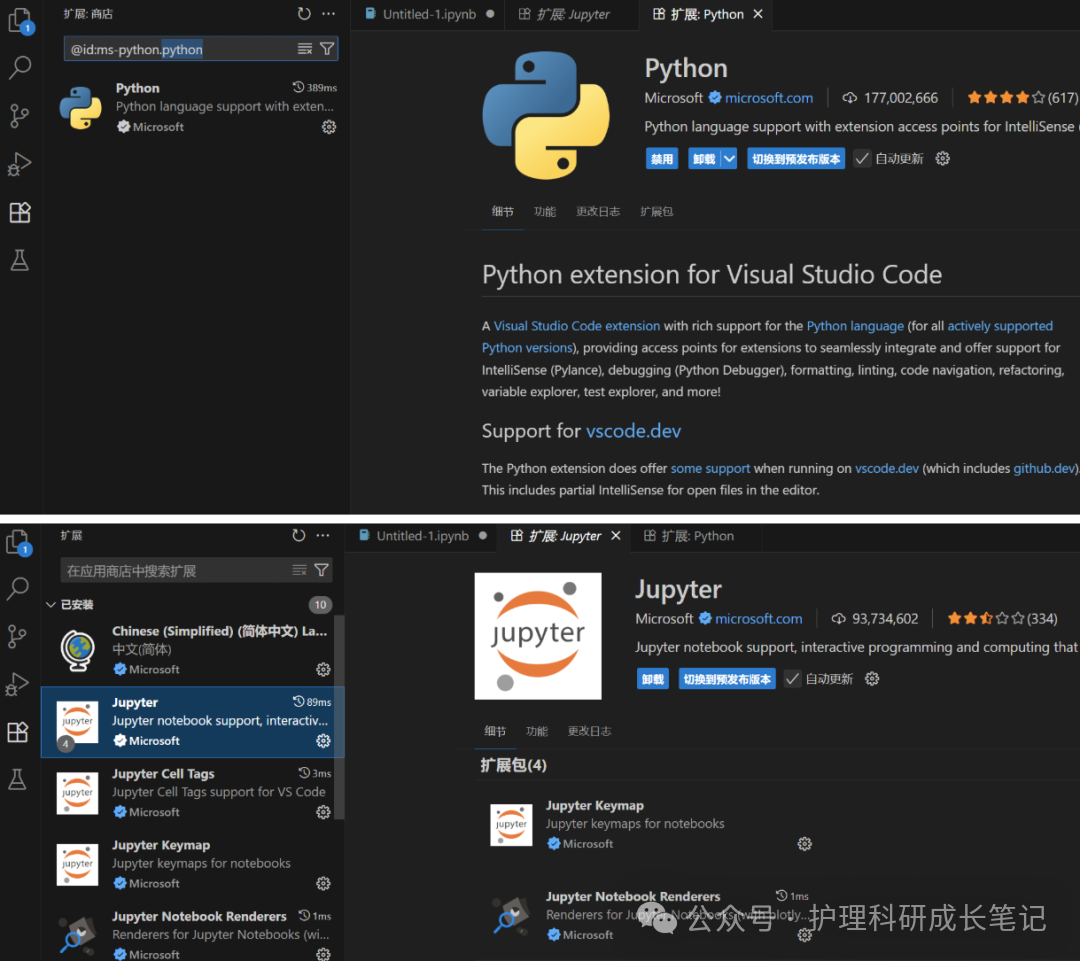
Additionally, you need to download the jupyter and python, ipykernel extensions.
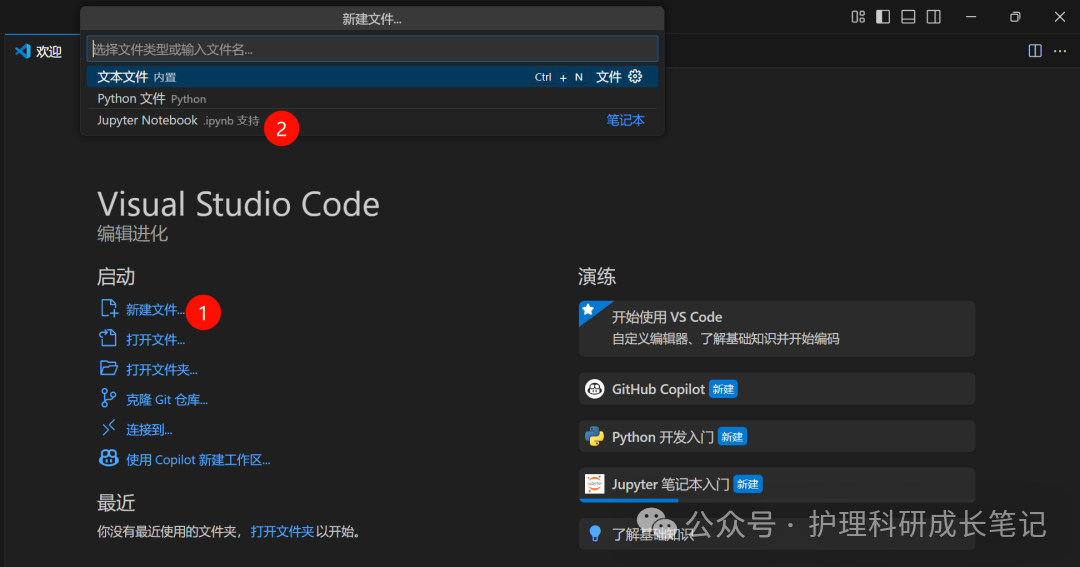
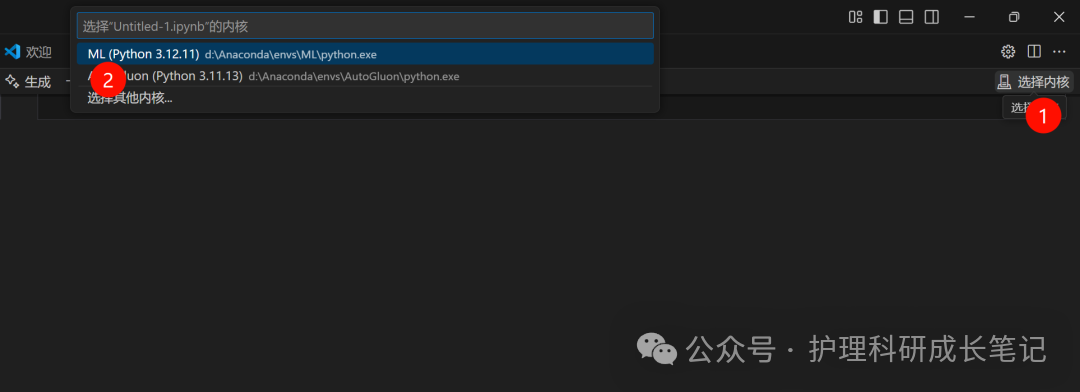
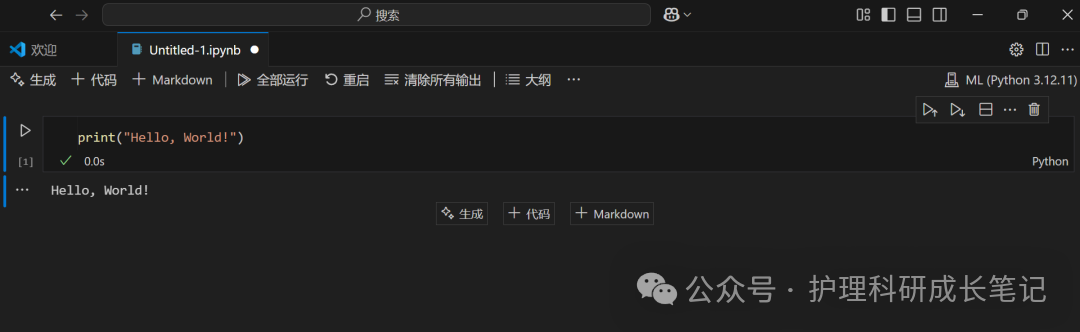
- Finally, you can create a jupyter notebook file to write code, selecting the kernel environment we created, and all subsequent code will run in this independent environment.
 Finally, of course, a small test, the classic “Hello, World”, successfully running~~~
 That’s all for sharing, see you next time~