First, let’s take a look at the data file format of the RT809H’s eMMC chip as follows:
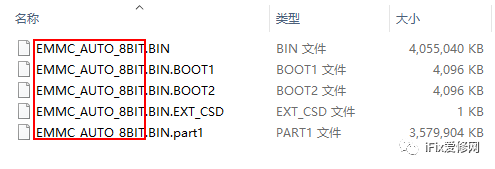
The part circled in red is variable, and users can name it themselves.
.BIN, .BIN.part1, .BIN.BOOT1, .BIN.BOOT2, .BIN.EXT_CSD and other file extensions are fixed; if they are not, the programmer will not recognize them or the software will report an error.
When backing up data at the point “Read“, a “Save” window will pop up, where you can select the save path and file name, etc.
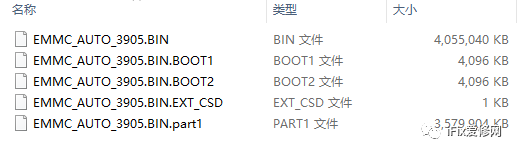
The 1st and 5th files are in the User area, and part1 is also part of the User area, and cannot be deleted, otherwise an error will be reported.
[Skip empty file: file path] If the corresponding partition is selected but there is no corresponding file, this error will be reported.
[.part file] Whether there are .part files or how many .part files there are is determined by the capacity of the EMMC chip; 4GB is one split, the larger the capacity, the more there are.
For example: a chip with a capacity of 4GB will not have .part files.
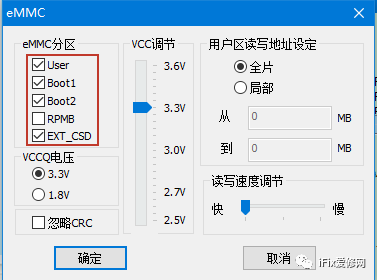
Default settings for EMMC options:
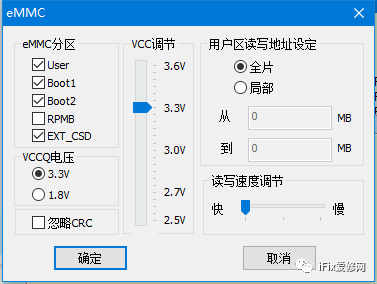
Under EMMC-related options, click the settings on the left side of the interface to see the image above.
EMMC chips generally use these 4 partitions that are checked: User, Boot1, Boot2, EXT_CSD. As security requirements become higher, an RPMB partition is often used, but since the ‘key’ is almost unobtainable from the “outside”, the programmer does not handle this area.
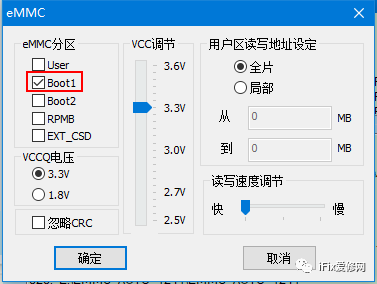
How to read and write a specific partition?
-
Read
Simply check the corresponding eMMC partition. When reading (non-User area), the data file that comes out will find at least two files; in addition to the checked one, it also contains the User area file, but it is 0KB, and the 0KB file can be deleted when saving.
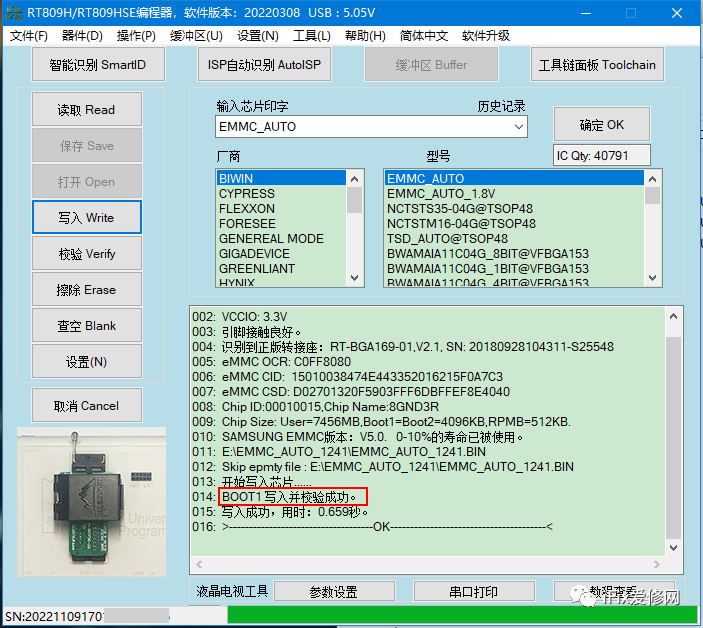
Taking reading the Boot1 area as an example:
Settings
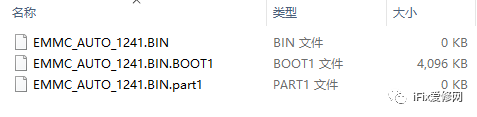
Files read out
-
Write
Taking the Boot1 area as an example, the file extension for writing is .bin.boot1, and case sensitivity does not matter.
Examples of filenames for standalone writing:
[User]xxxxx.BIN
[Boot1]xxxxx.BIN.BOOT1
[Boot2]xxxxx.BIN.BOOT2
[EXT_CSD]xxxxx.BIN.EXT_CSD
Note: The blue part of the file extension must be such characters, and the preceding xxxxx can be named by yourself [it is not recommended to use Chinese characters for naming], and when multiple partitions need to be written at the same time, xxxxx must be consistent.
How to read and write default partitions?
Reading: Check the corresponding partition and confirm, then click Read on the left.
Settings
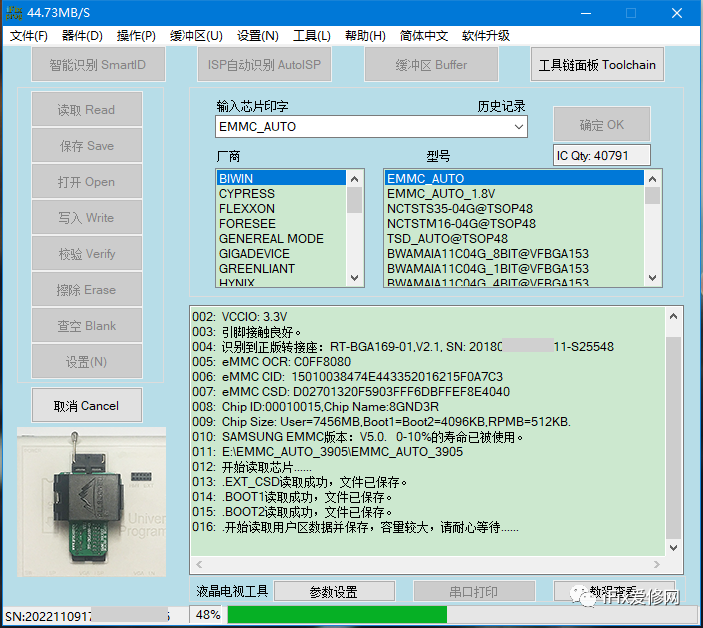
Reading process
Files read from an 8GB chip
Writing: Click Write on the left to open the file to be written, that is, the RT809H read file format as shown in the above image; at this time, any file can be selected, and the programmer will automatically complete writing all partition files.
For mostrepairpersonnel, reading and writingtoeMMCactually does not need to care about these partitionoptions, default is fine,because backup data is almostfull chip backupand notjust for a certain partition backup.
However, for some who have programming files or developers, targeted partition programming will be done; below is an introduction to the methods and issues to pay attention to:
Taking a customer’s mstar solution programming software as an example:
1. Partition Programming Files and Instructions
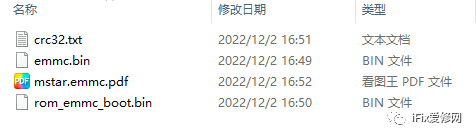
.pdf is the programming document that will introduce where the corresponding files should be programmed and some precautions;
crc32.txt is the checksum of the corresponding files, which is convenient for checking whether the files have been modified;
emmc.bin is the User area file;
rom_emmc_boot.bin is the Boot1 area file.
2. Creating Partition Programming Files
(1) User area: emmc.bin, no need to rename;
(2) Boot1 area: rename rom_emmc_boot.bin to emmc.bin.boot1
(3) EXT_CSD: Read the EXT_CSD partition file from the chip to be written, then modify the following three positions according to the programming instructions; then rename the file to: emmc.bin.ext_csd
RT809H only programs three bytes: 177【0xB1】, 179【0xB3】, 162【0xA2】, where 162 can only be programmed once, and there is no prompt for the EXT_CSD writing process.
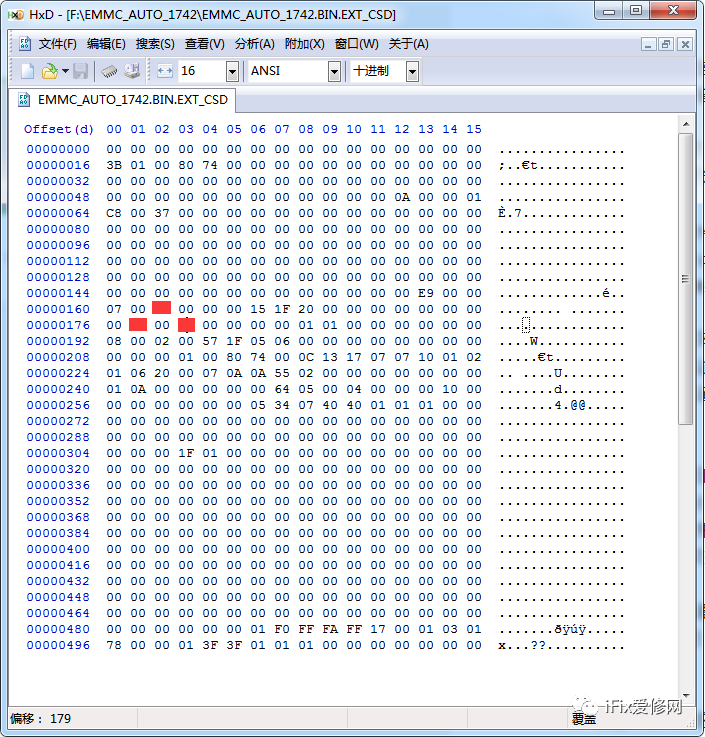
The red part in the image is the value to be programmed
Real programming files are not too large. After booting, various functional partitions will be automatically allocated in the User area, so when creating by yourself, it is not necessary to fill the capacity (for example, a 16GB chip does not need to create multiple .part files);
When processing the User area, be sure to carefully check the programming instructions provided by the factory; some data files do not start from 0, and pay attention to handle the offset address correctly, otherwise it may not work!
Data backed up using card reader solutions [common ones include: AU6438, GL827, GL3224, etc.] are basically User area files, mostly in .img format, which can be directly written to the eMMC chip by changing .img to .bin.
The partitions mentioned above are all pre-existing partitions in the eMMC chip manufacturers’ factory, not the Android software partitions of application product manufacturers. For example: fastboot, bootargs, recovery, misc, etc., these are generally all within the User area.