RT809H Programmer Tutorial: EMMC Offline Writing Method
Apply a bit of soldering flux on one side of the EMMC, use a hot air gun to heat evenly, and remove the EMMC chip. Let the removed EMMC chip cool aside, and observe the chip pins for any solder balls. If necessary, add solder or solder balls.
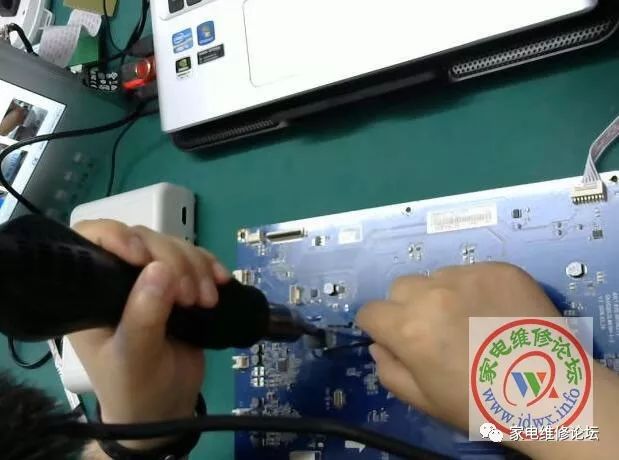
Clean the surface of the EMMC, place the EMMC into the BAG169 locking seat (make sure to identify pin 1), and insert the locking seat into the RT809H programmer.

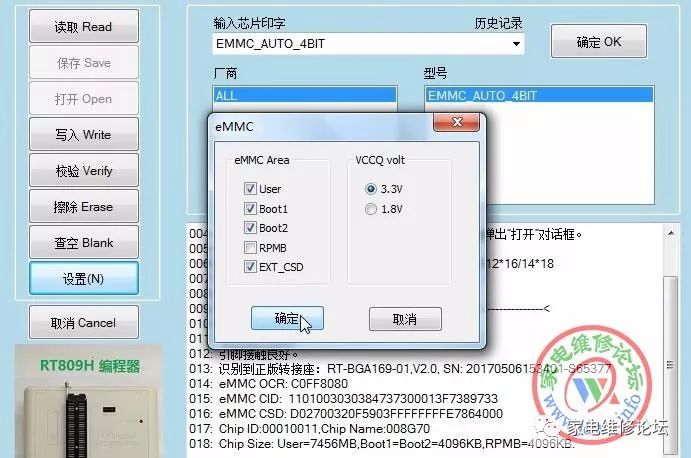
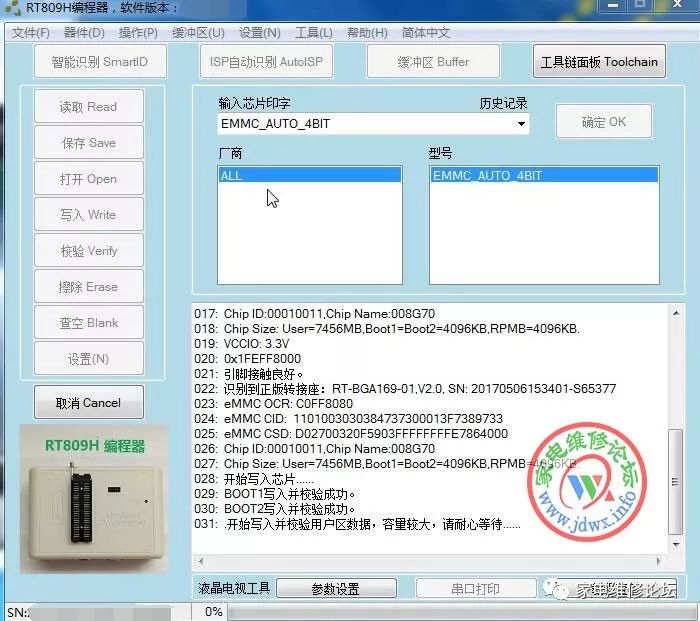
Open the RT809H operation interface, click on Smart Identification, select EMMC for TYPE, and 3.3V for Volt. Click on settings, check EMMC Area in User/boot1/boot2/EXT_CSD, select 3.3V for VCCQ, then click on write, choose a backup file, and start writing with any of them.
The capacity is large, please be patient during the writing process… During the idle time of writing, you can clean the motherboard pads. Once writing is complete, remove the EMMC chip. Apply a thin layer of soldering flux on the printed circuit board and also on the EMMC chip, align the EMMC on the motherboard pads.
Evenly heat with a hot air gun, gently move with tweezers; if it is elastic, the soldering is good. After the motherboard cools down, connect all the connection lines of the motherboard. Open the RT809H operation interface and set the printing parameters. Once the motherboard is powered on, you can view the printing information, and the display will show a normal image. The motherboard boot process is complete, and the repair is finished!
Original link: http://www.jdwx.info/article-947-1.html
Search on Taobao for Store Name: Home Appliance Repair Forum

Taobao Store Name: Home Appliance Repair Forum
RT809H Programmer (Taobao) Link:
https://item.taobao.com/item.htm?id=551805435687
Copy the link and open it in your browser or Taobao app