
Requirement

Imagine you are facing a scenario where the MCU code has the following snippet, and you need to see the values of the variables in real-time
sin_o cos_o automatically plotted, which is essentially a virtual oscilloscope (what a clever name)!
#include <math.h>

float x = 0;
double sin_o = 0;
double cos_o = 0;

int show(void){
while (1) {
    x += 1;
    if(x >= 360) x = 0;

    sin_o = sin(x*3.14/180);
    cos_o = cos(x*3.14/180);
  }
}
What good ideas do you have?
Method A: Use serial output and a third-party tool like VOFA+ to visualize (log output has a delay)
Method B: Use the development IDE to automatically plot (I tried Renesas’s, and it didn’t feel good)
This article introduces a better method, which is the JLINK driver’s built-in J-Scope, very convenient!
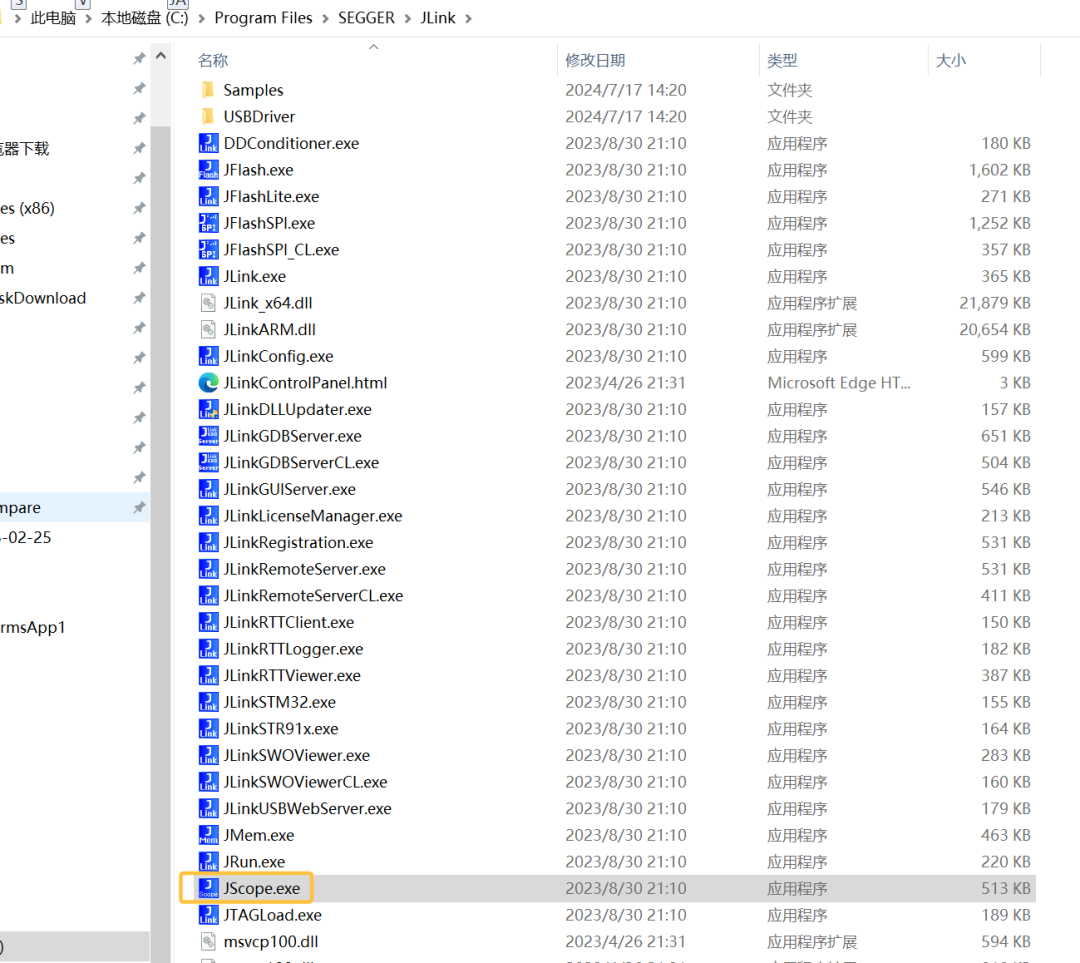
You can start this software from the installation directory. How to use it? Please continue reading.

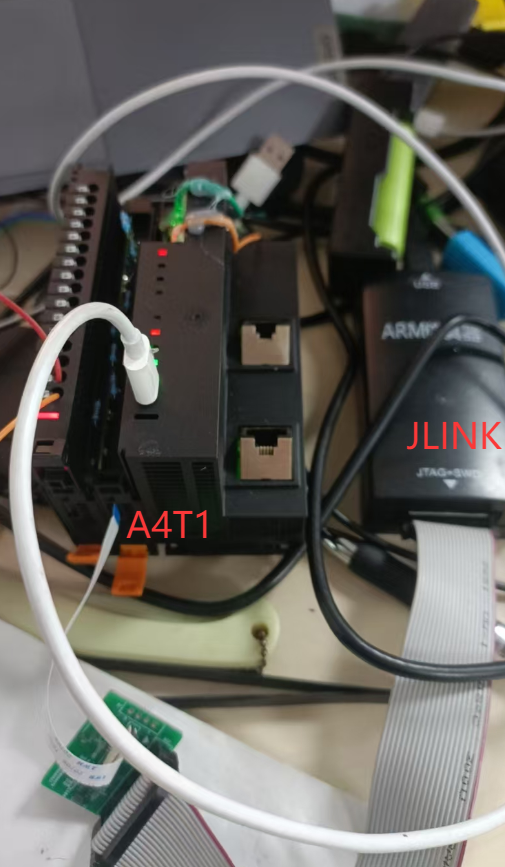
Hardware
The J-Scope software cannot be used without a development board! It must be JLINK + development board.
In this article, I used the Renesas A4T1 board at hand.
Software
Please refer to MY89003 V1.0 full-featured project to quickly create a project using E2STUDIO.
Then you can write the following code!
#include "hal_data.h"
FSP_CPP_HEADER
void R_BSP_WarmStart(bsp_warm_start_event_t event);
FSP_CPP_FOOTER
/****************************LED***************************/
void LED_BLINK(void){    static char flag=0;    if(flag){        R_IOPORT_PinWrite(&g_ioport_ctrl, BSP_IO_PORT_02_PIN_07, BSP_IO_LEVEL_LOW);
        R_IOPORT_PinWrite(&g_ioport_ctrl, BSP_IO_PORT_02_PIN_06, BSP_IO_LEVEL_HIGH);
    }else{        R_IOPORT_PinWrite(&g_ioport_ctrl, BSP_IO_PORT_02_PIN_07, BSP_IO_LEVEL_HIGH);
        R_IOPORT_PinWrite(&g_ioport_ctrl, BSP_IO_PORT_02_PIN_06, BSP_IO_LEVEL_LOW);
    }    flag = !flag;}
/****************************Test***************************/
#include <math.h>
float x = 0;
double sin_o = 0;
double cos_o = 0;
int show(void){   while (1) {    x += 1;    if(x >= 360) x = 0;    sin_o = sin(x*3.14/180);    cos_o = cos(x*3.14/180);  }}
void NAFE_PIN_READY_CALLBACK(external_irq_callback_args_t *p_args){}
void hal_entry(void){    show();    while(1){        R_BSP_SoftwareDelay (100, BSP_DELAY_UNITS_MILLISECONDS);
        LED_BLINK();    }}
/*******************************************************************************************************************//** * This function is called at various points during the startup process.  This implementation uses the event that is * called right before main() to set up the pins. * * @param[in]  event    Where at in the start up process the code is currently at **********************************************************************************************************************/
void R_BSP_WarmStart(bsp_warm_start_event_t event){    if (BSP_WARM_START_RESET == event)    {
#if BSP_FEATURE_FLASH_LP_VERSION != 0        /* Enable reading from data flash. */        R_FACI_LP->DFLCTL = 1U;        /* Would normally have to wait tDSTOP(6us) for data flash recovery. Placing the enable here, before clock and         * C runtime initialization, should negate the need for a delay since the initialization will typically take more than 6us. */#endif    }
    if (BSP_WARM_START_POST_C == event)    {        /* C runtime environment and system clocks are setup. */        /* Configure pins. */        R_IOPORT_Open (&g_ioport_ctrl, &IOPORT_CFG_NAME);
    }}
#if BSP_TZ_SECURE_BUILDFSP_CPP_HEADER
BSP_CMSE_NONSECURE_ENTRY void template_nonsecure_callable ();
/* Trustzone Secure Projects require at least one nonsecure callable function in order to build (Remove this if it is not required to build). */
BSP_CMSE_NONSECURE_ENTRY void template_nonsecure_callable (){}
FSP_CPP_FOOTER#endif
>No LOG operations
>LED will not BLINK because the previous function is already in an infinite loop
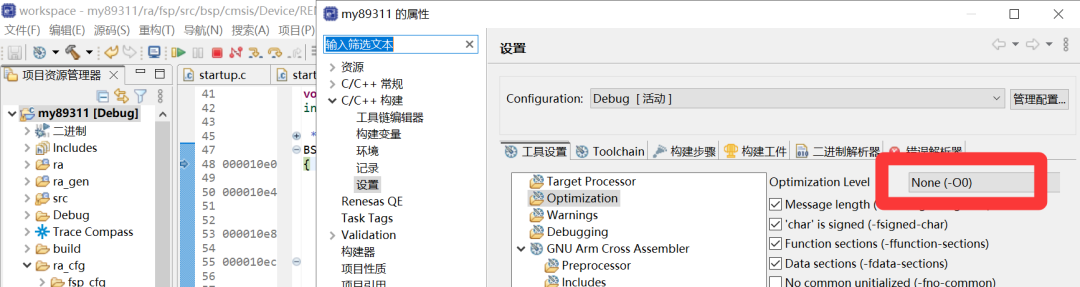
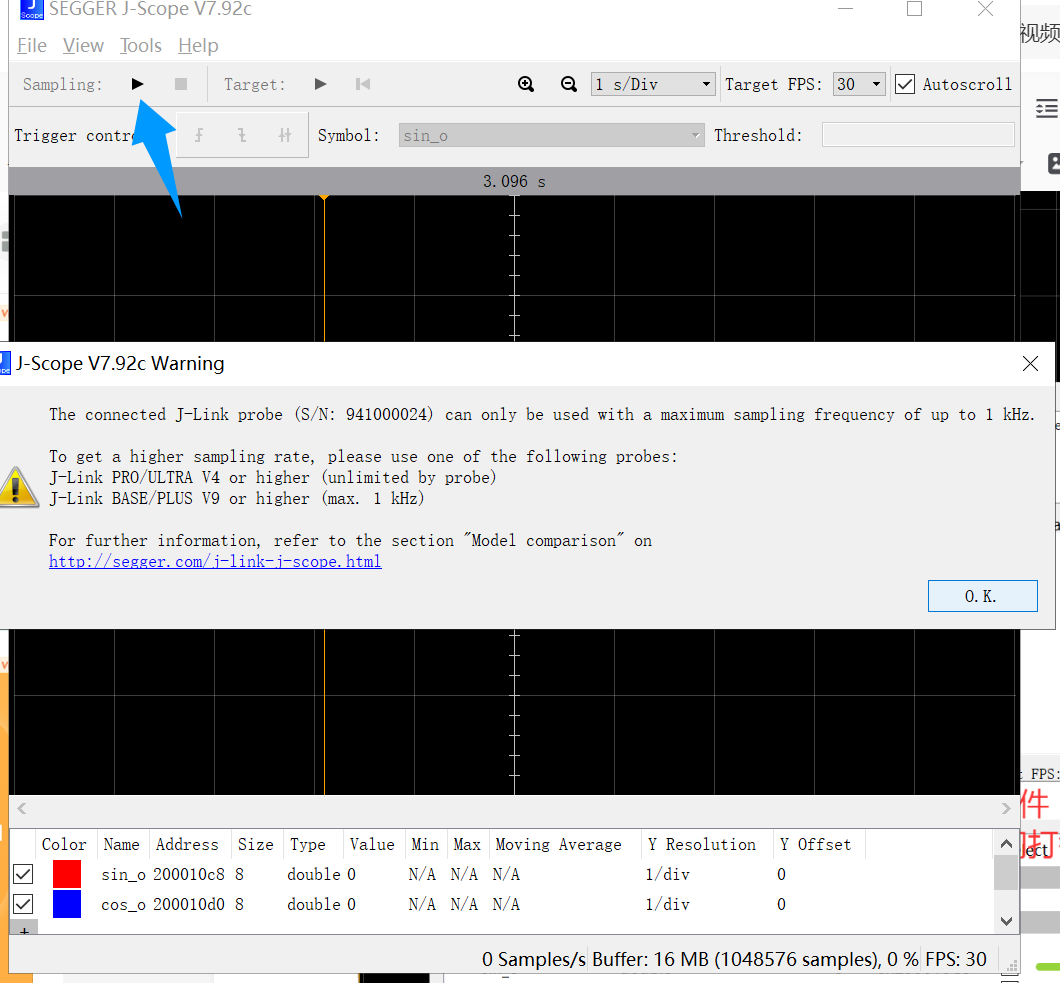
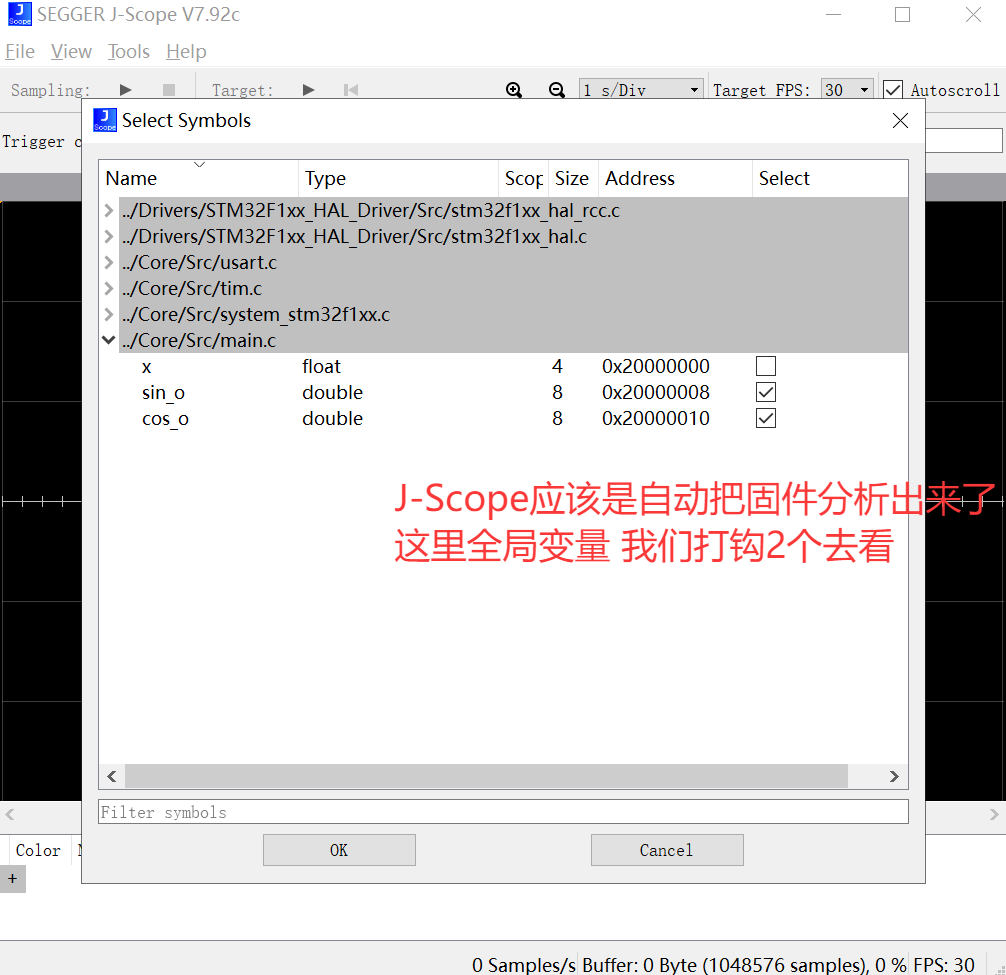
>Please open the map file to check the addresses of the variables sin_o and cos_o. They cannot be 0. You can adjust this through the IDE’s optimization level. Watch the video.
Open the J-Scope software

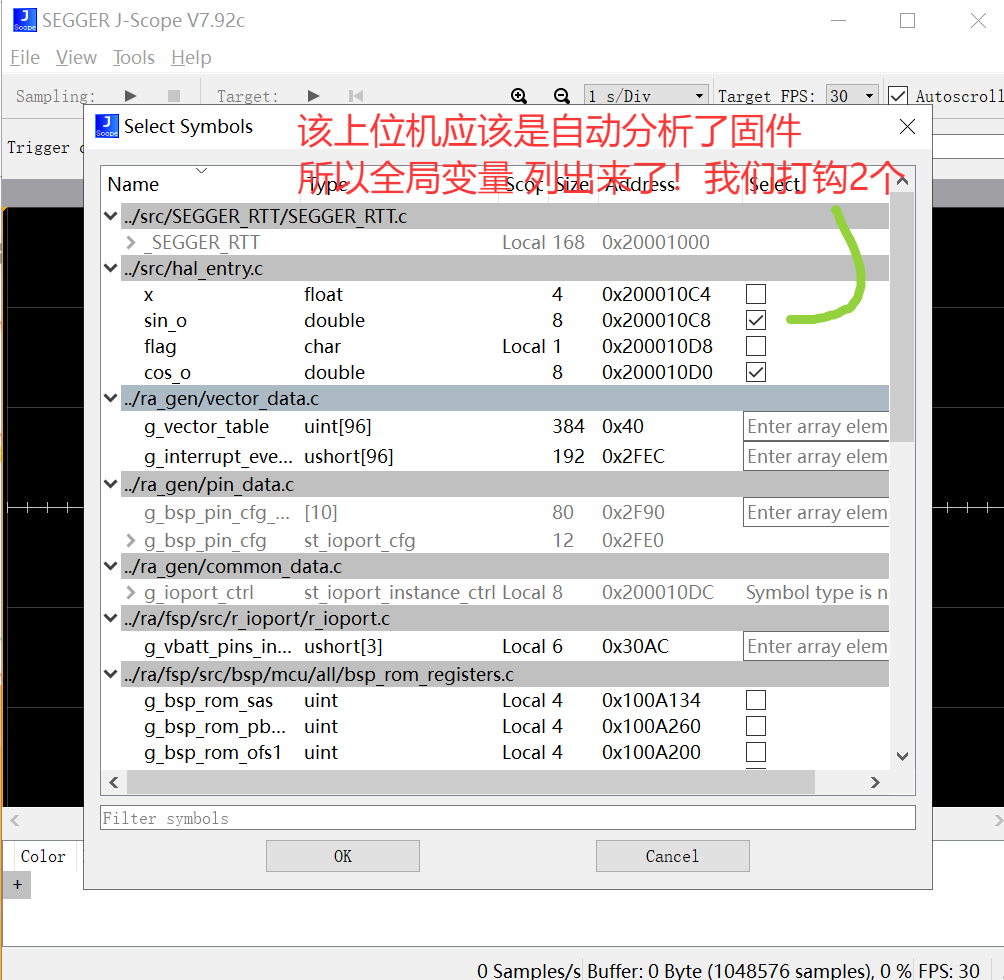
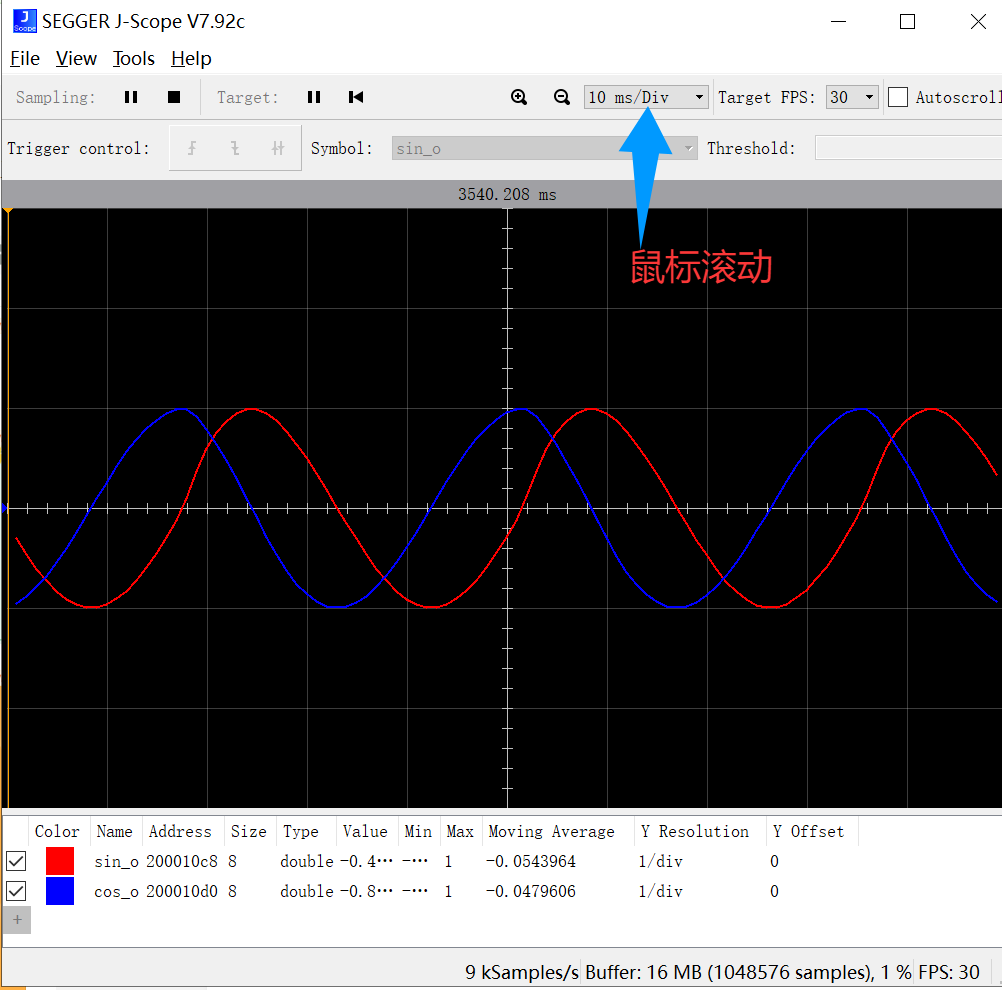
At this point, moving the mouse wheel will allow you to see the waveform!
Operation video
Video records the optimization level disaster scene
Thanks for the article
https://zhuanlan.zhihu.com/p/413285767《Everything You Know and Don’t Know About JTAG Is Here》《Using JLink cmd》
I personally think J-Scope is a great tool for conveniently viewing the waveforms of certain data, which is useful in ADC collection, temperature sensors, etc. However, it still cannot replace the software of virtual oscilloscopes that send data to the PC via hardware serial ports, because J-Scope can only read global variable data.
A super cool open-source serial virtual oscilloscope project, have fun!
[You can create a host computer to replace VOFA+]
New favorite for embedded debugging! J-Scope: Free + Real-time Data Visualization
Wasted efforts
Initially, I wanted to use STM32C8T6 for verification because it allows for simulation without physical hardware.1> MX, just create the simplest project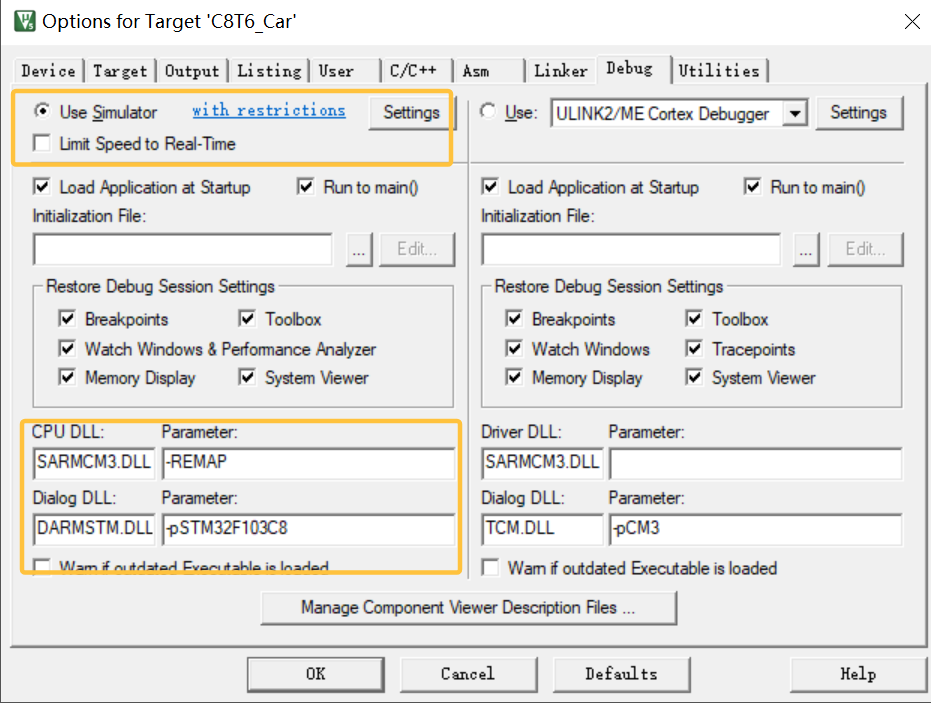 2> Turn off optimization
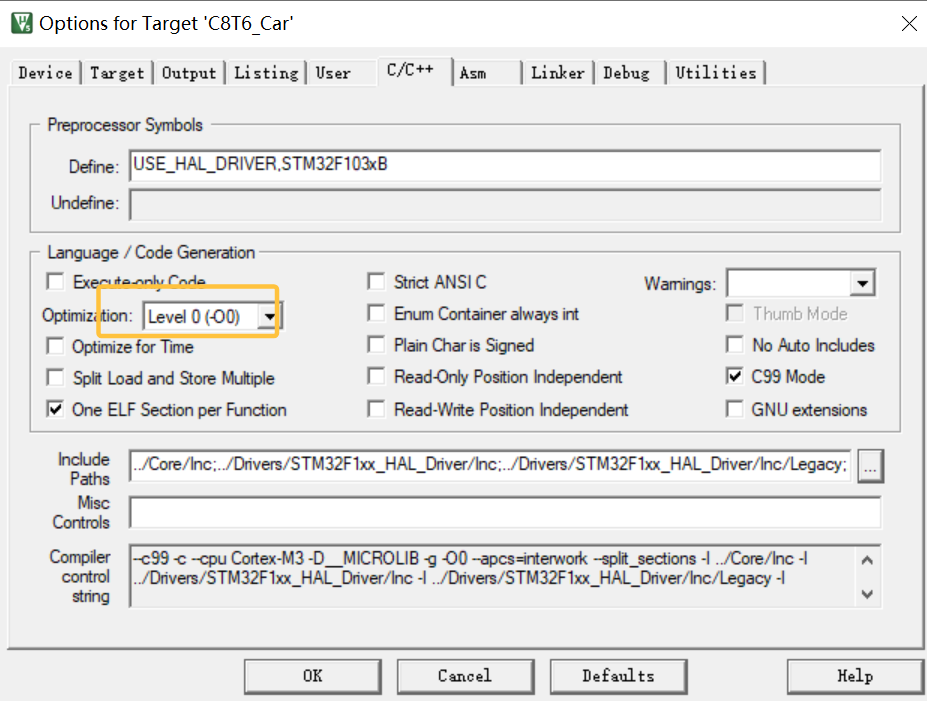 3> Real-time observation, check the boxAt this point, you can see the data updating in real-time, but there is no automatic plotting.
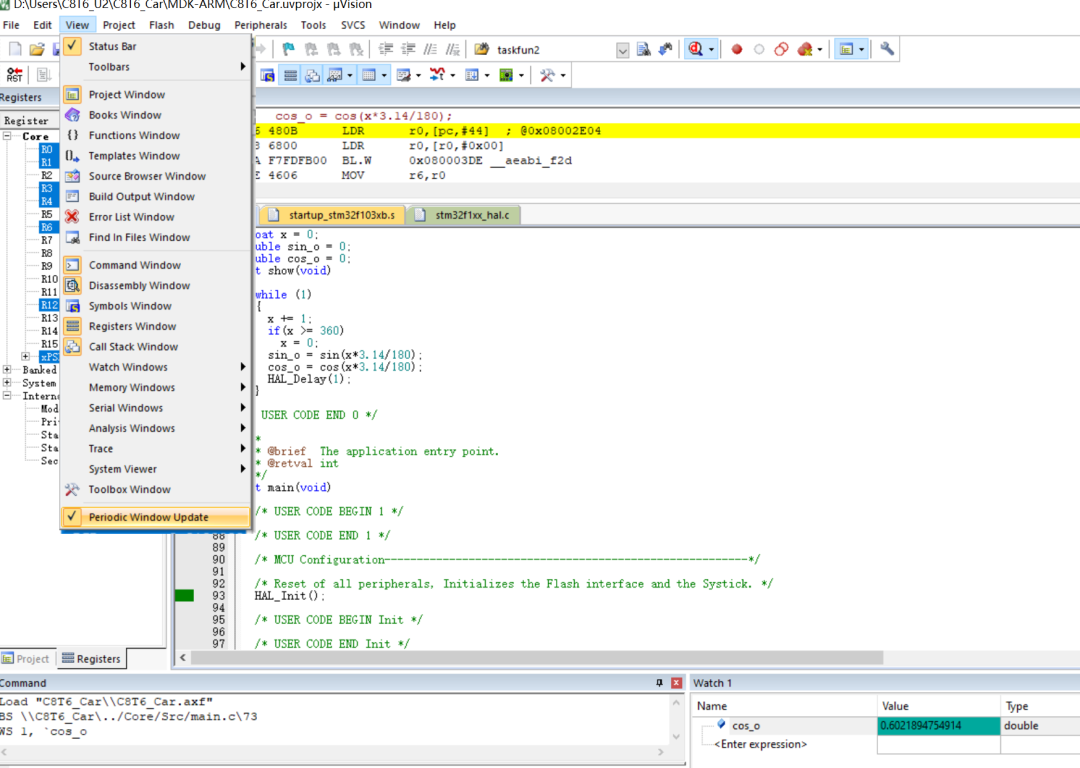
#include <math.h>
float x = 0;
double sin_o = 0;
double cos_o = 0;
int show(void){   while (1)  {    x += 1;    if(x >= 360)      x = 0;    sin_o = sin(x*3.14/180);    cos_o = cos(x*3.14/180);    HAL_Delay(1);  }}
/* USER CODE BEGIN 2 */ show(); /* USER CODE END 2 */
/* Infinite loop */ /* USER CODE BEGIN WHILE */ while (1)4> Start J-Scope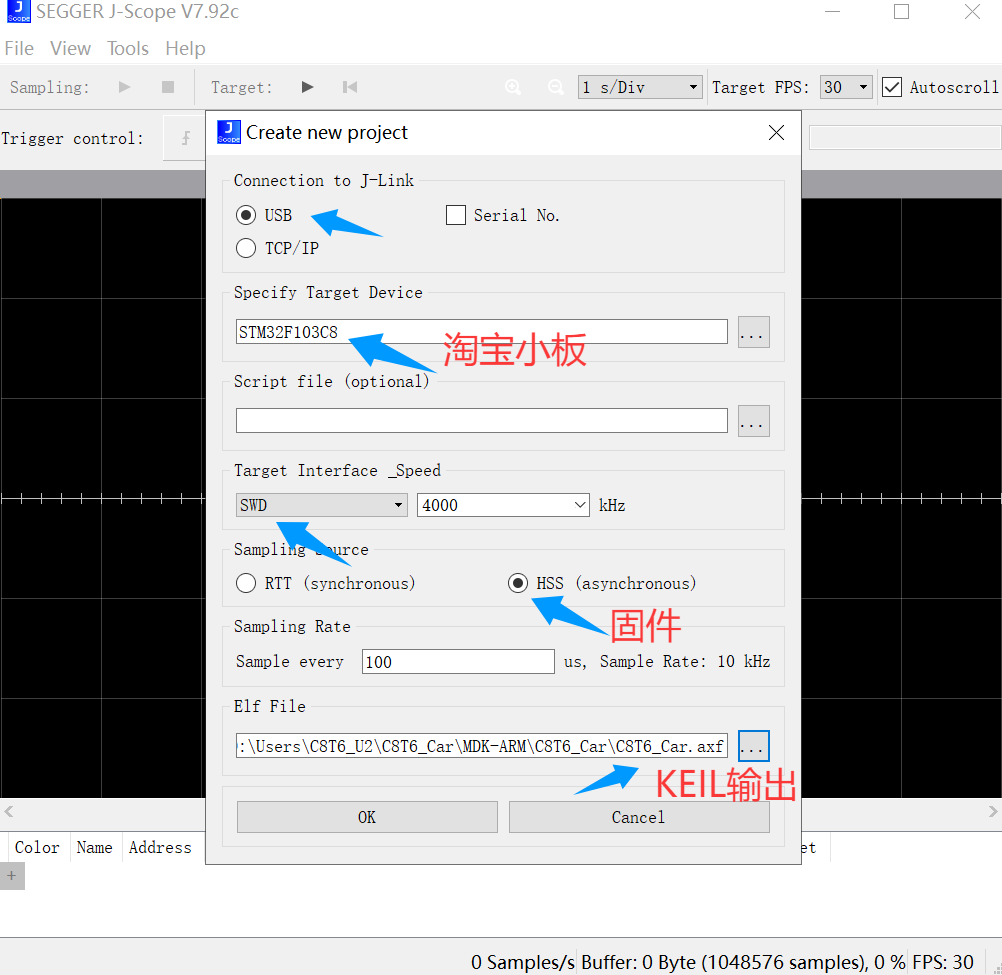
 Awkward! Physical hardware is needed!It cannot simulate with just firmware!