This article serves only to explain the merging methods and functions. (First, ensure that the SET is confirmed to be 100% OK before proceeding with the merge.) The steps are as follows:
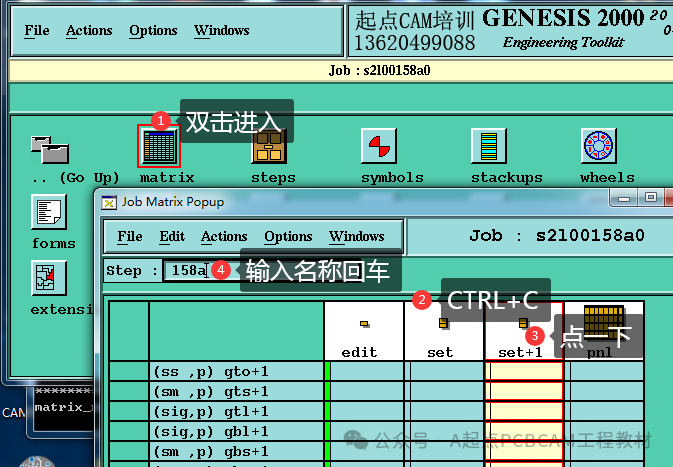
1. First, enter the Matrix layer manager of the part number that needs to be merged, copy the SET that needs to be merged, and rename it according to the part number.
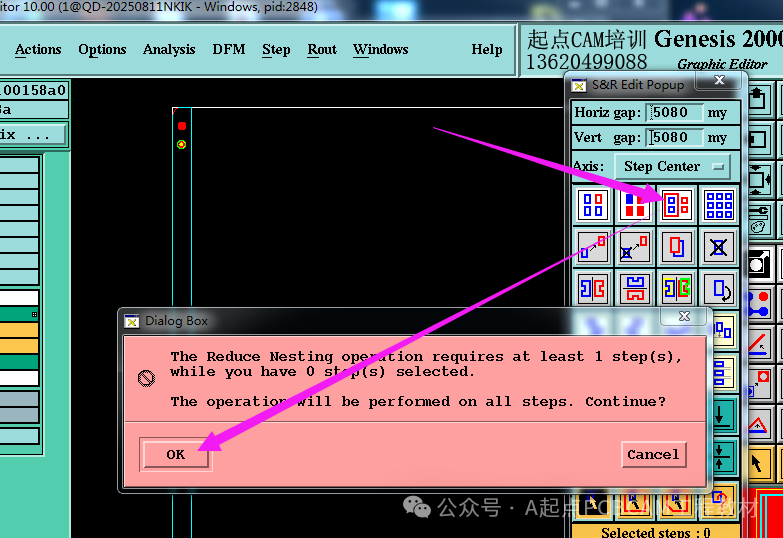
2. Double-click the renamed unit to enter it. In the new unit, press ALT+S+L+E, and in the pop-up panel tool, confirm the third function in the first row by pressing the space bar, which will break the virtual panel into physical units.
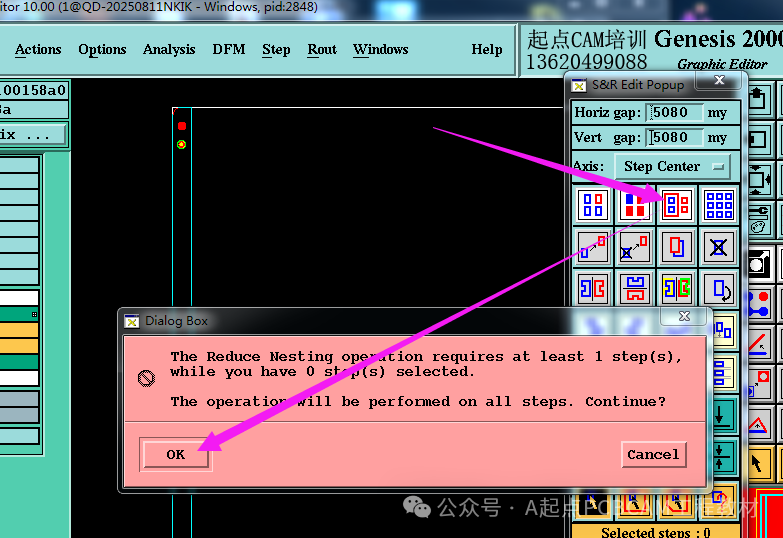
Repeat steps 1-2 for all SET units that need to be merged: copy → rename → break into physical units.
3. Enter the Steps unit of the part number that needs to be merged, press ALT+F+O to copy all units that need to be merged into the main part number.
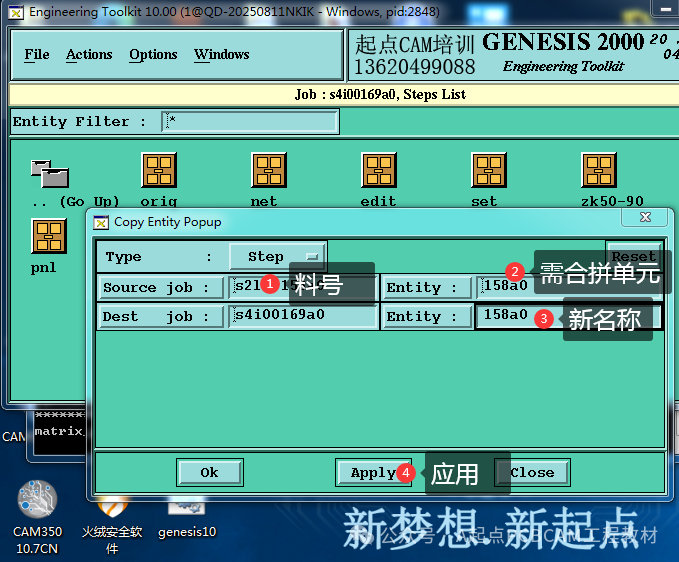
4. After copying, enter the main part number layer manager, create a new PN empty unit, and double-click to enter.
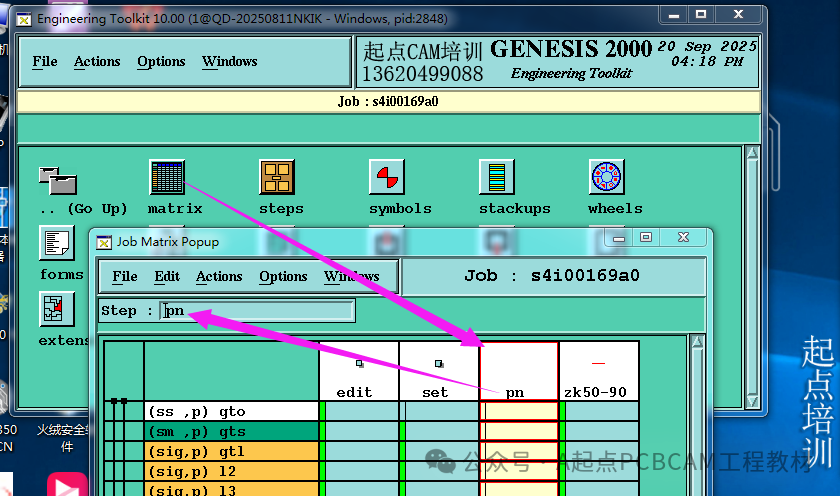
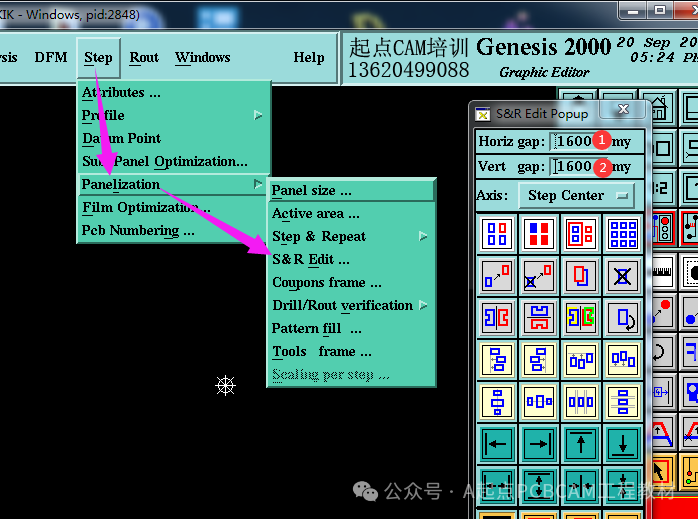
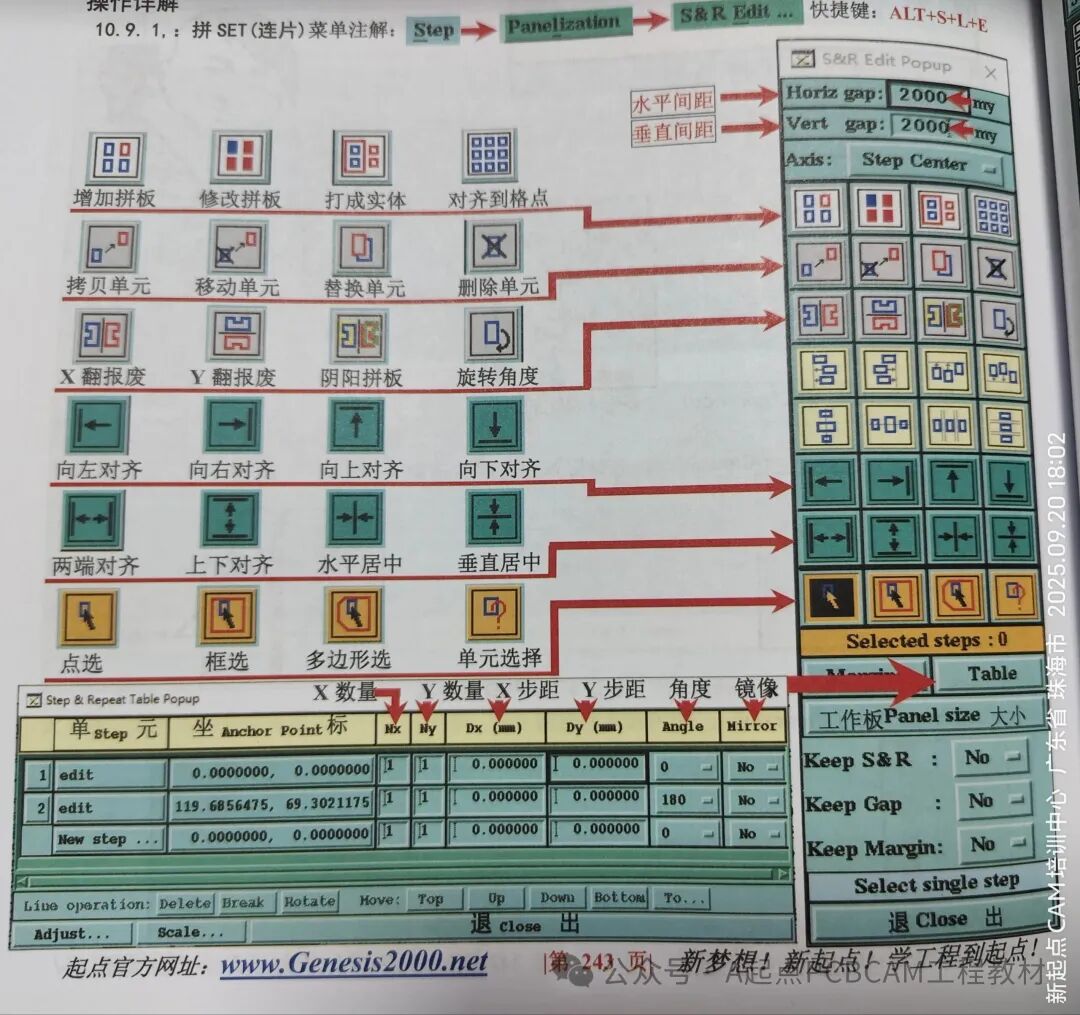
5. Then press ALT + S + L, and in the pop-up panel tool, fill in the panel spacing according to the size of the knife.
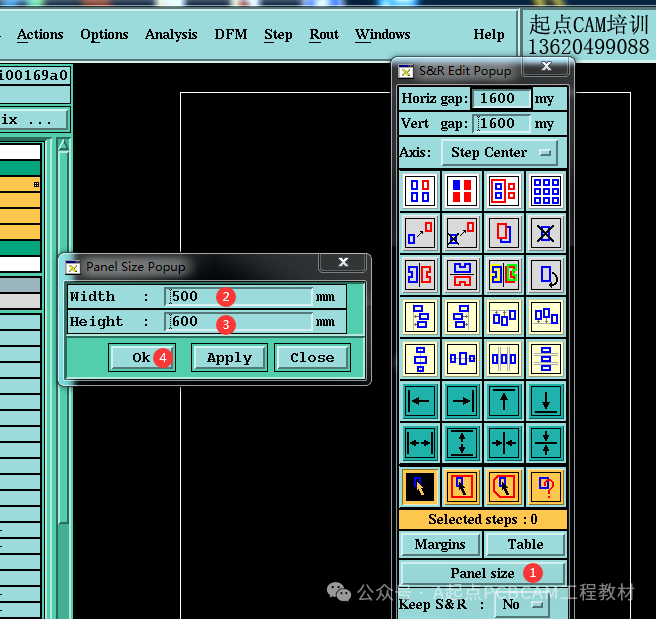
6. Click on the Panel size at the bottom, and in the pop-up dialog, enter the large board size of 500*600 (without electroplated edges, Pnl size).
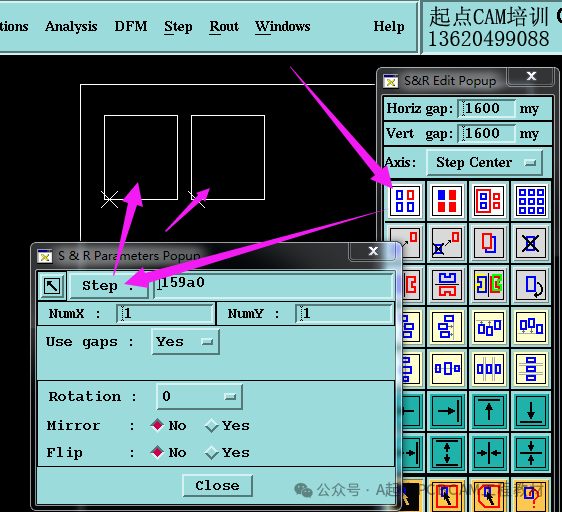
7. Click on the upper left corner of the panel tool to add the unit function and bring in all the units that need to be merged.
8. Finally, use the selection function at the bottom of the panel tool to select the units to be copied, and use the alignment function to align them to complete the merging of multiple models.
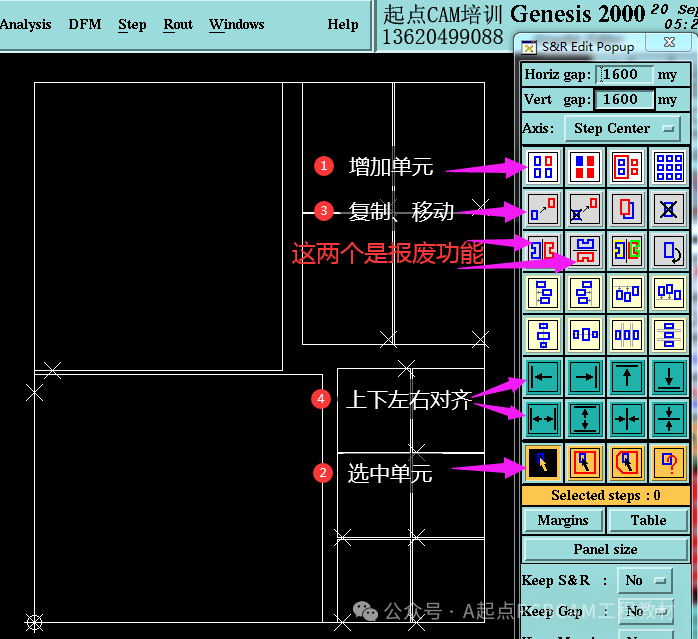
#Genesis2000 Panel Tool Function Diagram:
The above is the method for merging multiple models, without involving explanations of various requirements and rules. If you have a merging script, please skip directly  ! Wait! Fellow, please stay! Like
  and share ↗ to follow, so you won’t get lost in the next learning
  Thank you
  1362499088 Jing Gong