Linux | Red Hat Certified | IT Technology | Operations Engineer
👇1000-member technical exchange QQ group. Note [Public Account] for faster access.

1. Software Installation in Linux
There are generally three ways to install software in Linux:
a. Source Installation
In Linux systems, source installation provides high flexibility and customization but also has some obvious drawbacks. Below is a detailed summary of these drawbacks:
Complex Installation Process:
Source installation requires users to manually download the source code, extract, configure, compile, and install, making the whole process relatively cumbersome.
Especially when installing larger software collections (like the LAMP environment), there are more steps involved, increasing the chances of typographical errors.
Long Compilation Time:
Source installation requires compiling the source code, which can take a long time, especially for large software, where the compilation time can be very lengthy.
This increases the waiting time cost for users and reduces installation efficiency.
Difficult Error Resolution:
Since source installation involves multiple steps and tools (like the gcc compiler, make command, etc.), if an error occurs during installation, novice users may find it difficult to resolve.
This requires users to have a certain level of programming and technical knowledge, as well as error troubleshooting and problem-solving skills.
Complex Dependency Management:
Source installation usually requires users to manually resolve software dependency issues, adding complexity and uncertainty to the installation.
If dependencies are not installed or configured correctly, it may prevent the software from running properly.
Inconvenient Uninstallation:
While software installed from source can be completely uninstalled by deleting the installation directory, if users did not specify a clear installation path or scattered files across multiple directories during installation, the uninstallation process can become complex and difficult.
Lack of Unified Package Management:
Compared to binary package installation, source installation lacks a unified package management system to manage software installation, upgrades, queries, and uninstallation.
This can lead to inconvenience and confusion for users managing multiple software.
b. Package Installation – rpm
In Linux systems, while package installation offers rich functionality and flexibility, it also has some potential drawbacks. Below is a detailed summary of the drawbacks of package installation in Linux:
RPM (Red Hat Package Manager) is a software package format widely used in Red Hat, CentOS, and other RPM-based Linux distributions. RPM package installation also has some drawbacks:
Complex Dependency Relationships:During RPM package installation, if dependency issues arise, users need to resolve them manually. This adds complexity and uncertainty to the installation.
May Not Obtain Latest Versions:Since RPM packages are pre-compiled binary files, users may not be able to get the latest version of the software. This may cause users to miss some important security updates or feature improvements.
Inflexible Installation and Uninstallation:Compared to source installation, while RPM package installation simplifies the installation process, it may lack flexibility in uninstallation and upgrading. For example, during uninstallation, it may not completely remove all related files and configurations.
c. Package Manager Installation
The most recommended method for software installation in Linux is to use package managers like yum (CentOS) or apt/apt-get (Ubuntu) for software installation! This is because using a package manager automatically resolves package dependency issues!
What is a Software Package:
In Linux, a common way to install software is to download the source code of the program and compile it to obtain an executable program.
However, this can be cumbersome, so some people pre-compile commonly used software into software packages (which can be understood as installation programs on Windows) and place them on a server. Through the package manager, users can easily obtain these pre-compiled software packages and install them directly.
Software packages and package managers are like the relationship between “Apps” and “App Stores”.
yum (Yellow dog Updater, Modified) is a very commonly used package manager in Linux, mainly applied in Fedora, RedHat, CentOS, and other distributions.
Demonstration of Using Package Manager (Ubuntu)
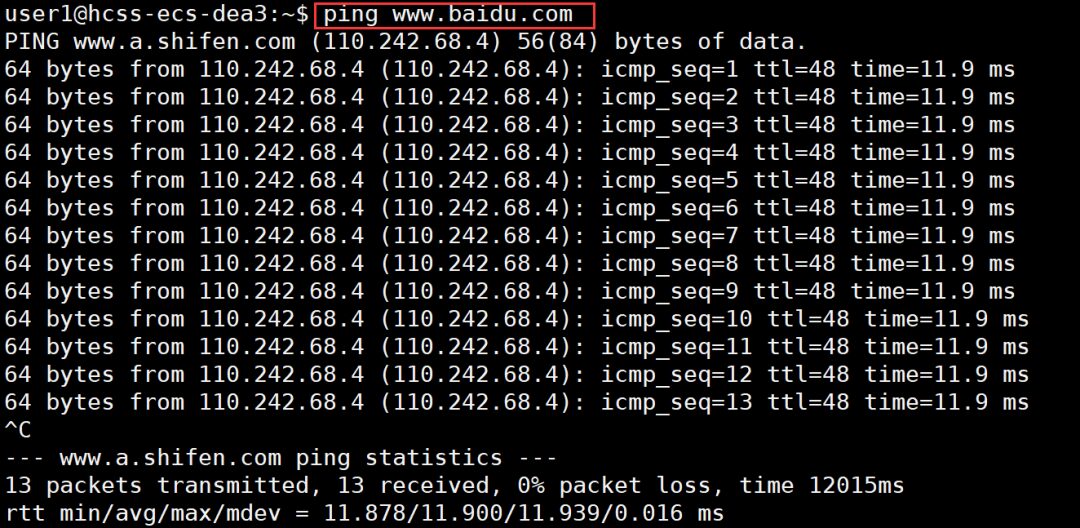
Note: All operations related to yum must ensure that the host (virtual machine) has internet access! You can verify this with the ping command:
After entering the ping command followed by a known online domain name or IP address, such as ping google.com or ping 8.8.8.8 (Google’s public DNS server).
If you receive a response, it indicates that your host can access the internet.
View Software Packages
Using the yum list command, you can list the software packages currently available. Since the number of packages may be very large, we need to use the grep command to filter out the packages we are interested in. For example:

Install Software
Through apt, we can complete the installation of lrzsz with a very simple command.
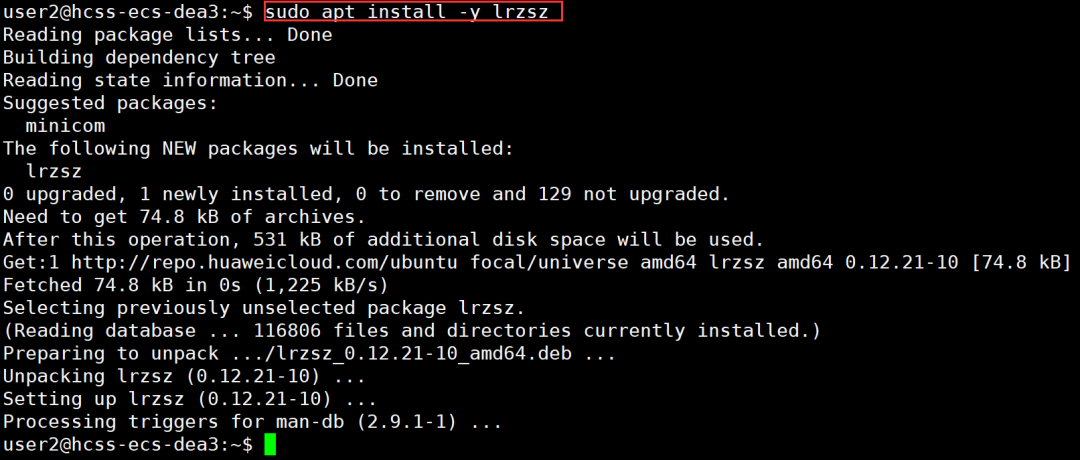
Note: When installing software, since it requires writing to the system directory, you generally need to use sudo or switch to the root account to complete the installation.
apt can only install one software at a time. If you try to install another software while apt is installing one, apt will report an error.
Uninstall Software (One Command Is Very Simple):
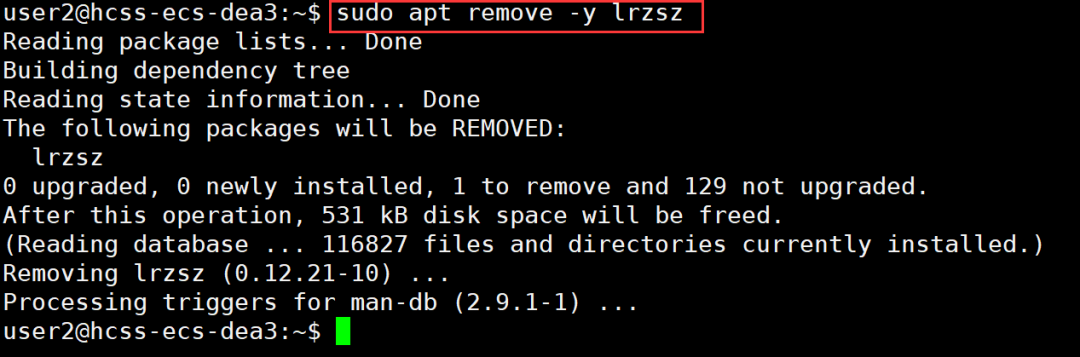
Explanation: If the -y option is not included, the machine may prompt you to confirm whether to install or uninstall the software. The -y (yes) option indicates a forced action. Therefore, the -y option can be included or omitted, depending on personal preference!
2. Linux Editor – vim
2.1 Basic Concept of vim
vim has three main modes (there are many modes, but mastering these three is sufficient): command mode, insert mode, and last line mode. The functions of each mode are as follows:
Normal/Command Mode:
This mode controls the movement of the screen cursor, deletion of characters, words, or lines, copying sections, and entering Insert mode or Last line mode.
Insert Mode:
You can only input text in Insert mode. Press the “ESC” key to return to command mode. This mode is the most frequently used editing mode.
Last Line Mode:
This mode is used for saving or exiting files, replacing files, searching strings, listing line numbers, etc. In command mode, press shift+: to enter this mode. To view all your modes: open vim and directly type :help vim-modes in last line mode.
2.2 Basic Operations of vim
To enter vim, type vim followed by the file name at the system prompt to enter the full-screen editing interface:

 However, one thing to note is that after entering vim, you are in [Normal Mode], and you must switch to [Insert Mode] to input text.
Switching from [Normal Mode] to [Insert Mode]: Any of the following three methods can be used
Press a, i, or oSwitching from [Insert Mode] to [Normal Mode]
When in [Insert Mode], you can only keep typing. If you realize you have typed the wrong character and want to move the cursor back to delete the character, you can first press the “ESC” key to switch to [Normal Mode] and then delete the text. Of course, you can also delete directly.
Switching from [Normal Mode] to [Last Line Mode]
Press "shift + ;" which is actually typing ":"To exit vim and save the file, in [Normal Mode], press the “:” key to enter Last line mode. For example:
: w (save the current file) : wq (type "wq" to save and exit vim) : q! (type "q!" to exit vim without saving)2.3 Command Set in Normal Mode of vim
Insert Mode
Press "i" to switch to insert mode. After pressing "i", you will start typing from the current cursor position; press "a" to start typing from the position right after the current cursor; press "o" to insert a new line and start typing from the beginning of that line.Switching from Insert Mode to Command Mode
Press the "ESC" key.Moving the Cursor
In vim, you can directly use the arrow keys to move up, down, left, and right, but the proper way in vim is to use the lowercase letters "h", "j", "k", and "l" to move the cursor left, down, up, and right respectively. Press "G" to move to the end of the document; press "$" to move to the end of the current line; press "^" to move to the beginning of the current line; press "w" to jump to the beginning of the next word; press "e" to jump to the end of the next word; press "b" to jump back to the beginning of the previous word; press "#l" to move to the #th position in the line, e.g., "5l", "56l"; press "gg" to go to the beginning of the text; press "shift+g" to go to the end of the text; press "ctrl + b" to move back one page; press "ctrl + f" to move forward one page; press "ctrl + u" to move back half a page; press "ctrl + d" to move forward half a page.Deleting Text
"x": deletes one character at the cursor position each time it is pressed; "#x": for example, "6x" deletes the next 6 characters including the one at the cursor; "X": capital X deletes one character in front of the cursor each time it is pressed; "#X": for example, "20X" deletes the previous 20 characters; "dd": deletes the current line; "#dd": deletes # lines starting from the current line.Copying
"yw": copies characters from the cursor position to the end of the word to the buffer; "#yw": copies # characters to the buffer; "yy": copies the current line to the buffer; "#yy": for example, "6yy" copies the next 6 lines starting from the current line; "p": pastes the characters from the buffer at the cursor position. Note: All copy commands related to "y" must be used in conjunction with "p" to complete the copy and paste function.Replacing
"r": replaces the character at the cursor position; "R": replaces characters at the cursor position until the "ESC" key is pressed.Undoing the Last Operation
"u": if you mistakenly execute a command, you can immediately press "u" to return to the previous operation. Pressing "u" multiple times can execute multiple undos; "ctrl + r": redo.Changing
"cw": changes the word at the cursor position to the end of the word; "c#w": for example, "c3w" changes 3 words.Jumping to a Specific Line
"ctrl" + "g" lists the line number at the cursor position; "#G": for example, "15G" moves the cursor to the beginning of line 15.2.4 Command Set in Last Line Mode of vim
Before using last line mode, remember to press the “ESC” key to ensure you are in normal mode, then press the “:” key to enter last line mode.
Listing Line Numbers
"set nu": after typing "set nu", it will list line numbers in front of each line in the file.Jumping to a Certain Line in the File
"#": the "#" symbol represents a number; after the colon, input a number and press enter to jump to that line. For example, inputting 15 and then pressing enter will jump to line 15 of the document.Finding Characters
"/keyword": first press the "/" key, then input the character you want to search for; if the first found keyword is not what you want, you can keep pressing "n" to continue searching for the desired keyword; "?keyword": first press the "?" key, then input the character you want to search for; if the first found keyword is not what you want, you can keep pressing "n" to search backward for the desired keyword.Saving the File
"w": typing "w" after the colon saves the file.Exiting vim
"q": press "q" to exit; if you cannot leave vim, you can force exit by following "q" with a "!"; "wq": it is generally recommended to use "w" together when exiting, so that you can save the file upon exit.3. One-Click Deployment of vim Editor Environment
If your Linux machine is CentOS, click the link below for detailed instructions:
VimForCpp: Quickly transform vim into a C++ IDE
Execute the command in the shell (to make vim configuration effective under which user, execute this command under that user. Strongly “not recommended” to execute directly under root):
curl -sLf https://gitee.com/HGtz2222/VimForCpp/raw/master/install.sh -o ./install.sh && bash ./install.shYou will need to enter the root password as prompted. Your root password will not be uploaded, so please enter it with confidence.
If your Linux machine is Ubuntu, you can follow the steps below:
1. First, enter the following command under your normal user
git clone https://github.com/chxuan/vimplus.git ~/.vimplusYou may encounter access failure issues because this is an external network, which has high requirements for network connectivity. You can try a different network or try again at a different time; in short, trying multiple times may lead to success.
2. Then enter the following command
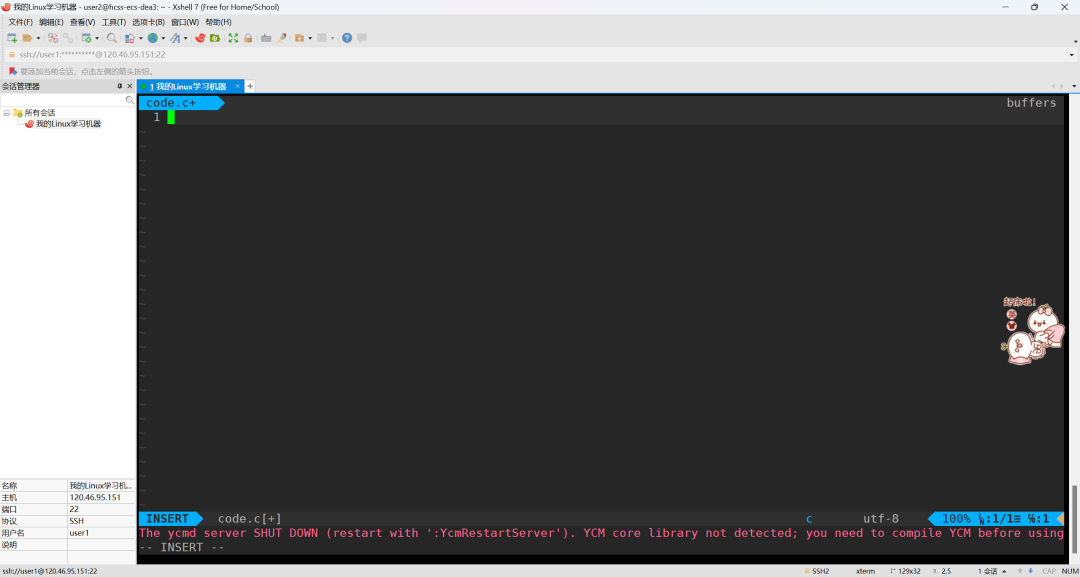
cd ~/.vimplus3. Finally, enter the last command (without sudo)
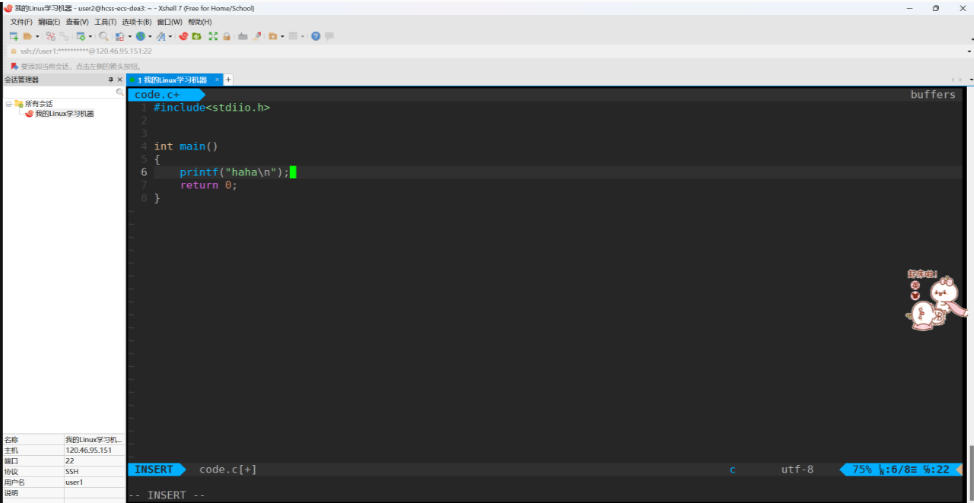
./install.shAfter completing the above three steps, your vim environment will be automatically configured! (The effect is approximately as follows)
For course inquiries, add: HCIE666CCIE
↓ Or scan the QR code below ↓

What technical points and content do you want to see?
You can leave a message below to let us know!