This article aims to help everyone understand how to easily set up machine learning inference capabilities on the Xilinx KV260 Vision AI Starter Kit running Ubuntu Desktop.
Hardware Components
-
Kria KV260 Vision AI Starter Kit
-
AMD-Xilinx Kria KV260 Vision AI Starter Kit x 1
-
AMD-Xilinx Xilinx Kria KV260 Power Supply and Adapter x 1
-
AMD-Xilinx Xilinx Kria KV260 Basic Accessory Package (Optional) x 1
-
3D Printed KV260 Stand (Optional) x 1
Overview
The release of Ubuntu Desktop 20.04.3 LTS for Xilinx development boards, including the Kria KV260 Vision AI Starter Kit, opens up a world of prototyping and development opportunities. Ubuntu is an excellent development environment for creating machine learning and computer vision applications, and now Canonical officially supports it on multiple Xilinx development boards. This project will explore how to easily implement accelerated machine learning applications on Xilinx hardware using Ubuntu 20.04.3 on the Xilinx Kria KV260 Vision AI Starter Kit.
Requirements
-
KV260 Starter Kit with Power Supply
-
USB Webcam or KV260 Basic Accessory Package
Project Setup
The setup for this project is very simple and consists of the following steps, roughly following the getting started instructions here.
Step 1: Download the Ubuntu Desktop Image for the Kria KV260 Vision AI Starter Kit from the Canonical Download Page
You can find the download here, or if you are using a Linux PC to download the desktop image file, you can use the following command from the terminal:
wget https://people.canonical.com/~platform/images/xilinx/kria/iot-kria-classic-desktop-2004-x03-20211110-98.img.xz -O ~/Downloads/iot-kria-classic-desktop-2004-x03-20211110-98.img.xzStep 2: Burn the Downloaded Ubuntu Desktop Image File to a Blank SD Card
You can use an imaging utility like BalenaEtcher or use the command on Linux to write the image file to the SD card. If using the command on Linux, make sure to read the disclaimer below before proceeding:
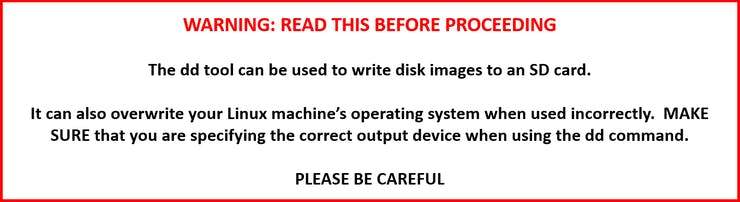
The following command can be used to write the SD card image using Linux:
Note: The SD card /dev/sd mentioned above is unique to your system. You need to replace with the appropriate drive mapping that fits your system. For example, could be sda, sdb, sdc, etc., depending on how your system enumerates SD card devices. Ensure that the name specified in of= above is the device enumeration, not a partition (i.e., of=/dev/sd is correct, but of=/dev/sd1 is not).
Once the SD card writing process is complete, you can use the following command to eject the device:
sudo eject /dev/sdNote: The SD card device enumeration from the previous step also applies to this step.
Step 3: Set Up the Hardware
The KV260 should be connected according to the instructions in the getting started guide at https://www.xilinx.com/products/som/kria/kv260-vision-starter-kit/kv260-…
Step 4: Boot Ubuntu on the Kria KV260
The Xilinx getting started page describes how to boot Ubuntu on the KV260 and initialize the Ubuntu image using Xilinx utilities.
Please follow the instructions at https://www.xilinx.com/products/som/kria/kv260-vision-starter-kit/kv260-…
Step 5: Install Machine Learning Accelerator Overlays on the KV260
The programmable logic (FPGA structure) of the KV260 can dynamically load user-customizable hardware accelerators. Prebuilt snapshots can be used to install basic functionality, including programmable logic overlays. The prebuilt overlays are the same as those used in the NLP-SmartVision accelerated application from the Kria App Store. The NLP-SmartVision application includes a B3136 DPU for accelerating machine learning inference applications, as well as a MIPI capture pipeline for interfacing with the onboard AP1302 ISP. Even when installing the NLP-SmartVision application, we can still use the overlays it provides to create our own custom applications.
The following command from the Xilinx Wiki will install the NLP-SmartVision snap.
sudo xlnx-config --snap --install xlnx-nlp-smartvisionNote: The xlnx-config utility was installed in Step 4 above.
We can also install the Vitis-AI library example using the prebuilt snap. The Vitis-AI library snap installs precompiled test applications for running various machine learning tasks related to models in the Xilinx Vitis-AI Model Zoo.
The following command will install the Vitis-AI library snap.
sudo snap install xlnx-vai-lib-samplesAfter installing the Vitis-AI library example snap, we are now set up and ready to create our own custom machine learning applications.
>>> Scan or Click “Read the Original” for More Content