“ I have seen many articles about Vim configurations online, and I have also written some simple Vim configuration tutorials myself. However, I think this article is well-written, so after communicating with the author, I decided to repost it. I hope this Vim configuration article can be helpful to everyone.”
I have selected several plugins to help you create a simple and practical Vim.
1. Install Necessary Packages
To ensure a smooth installation and configuration process, we need to install some necessary packages first.
First, we need to use curl and git to download data, so these two must be installed.
Secondly, as I mentioned in the previous article, Vim’s navigation requires support from ctags, so we need to install universal-ctags. Additionally, there is a more powerful software than ctags, called gtags, which we will also install. The package providing gtags is global.
Next, when using Vim, we need a full-text search tool, and I recommend rg, so we need to install ripgrep.
Finally, we need to be able to compile C and Python programs. Therefore, we also need to install build-essential and cmake, as well as python3-dev. Since we are at it, let’s also install clang and clangd.
The installation command is as follows:
sudo aptitude install curl git python3-absl\
universal-ctags global ripgrep build-essential \
cmake python3-dev clang clangd
Later, I found out that clangd can be omitted because YouCompleteMe will download clangd itself during compilation.
2. Install vim-plug
Using Vim normally requires plugins, so we need to install a plugin manager, and I choose vim-plug. First, go to GitHub to find vim-plug, and then install it according to the instructions on the homepage.
However, http://raw.githubusercontent.com is often unstable, which frequently causes installation failures. But no worries, we can clone the project or download the zip package. (This method can also be used for the ohmyzsh installation failure mentioned in the previous article.) We only need the <span>plug.vim</span> file from it.
Copy this file to the <span>.vim/autoload</span> directory in your home directory. Then, open the <span>.vimrc</span> file and configure vim-plug. The plugin configuration is straightforward: first call <span>call plug#begin()</span>, then call <span>call plug#end()</span>, and place the required plugins using <span>Plug <plugin_name></span> between these two function calls. Finally, enter the <span>:PlugInstall</span> command to install.
vim-plug has powerful features, allowing you to configure commands to run after plugin installation and to configure delayed loading of plugins. My strategy is to visit the homepage of each plugin I install, and configure it according to the instructions provided for vim-plug.
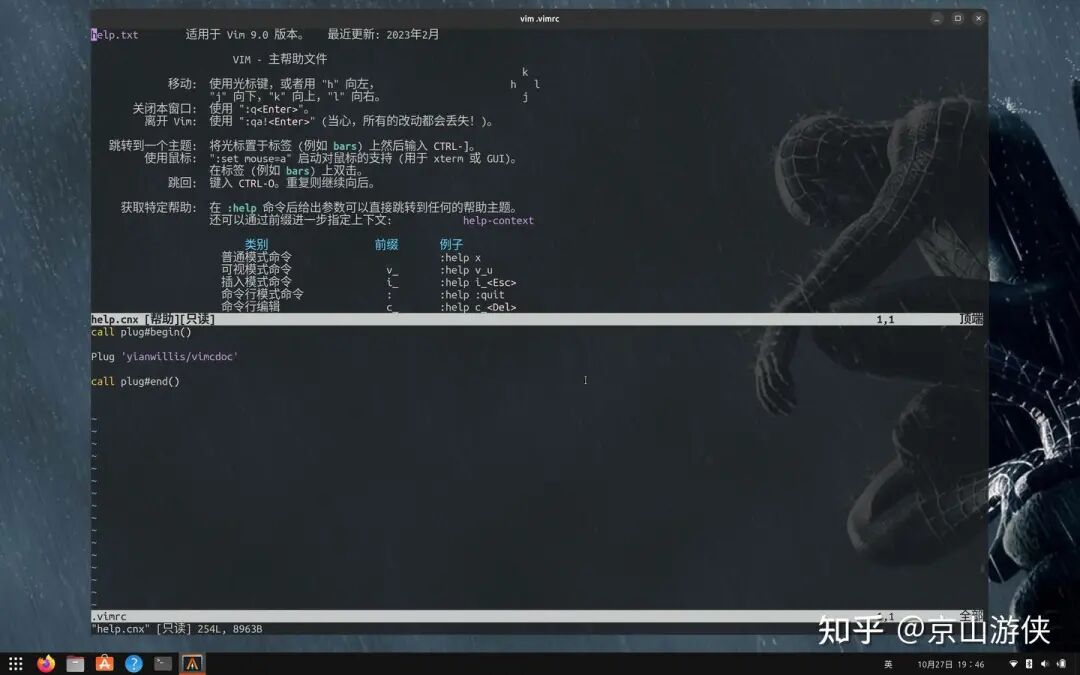
Let’s try installing a plugin first, I will choose the previously mentioned vimcdoc. After installing this plugin, we can read the Chinese help. As shown in the figure below:
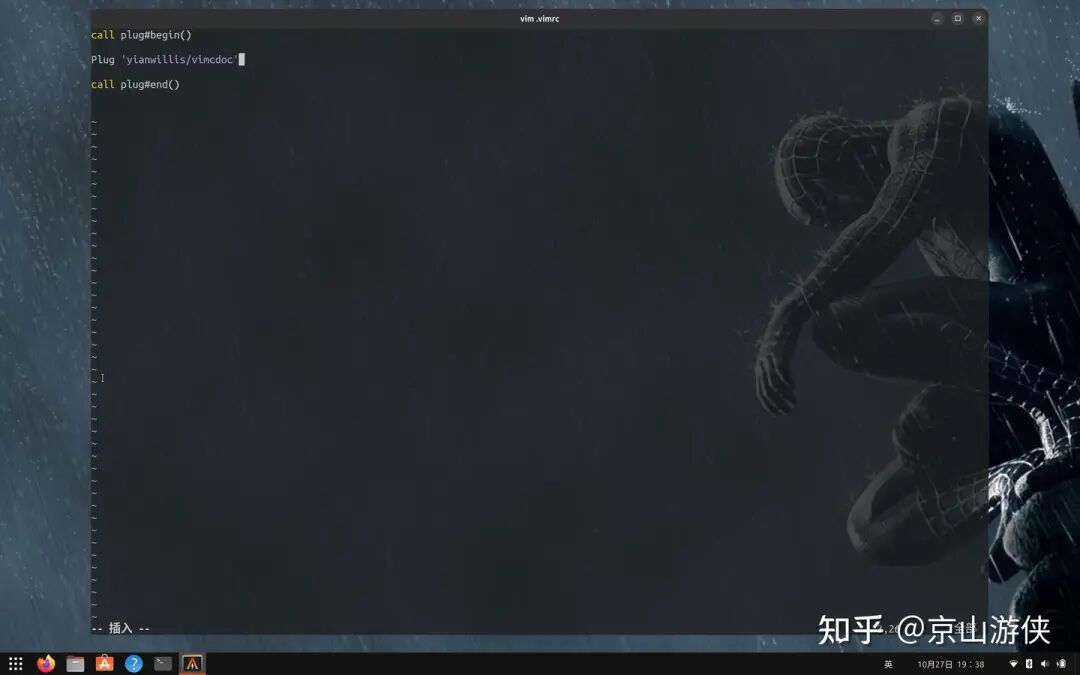
Enter the <span>:PlugInstall</span> command to install the vimcdoc plugin. After installation, enter <span>:help</span> to read the Chinese documentation. As shown in the figure below:
3. Configure Basic Options for Vim
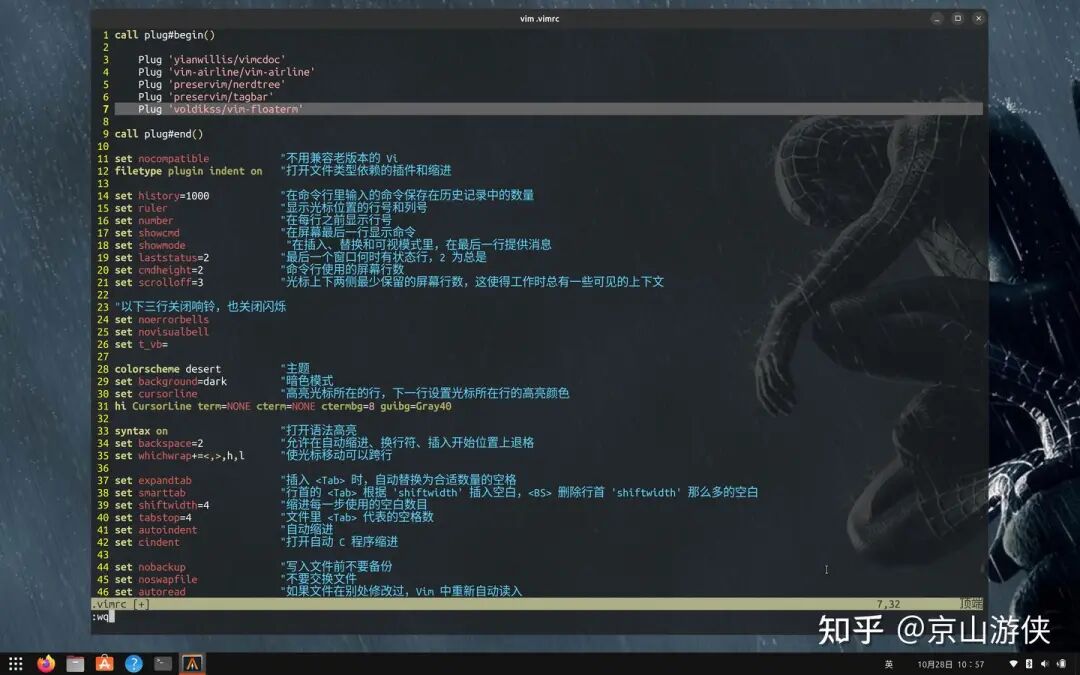
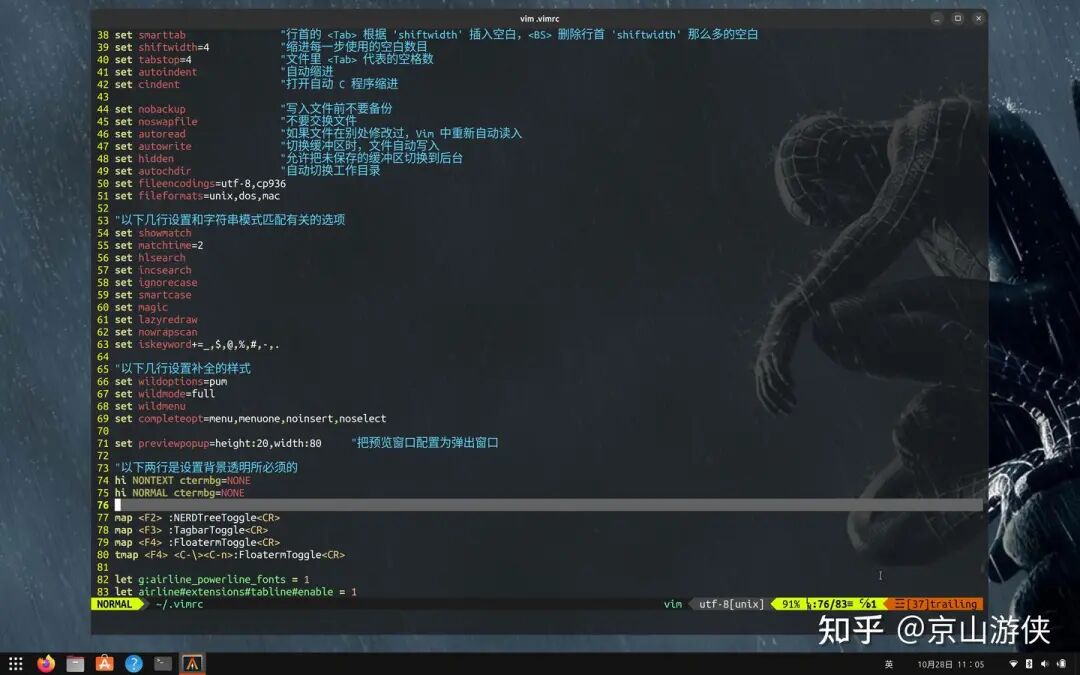
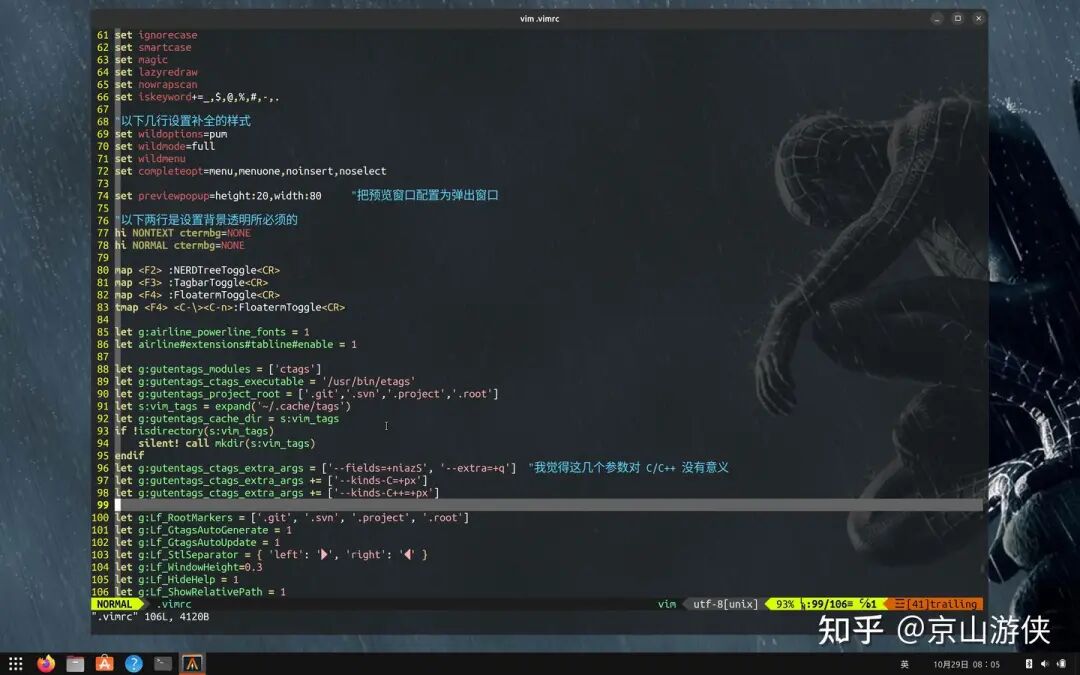
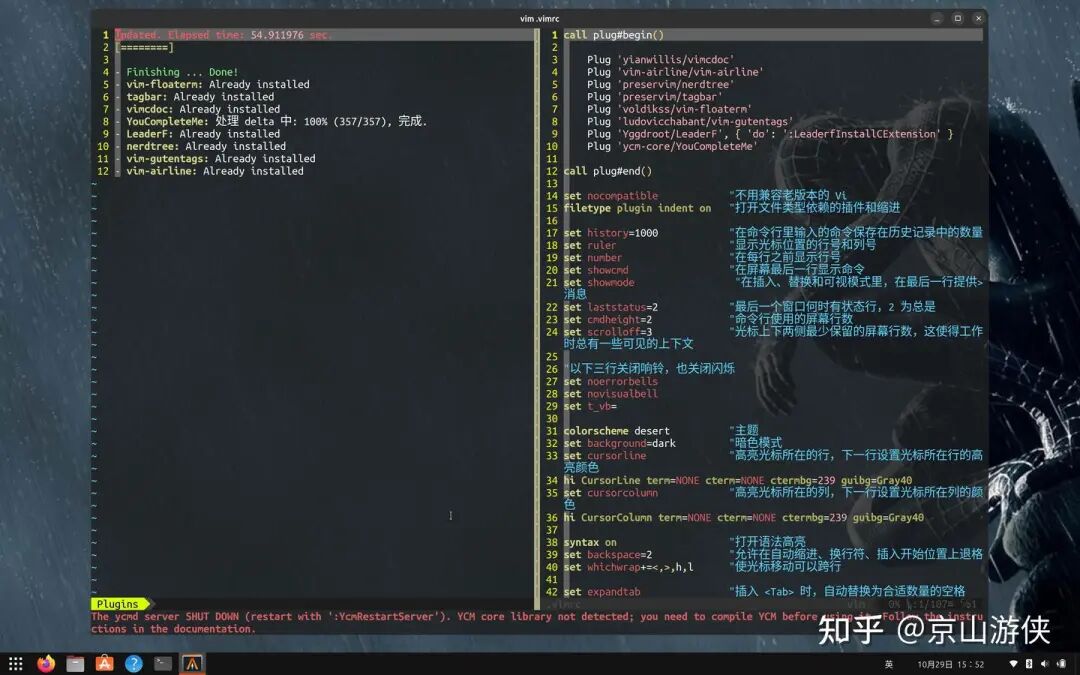
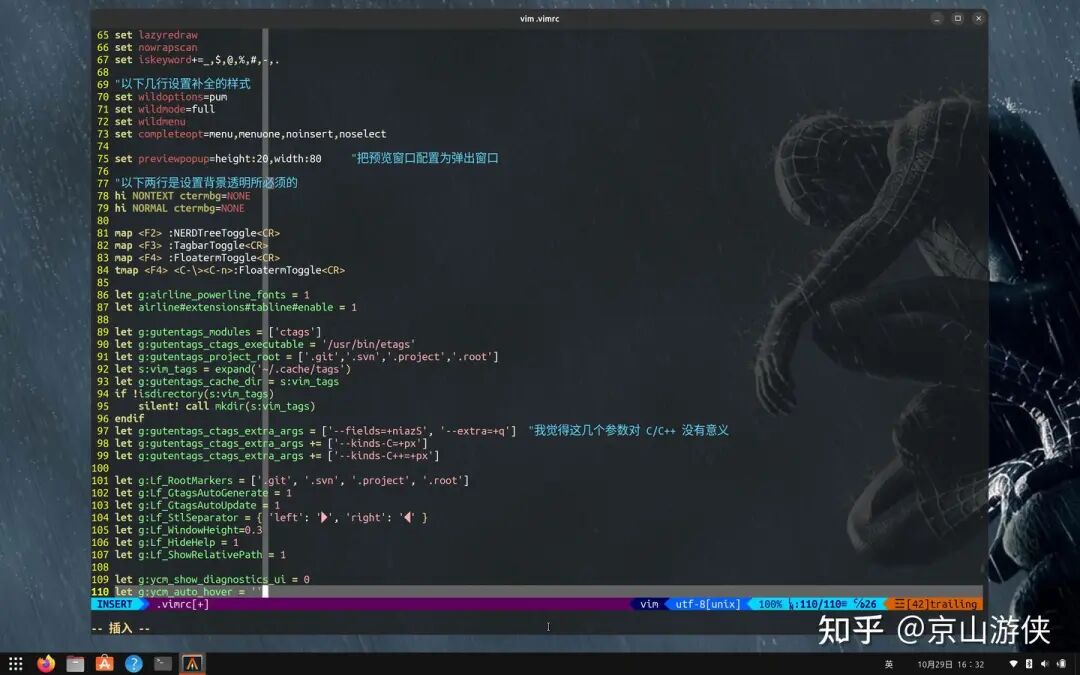
Next, I will directly paste my configuration options, as shown in the following two figures:
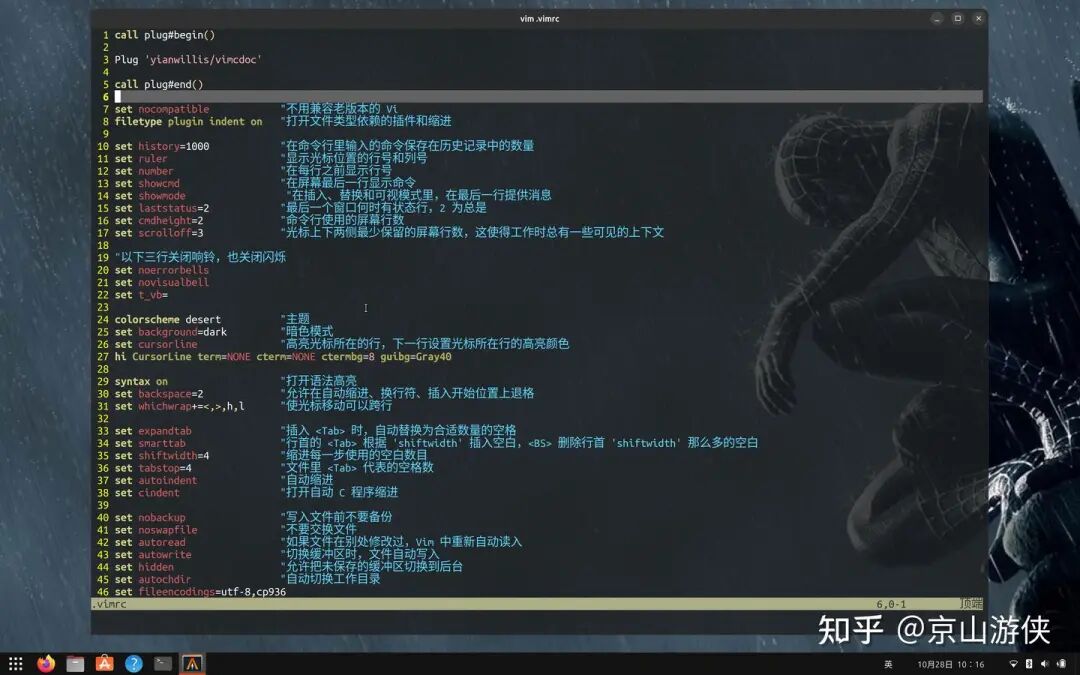
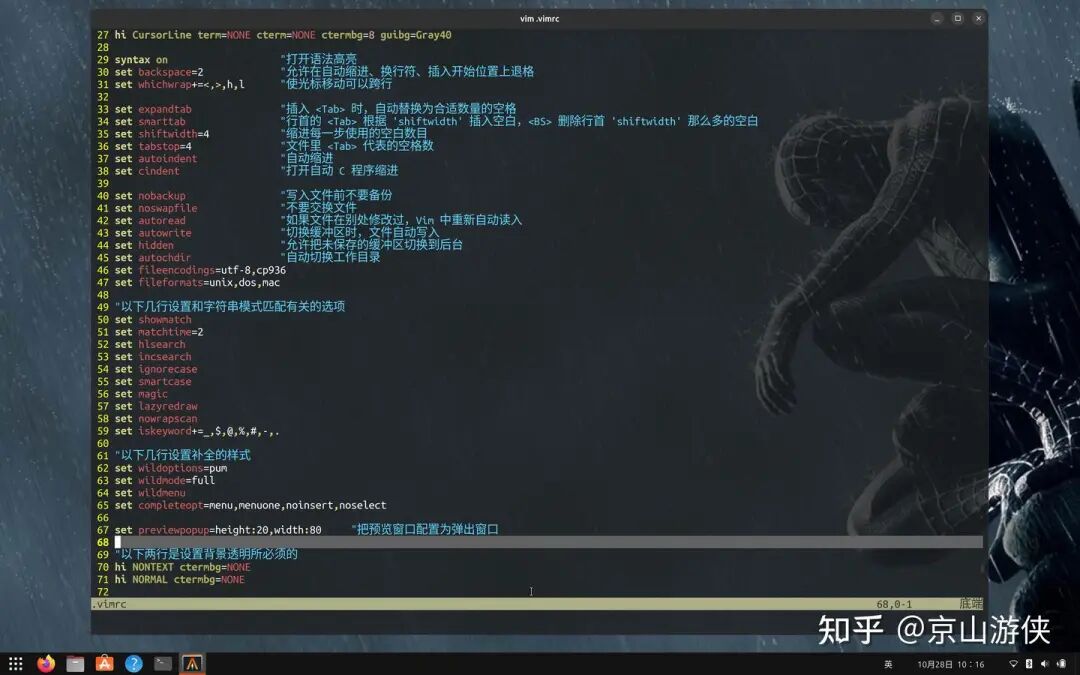
The above configuration options were gradually improved while reading the Vim user manual. The only additions are related to command completion and auto-completion settings, which I adjusted to my preferred style, and I also configured a transparent background.
With the Chinese help, everyone can check the meaning of each option themselves. This configuration file is very concise, with less than 70 lines including blank lines and comments.
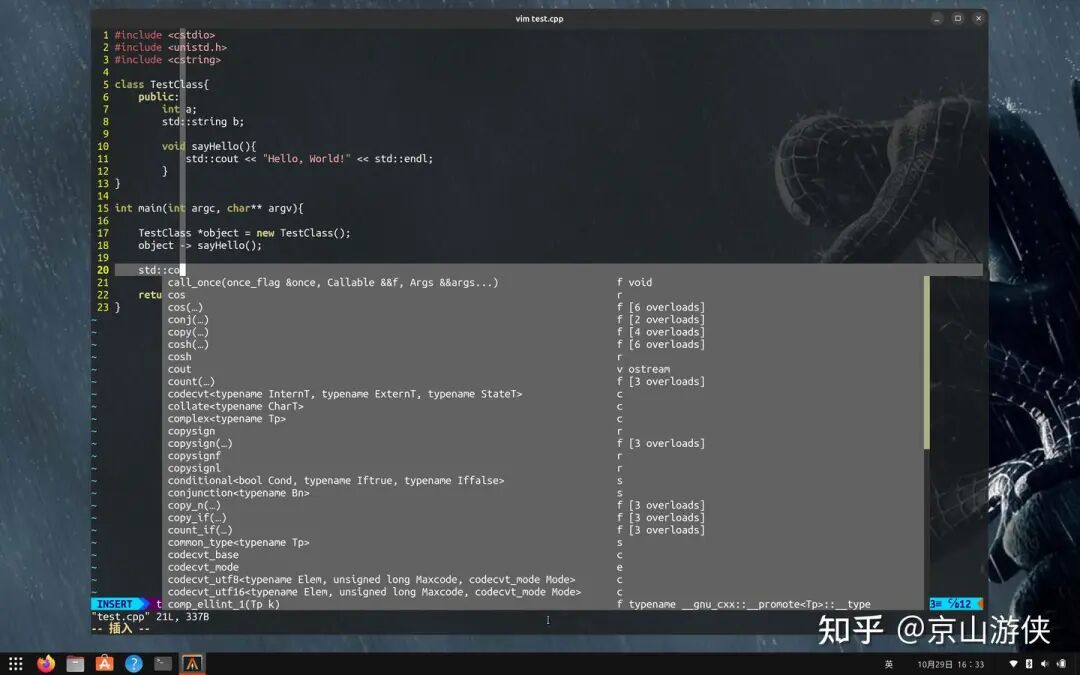
My command completion looks like this:
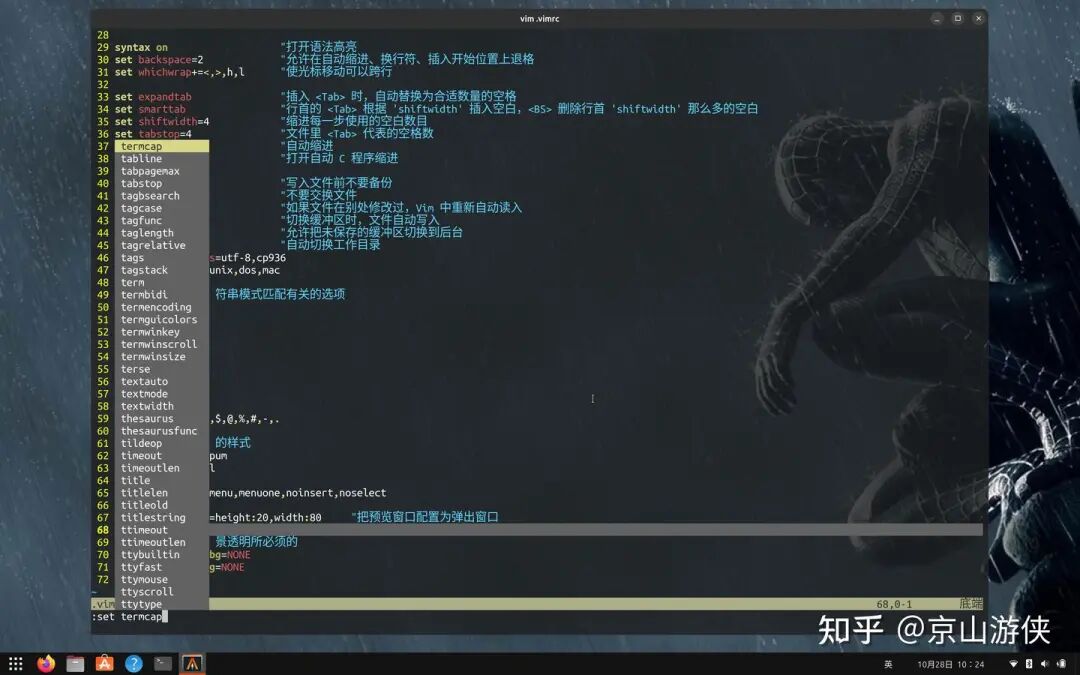
My auto-completion looks like this:

I specifically set it to not auto-select or auto-insert, and I do not want a preview. I need to use <span>Ctrl-N</span> and <span>Ctrl-P</span> to select and insert.
4. Install Several Plugins to Improve the Interface
I have chosen four plugins: vim-airline, nerdtree, tagbar, and vim-floaterm. Among them, vim-airline is a beautification plugin, nerdtree provides file tree functionality, tagbar provides a symbol list functionality, and vim-floaterm gives us a floating terminal. Their installation is very simple, as shown in the figure below:
Add the plugin names between <span>call plug#begin()</span> and <span>call plug#end()</span>, save, and then enter the <span>:PlugInstall</span> command to install.
These plugins require very little configuration, mainly to configure a few key mappings for quickly opening and closing them. The vim-airline configuration is set to use nerd fonts and display the tabline. As shown in the figure below:
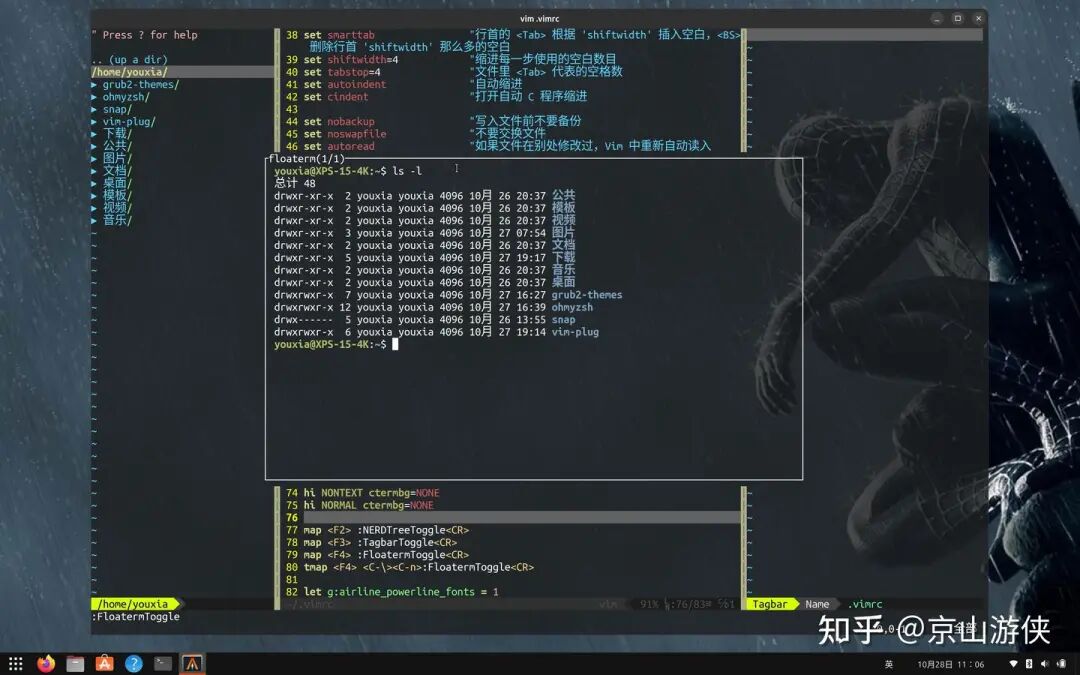
Now, we can use the <span>F2</span> key to open and close the file tree, the <span>F3</span> key to open and close the symbol list, and the <span>F4</span> key to open and close the terminal. As shown in the figure below:
5. Use vim-gutentags to Manage Tags Files
The previous article discussed the importance of tags files and introduced the tool universal-ctags for generating tags files. However, the most convenient method should be to use vim-gutentags to automatically generate tags files and automatically add them to Vim.
vim-gutentags supports many modules, including ctags, cscope, pycscope, gtags_cscope, cscope_maps, etc. Here, we decide to use vim-gutentags to manage ctags. As for gtags, that is another topic, and I will let the LeaderF plugin introduced later manage it.
I won’t elaborate on the installation; when managing plugins with vim-plug, the installation is always the same.
Let me talk about the configuration. vim-gutentags will search for specific files in the directory, such as <span>.git</span>, <span>.svn</span>, etc. If found, it considers the directory a separate project and will automatically generate tags files for it. I set this special file to <span>.project</span> and <span>.root</span>. At the same time, I set it to place the tags files in the <span>.cache/tags</span> directory in the home directory for centralized management, avoiding pollution of the project directory. Therefore, the configuration for vim-gutentags is as follows:
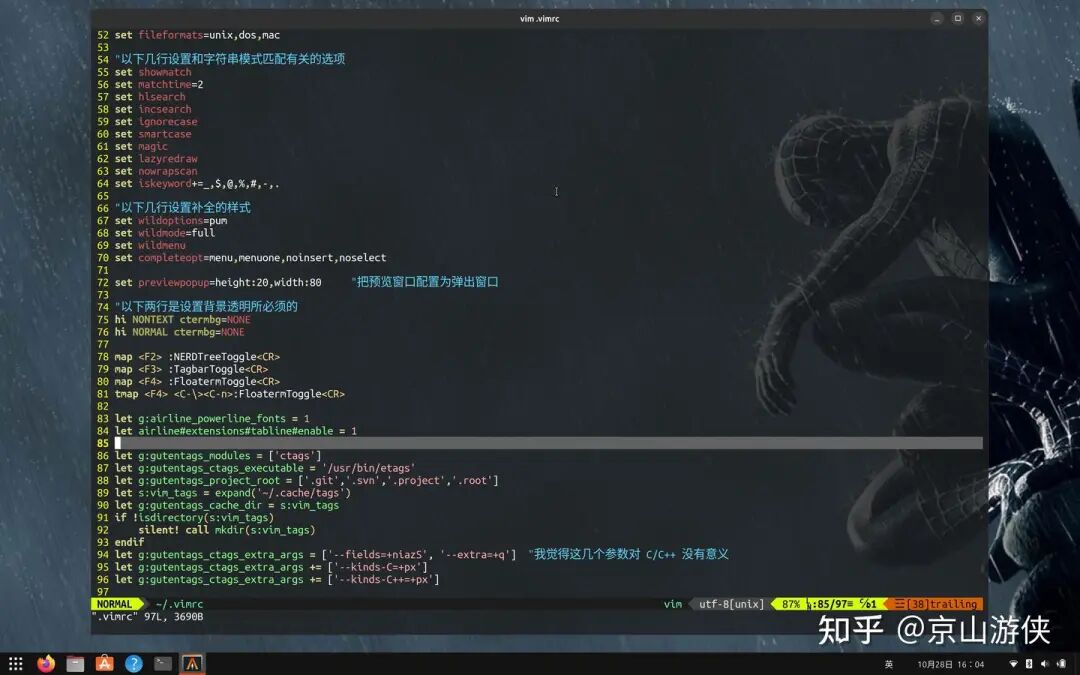
Why do we add <span>+px</span> to the parameters <span>--kinds-C</span> and <span>--kinds-C++</span>? This is because we consider that C and C++ specific header files may only contain function declarations without function definitions, and external defined variables are also declared in header files. As for <span>--fields</span> and <span>--extras</span>, I believe they are unnecessary for C and C++ languages. The meanings of these parameters can be viewed using <span>ctags --list-fields</span> and <span>ctags --list-extras</span>. As for which ones to include or exclude, everyone is welcome to discuss.
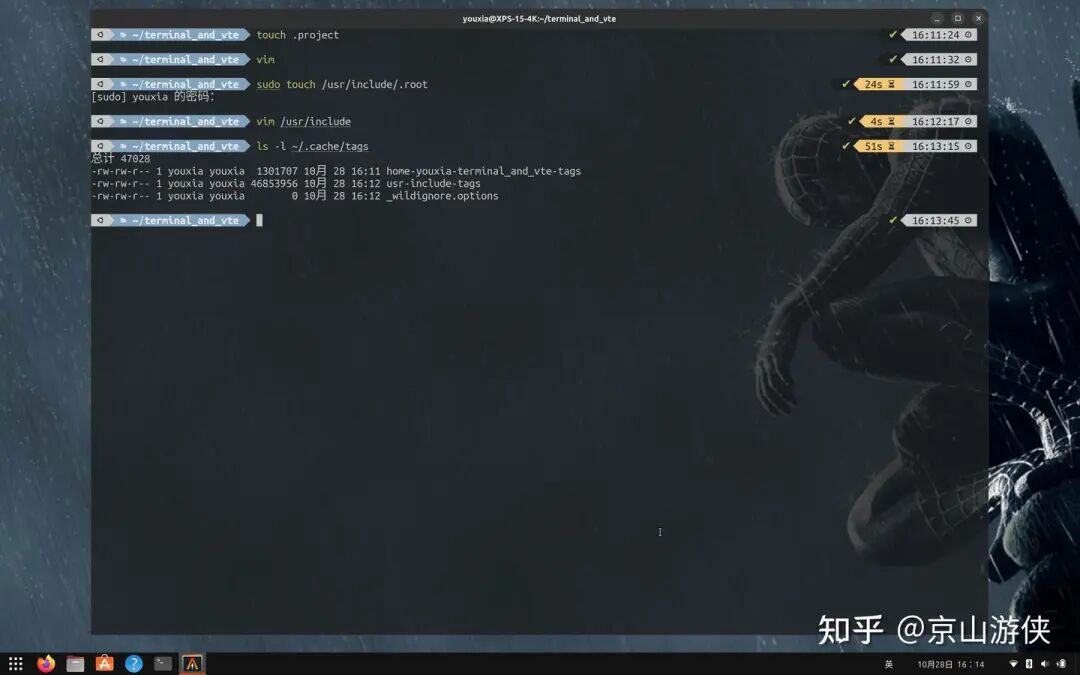
For practical use, enter the <span>terminal_and_vte</span> directory, use <span>touch .project</span> to create an empty <span>.project</span> file, and then open any source code file in that directory with Vim, and a tags file will be automatically generated. The tags file will be located in the <span>.cache/tags</span> directory in the home directory.
Let’s take it a step further and use <span>sudo touch /usr/include/.root</span> to create an empty <span>.root</span> file in the <span>/usr/include</span> directory. Then, open any source code file in the <span>/usr/include</span> directory with Vim, and it will generate tags files for all header files in the system. If you need to use these header files’ tags files later, you can manually add them to Vim. As shown in the figure below:
At this point, we can happily jump between codes, as shown in the figure below:

Furthermore, you can use the <span>:ptag</span> command to preview a tag’s definition, as shown in the figure below:
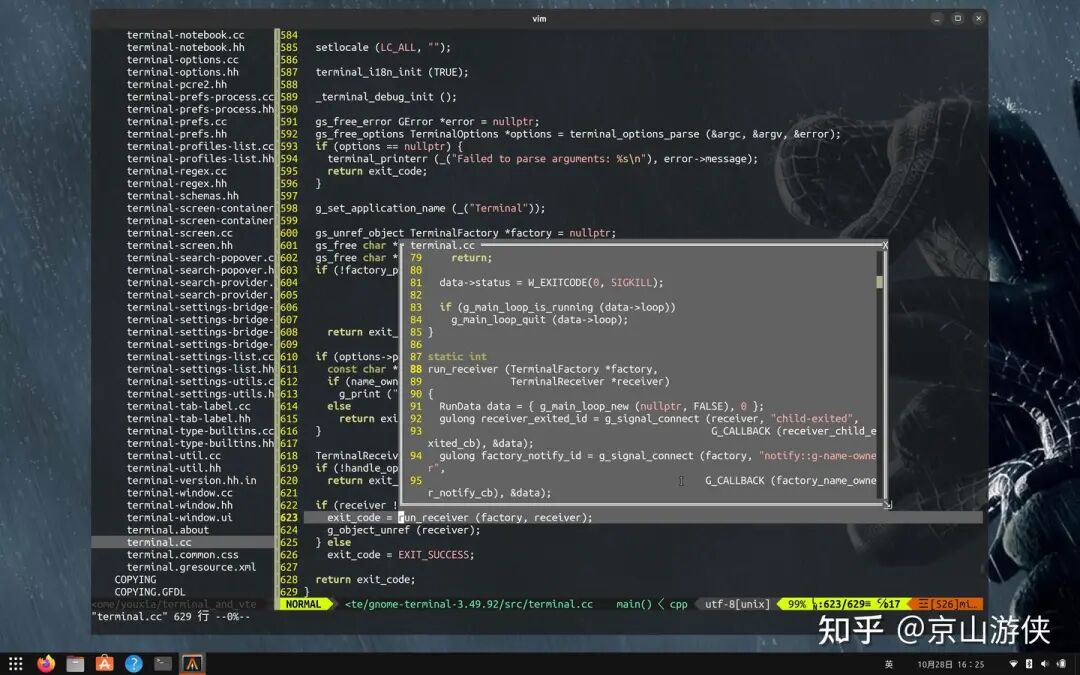
The preview window that was not mentioned in the previous article is presented here. Thanks to the terminal and popup window features introduced after Vim 8, we experienced the pop-up terminal window and pop-up preview window in this article. Isn’t it great?
Use the <span>:pclose</span> command to close the preview window.
6. Using LeaderF, rg, and gtags
In this section, I will introduce a slightly heavier plugin, LeaderF. LeaderF is mainly used for file searching, allowing you to search for desired files in projects, buffers, and MRU (most recently used files list), primarily by fuzzy searching file names. But can we search by file content? Yes, LeaderF’s rg subcommand provides this functionality, which requires the external tool ripgrep. Additionally, LeaderF has a gtags module that can manage the gtags database and find symbol definitions and references based on gtags. We will experience this shortly.
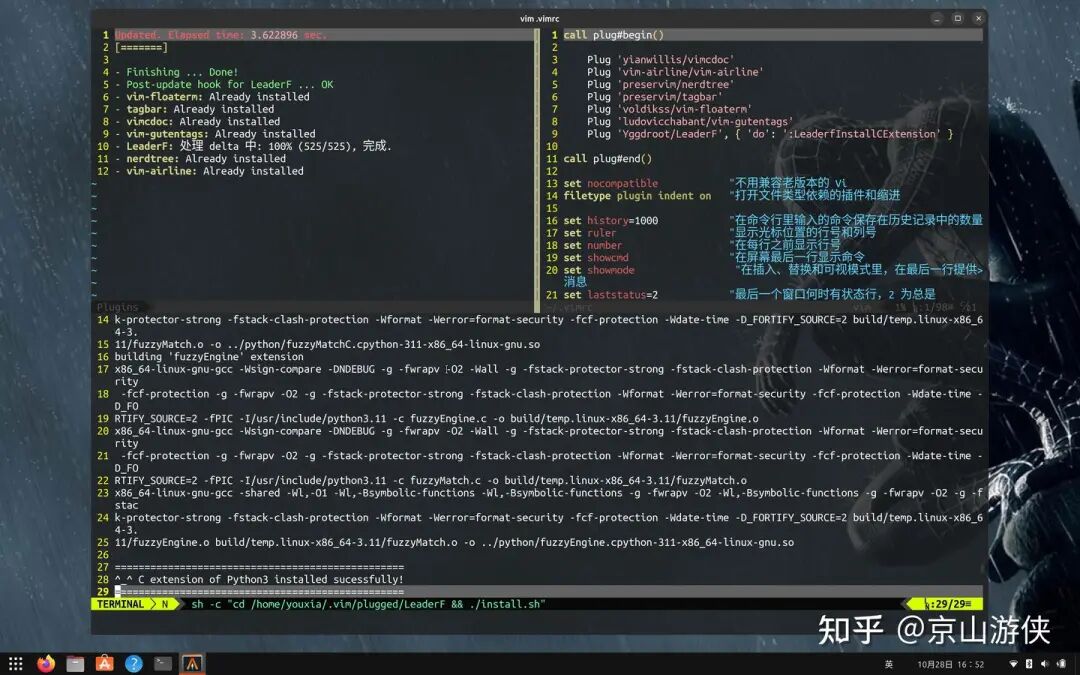
Find the LeaderF homepage on GitHub and configure it according to the instructions on the homepage. As follows:
Plug 'Yggdroot/LeaderF', { 'do': ':LeaderfInstallCExtension' }Add it between <span>.vimrc</span> files <span>call plug#begin()</span> and <span>call plug#end()</span>. You can see that this configuration specifies that after installing LeaderF, a command should be run. Enter the <span>:PlugInstall</span> command to install. The installation is successful as shown in the figure below:
The next step is to configure LeaderF. LeaderF claims to be ready to use out of the box, but since we are using gtags, we still need to add a few simple configurations, which are to specify the project root directory markers and enable automatic generation and updating of the gtags database. As shown in the figure below:
The gtags database automatically generated by LeaderF is placed in the <span>.cache/LeaderF/gtags</span> directory in the home directory, and this option does not require our configuration. The gtags database will not pollute project files.
Regarding the use of LeaderF, I suggest everyone use its command line more, as this will help improve our understanding of LeaderF. Enter <span>:Leaderf -h</span> to view the help for the <span>:Leaderf</span> command. Please note that the command here is slightly different from the plugin name; <span>f</span> is lowercase. As shown in the figure below:

As you can see, the <span>:Leaderf</span> command has many subcommands, among which the more important ones are <span>file buffer mru tag gtags rg</span>. Use <span>:Leaderf <subcommand> -h</span> to view the help for each subcommand. I won’t elaborate on this here.
Now let’s get practical.
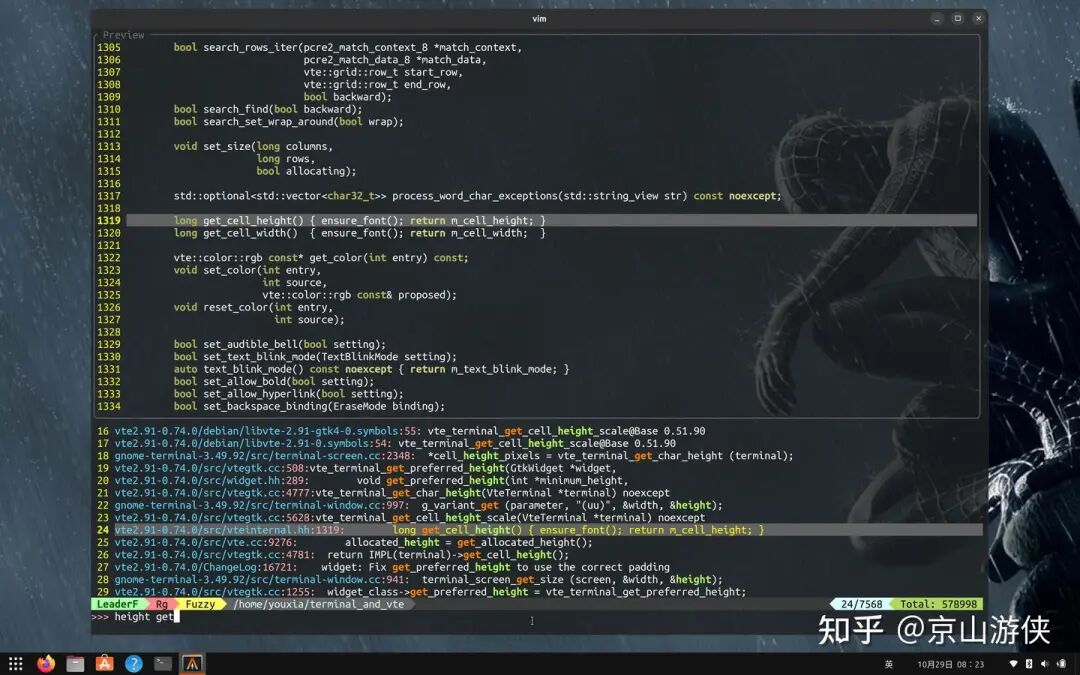
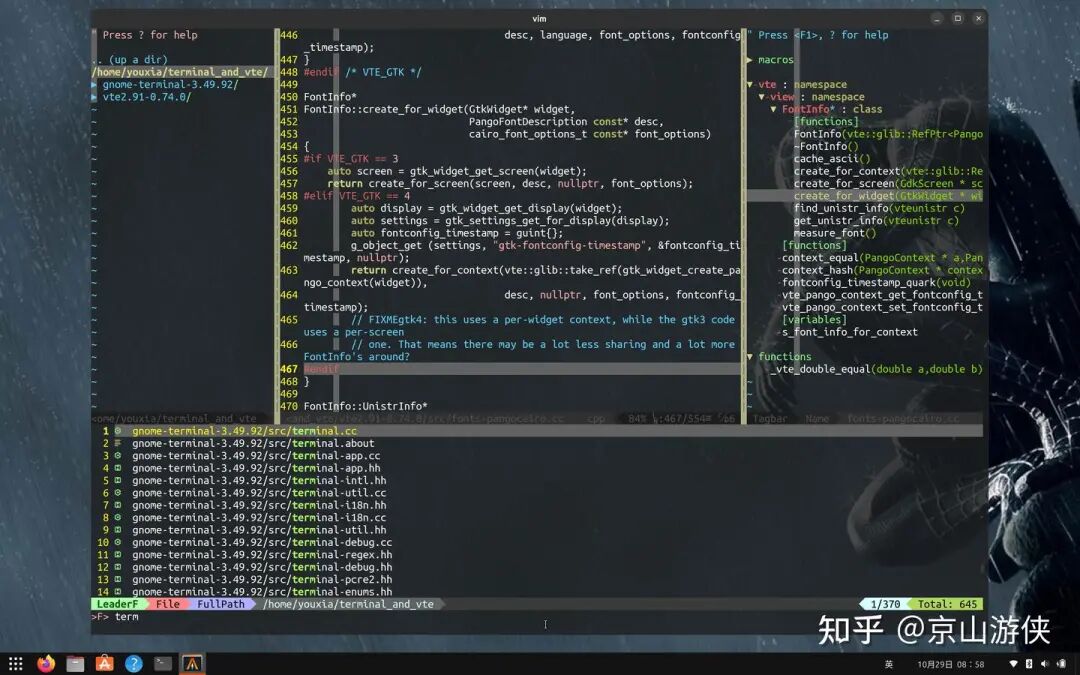
Using the example of the gnome terminal having abnormal line height, enter the source code directory <span>terminal_and_vte</span>, which already has the empty <span>.project</span> file we created earlier. Start Vim in that directory.
First, let’s experience the full-text search function of rg. Think about it, the abnormal line height of gnome terminal must be related to height and definitely related to get, so we enter the <span>:Leaderf rg</span> command, and then in the pop-up interface, enter <span>height get</span>, and we can find many related contents. In the LeaderF window, use <span>Ctrl-J</span> and <span>Ctrl-K</span> to switch between entries, and soon we find the <span>get_cell_height</span> function, as shown in the figure below:
I think the <span>:Leaderf tag</span> command should also be able to accomplish this task, and searching in tags may yield more accurate results. From the screenshot above, we can see that LeaderF is located at the bottom of the screen by default, and it provides a preview of the search results. We can use the <span>--popup</span> parameter to use a pop-up window and use the <span>--no-auto-preview</span> parameter to disable the preview.
Continuing from the screenshot above, the <span>get_cell_height</span> function directly returns the <span>m_cell_height</span> member variable, and based on ctags, we can directly jump to the definition of <span>m_cell_height</span>. But where is this variable assigned?
This is where gtags comes into play. The functionality of ctags is limited; it can only be used to find symbol definitions. However, gtags goes further; it can find both symbol definitions and references. This means that for a function, it can find not only where the function is defined but also where it is called. For a variable, it can find not only where the variable is defined but also where it is assigned and used, etc.
Use the <span>:Leaderf gtags</span> subcommand to invoke the functionality of <span>gtags</span>, with the parameter <span>-d</span> indicating to find definitions and the parameter <span>-r</span> indicating to find references. Below, I will use a more flexible parameter <span>--by-context</span>, which will automatically determine whether to find definitions or references based on the content under the cursor. As shown in the following two figures:
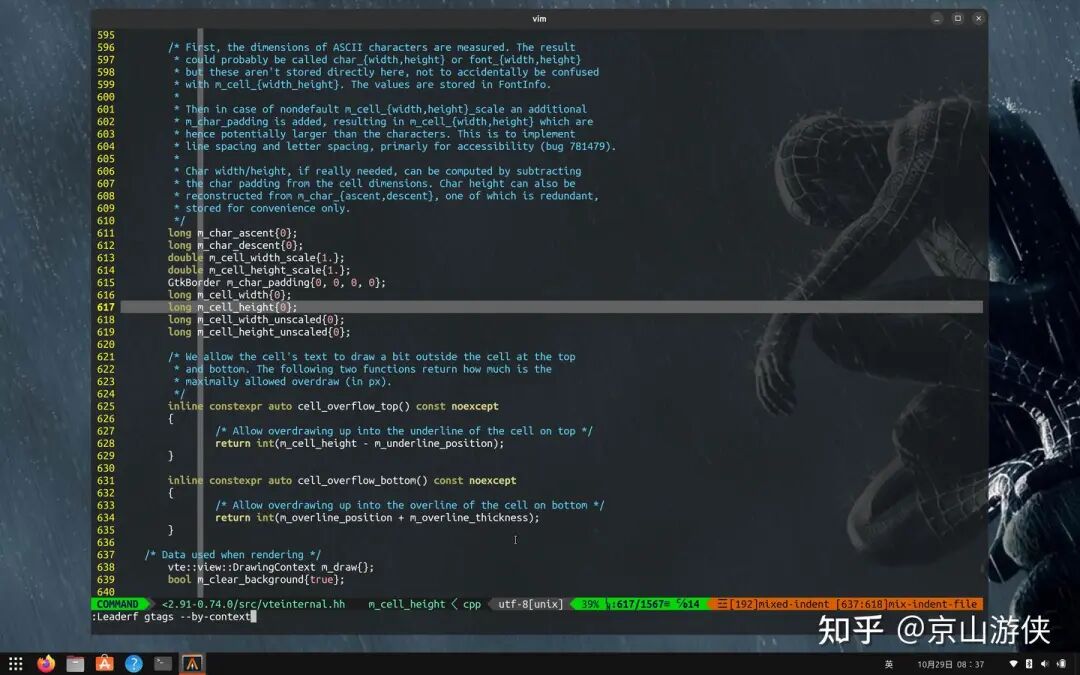

We can see that the initialization of <span>m_cell_height</span> uses the <span>m_fonts[]</span> variable, and then based on the definition, we jump to the definition of <span>m_fonts</span>, and by checking references, we find the initialization of <span>m_fonts</span>. This way, we can jump to definitions and look for references, gradually sorting out the logic of the code, and soon we can locate the <span>gtk_widget_creat_pango_context</span> function. The facts indicate that the issue with the abnormal line height of the gnome terminal should be attributed to gtk or pango.
If using a pop-up window, the interface of LeaderF looks like this:
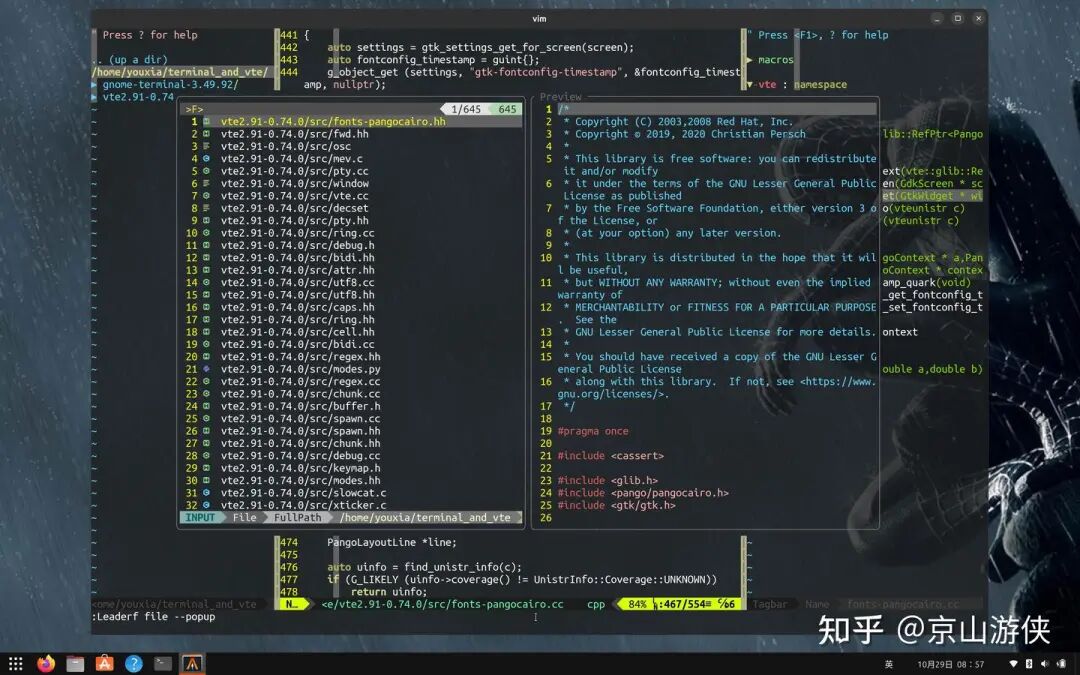
It’s quite impressive, isn’t it? If you turn off the preview function, the interface looks like this:
To use LeaderF, I made a few slight modifications to the previous configuration, turning off the <span>audochdir</span> option, which ensures that the working directory is always the project root directory, making file searching more convenient.
Alright, that concludes the discussion on LeaderF. In the next section, we will experience the most heavyweight plugin in this article, YouCompleteMe, which is also the last plugin.
7. Using YouCompleteMe for Auto-Completion
Installing YouCompleteMe is straightforward, just like installing the other plugins. Add <span>Plug 'ycm-core/YouCompleteMe'</span> to the configuration file, and then run <span>:PlugInstall</span>. Just hope GitHub doesn’t act up. As shown in the figure below:
After installation, it also needs to be compiled. Enter the directory where YouCompleteMe is located and run the <span>install.py</span> script, as shown in the figure below:

I chose the <span>--clangd-completer</span> option, even though the help file states it is EXPERIMENTAL.
During the compilation process, there was a small hiccup; it actually failed, as shown in the figure below:
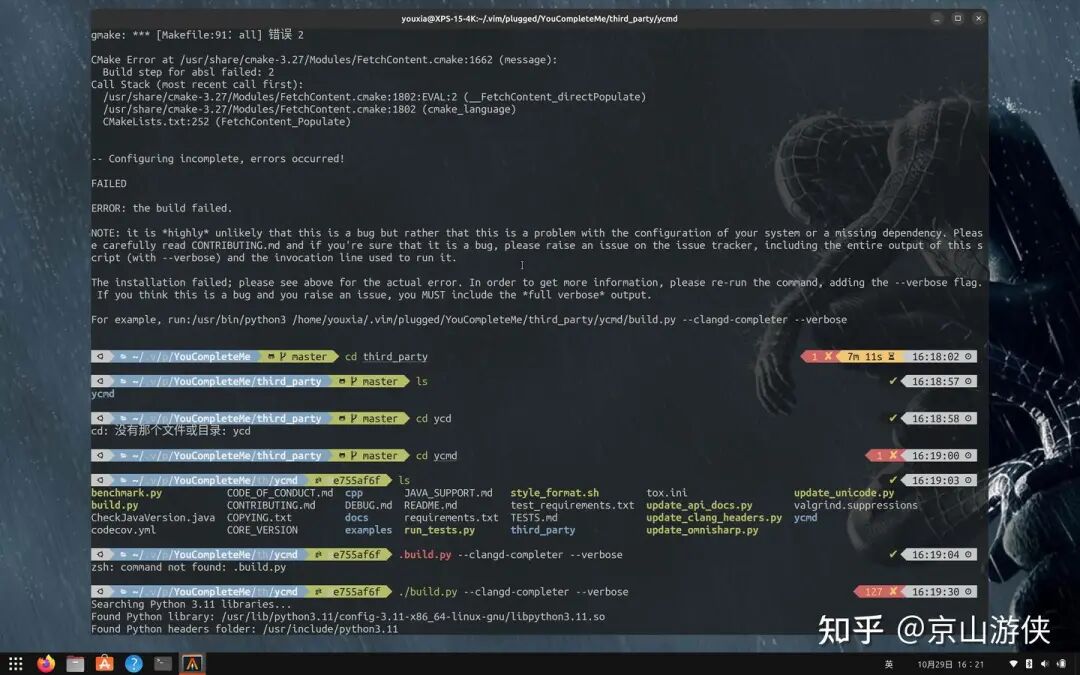
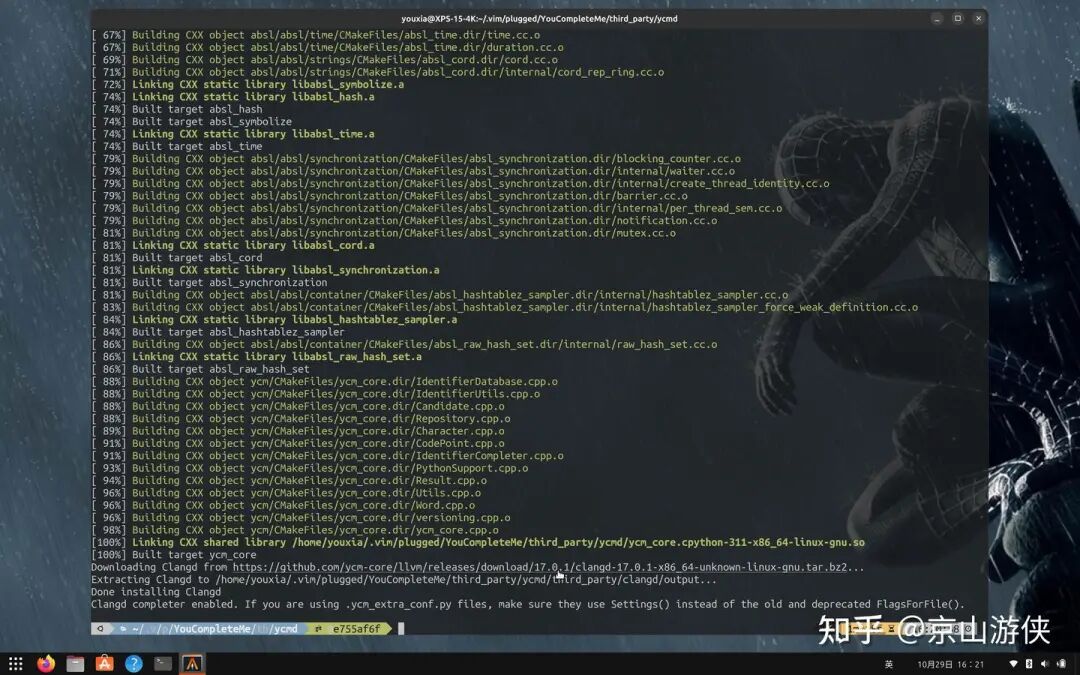
Then I followed the prompt and directly ran <span>third_party/ycmd/build.py --clangd-completer --verbose</span>. I originally intended to see the output information, but unexpectedly, it succeeded. As shown in the figure below: (I seriously suspect that the previous failure was due to the lack of the python3-absl library because I found the word absl in the error message before running this build.py.)
Next, let’s write a small program to test the auto-completion feature, as shown below:
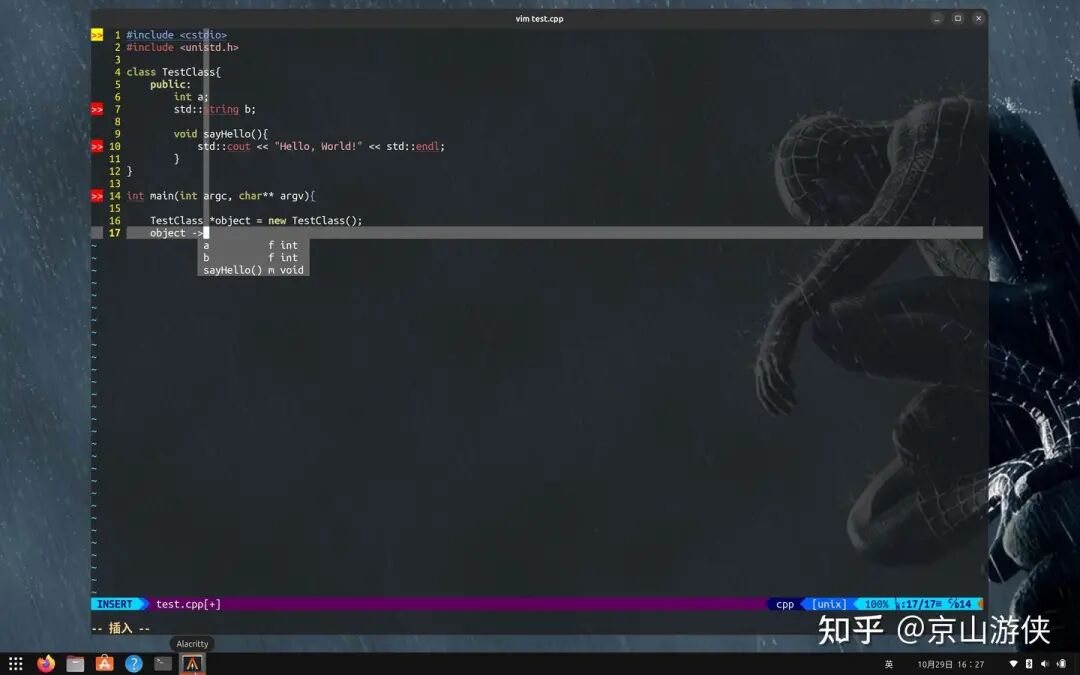
The auto-completion options pop up automatically, and the functionality is fine. In addition to auto-completion, I found that YouCompleteMe also has syntax checking functionality, mainly manifested in the red and yellow arrows and underlines in the interface. Quite annoying.
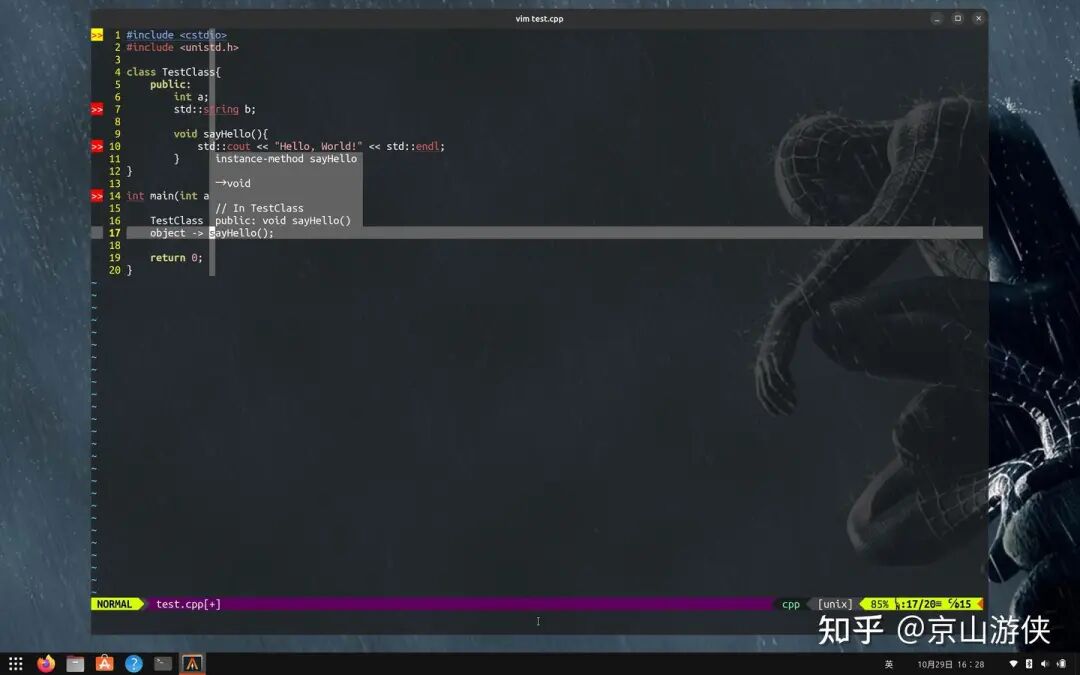
Another annoying feature is that when the cursor hovers over a function, a preview small window pops up. Obviously, this window is not as powerful as the <span>:ptag</span> functionality and only adds to the annoyance. Therefore, I made the following two configurations for the YouCompleteMe plugin:
The interface became much cleaner. The auto-completion feature is quite useful, as shown in the figure below:
Finally, I remind you again to use <span>Ctrl-N</span> and <span>Ctrl-P</span> to make selections, of course, you can also use the up and down arrows.
At this point, our Vim is completely configured. Eight plugins, 110 lines of configuration, and we are done.
Finally, here is my configuration file:
call plug#begin() Plug 'yianwillis/vimcdoc' Plug 'vim-airline/vim-airline' Plug 'preservim/nerdtree' Plug 'preservim/tagbar' Plug 'voldikss/vim-floaterm' Plug 'ludovicchabant/vim-gutentags' Plug 'Yggdroot/LeaderF', { 'do': ':LeaderfInstallCExtension' } Plug 'ycm-core/YouCompleteMe'call plug#end()set nocompatible " Do not be compatible with old versions of Vi set filetype plugin indent on " Enable file type dependent plugins and indentation set history=1000 " Number of commands saved in command line history set ruler " Show cursor position line number and column number set number " Show line numbers before each line set showcmd " Display commands in the last line of the screen set showmode " Provide messages in the last line during insert, replace, and visual modes set laststatus=2 " When the last window has a status line, 2 means always set cmdheight=2 " Number of screen lines used for command line set scrolloff=3 " Minimum number of screen lines to keep above and below the cursor, ensuring some visible context while working " The following three lines turn off the bell and blinking set noerrorbells set novisualbell set t_vb=colorscheme desert " Theme set background=dark " Dark mode set cursorline " Highlight the line where the cursor is, the next line sets the background color of the cursor line hi CursorLine term=NONE cterm=NONE ctermbg=239 guibg=Gray40 set cursorcolumn " Highlight the column where the cursor is, the next line sets the background color of the cursor column hi CursorColumn term=NONE cterm=NONE ctermbg=239 guibg=Gray40 syntax on " Enable syntax highlighting set backspace=2 " Allow backspacing over auto indent, line breaks, and the start of insert set whichwrap+=<,>,h,l " Allow cursor movement to cross lines set expandtab " Replace <Tab> with the appropriate number of spaces when inserting set smarttab " Insert spaces according to 'shiftwidth' at the beginning of the line, <BS> deletes that many spaces set shiftwidth=4 " Number of spaces used for each step of indentation set tabstop=4 " Number of spaces that <Tab> represents in the file set autoindent " Enable auto indentation set cindent " Enable automatic C program indentation set nobackup " Do not backup before writing files set noswapfile " Do not create swap files set autoread " Automatically read the file if it has been modified elsewhere set autowrite " Automatically write the file when switching buffers set hidden " Allow switching to the background with unsaved buffers set fileencodings=utf-8,cp936 set fileformats=unix,dos,mac " The following lines set options related to string pattern matching set showmatch set matchtime=2 set hlsearch set incsearch set ignorecase set smartcase set magic set lazyredraw set nowrapscan set iskeyword+=_,$,@,%,#,-,. " The following lines set the style of completion set wildoptions=pum set wildmode=full set wildmenu set completeopt=menu,menuone,noinsert,noselect set previewpopup=height:20,width:80 " Configure the preview window as a pop-up window " The following two lines are necessary for setting background transparency hi NONTEXT ctermbg=NONE hi NORMAL ctermbg=NONE map <F2> :NERDTreeToggle<CR> map <F3> :TagbarToggle<CR> map <F4> :FloatermToggle<CR> tmap <F4> <C-\><C-n>:FloatermToggle<CR> let g:airline_powerline_fonts = 1 let airline#extensions#tabline#enable = 1 let g:gutentags_modules = ['ctags'] let g:gutentags_ctags_executable = '/usr/bin/etags' let g:gutentags_project_root = ['.git','.svn','.project','.root'] let s:vim_tags = expand('~/.cache/tags') let g:gutentags_cache_dir = s:vim_tags if !isdirectory(s:vim_tags) silent! call mkdir(s:vim_tags) endif let g:gutentags_ctags_extra_args = ['--fields=+niazS', '--extra=+q'] " I think these parameters are meaningless for C/C++ let g:gutentags_ctags_extra_args += ['--kinds-C=+px'] let g:gutentags_ctags_extra_args += ['--kinds-C++=+px'] let g:Lf_RootMarkers = ['.git', '.svn', '.project', '.root'] let g:Lf_GtagsAutoGenerate = 1 let g:Lf_GtagsAutoUpdate = 1 let g:Lf_StlSeparator = { 'left': "\ue0b0", 'right': "\ue0b2" } let g:Lf_WindowHeight = 0.3 let g:Lf_HideHelp = 1 let g:Lf_ShowRelativePath = 1 let g:ycm_show_diagnostics_ui = 0 let g:ycm_auto_hover = ''Article Author:Jingshan Youxia
Source:Zhihu CommunityArticle URL:https://zhuanlan.zhihu.com/p/663747364 Learn how to choose a good Linux distribution!11 Vim tips to improve your editing efficiency!Using Vim, having a few essential plugins is very useful!Old friend, remember to 🌟star so it’s easier to find me next time!