
This article is lengthy, estimated reading time: 10 minutes.
# Author: Roff Segger, Technical Testing, Translation, and Writing at Microtech
We are testing using SEGGER’s Embedded Studio development environment: on a Cortex-M microcontroller, how much Flash memory is needed to complete a blinking LED application?
Objective:
· Create a blinking application using less than 100 bytes of code
· Use a switching frequency easily visible to the human eye (i.e., in the range of 1-5Hz)
· Main program written in C/C++
· Use readily available hardware
· Do not use or disable the runtime system initialization of the toolchain
This article will roughly introduce every byte and instruction we will use. It is a good way to understand what happens at system startup, i.e., what happens “under the hood” before reaching the main() function.
In short: Using the Embedded Studio development environment, this task can be accomplished within a program of less than 100 bytes.
01
Hardware
The hardware we are using is an STM32 Trace Reference Board. It is very simple, with only one STM32F407 microcontroller, 3 LEDs, a debug/trace interface, and a USB power port.
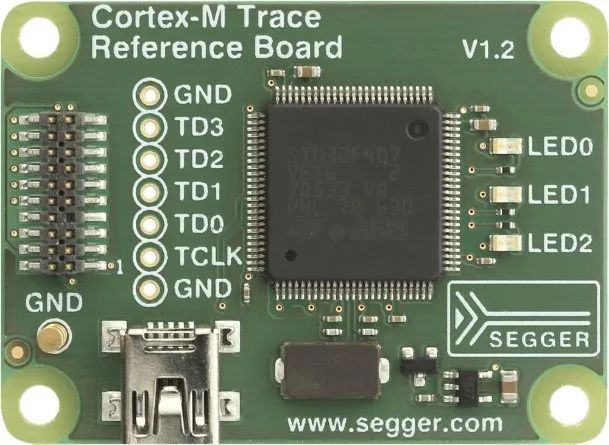
Each J-Trace emulator delivery includes this development board; however, here, I am just using the regular J-Link functionality to download and debug the program. Users can also choose any hardware with an LED for testing.
02
Creating the Project
Very simple, open the Embedded Studio development environment, select File -> New Project from the menu, choose the first option to create an executable file.
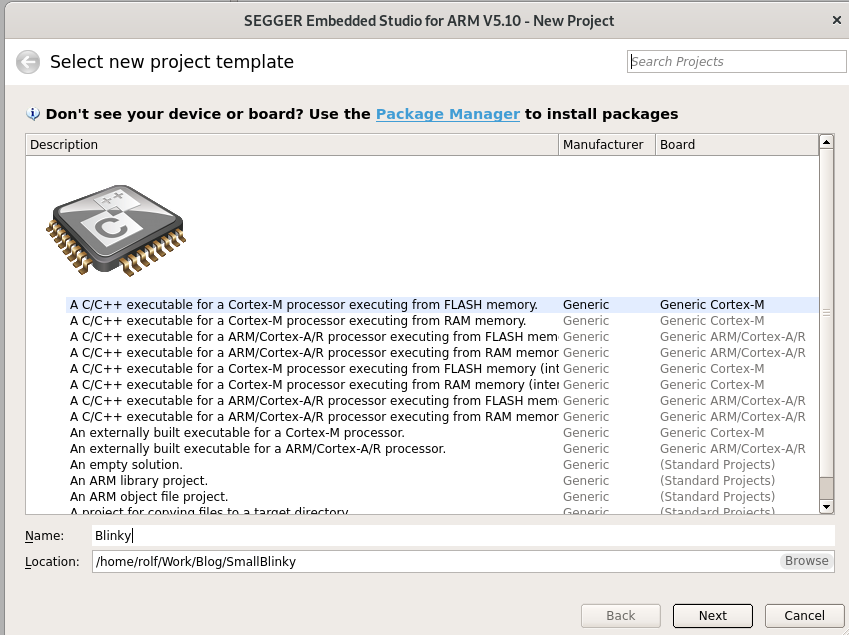
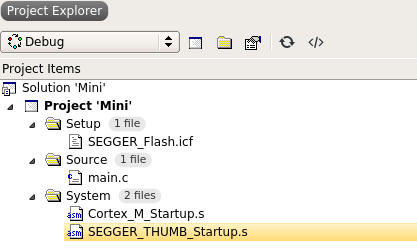
Follow the prompts, choose to use the defaults, click next several times, and I finally get a small project as shown in the Project Explorer window below.
Select Build -> Build Mini or press F7 to build our program.
Debug -> Go or F5 to start the debugger.
We are currently not connected to hardware, so Embedded Studio requires us to use the built-in simulator.
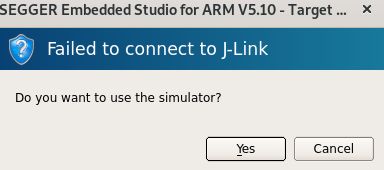
Click Yes or press Enter to start the simulator.
The debugger stops at the main() function, which is a standard “Hello world” application.
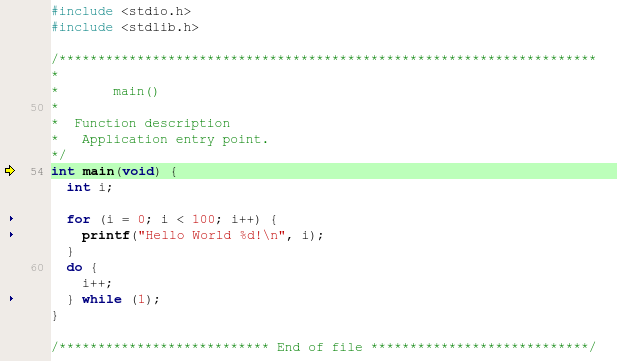
Now, to achieve the minimal application, we simplify it to a basically empty loop.
int main(void) { int i; do { i++; } while (1);}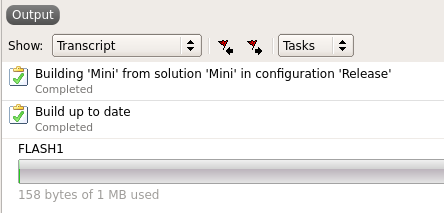
The result occupies only 158 bytes of Flash. This is already quite good, but before adding the actual LED blinking functionality, I need to understand the memory usage and how to minimize my program.
To do this, I can check the Memory Usage Window, linker map files, generated ELF files, or simply look at the Project Explorer.
From the Project Explorer window, I can see that this executable file consists of 3 source files, and how much Code + RO space they use. Note that these are the values generated by the compiler for the object files. For the final executable file, the linker can eliminate unused functions or add some glue code (from Flash to RAM or from Thumb instructions to ARM instructions) and padding (e.g., to ensure 4-byte alignment) when necessary.
Another place using Flash memory might be the code linked from the library, for example: C runtime library. However, our small project does not use library functions, so we do not have to consider the library code’s space usage.
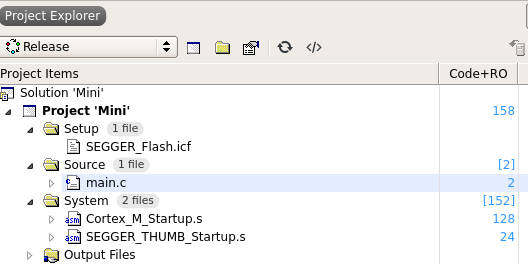
Moreover, the Project Explorer shows the memory usage of each source file (2, 128, and 24 bytes) and the total memory usage of the project executable: 158 bytes. This matches the values we see in the Output window.
03
Understanding Project Structure
What are the purposes of these three files? Our application is just a simple main() function. Why do I need the other two files?
🔹main.c – The application.
🔹Cortex_M_Startup.s – CPU-related code, contains the interrupt vector table.
🔹SEGGER_THUMB_Startup.s – Code that application programmers do not need to modify.
Let’s take a closer look at them to unveil the mystery everyone wants to know: how does the startup code work?
With this knowledge, let’s see how to shrink our application.
04
main.c
main.c contains our application, a very simple main() function.
Our compiler is smart enough. It can see that this program does nothing and optimize it to an empty loop using only one instruction or two bytes of code.
How do I know this? We can look at main.o, which is the output generated by the compiler. In the Project Explorer, right-click on main.c -> Show Disassembly, or expand it and double-click on main.o in the Output files. It reveals that the main program has only one branch.
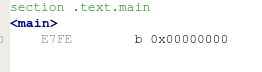
This is our main application. We cannot simplify it any further.
05
Cortex_M_Startup.s
Cortex_M_Startup.s contains the CPU-related code necessary for the application to execute on Cortex-M hardware. It includes the interrupt vector table and the function executed on power-up or reset: Reset_Handler.
This file uses most of the Flash space. Let’s take a closer look at what it generates.
Cortex_M_Startup.o shows that it contains the interrupt vector table .vectors section and the default exception handler implementations.
section .vectors<_vectors>00000000 .word 0x0000000000000000 .word 0x0000000000000000 .word 0x0000000000000000 .word 0x0000000000000000 .word 0x0000000000000000 .word 0x0000000000000000 .word 0x0000000000000000 .word 0x0000000000000000 .word 0x0000000000000000 .word 0x0000000000000000 .word 0x0000000000000000 .word 0x0000000000000000 .word 0x0000000000000000 .word 0x0000000000000000 .word 0x00000000 section .init.NMI_Handler<NMI_Handler>E7FE b 0x00000000 section .init.MemManage_Handler<MemManage_Handler>E7FE b 0x00000000 section .init.BusFault_Handler<BusFault_Handler>E7FE b 0x00000000 section .init.UsageFault_Handler<UsageFault_Handler>E7FE b 0x00000000 section .init.SVC_Handler<SVC_Handler>E7FE b 0x00000000 section .init.DebugMon_Handler<DebugMon_Handler>E7FE b 0x00000000 section .init.PendSV_Handler<PendSV_Handler>E7FE b 0x00000000 section .init.SysTick_Handler<SysTick_Handler>E7FE b 0x00000000 section .init.Reset_Handler<reset_handler><Reset_Handler>F7FFFFFE bl 0x00000000F7FFBFFE b.w 0x00000004 section .init.HardFault_Handler<HardFault_Handler>4908 ldr r1,680A ldr r2, [r1]2A00 cmp r2, #0<hfLoop>D4FE bmi 0x00000006F01E0F04 tst lr, #4BF0C ite eqF3EF8008 mrseq r0, mspF3EF8009 mrsne r0, pspF0424200 orr r2, r2, #0x80000000600A str r2, [r1]6981 ldr r1, [r0, #24]3102 adds r1, #26181 str r1, [r0, #24]4770 bx lrE000ED2C .word 0xE000ED2CThis is the culprit.
The ARM core defines the first 16 entries in the vector table, followed by entries for external device interrupts. This file provides a vector table with 16 entries (or 64 bytes). These entries are only used for that table.
In the application, we are not handling any faults or interrupts; in fact, we only need the Reset_Handler, which is the code executed immediately on reset. We also need the first entry in the vector table, which initializes the stack pointer (SP) on reset.
Thus, we can remove all unnecessary entries and reduce this table to two entries while eliminating the default exception handlers.
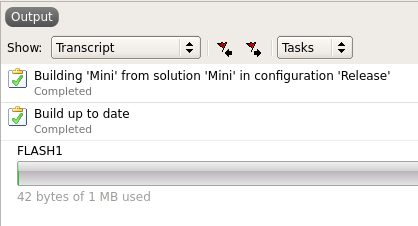
We regenerate the application. Nice! Now the application is reduced to 42 bytes.
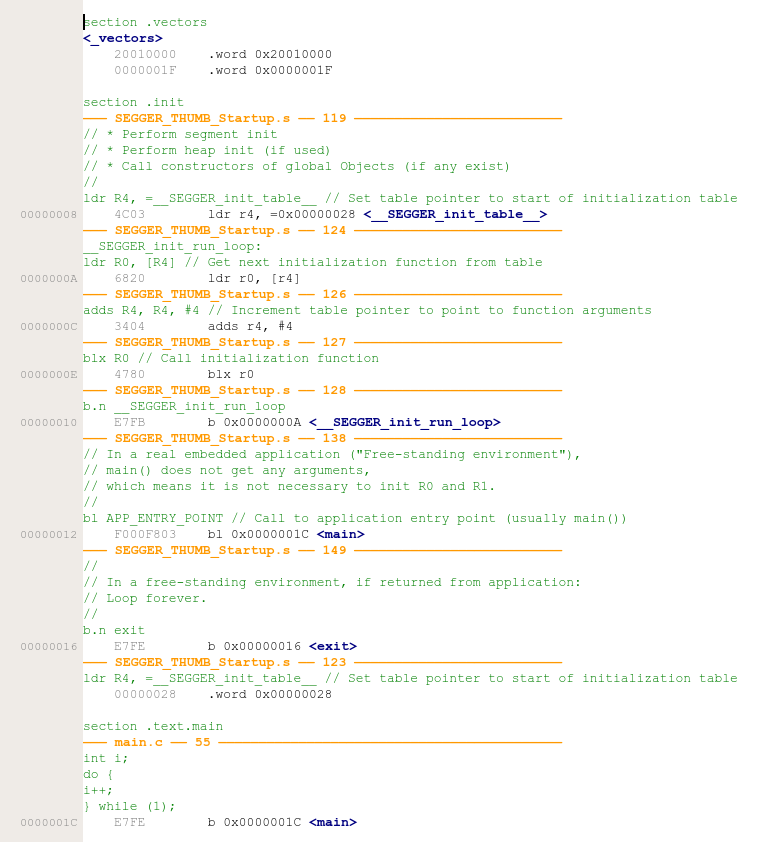
Let’s take a look at the content of the output ELF file.
From 0x0000 0000, 8 bytes: vector table, containing the initialized SP and a pointer to Reset_Handler.
From 0x0000 001E, 8 bytes: Reset_Handler, two 4-byte instructions. A nop instruction inserted by the linker, replacing the call to SystemInit (which does not exist in the application), and a jump to _start instruction.
From 0x0000 0008, 20 bytes: the general runtime initialization of SEGGER_THUMB_Startup.s, which performs calls to initialization functions generated by the linker from SEGGER_init_table, then calls main; if main returns, it stops in the exit loop.
From 0x0000 0028, 4 bytes: the linker generated SEGGER_init_table,
which contains the initialization functions that need to be called before main. It may include segment initialization (copying initialized data), segment filling (for zero-initialized static variables or pre-filling the stack), heap initialization, or calling constructors for global C++ objects. None of these are used in our application.
The last (and only) instruction is a jump to the end of runtime initialization, calling the main function.
Plus 2 bytes of padding from 0x00000026 to align SEGGER_init_table, totaling 42 bytes.
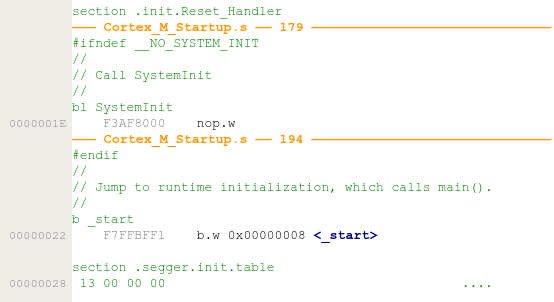
Since the application does not use the SystemInit function, we can remove the bl SystemInit statement and replace it with a nop to save 4 bytes and reduce it to 38+2=40 bytes.
Our application is already as small as possible. Now let’s start adding the blinking code!
06
Adding Blinking Code
We wrote some code to initialize and control the LEDs on the reference board and a simple delay function.
With this code, we can create a main application with blinking functionality as follows:
/****************************************** main()** Function description* Application entry point.*/int main(void) { _InitLED(); for (;;) { _SetLED(); _Delay(NUM_DELAY_LOOPS); _ClrLED(); _Delay(NUM_DELAY_LOOPS); }}The complete source code project is accessible (click “Read the original text”): https://blog.segger.com/wp-content/uploads/2020/08/Blinky_Mini.zip
Let’s rebuild and check the output.
Success! The application size is only 96 bytes (requires building in release mode; using debug mode will result in a larger code size).
Can it really run? Let’s give it a try. We connect the board to the J-Link and the J-Link to our computer. Press F5 to run it. Just like at the beginning of this project, the debug session starts and runs to the main function, only this time on actual hardware instead of the simulator. When we click F5 again to continue, we can see LED0 on the development board blinking.
07
Summary
The blinking program written in C can indeed fit into less than 100 bytes of program (or more accurately, read-only) memory.
The startup code does not need to be that complex. It just initializes the hardware (the purpose of SystemInit) and the runtime system.
The runtime system initialization is handled by Embedded Studio and the SEGGER linker. It ensures that only the necessary code is included to make the generated executable as small as possible.
The SEGGER linker can also include specific initializations, such as completing heap initialization and calling constructors when needed. These functions are controlled by scripts in the linker.
initialize by symbol __SEGGER_init_heap { block heap }; // Init the heap if there is oneinitialize by symbol __SEGGER_init_ctors { block ctors }; // Call constructors for globalobjects which needThe startup code generated by the SEGGER linker is very small and easy to understand. Combining the efficient SEGGER compiler with modular runtime libraries and the host-side output printf() function, we can stand out.
Take a look at the size of a simple “Hello World” program on a computer; perhaps we should also provide a SEGGER Studio that can generate the same small program on a computer.
Can your program be more compact? Try it with your toolchain and challenge writing a blinking program in 100 bytes! I believe it will be hard to beat on the same hardware.
08
Can the code for this project be more compact?
The surprising answer is: yes.
First: some microcontrollers have toggle registers that allow the loop to be split into _ToggleLED() / Delay().
Also, the amount of code needed for initialization varies; it could be smaller on other hardware.
However, even on the same hardware, we can further reduce program size.
We can place _start in the vector table so that the program can start executing in the general startup code, saving 4 bytes of jump space.
We can remove exit() and the 2-byte branch because we know the main() program will never return.
Since I only want a program of less than 100 bytes, let’s stop here.
Happy coding!
This article is sourced from the internet, freely conveying knowledge, and copyright belongs to the original author. If there are any copyright issues, please contact me for deletion.
Note
Due to recent changes in WeChat public accounts’ push rules, to prevent difficulty in finding articles, you can star and pin this account so that articles pushed will appear in your subscription list.
You may also like:
How to Handle HR Questions for Embedded Engineer Interviews?
Hello Series | CMake Brief Basics
Reply with 1024 in the WeChat public account chat interface to get embedded resources; reply with m to view article summaries