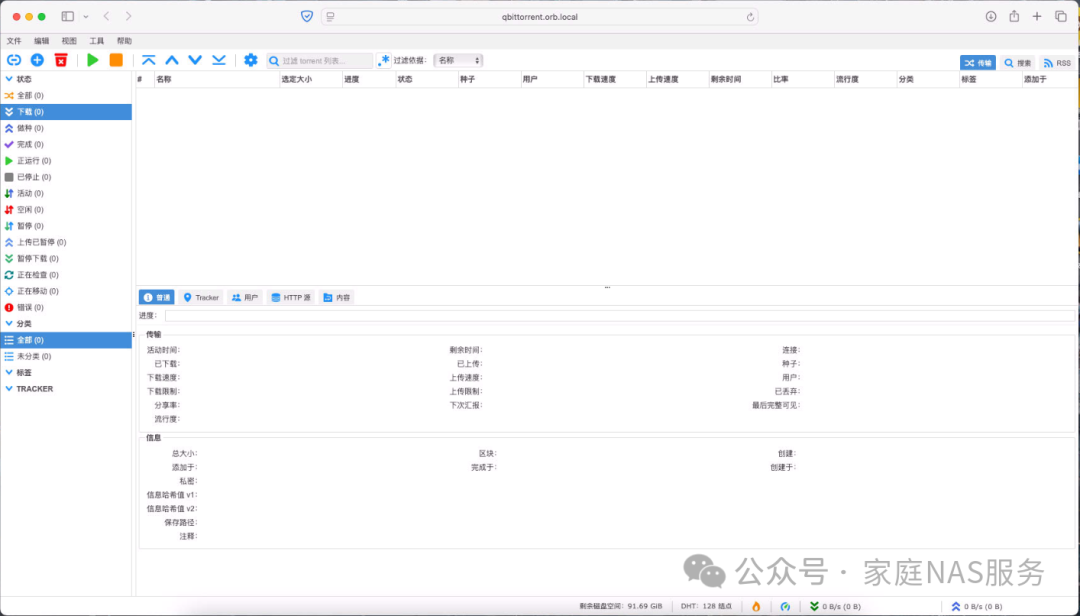
qBittorrent is a powerful and lightweight open-source BitTorrent client software. It allows users to download and share files via the BitTorrent protocol. It supports multiple platforms including Windows, Mac, and Linux! qBittorrent aims to provide a user experience similar to µTorrent, being equally compact while avoiding the ads and bundled software found in µTorrent.
This article mainly discusses how to install qBittorrent in Docker.
1.Preparation before installation
1.1.Setting up the directory structure
The previous articles on installing Jellyfin and MoviePilot suggested the following folder structure:
/media/
├── tv/ # Directory for storing TV show source files
├── movie/ # Directory for storing movie source files
├── video/ # Other videos (you know what I mean)
├── tvshows/ # Additional TV show directory (directory for organized hard links of TV shows)
└── movieshows/ # Movie derivative content (directory for organized hard links of movies)
It is recommended to create a /downloads folder at the same level as /media for installing qBittorrent.
2.Installing qBittorrent using Portainer
As mentioned earlier, after installing Docker, we can install Portainer to manage Docker, which provides a more user-friendly visual interface for beginners.
Installing Docker (Orbstack) on Mac and managing it with Portainer
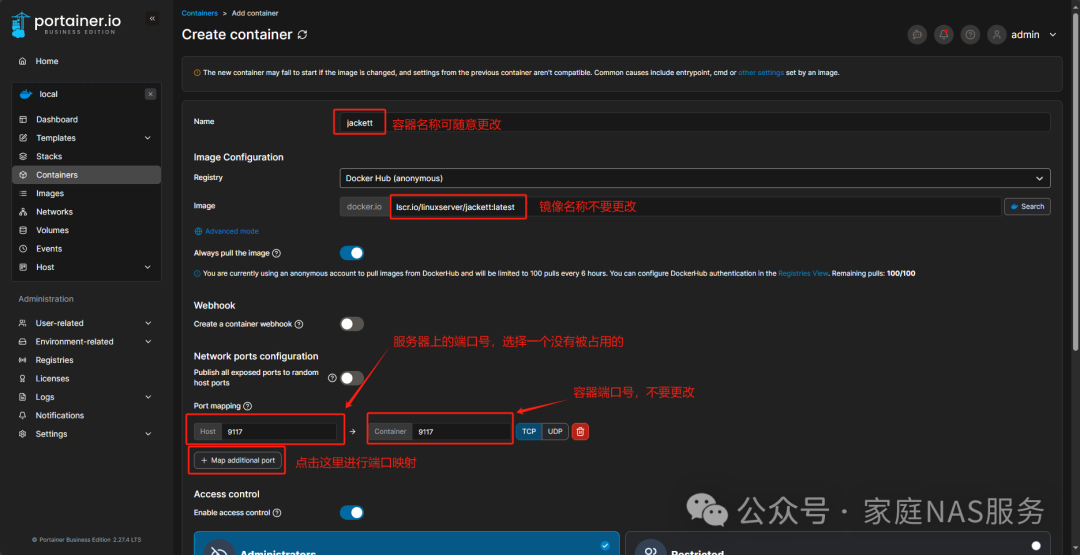
Open Portainer, in the container interface, click Add container:
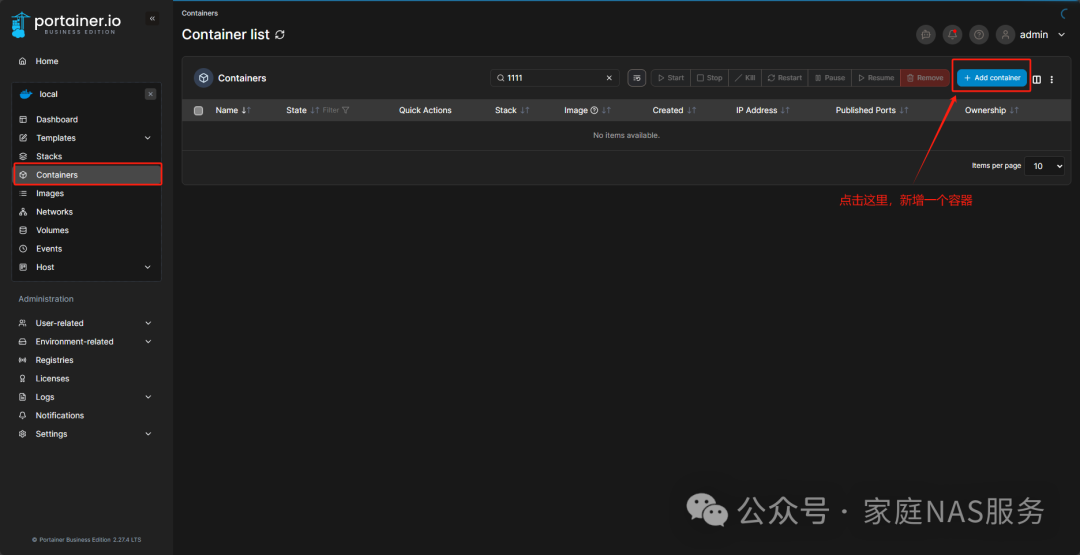
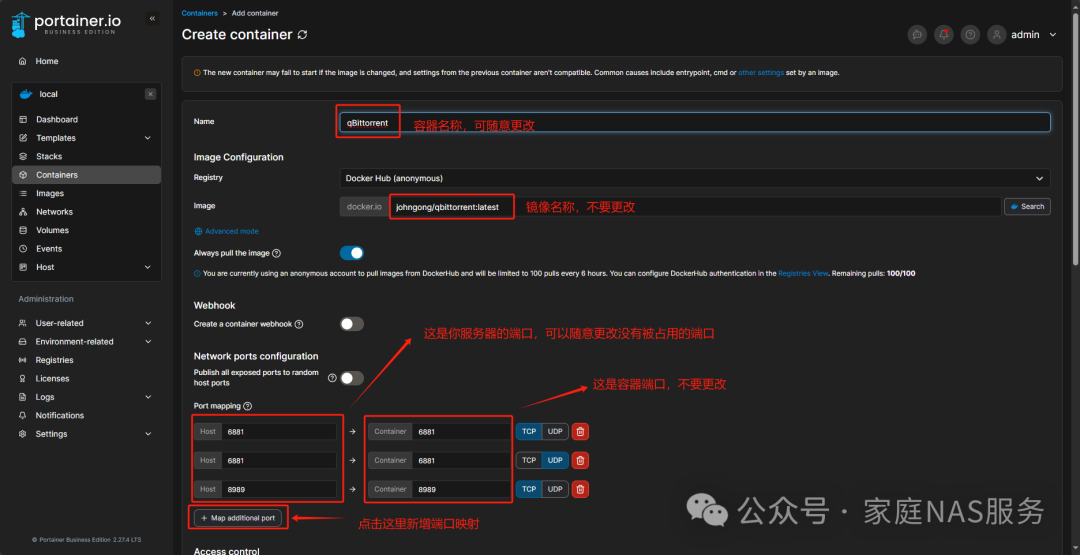
In the Name field, enter qBittorrent, in the Image field, enter johngong/qbittorrent:latest, then click Map additional port for port mapping. If your ports 6881 and 8989 are not occupied, you can keep the default configuration.
Click on Volumes for path mapping. We must map the paths on the server to the container so that qBittorrent can access these paths. If you created the folders as per the above directory, then follow the path mapping shown in the image below. /config does not need to be mapped; it will be automatically created and saved in Docker’s Volumes directory.
Map /movie, /tv, and /video separately, mainly to store different types of videos in different folders during downloads.

When mapping paths, note that the slashes are “/”. For example, if you copied the Windows path directly from the folder, it would be: E:\media, but when mapping in Docker, it needs to be changed to: E:/media.
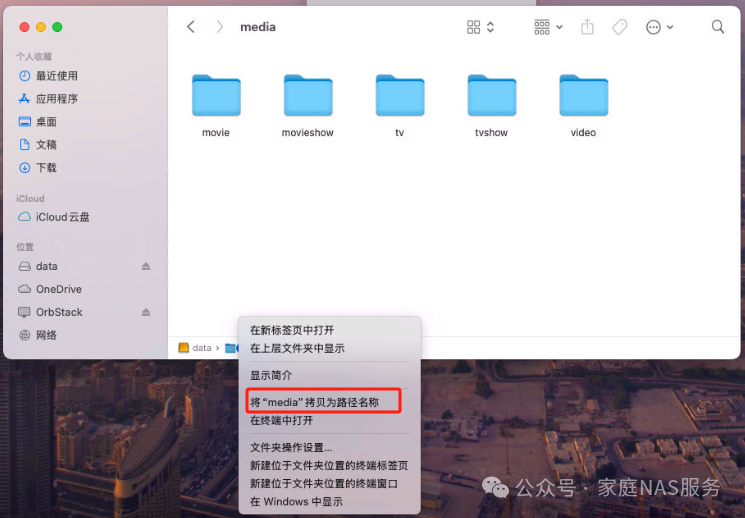
If you are on Mac, you can directly open Finder, find the media folder, then right-click on the folder, and select: Copy “media” as Path Name from the pop-up menu, and paste it to replace.
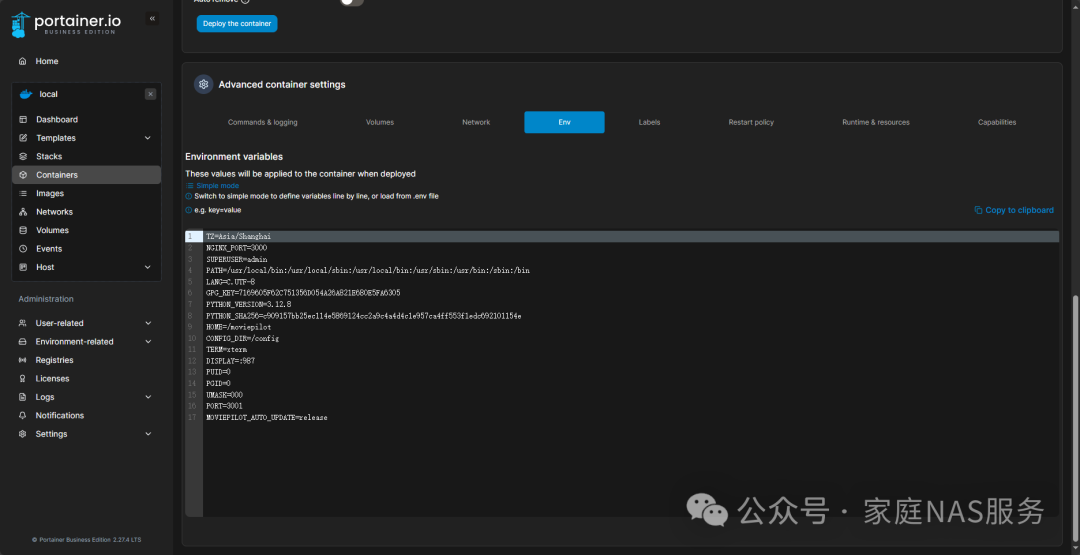
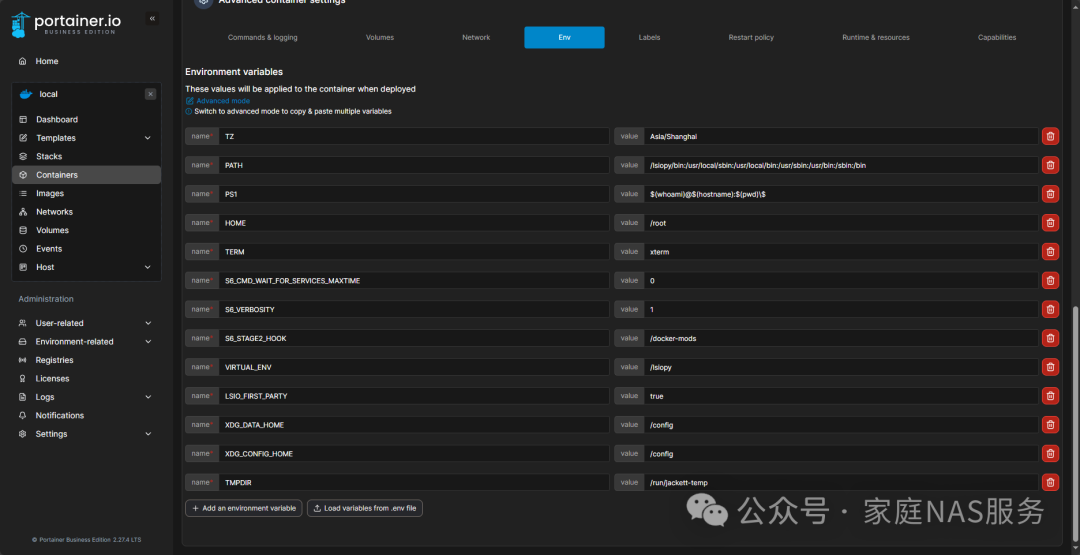
Switch to the Env tab, where the environment variables are located. We click on Advanced mode to switch to advanced mode and enter the following code:
QB_WEBUI_PORT=8989QB_EE_BIN=falsePATH=/usr/local/sbin:/usr/local/bin:/usr/sbin:/usr/bin:/sbin:/binUID=1000GID=1000UMASK=022TZ=Asia/ShanghaiLIBTORRENT2=falseQB_TRACKERS_UPDATE_AUTO=trueQB_TRACKERS_LIST_URL=https://raw.githubusercontent.com/ngosang/trackerslist/master/trackers_all.txtENABLE_CHOWN_DOWNLOADS=trueENABLE_CHOWN_R_DOWNLOADS=trueQB_DOWNLOADS_DIRECTORY=/DownloadsS6_CMD_WAIT_FOR_SERVICES_MAXTIME=0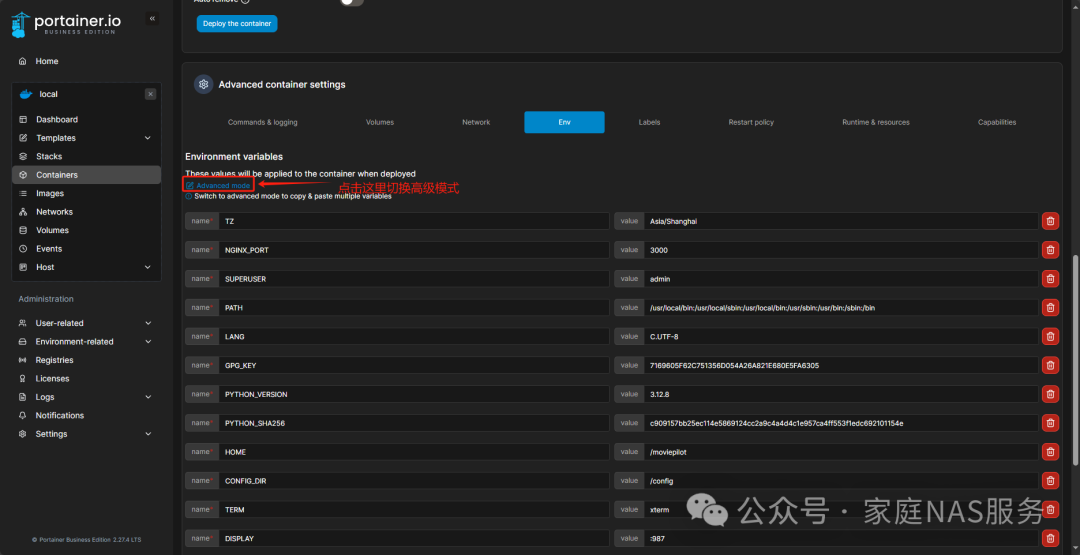
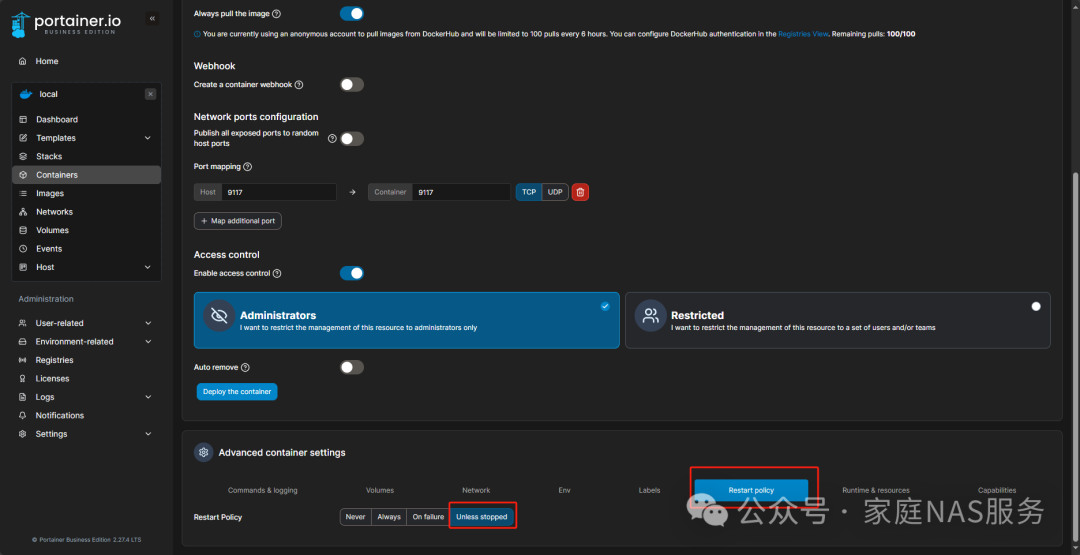
Then switch to the Restart policy tab, where the restart policy is set to Unless stopped:


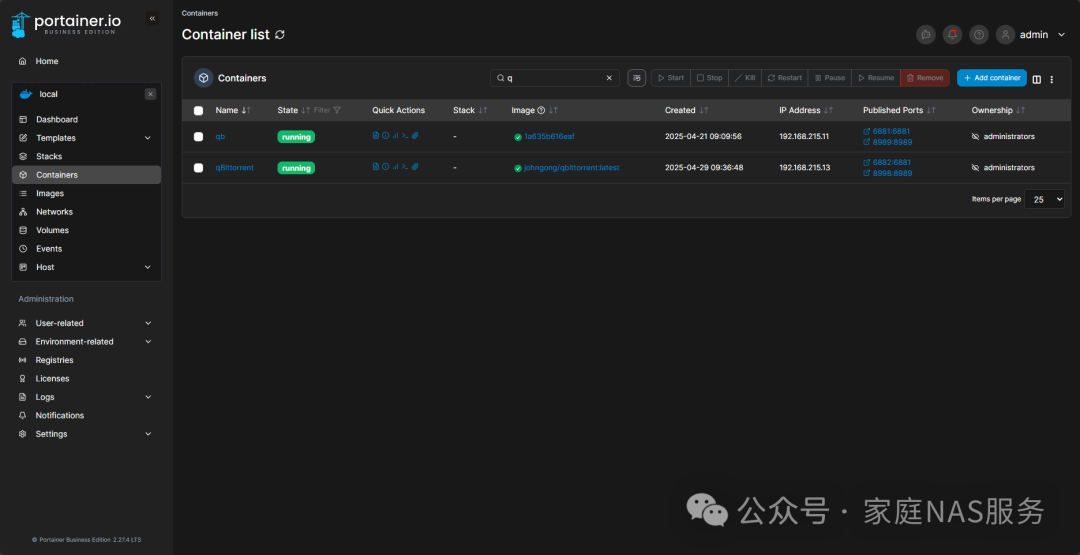
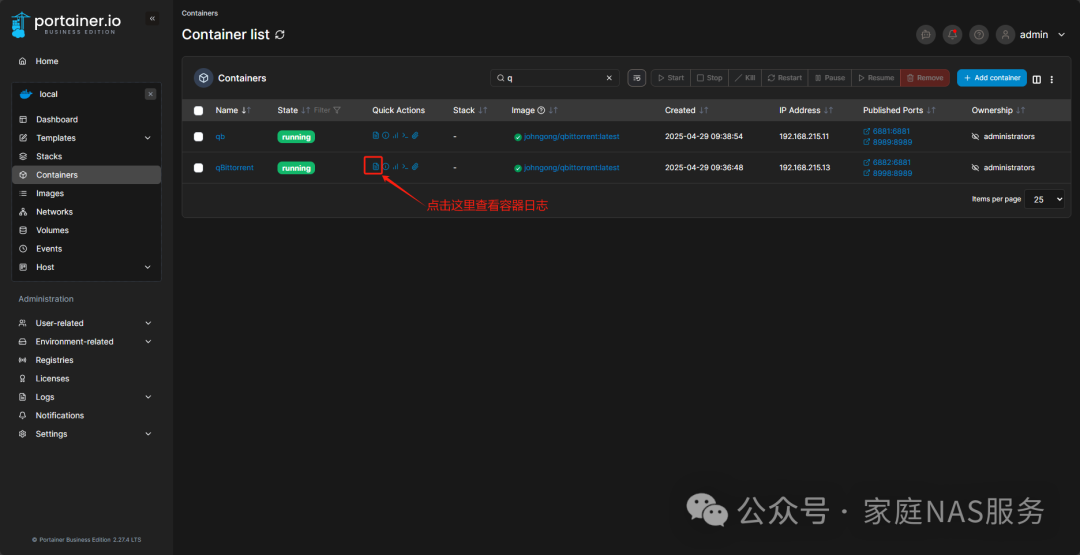
After completion, you can check in the container interface. The reason I see two is that I previously deployed one and created another for documentation purposes:
3.qBittorrent settings
3.1.Accessing qBittorrent
Open your browser and enter the address of qBittorrent.
If you are accessing from the machine where qBittorrent is installed, enter the address:http://localhost:8989/
If accessing from another computer in the local area network, replace localhost in the above address with the IP address of the computer where the qBittorrent service is located (it is recommended to fix the IP of the server computer).
How to check the IP address on Windows:
Press Win+R, type cmd, and hit Enter. In the command window that pops up, type ipconfig to view the IP address.
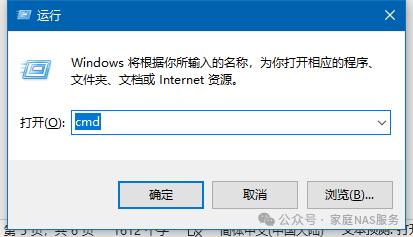

In the above example, you can access by entering http://172.18.56.27:8989 in the browser.
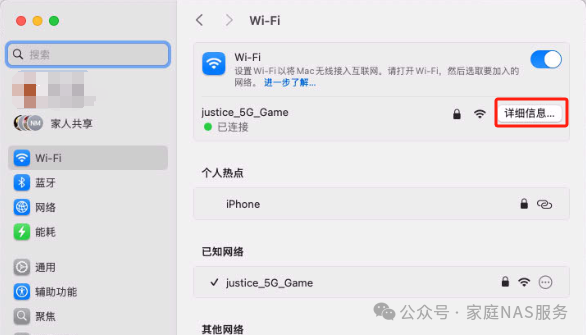
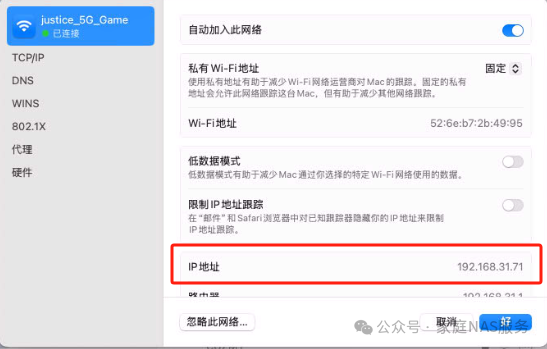
How to check the IP address on Mac:
Go to Settings – WIFI (Ethernet) and click on Details to view:
3.2.Login
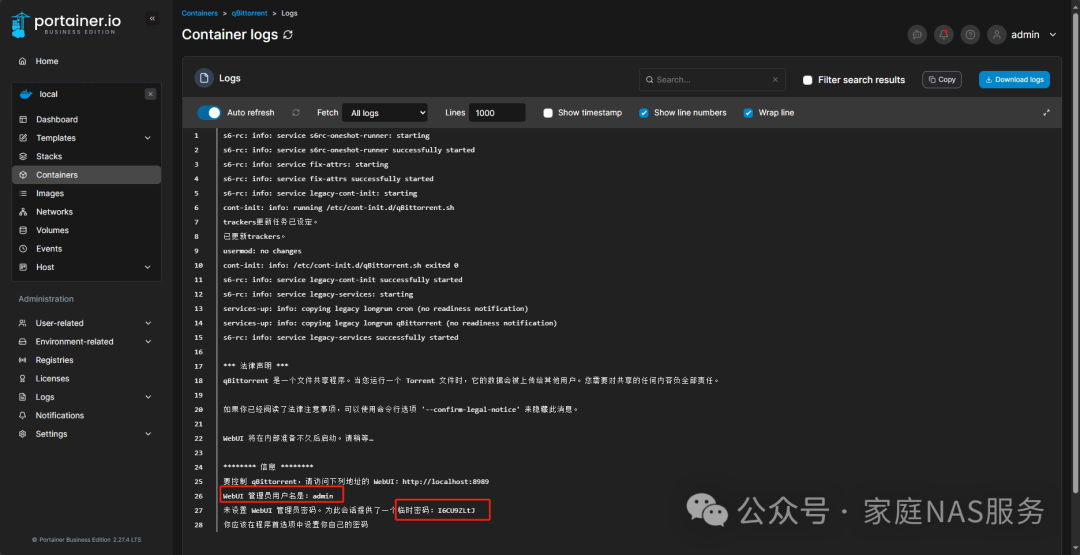
The default admin account for qBittorrent is admin, and the default password is a randomly generated password created when it starts. We will now check the container logs in Portainer to extract the password:
Open Portainer, find the MoviePilot container, and check the container logs:
Find the “temporary password” field in the logs and copy the random password that follows.
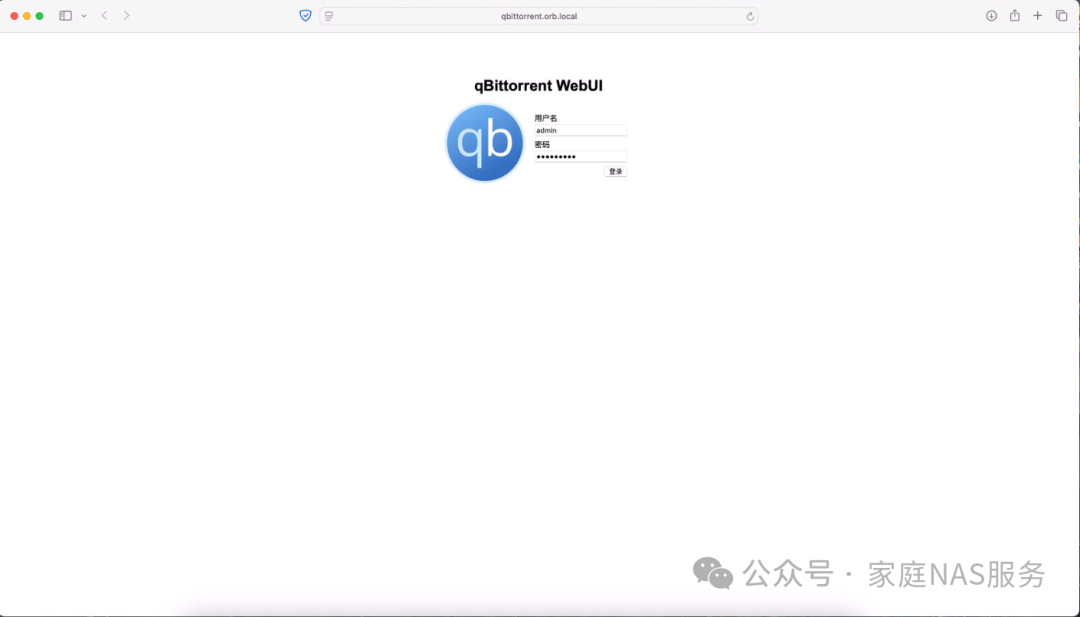
Log in with the account admin and the password you just copied to see the main interface.
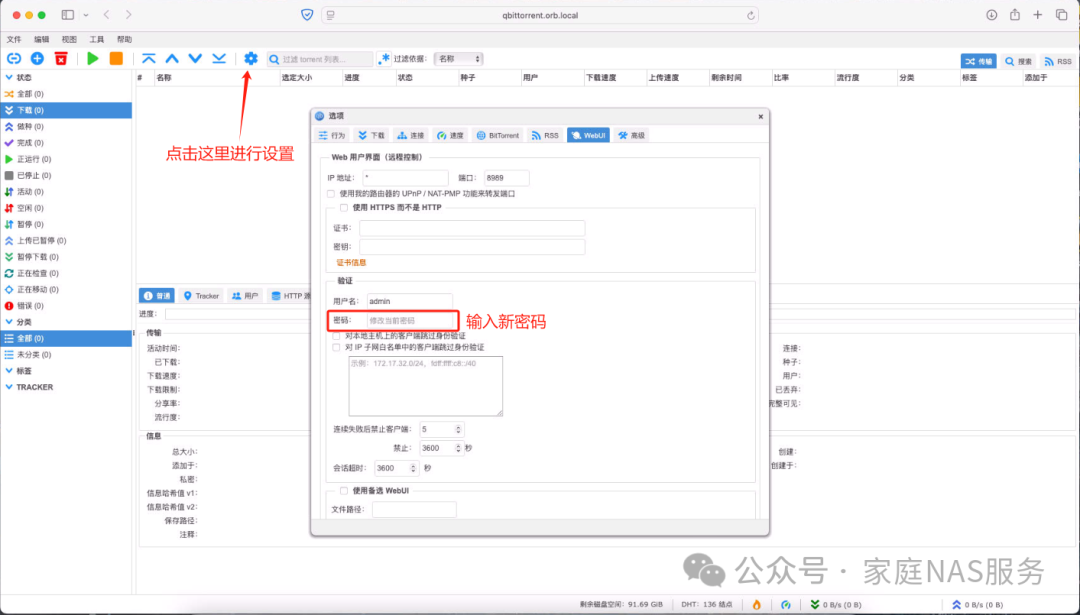
3.3.Password modification
The admin password is randomly generated, and it is recommended to change the admin account password as soon as you log in.
Modify the password in the settings interface and save it.
3.4.Settings
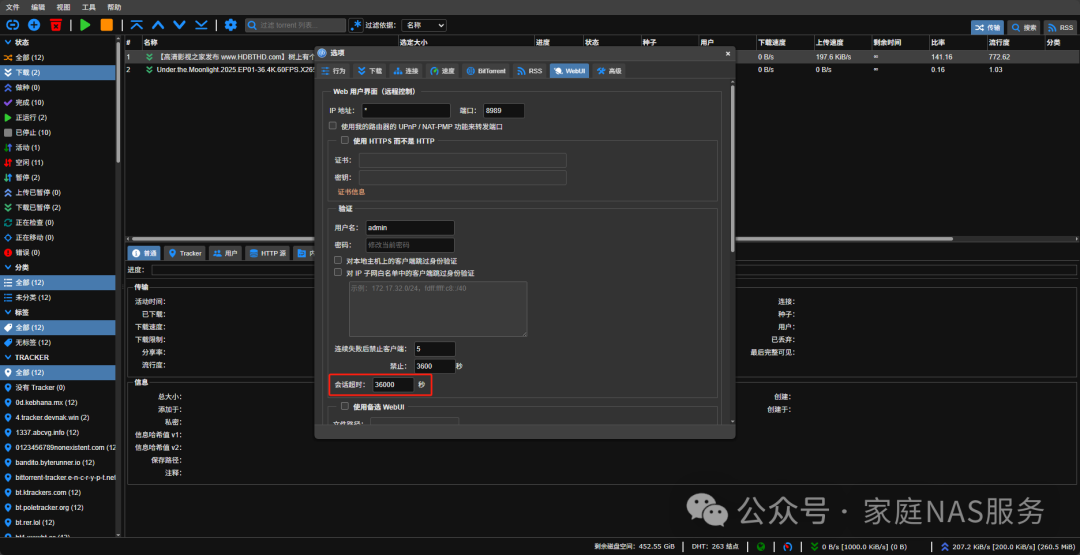
In the settings page, modify the session timeout, which is set to 1 hour by default. This means that after logging in, if you open the qBittorrent page again after 1 hour, you will need to log in again. You can set the time as needed:
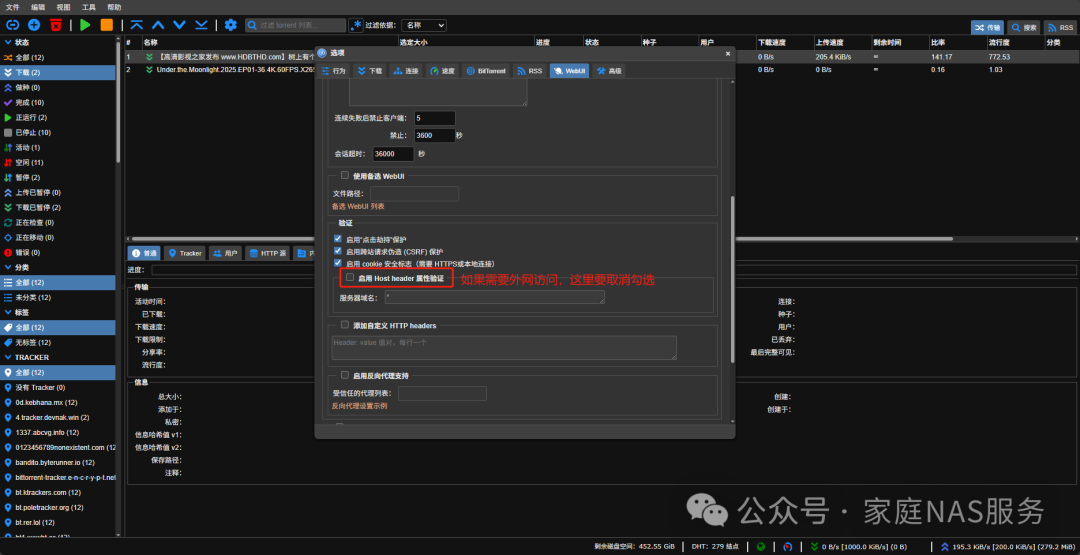
If you need to access qBittorrent from the external network, you need to disable Host header validation.
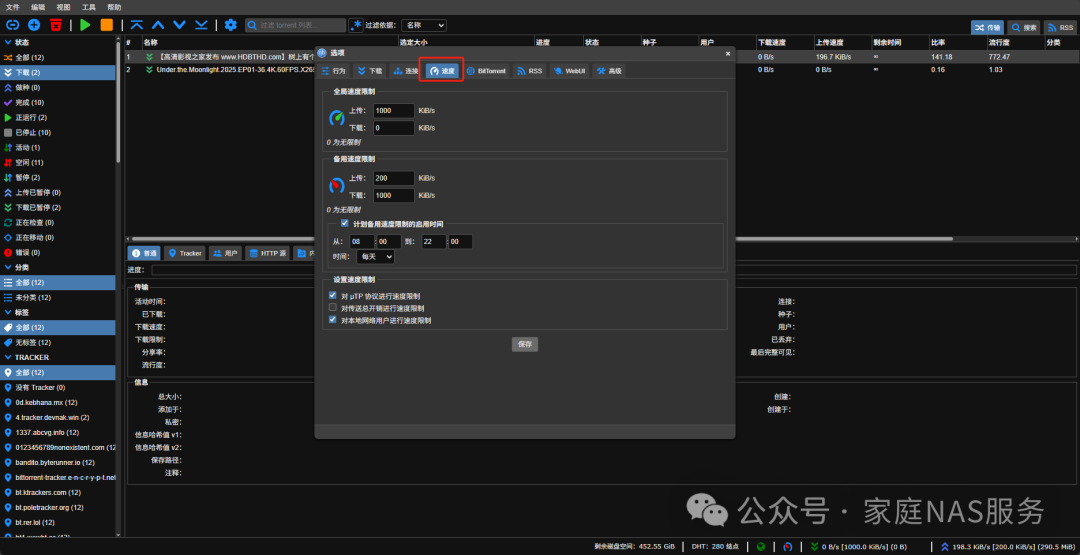
Speed limits can be set as needed.
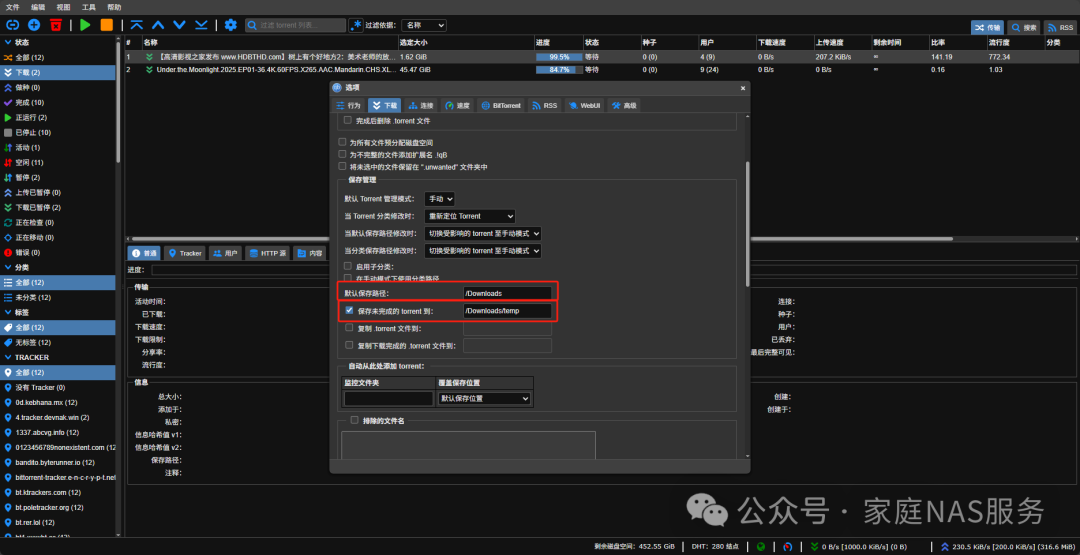
The default download path can be set as needed. It is recommended to check and set to save incomplete torrents to /Downloads/temp. If this option is checked, it will temporarily save unfinished files in this directory. If unchecked, it will directly store in the media library directory, causing MoviePilot to start scraping and creating hard links to the media library. Then Jellyfin will scan the library, but at this time the video is not fully downloaded and cannot be watched, affecting the viewing experience.
3.5.Downloading
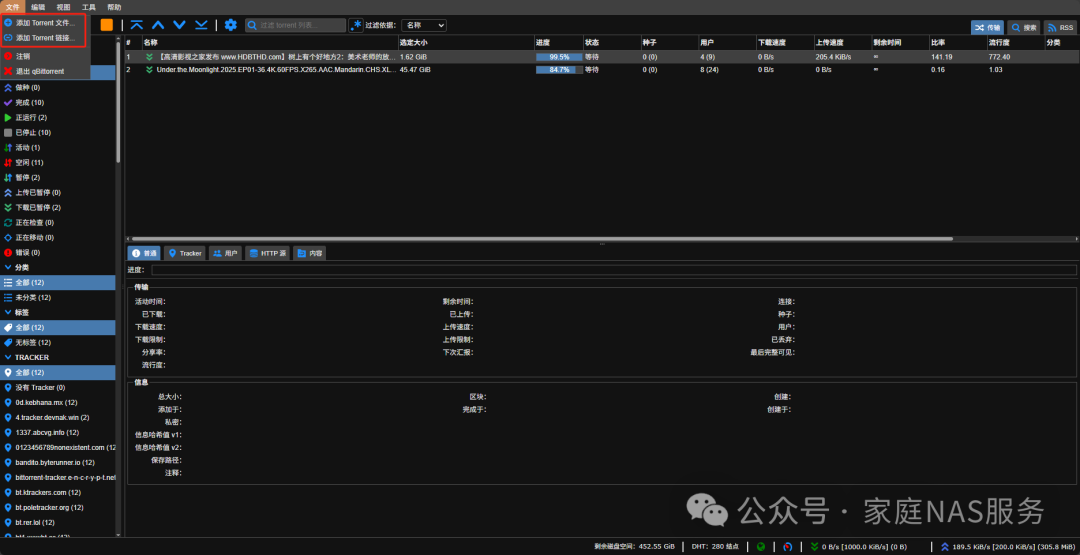
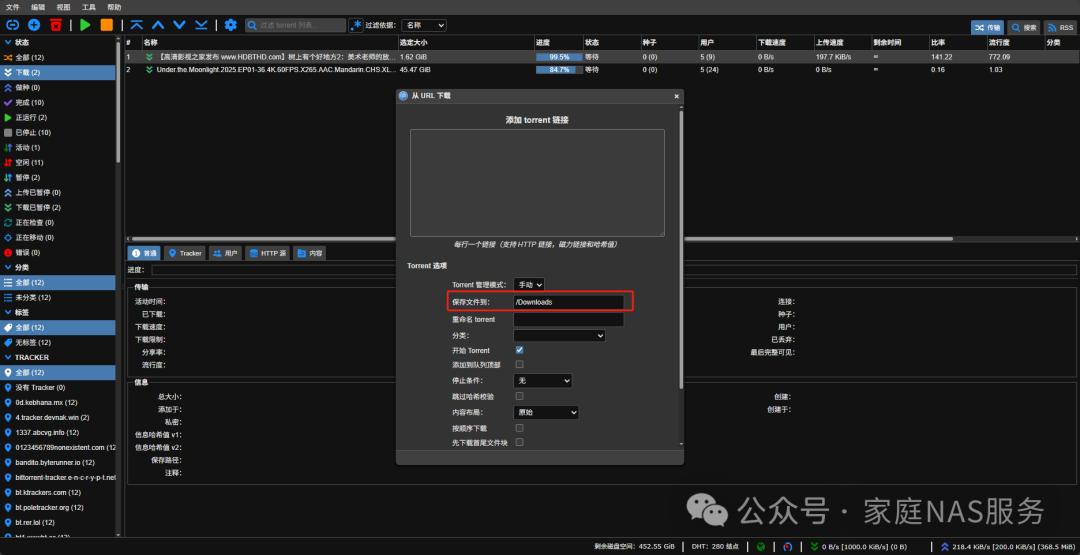
Click on Files, and add downloads using torrent files or magnet links as needed.
If you have mapped the media library paths earlier, then when downloading, qBittorrent will automatically move the files to the media library after completion, and MoviePilot will automatically scrape and import them into Jellyfin.
For movies, set the save file path to: /movie
For TV shows, set the save file path to: /tv
For other videos, set the save file path to: /video
3.6.Searching for resources
qBittorrent has a built-in resource searcher that can directly search for resources.
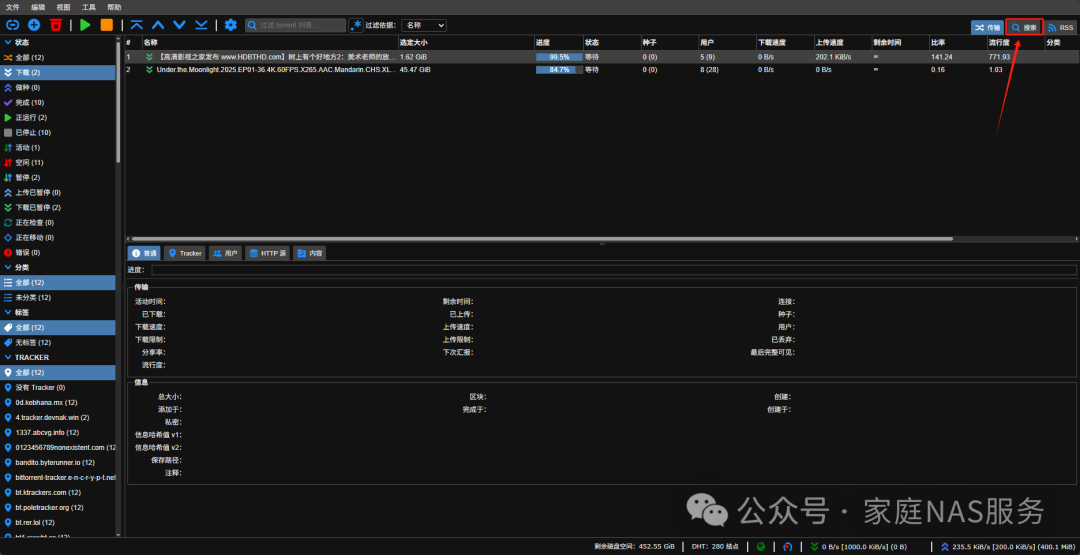
Direct searches may not yield good results, so it is recommended to install the Jackett plugin. This also requires us to deploy a Jackett instance locally using Docker.
4.Installing Jackett
4.1.Docker installation
We will also use Portainer to install Jackett.
Don’t forget to change the restart policy to Unless stopped.
For environment variables, you only need to add one, TZ=Aisa/Shanghai; others will be added automatically during creation.
Then pull the container to complete the setup.
After deployment, we can access it viahttp://localhost:9117/.
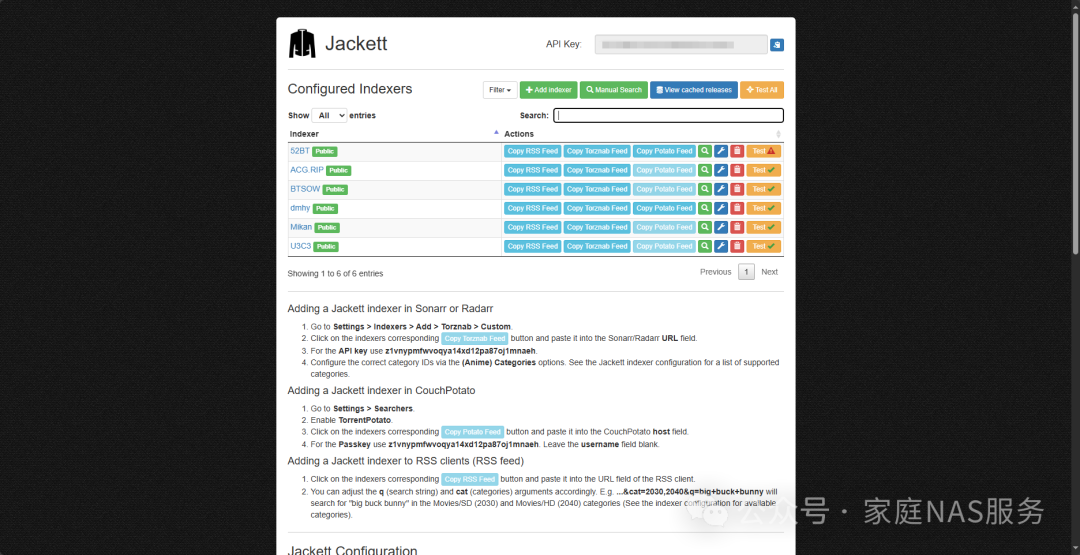
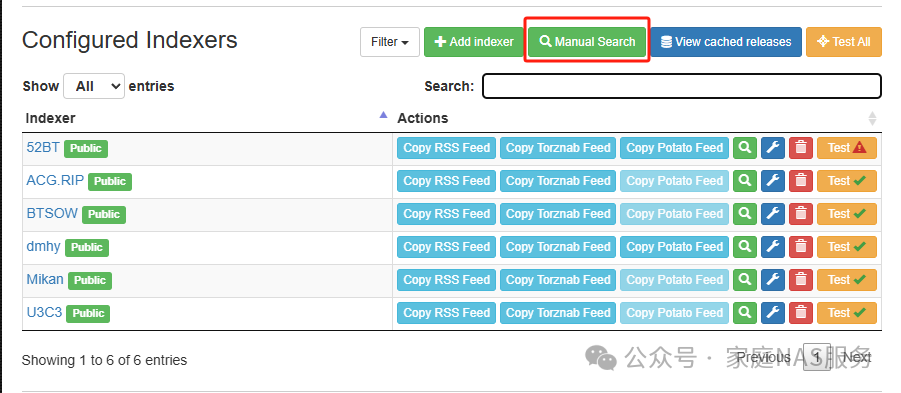
4.2.Adding indexers
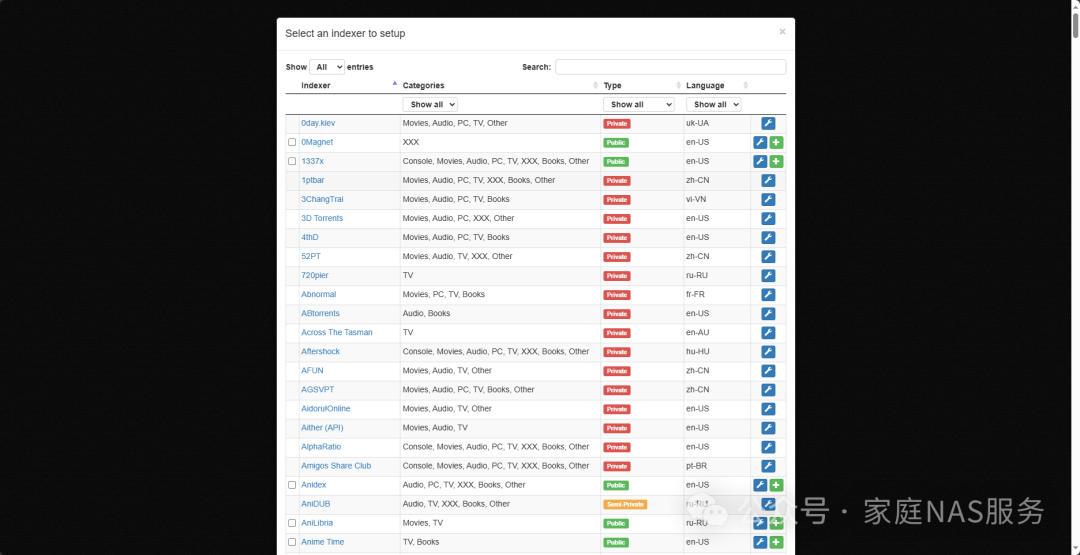
Click Add indexer to add an indexer.
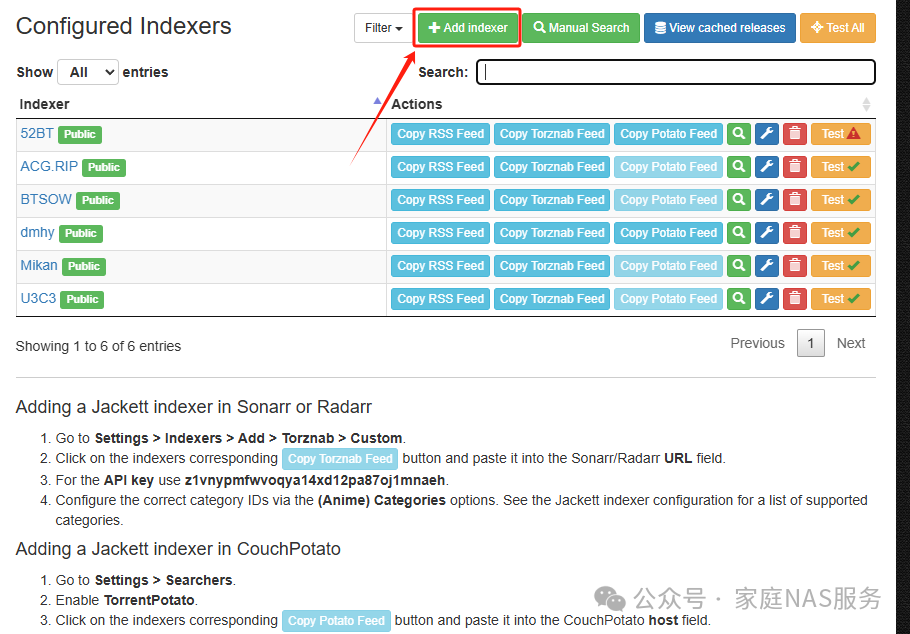
Indexers are like individual BT or PT sites used to search for torrents. Public ones can be added directly, while private ones require entering a username and password by clicking the gear icon.
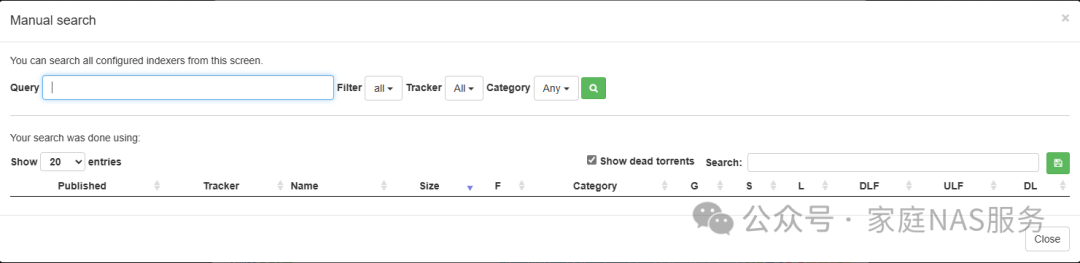
4.3.Searching
After adding the indexers, click Manual Search to search for torrents.
5.Enabling the Jackett plugin for qBittorrent
5.1.Directly modify the configuration file in the system
In Portainer, click on the container name to enter the container details page.
Scroll down to view the /config corresponding directory volume.
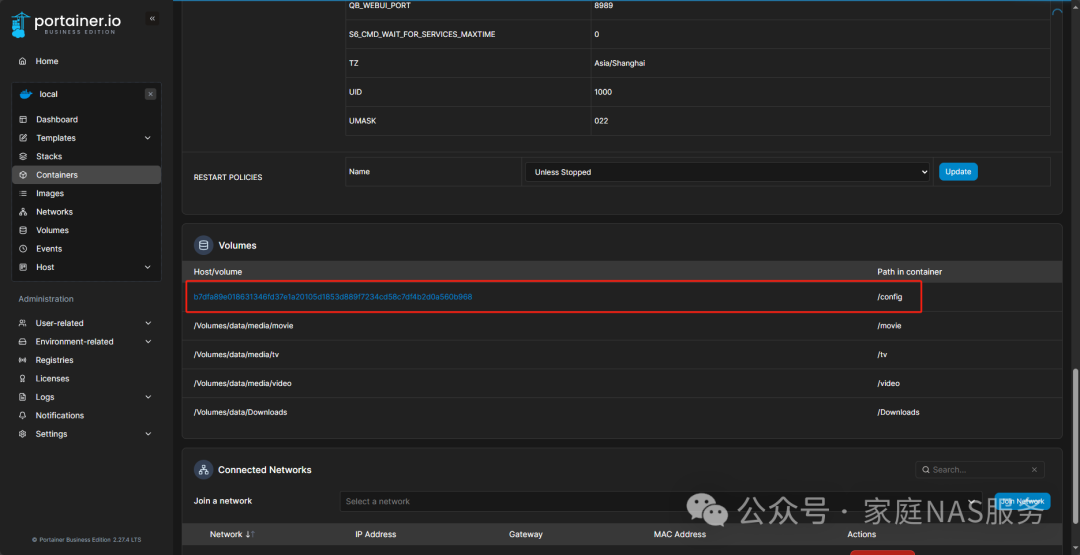
On your server, find this volume. I am using Mac, open Finder, go to /Users/zhourenhui/OrbStack/docker/volumes directory, and enter the corresponding volume.
Enter the directory /b7dfa89e018631346fd37e1a20105d1853d889f7234cd58c7df4b2d0a560b968/qBittorrent/data/nova3/engines
Open the jackett.json file, where you need to fill in the api_key from the upper right corner of your Jackett main interface, and the url should be your Jackett server address, which needs to be written ashttp://your_server_IP:9117/. Do not fill in localhost:9117 or 127.0.0.1:9117 because Docker containers are network isolated.
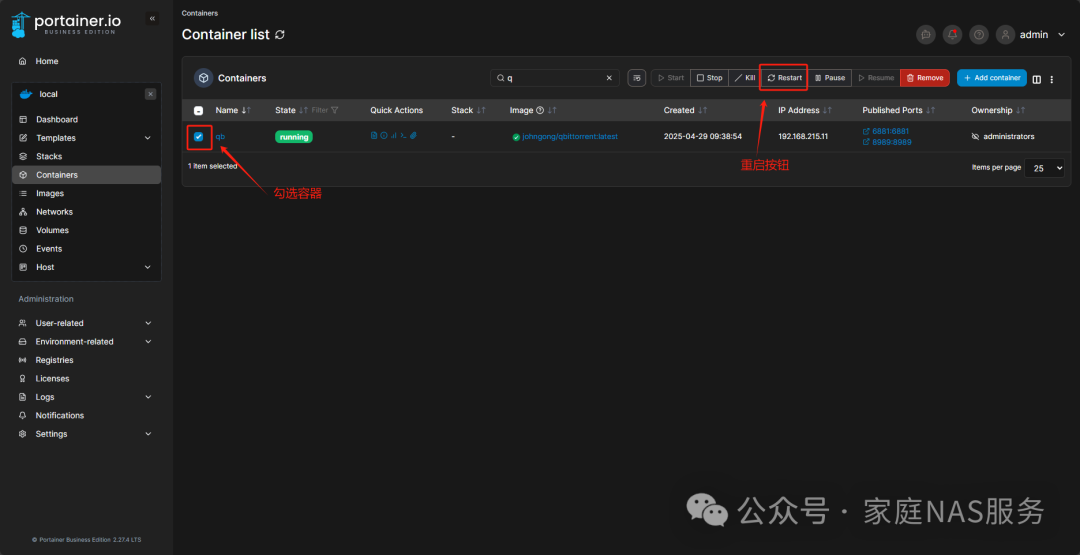
{ "api_key": "Fill in the key from the Jackett server here", "thread_count": 20, "tracker_first": false, "url": "http://your_server_IP:9117"}After modification, restart the qBittorrent container in Portainer.
5.2.Modify in Portainer
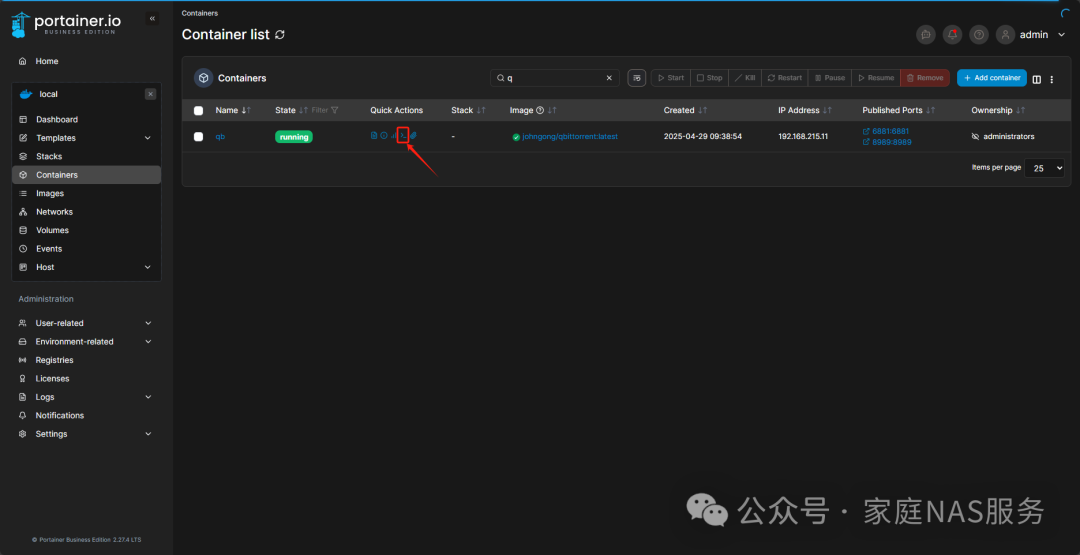
If you cannot find the mounted directory for qBittorrent, we can also modify it using commands in Portainer. Click the command line button for the container in Portainer.
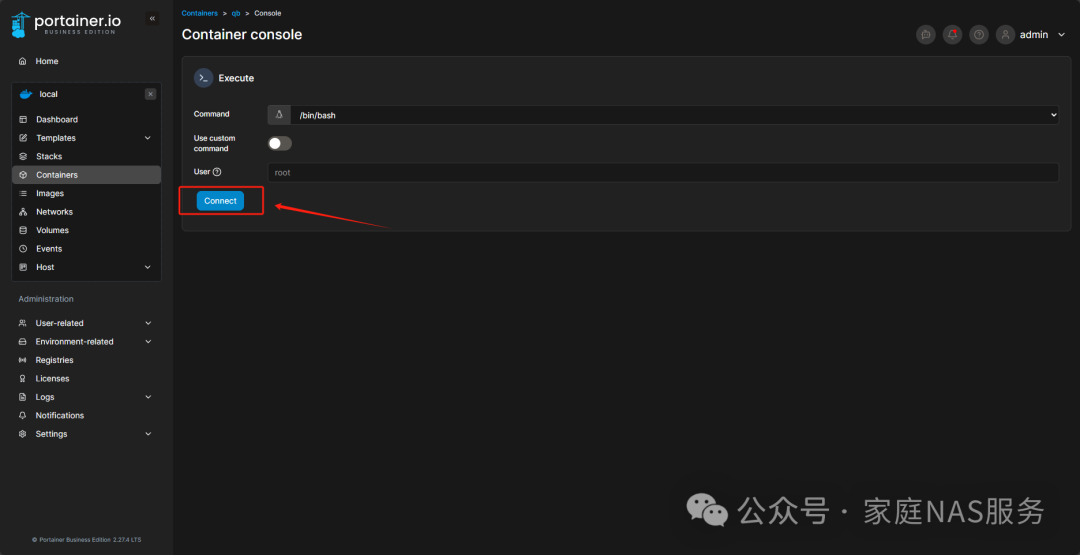
Click Connect.
At this point, we have effectively entered the mounted directory of the container.

Type ls and hit Enter to check which folders are available.
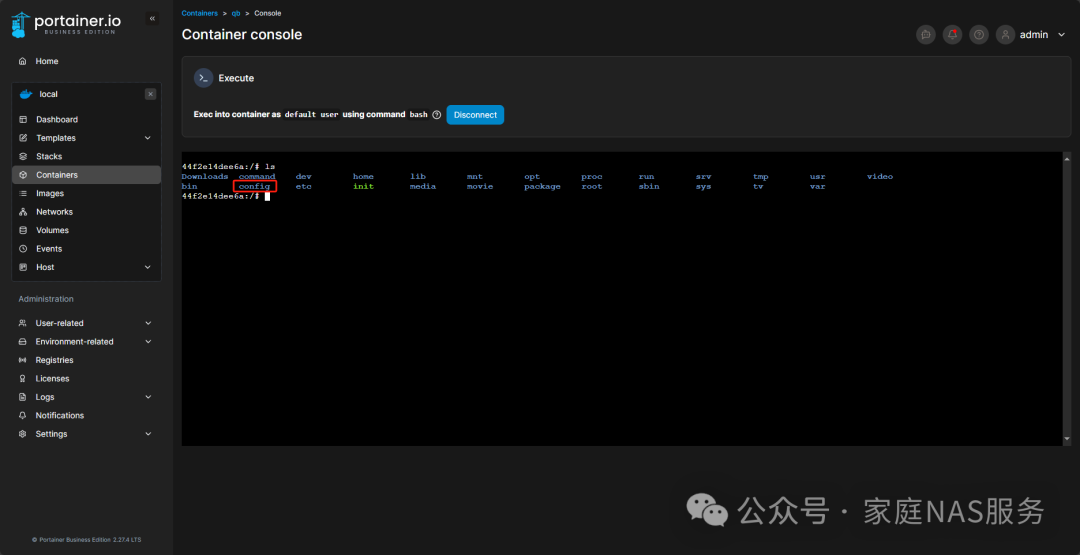
We need to enter the configuration folder, type cd config and hit Enter, noting the space in between. Then use the ls command again to see which folders are available next.
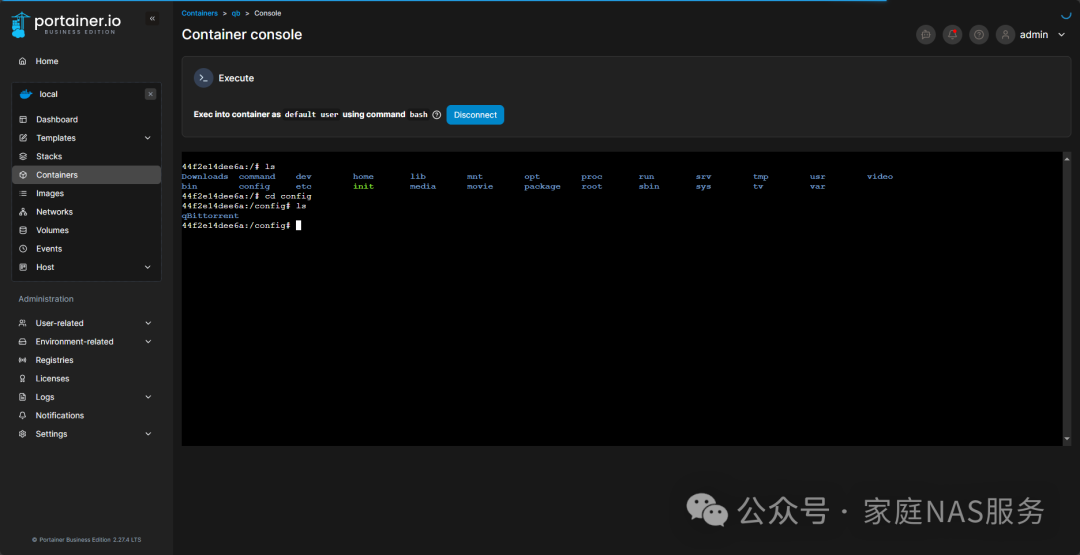
We can see that there is only one qBittorrent folder, so we will input the command cd qBittorrent/data/nova3/engines and use the ls command again to check which files are available.
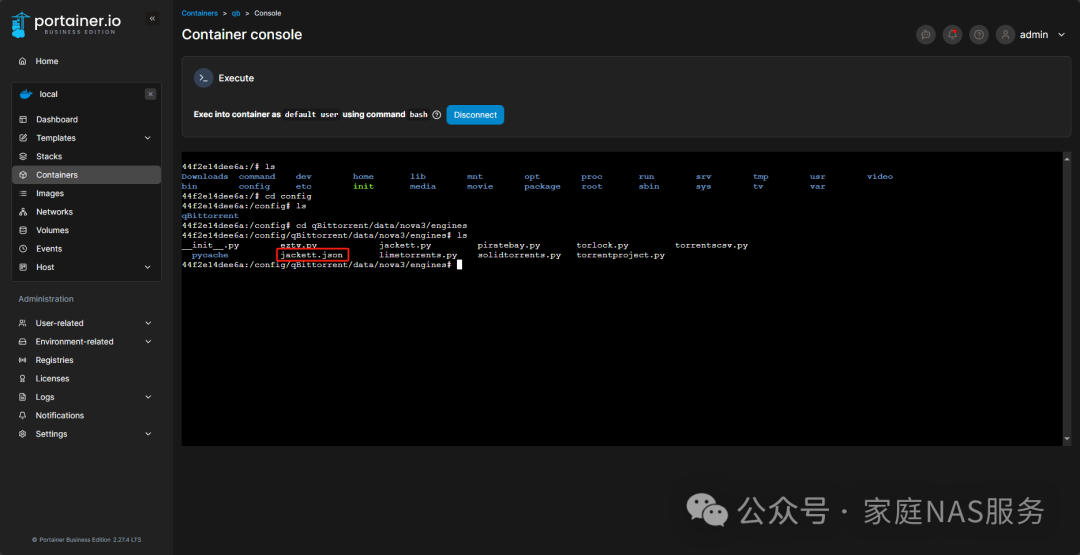
We need to modify the jackett.json file, type vi jackett.json and hit Enter.
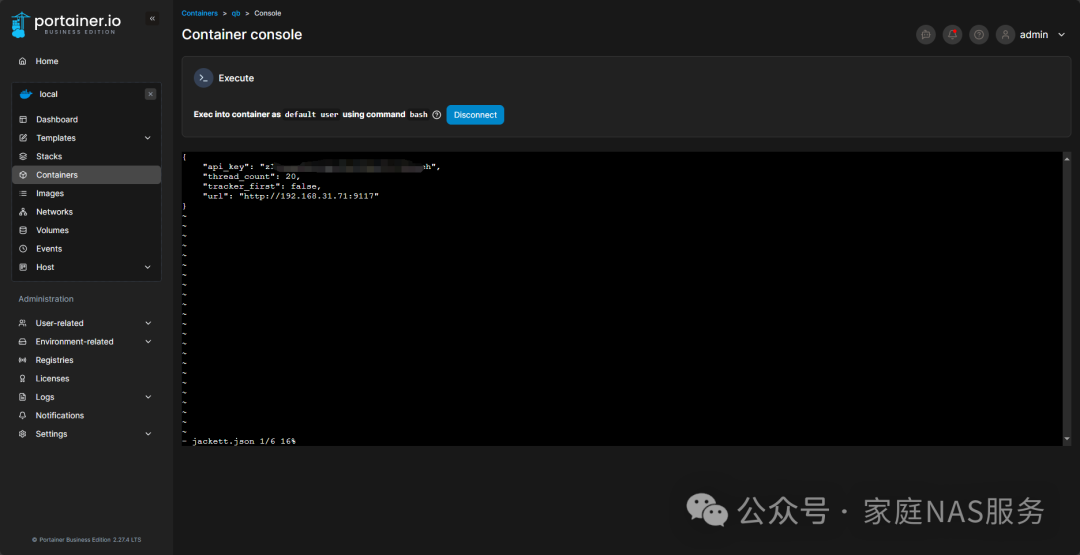
You will see the contents of the configuration file. At this point, press the i key to insert and modify the content. Fill in the api_key from the upper right corner of your Jackett main interface, and the url should be your Jackett server address, which needs to be written ashttp://your_server_IP:9117/.
After modification, press the Esc key, then type :wq and hit Enter to save successfully, then restart qBittorrent to use it.
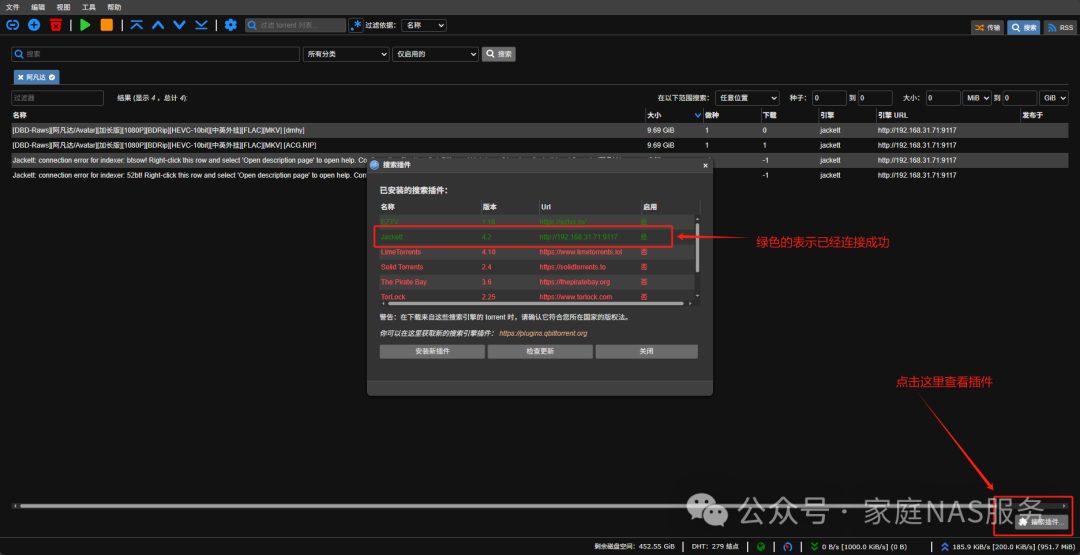
You can check in qBittorrent whether the plugin has been successfully enabled.
Previous articles:
Building a Home Media Server (Part 1) — Jellyfin
Building a Home Media Server (Part 2) — MoviePilot
Installing Docker (Orbstack) on Mac and managing it with Portainer
Installing Homebrew on Mac Mini