Hello everyone, I am Mengmeng, your learning assistant. ~
~
 In the last article, we introduced the HTTP protocol, which includes the request and response parts. A request is when the client sends request information to the server, and after receiving the request, the server processes it and returns a response.
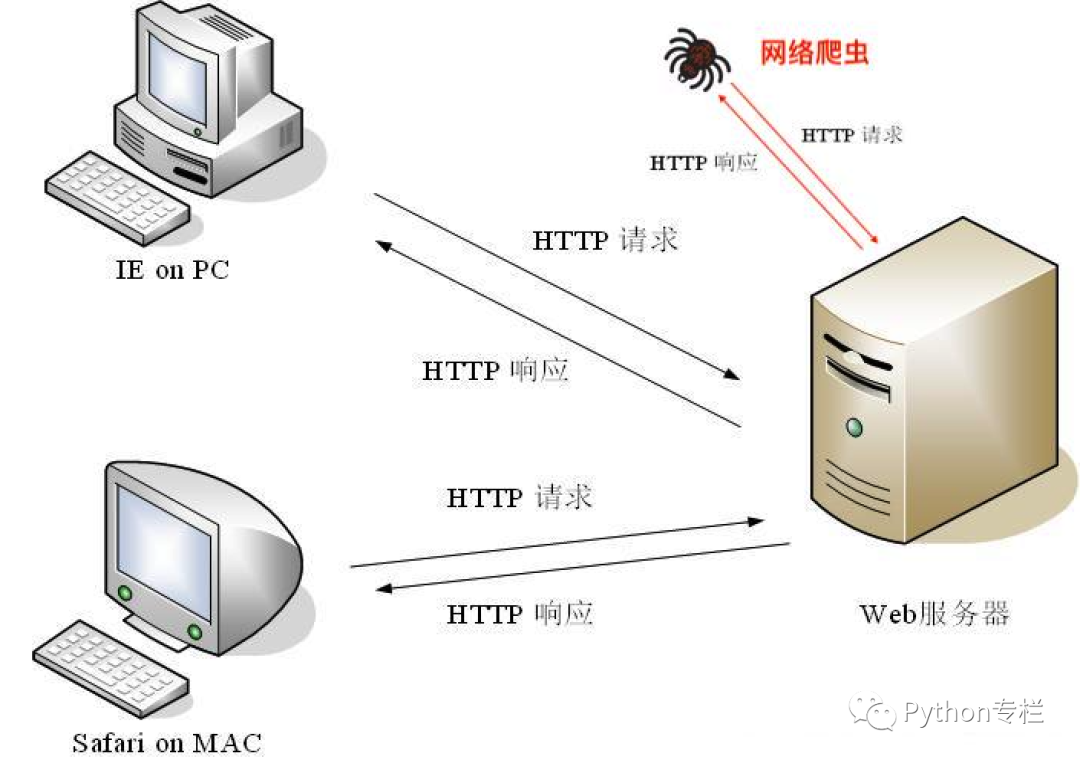
From the above image and the previous chapter on web scraping, we understand that when we use a browser to access some websites, we are using the HTTP protocol. Similarly, web crawlers also need to use the HTTP protocol to send requests and obtain responses.Computers or laptops use browsers (such as IE, Chrome, Safari, etc.), through which we can see a wealth of diverse and comprehensive online information. So, if we use a web crawler to access a web server, what does Python use to send requests and obtain responses?In Python, we can use the urllib module and the requests module. This article will mainly focus on the urllib module.
First of all, <span><span>urllib</span></span> is a standard library that comes with Python, so there is no need to install it; you can use it directly. If you want to learn the urllib library systematically, you can refer to its official documentation. Official documentation:
https://docs.python.org/zh-cn/3.7/library/urllib.html
First, let’s take a look at the official documentation of the urllib library:
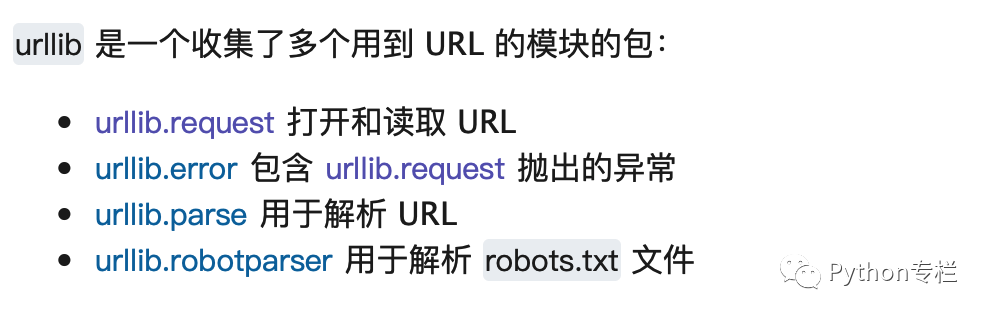
You can see that the documentation divides urllib into four parts:
- urllib.request – Request module
- urllib.error – Exception handling module
- urllib.parse – Parsing module
- urllib.robotparser – File parsing module
This article will also explain these four parts.
urllib.request – Request Module
The urllib.request module provides the most basic methods for constructing HTTP requests. It can simulate the process of sending a request from a browser, and it also handles authentication, redirections, cookies, and other content.
urllib.request.urlopen(url, data=None, [timeout, ]*, context=None)
Open the uniform resource locator (URL) url, which can be a string or a Request object, and returns an HTTPResponse object.
Parameter description:
- url is the address of the webpage to be accessed.
- data (optional) is an additional parameter. If you want to add data, it must be in byte stream encoding format, i.e., bytes type. You can convert it using the bytes() function. Additionally, if you pass this data parameter, the request method will no longer be GET but will be POST.
- timeout (timeout duration) sets the timeout duration for accessing the website.
- context must be of type ssl.SSLContext, used to specify SSL settings.
Let’s look at a piece of code that uses urllib.request.urlopen to access the Baidu homepage.
# Importing the library
import urllib.request
# Sending a request to Baidu using urllib.request.urlopen and getting the response
response = urllib.request.urlopen('http://www.baidu.com/')
# Checking the type of the returned response
print("Checking response type: ", type(response))
# Getting the response code
print(response.getcode())
# Reading the response content
page = response.read()
# Printing the response content
print(page)
From the results, we find that the returned object is of type HTTPResponse, which has the following callable methods:
- read(): The method works exactly like a file object;
- info(): Returns an httplib.HTTPMessage object, representing the header information returned by the remote server;
- getcode(): Returns the HTTP status code. For HTTP requests, 200 indicates that the request was successfully completed; 404 indicates that the URL was not found;
- geturl(): Returns the actual URL of the page obtained. This method is very helpful when urlopen (or opener object) may involve a redirection. The obtained page URL may not be the same as the real requested URL.
In the above example, we used getcode() to get the status code and read() to read the response content.From this, we know that using the urlopen() method can achieve the most basic request initiation, but these simple parameters are not enough to construct a complete request. Because in the previous article, we mentioned that a complete request must include header information and other details. Therefore, if we need to add headers to the request, we must use the more powerful Request class.So, in terms of hierarchy, the Request class is an upgrade from urlopen(). Let’s take a look at the explanation provided in the official documentation for the Request class.
urllib.request.Request(url, data=None, headers={}, origin_req_host=None, unverifiable=False, method=None)Parameters:
- url: The URL to be requested
- data: data must be of bytes type. If it is a dictionary, it can be encoded using the urlencode() method in the urllib.parse module.
- headers: headers is a dictionary type, which is the request header. It can be constructed directly through the headers parameter when constructing the request, or it can be added using the add_header() method of the request instance. You can disguise the browser through the request header. The default User-Agent is Python-urllib. To disguise as a Firefox browser, you can set the User-Agent to Mozilla/5.0 (x11; U; Linux i686) Gecko/20071127 Firefox/2.0.0.11.
- origin_req_host: Specifies the host name or IP address of the requester.
- unverifiable: Sets whether the webpage requires verification, default is False, this parameter generally does not need to be set.
- method: A string used to specify the method used for the request, such as GET, POST, and PUT.
In essence, the Request object is: using request() to wrap the request, and then using urlopen() to obtain the page. Simply using urlopen is not sufficient to construct a complete request. For example, if we do not add headers and other information when requesting Lagou.com, we will not be able to parse the webpage content normally.The following code accesses the test website http://httpbin.org/ using the POST request method, carrying parameters and request header information.
from urllib import request, parse
url = 'http://httpbin.org/post'
# Setting request headers
headers = { 'User-Agent': 'Mozilla/5.0 (Macintosh; Intel Mac OS X 10_14_3) AppleWebKit/605.1.15 (KHTML, like Gecko) Version/12.0.3 Safari/605.1.15', 'Host': 'httpbin.org'}
# Setting parameters
dict = { 'name': 'Germey'}
# Converting parameters to byte format
data = bytes(parse.urlencode(dict), encoding='utf8')
# Creating Request object
response = request.Request(url=url, data=data, headers=headers, method='POST')
# Using urlopen to send the request
response = request.urlopen(req)
# Reading and printing the result
print(response.read())
urllib.error
urllib.error can receive exceptions generated by urllib.request. urllib.error has two methods, URLError and HTTPError.
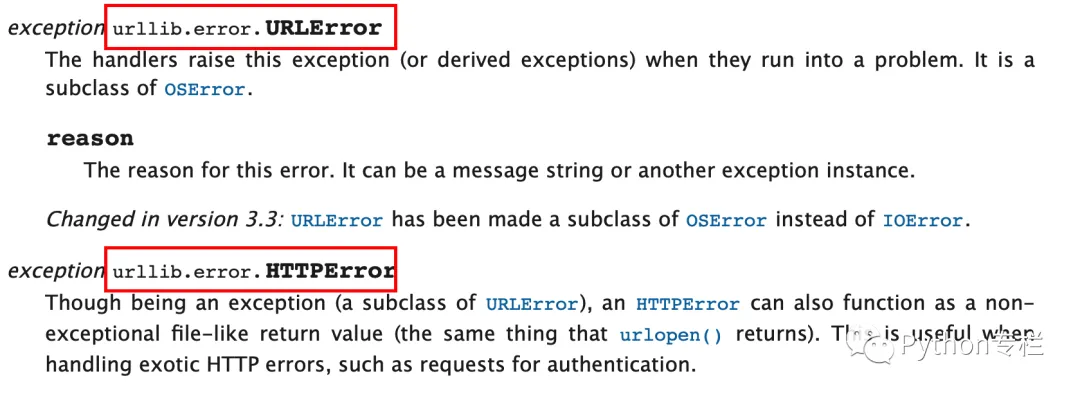
URLError is a subclass of OSError, and HTTPError is a subclass of URLError. The HTTP response from the server will return a status code, and based on this HTTP status code, we can know whether our access was successful. For example, the 200 status code mentioned in the second note indicates a successful request, while common errors like 404 indicate that the page was not found.
URLError
The URLError exception has only the reason attribute, which indicates the error reason. Let’s take a look at the URLError exception with the following code:
from urllib import request, error
# A non-existent URL
url = "http://www.nonepython.com"
req = request.Request(url)
try:
    response = request.urlopen(req)
    print('Status code: '+str(response.getcode()))
    html = response.read().decode('utf-8')
    print(html)
except error.URLError as e:
    print('Error:', e.reason)
Running result:
Error: [Errno 8] nodename nor servname provided, or not known
When accessing this URL through urlopen, the server could not be reached, resulting in an error. Therefore, URLError occurs when the URL is incorrect or does not exist.
HTTPError
HTTPError is a subclass of URLError, and its exception has three attributes:
- code: Returns the status code, 404 indicates not found, 500 indicates server error.
- reason: Returns the error reason.
- headers: Returns the request headers.
Let’s take a look at the HTTPError exception with the following code (you can try modifying the URL to observe the results):
from urllib import request, error
try:
    response = request.urlopen('http://www.douban.com/374838/')
except error.HTTPError as e:
    print('HTTPError:', e.code, e.reason, e.headers)
else:
    print('Request successful!')
The request result is as follows:

418 is an error code, with no reason, and the rest are the contents of the headers.Finally, it is worth noting that if you want to catch exceptions using both HTTPError and URLError, you need to place HTTPError before URLError, because HTTPError is a subclass of URLError. If URLError is placed first, when an HTTP exception occurs, it will respond to URLError first, and thus HTTPError will not be able to capture the error information.
from urllib import request, error
try:
    response = request.urlopen('http://www.douban.com/374838/')
except error.HTTPError as e:
    print('HTTPError:', e.code, e.reason, e.headers)
except error.URLError as e:
    print('URLError:', e.reason)
else:
    print('Request successful!')
urllib.parse
The urllib library also includes the parse module, which is used for parsing links. It defines standard interfaces for handling URLs, such as extracting, merging, and converting URL components.urllib.parse is divided into URL parsing and URL quoting.
URL Parsing
The URL parsing functions focus on breaking down a URL string into its components or combining URL components into a URL string.
Definition: urllib.parse.urlparse(urlstring, scheme=”, allow_fragments=True)Functionality: Splits the URL into six major components, such as: http://www.baidu.com/index.html?name=mo&age=25#dowell1. Transport protocol: http, https2. Domain name: e.g., www.baidu.com is the website name. baidu.com is the primary domain, and www is the server.3. Port: If not specified, the default is port 80.4. Path: http://www.baidu.com/index.html. / indicates a hierarchical path.5. Parameters: ? indicates parameters (optional), e.g., ?name=mo6. Hash value: HASH value (optional) #dowell
Remember: urlencode
It is very useful for constructing GET request parameters. First, declare a dictionary to represent the parameters, and then call the urlencode method to serialize it into GET request parameters.
from urllib.parse import urlencode
params = {'name':'Xiao Ming','age':20}
base_url = 'http://baidu.com?'
base_url += urlencode(params)
print(base_url)# Result: http://baidu.com?name=%E5%B0%8F%E6%98%8E&age=20
URL Quoting
The URL quoting functions focus on obtaining program data and making it safe for use as URL components by quoting special characters and appropriately encoding non-ASCII text. They also support reversing these operations to recreate the original data if the above URL parsing functions do not cover that task.
- quote
This method converts content into URL encoding format and can convert Chinese strings into URL encoding.
from urllib.parse import quote
keyword = '美女'
url = 'http://www.baidu.com?wd=' + quote(keyword)
print(url)# Result: http://www.baidu.com?wd=%E7%BE%8E%E5%A5%B3-
unquote: Use unquote to restore.
from urllib.parse import quote, unquote
print(unquote('%E7%BE%8E%E5%A5%B3'))# Result: 美女
urllib.robotparser
Before we explain urllib.robotparser, let’s talk about the website file <span><span>robots.txt</span></span>. Every website defines a <span><span>robots.txt</span></span> file, which can inform web crawlers of the restrictions when crawling the site. As good netizens and for the benefit of others, we generally follow these restrictions.How to view this file? You can access it by adding <span><span>robots.txt</span></span> to the end of the target website’s domain name.For example, the <span><span>robots.txt</span></span> file for the target website <span><span>https://www.baidu.com</span></span> is <span><span>https://www.baidu.com/robots.txt</span></span>
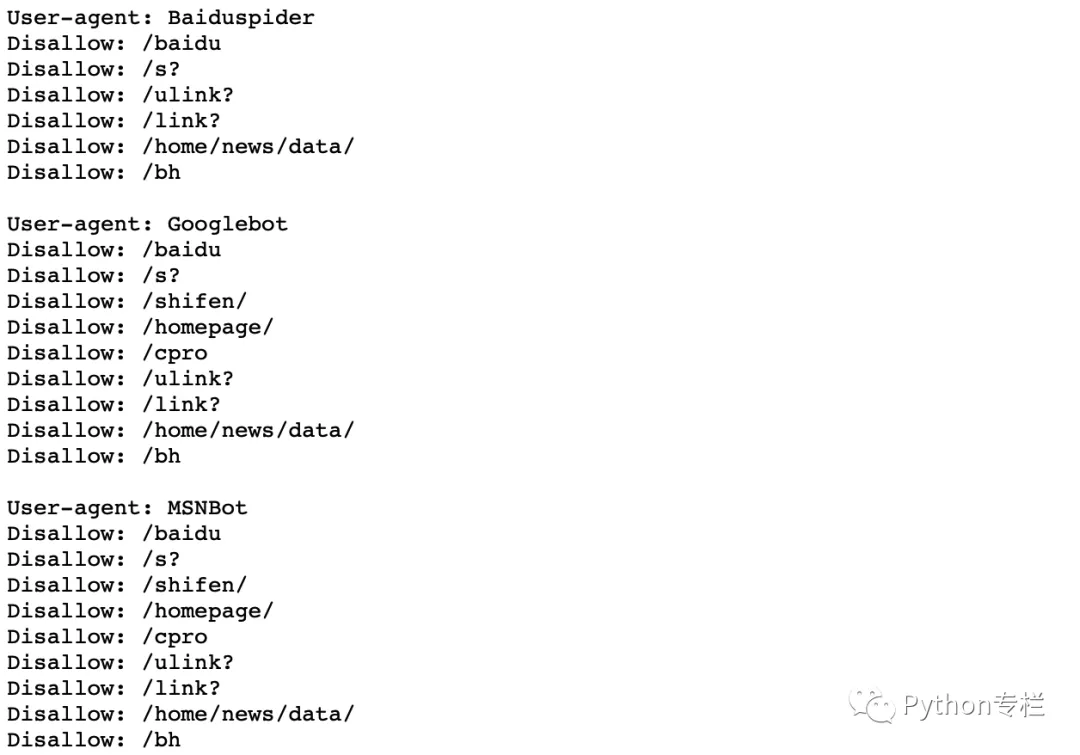
About the content of this <span>robots.txt</span> file:Section 1: Defines the <span><span>Sitemap</span></span> file, which is the so-called website map. The Sitemap file provided by the website contains links to all pages within the site, so it is not an exaggeration to call it a map.Section 2: If this part is not commented out and specifies a redirect link, it indicates that the time interval between two crawls by each user cannot be less than 5 seconds; otherwise, the accessed webpage will automatically redirect to the specified link. At this point, it is equivalent to the website server banning the IP, and the ban duration depends on the situation of each website.Section 3: This part indicates that the <span><span>robots.txt</span></span> file prohibits crawlers that act as MSNBot from accessing the website. In other words, it prohibits the MSNBot crawler agent from accessing the website.Disallow indicates paths that are not allowed to be accessed, while allow indicates paths that are allowed to be accessed.
import ssl
ssl._create_default_https_context = ssl._create_unverified_context
rp = robotparser.RobotFileParser()
rp.set_url('https://www.baidu.com/robots.txt')
rp.read()
url = 'https://www.baidu.com'
user_agent = 'YoudaoBot'
wsp_info = rp.can_fetch(user_agent, url)
print("Wandoujia Spider agent access status: ", wsp_info)
user_agent = 'Other Spider'
osp_info = rp.can_fetch(user_agent, url)
print("Other Spider agent access status: ", osp_info)
When you use urllib.urlopen for an https request, it will verify the SSL certificate. If the target uses a self-signed certificate, a URLError will occur. If this happens, you can add the following at the beginning:
import ssl
ssl._create_default_https_context = ssl._create_unverified_context
Alright! Let’s run the above code and see what the results are!Of course, among these four categories, some contents are more extensive, and we only mention the more commonly used content, hoping it will be helpful to everyone!Finally, an additional note is that urllib.urlretrieve() directly downloads remote data to the local machine.This function can conveniently save a file from a webpage to the local machine. The file type can be an HTML file, image, video, or other media files.
urlretrieve(url, filename=None, reporthook=None, data=None)
- The url parameter specifies the URL of the file to be downloaded.
- The filename parameter specifies the local path to save (if not specified, urllib will generate a temporary file to save the data).
- The reporthook parameter is a callback function that will be triggered when the connection to the server is established and when the corresponding data block transfer is completed. We can use this callback function to display the current download progress.
- The data parameter is the data to be posted to the server. This method returns a tuple containing two elements (filename, headers), where filename indicates the path saved locally, and headers indicates the server’s response headers.
from urllib import request
image_url = 'https://gimg2.baidu.com/image_search/src=http%3A%2F%2Fdingyue.nosdn.127.net%2FwFdkoX0pkLJoS1Ued6ou7dgUMaiZfAy93RiVXhz3iy7QU1542769981593compressflag.jpeg&refer=http%3A%2F%2Fdingyue.nosdn.127.net&app=2002&size=f9999,10000&q=a80&n=0&g=0n&fmt=jpeg?sec=1620297676&t=0b3443d8c5b502c8134079e0e131ef3f'
request.urlretrieve(image_url,'liying.jpg')
This method is mainly used for file saving. The path is relative to the current py file, saving as liying.jpg.
 Mengmeng has prepared a diverse course system for you to unlock.
 If you are interested in Python, and want to learn more in-depth, you can click the image to learn. This is a systematic free nanny-level video tutorial, theory + practice, suitable for beginners!↓↓↓
– End –
Want to enhance your skills and career development?
Recommended free courses:Linux Cloud Computing | Java Development | HarmonyOS | Python Data Analysis | Internet of Things | Cybersecurity | Game Art | Software Testing | Unity Game Development | PMP Project Management | HTML5 Frontend Development | All-Media Operations | UI/UX Design | Film Editing | C++ | Big Data | Computer Level 2