The concept of creating or configuring multiple IP addresses on a single network interface is known as IP aliasing. This technique is particularly useful in web server environments, allowing multiple IP addresses to be bound to a single network interface within the same subnet, thereby enabling the hosting of multiple virtual sites on a single server.
The main advantage of using IP aliasing is that it eliminates the need for a separate physical network card for each IP address. By creating multiple virtual interfaces for a single physical network card, network configurations can be flexibly expanded while significantly reducing hardware investment and maintenance costs.
The configuration methods provided in this article primarily target RHEL 7 and earlier versions, which use the traditional network-scripts method for network management. Applicable distributions include CentOS 7, RHEL 7, etc.
Important Note: In RHEL 8 and later versions, the network configuration method has undergone significant changes, and it is recommended to use the
<span>nmcli</span>tool from NetworkManager for configuration. The traditional method requires manually installing the network-scripts package in RHEL 8 and is no longer officially recommended.
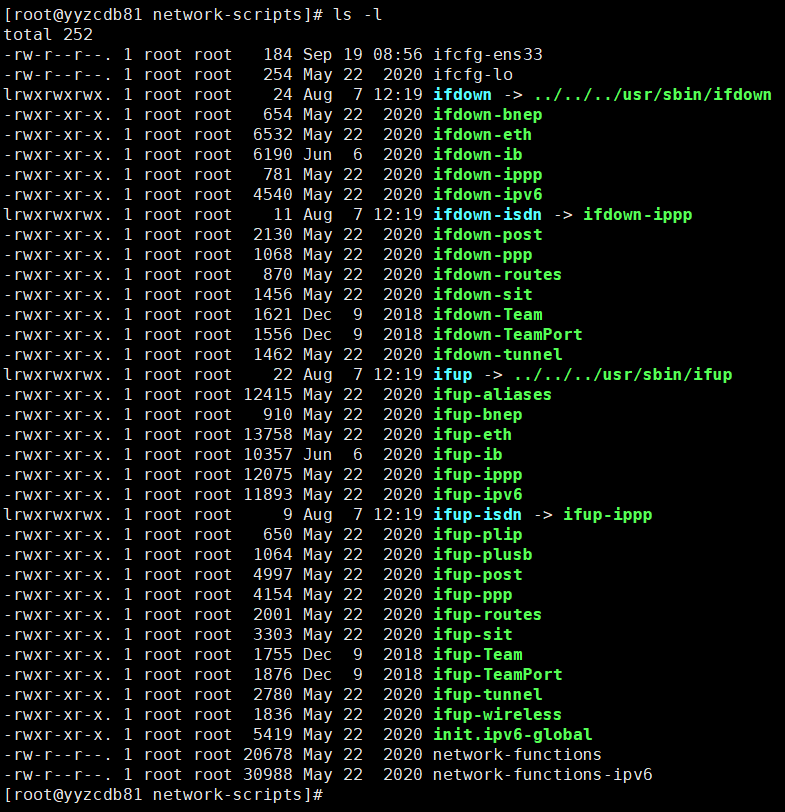
In a typical configuration for RHEL 7, the default Ethernet interface is usually named <span>ifcfg-ens33</span>. If a second Ethernet device is connected, it will be displayed as <span>ifcfg-ens34</span>, and subsequent devices will follow this naming convention. All configuration files for these network interfaces are located in the <span>/etc/sysconfig/network-scripts/</span> directory.
ls -l /etc/sysconfig/network-scripts/
Example Output:
[root@yyzcdb81 network-scripts]# ls -l
total 252
-rw-r--r--. 1 root root   184 Sep 19 08:56 ifcfg-ens33
-rw-r--r--. 1 root root   254 May 22  2020 ifcfg-lo
lrwxrwxrwx. 1 root root    24 Aug  7 12:19 ifdown -> ../../../usr/sbin/ifdown
-rwxr-xr-x. 1 root root   654 May 22  2020 ifdown-bnep
-rwxr-xr-x. 1 root root  6532 May 22  2020 ifdown-eth
-rwxr-xr-x. 1 root root  6190 Jun  6  2020 ifdown-ib
-rwxr-xr-x. 1 root root   781 May 22  2020 ifdown-ippp
-rwxr-xr-x. 1 root root  4540 May 22  2020 ifdown-ipv6
lrwxrwxrwx. 1 root root    11 Aug  7 12:19 ifdown-isdn -> ifdown-ippp
-rwxr-xr-x. 1 root root  2130 May 22  2020 ifdown-post
-rwxr-xr-x. 1 root root  1068 May 22  2020 ifdown-ppp
-rwxr-xr-x. 1 root root   870 May 22  2020 ifdown-routes
-rwxr-xr-x. 1 root root  1456 May 22  2020 ifdown-sit
-rwxr-xr-x. 1 root root  1621 Dec  9  2018 ifdown-Team
-rwxr-xr-x. 1 root root  1556 Dec  9  2018 ifdown-TeamPort
-rwxr-xr-x. 1 root root  1462 May 22  2020 ifdown-tunnel
lrwxrwxrwx. 1 root root    22 Aug  7 12:19 ifup -> ../../../usr/sbin/ifup
-rwxr-xr-x. 1 root root 12415 May 22  2020 ifup-aliases
-rwxr-xr-x. 1 root root   910 May 22  2020 ifup-bnep
-rwxr-xr-x. 1 root root 13758 May 22  2020 ifup-eth
-rwxr-xr-x. 1 root root 10357 Jun  6  2020 ifup-ib
-rwxr-xr-x. 1 root root 12075 May 22  2020 ifup-ippp
-rwxr-xr-x. 1 root root 11893 May 22  2020 ifup-ipv6
lrwxrwxrwx. 1 root root     9 Aug  7 12:19 ifup-isdn -> ifup-ippp
-rwxr-xr-x. 1 root root   650 May 22  2020 ifup-plip
-rwxr-xr-x. 1 root root  1064 May 22  2020 ifup-plusb
-rwxr-xr-x. 1 root root  4997 May 22  2020 ifup-post
-rwxr-xr-x. 1 root root  4154 May 22  2020 ifup-ppp
-rwxr-xr-x. 1 root root  2001 May 22  2020 ifup-routes
-rwxr-xr-x. 1 root root  3303 May 22  2020 ifup-sit
-rwxr-xr-x. 1 root root  1755 Dec  9  2018 ifup-Team
-rwxr-xr-x. 1 root root  1876 Dec  9  2018 ifup-TeamPort
-rwxr-xr-x. 1 root root  2780 May 22  2020 ifup-tunnel
-rwxr-xr-x. 1 root root  1836 May 22  2020 ifup-wireless
-rwxr-xr-x. 1 root root  5419 May 22  2020 init.ipv6-global
-rw-r--r--. 1 root root 20678 May 22  2020 network-functions
-rw-r--r--. 1 root root 30988 May 22  2020 network-functions-ipv6
[root@yyzcdb81 network-scripts]#
Assuming we need to create three virtual interfaces to bind three IP addresses (172.16.250.91, 172.16.250.92, and 172.16.250.93) to the network card.
We need to create three additional alias configuration files, while <span>ifcfg-ens33</span> retains its primary IP address. We will bind the following IP addresses by setting three aliases:
| Adapter | IP Address | Type |
|---|---|---|
| ens33 | 172.16.250.81 | Main Interface |
| ens33:0 | 172.16.250.91 | Alias 1 |
| ens33:1 | 172.16.250.92 | Alias 2 |
| ens33:2 | 172.16.250.93 | Alias 3 |
Where <span>:X</span> indicates the device (interface) number when creating an alias for the ens33 interface. Each alias must be assigned a number in sequence.
For example, we can copy the existing parameters of the interface <span>ifcfg-ens33</span> into virtual interface files named <span>ifcfg-ens33:0</span>, <span>ifcfg-ens33:1</span>, and <span>ifcfg-ens33:2</span>.
Navigate to the network scripts directory and create the files as follows:
[root@yyzcdb81 /]# cd /etc/sysconfig/network-scripts
[root@yyzcdb81 network-scripts]# cp ifcfg-ens33 ifcfg-ens33:0
[root@yyzcdb81 network-scripts]# cp ifcfg-ens33 ifcfg-ens33:1
[root@yyzcdb81 network-scripts]# cp ifcfg-ens33 ifcfg-ens33:2
[root@yyzcdb81 network-scripts]#
Open the <span>ifcfg-ens33</span> file to view its contents:
vim ifcfg-ens33
Example Output:
TYPE=Ethernet
PROXY_METHOD=none
BROWSER_ONLY=no
BOOTPROTO=none
DEFROUTE=yes
NAME=ens33
DEVICE=ens33
ONBOOT=yes
IPADDR=172.16.250.81
PREFIX=24
GATEWAY=172.16.250.1
DNS1=223.5.5.5
For the alias files, we mainly need to focus on two parameters (<span>DEVICE</span> and <span>IPADDR</span>). Therefore, using the <span>vim</span> editor, open each file and modify the <span>DEVICE</span> and <span>name</span> to correspond to the alias, and change the <span>IPADDR</span> address, removing the default gateway, as alias interfaces typically do not require a gateway.
After modifications, the contents of these files are as follows:
File <span>ifcfg-ens33:0</span>
TYPE=Ethernet
PROXY_METHOD=none
BROWSER_ONLY=no
BOOTPROTO=none
DEFROUTE=yes
NAME=ens33:0
DEVICE=ens33:0
ONBOOT=yes
IPADDR=172.16.250.91
PREFIX=24
DNS1=223.5.5.5
File <span>ifcfg-ens33:1</span>
TYPE=Ethernet
PROXY_METHOD=none
BROWSER_ONLY=no
BOOTPROTO=none
DEFROUTE=yes
NAME=ens33:1
DEVICE=ens33:1
ONBOOT=yes
IPADDR=172.16.250.92
PREFIX=24
#GATEWAY=172.16.250.1
DNS1=223.5.5.5
File <span>ifcfg-ens33:2</span>
TYPE=Ethernet
PROXY_METHOD=none
BROWSER_ONLY=no
BOOTPROTO=none
DEFROUTE=yes
NAME=ens33:2
DEVICE=ens33:2
ONBOOT=yes
IPADDR=172.16.250.93
PREFIX=24
DNS1=223.5.5.5
After completing all changes, save the files and restart/start the network service to apply the changes.
[root@yyzcdb81 network-scripts]# systemctl restart network
[root@yyzcdb81 network-scripts]#
To verify that all aliases (virtual interfaces) have started and are running correctly, you can use the <span>ifconfig</span> or <span>ip</span> command.
[root@yyzcdb81 ~]# ifconfig
Example Output:
ens33: flags=4163<UP,BROADCAST,RUNNING,MULTICAST>  mtu 1500
        inet 172.16.250.81  netmask 255.255.255.0  broadcast 172.16.250.255
        inet6 fe80::20c:29ff:fe22:e8c0  prefixlen 64  scopeid 0x20<link>
        ether 00:0c:29:22:e8:c0  txqueuelen 1000  (Ethernet)
        RX packets 4404  bytes 812600 (793.5 KiB)
        RX errors 0  dropped 0  overruns 0  frame 0
        TX packets 4011  bytes 694481 (678.2 KiB)
        TX errors 0  dropped 0 overruns 0  carrier 0  collisions 0

ens33:0: flags=4163<UP,BROADCAST,RUNNING,MULTICAST>  mtu 1500
        inet 172.16.250.91  netmask 255.255.255.0  broadcast 172.16.250.255
        ether 00:0c:29:22:e8:c0  txqueuelen 1000  (Ethernet)

ens33:1: flags=4163<UP,BROADCAST,RUNNING,MULTICAST>  mtu 1500
        inet 172.16.250.92  netmask 255.255.255.0  broadcast 172.16.250.255
        ether 00:0c:29:22:e8:c0  txqueuelen 1000  (Ethernet)

ens33:2: flags=4163<UP,BROADCAST,RUNNING,MULTICAST>  mtu 1500
        inet 172.16.250.93  netmask 255.255.255.0  broadcast 172.16.250.255
        ether 00:0c:29:22:e8:c0  txqueuelen 1000  (Ethernet)
From another machine, ping each IP address to receive a reply from each IP.
ping 172.16.250.91
ping 172.16.250.92
ping 172.16.250.93
Example Output:
[root@yybbdbserver ~]# ping 172.16.250.91
PING 172.16.250.91 (172.16.250.91) 56(84) bytes of data.
64 bytes from 172.16.250.91: icmp_seq=1 ttl=64 time=0.493 ms
64 bytes from 172.16.250.91: icmp_seq=2 ttl=64 time=0.377 ms
64 bytes from 172.16.250.91: icmp_seq=3 ttl=64 time=0.391 ms
64 bytes from 172.16.250.91: icmp_seq=4 ttl=64 time=0.338 ms

[root@yybbdbserver ~]# ping 172.16.250.92
PING 172.16.250.92 (172.16.250.92) 56(84) bytes of data.
64 bytes from 172.16.250.92: icmp_seq=1 ttl=64 time=0.556 ms
64 bytes from 172.16.250.92: icmp_seq=2 ttl=64 time=0.387 ms
64 bytes from 172.16.250.92: icmp_seq=3 ttl=64 time=0.364 ms

[root@yybbdbserver ~]# ping 172.16.250.93
PING 172.16.250.93 (172.16.250.93) 56(84) bytes of data.
64 bytes from 172.16.250.93: icmp_seq=1 ttl=64 time=6.59 ms
64 bytes from 172.16.250.93: icmp_seq=2 ttl=64 time=6.25 ms
64 bytes from 172.16.250.93: icmp_seq=3 ttl=64 time=5.56 ms