
Core Programming Concept 7 – Mastering ‘Continue’ in Loops: Let It Take a Break!
Introduction: Young makers, we have already made Arduino tirelessly loop through tasks (<span>for</span> and <span>while</span>). However, sometimes during the loop, we want it to skip a round instead of stopping completely. For example, when checking a row of seats, “If this seat is empty, skip checking it.” Today, we will introduce the ‘skip’ master in loops — <span>continue</span>, which allows you to control loops more effectively!
👉 Follow our public account [Hardware Programming and Innovation], reply with [continue] to get the code package and source code for this article!
1. 3-Minute Concept: What is ‘continue’?
Life Analogy:
- The teacher checks homework: “From the first row to the last row, if any student’s homework has already been graded, just skip and check the next student’s homework directly.”
- The teacher does not stop checking, but simply skips those that do not need to be checked again, continuing with the rest of the work.
In programming, <span>continue</span> is this “skip” command. When it encounters <span>continue</span> in a loop, it will immediately end the current loop iteration, skip all the code that follows it, and directly start the next loop iteration.

2. Hands-On Practice! Exploring 3 ‘continue’ Examples
Example 1: Serial Print of Odd Numbers
- Learning Objective: Understand the most basic use of ‘continue’ — skip even numbers and only print odd numbers.
- Required Components: Arduino board × 1 (no additional components needed, use the serial monitor).
Arduino IDE code is as follows:
// Example 1: Serial Print of Odd Numbers
// Task: Print odd numbers between 1-10, skip even numbers
void loop() {
for (int i = 1; i <= 10; i++) {
// If i is even, skip the remaining part of this loop iteration
if (i % 2 == 0) { // % is the modulus operator, if i divided by 2 has a remainder of 0, it means it's even
continue; // When encountering continue, jump directly to i++, starting the next loop iteration
}
// If execution reaches here, it means i is odd
Serial.println(i);
delay(500);
}
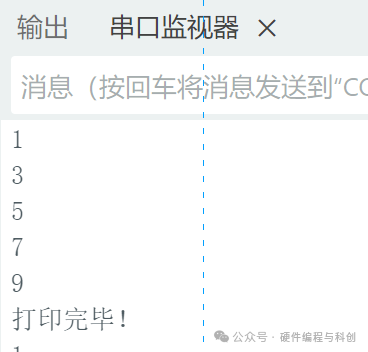
Serial.println("Printing complete!");
delay(2000); // Wait for 2 seconds before loop() restarts
}✅ What did you see? The serial monitor only prints 1, 3, 5, 7, 9. When <span>i</span> is even, the <span>continue</span> command skips the <span>Serial.println(i)</span> line of code.
Example 2: ‘Smart’ Flowing Lights (Skipping Broken LEDs)
- Learning Objective: Use ‘continue’ in hardware control to improve program fault tolerance.
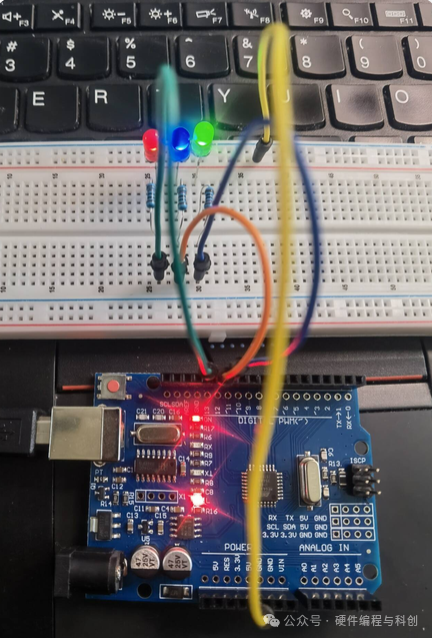
- Required Components: LED × 3, 220Ω resistors × 3, breadboard and wires.
Connection Diagram: [3 LEDs connected to Arduino pins 11, 12, and 13.]
Arduino IDE code is as follows:
// Example 2: 'Smart' Flowing Lights (Skipping Broken LEDs)
// Assume the LED on pin 12 is broken, we want the flowing lights to skip it
void loop() {
  for (int pin = 11; pin <= 13; pin++) {
    // If the current pin is the broken LED on pin 12, skip it
    if (pin == 12) {
      continue; // Skip the operation to light up the LED on pin 12
    }

    digitalWrite(pin, HIGH); // Light up the normal LED
    delay(300);
    digitalWrite(pin, LOW);  // Turn off
    delay(100);
  }
}
✅ What did you see? Only the LEDs on pins 11 and 13 are flashing alternately, while the LED on pin 12 remains off. The program intelligently skipped the “broken” LED, allowing the other lights to function normally.
Example 3: Data Filter (Skipping Outliers)
- Learning Objective: Use ‘continue’ in data processing to filter out unreasonable sensor data.
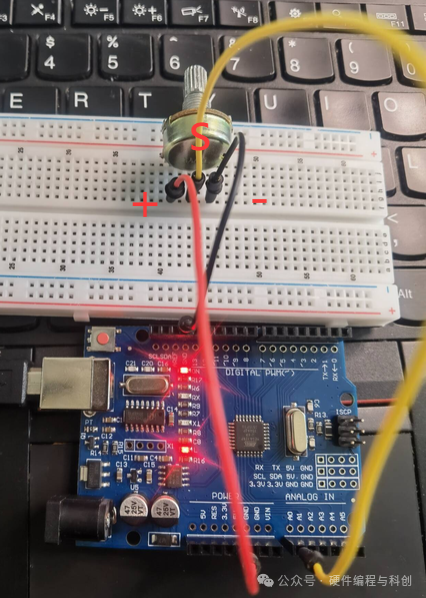
- Required Components: Potentiometer × 1.
Connection Diagram: [Potentiometer connection diagram, middle pin connected to A0, sides connected to 5V and GND.]
Arduino IDE code is as follows:
// Example 3: Data Filter (Skipping Outliers)
// Task: Continuously read the potentiometer 10 times, but only print values within a reasonable range (200-800)
void loop() {
  int sensorValue;
  // If the reading is not within a reasonable range, skip printing

   // Code omitted...
  Serial.println("=== One round of collection finished ===");
  delay(2000);
}
✅ Operation and Observation: Rotate the potentiometer, and you will see that only when the value is between 200-800 is it marked as “valid reading”. Out-of-range “outliers” will be identified and skipped, making your data cleaner and more reliable!
3. Parent-Child Interactive Playground: Safe Password Checker
Experiment Name: “Smart Access Control Simulation System”
- Objective: Use ‘continue’ to implement a simple password attempt mechanism, skipping already tried incorrect passwords.
- Preparation: Complete the serial communication environment from [Example 1].
Task Steps:
- [Scenario Construction]
- [Parents] Set the scenario: “We simulate an access control system with 3 possible passwords, but one of them is an old password that has already expired.”
- [Child] Think: How can we make the program automatically skip that expired password?
- [Logic Design]
- Define an array to store all possible passwords (including the expired one).
- Use a loop to iterate through all passwords.
- Within the loop, if an expired password is encountered, use
<span>continue</span>to skip this attempt.
- [Programming Implementation]
void setup() {
  Serial.begin(9600);
  int passwords[] = {123, 456, 789}; // Possible passwords
  int expiredPassword = 456;         // Expired password

  Serial.println("Starting to try all possible passwords:");

  for (int i = 0; i < 3; i++) {
    if (passwords[i] == expiredPassword) {
      Serial.print("Skipping expired password: ");
      Serial.println(passwords[i]);
      continue; // Skip expired password
    }

    Serial.print("Trying password: ");
    Serial.println(passwords[i]);
    // Here you can add the actual password verification logic
    delay(1000);
  }
}
void loop() {
  // Empty loop
}- [Discussion Upgrade]
- [Discussion Together]: What if there is more than one expired password?
- [Challenge]: Can you modify the program to skip multiple expired passwords?
This experiment can train children: logical thinking, conditional judgment ability, and the ability to flexibly use ‘continue’ to solve problems in real scenarios.
4. Programming English Mini-Class
Now let’s learn today’s key English word:
<span>continue</span>[kənˈtɪnjuː] – Continue
- Meaning in Programming: Skip the remaining part of the current loop and continue executing the next loop.
- Memory Tip: The meaning of this word itself is “continue”. In a loop, it allows us to continue to the next round.
<span>skip</span>[skɪp] – Skip
- Although not a keyword, it is the best explanation for understanding ‘continue’.
- Memory Tip: Pronounce it as “think running”, imagine your thoughts skipping the complex parts.
continue vs break: Remember the previous <span>break</span>? Let’s compare:
<span>break</span>: Completely stop – like the school bell, the entire loop ends.<span>continue</span>: Skip this round – like saying “I will observe this round” in gym class, only skipping the current round, the game continues.
English Mini Challenge: Tell your parents: “The program will skip this number and continue to the next.” (The program will skip this number and continue to the next.)
Next Article Preview:
Awesome! You have mastered two powerful tools for loop control: <span>break</span> (completely stop) and <span>continue</span> (skip this round)! Now, your programming toolkit is quite rich. The next lesson will explain break, making your code cleaner and more powerful!
📢 Want to challenge more complex projects? Follow our public account and reply with [Project Ideas] to get 10 advanced project inspirations!
Article Tags: #Core Programming Concepts #Continue Statement #Loop Control #Skip Loop #Parent-Child Programming #Arduino Programming #Programming Thinking