Click the blue text above to follow us

In the field of industrial control, CANopen is widely used as a standard protocol. Today, we will share the application case of the integrated stepper motor and Delta PLC (AS228T) under the CANopen communication protocol:
1. Hardware Composition

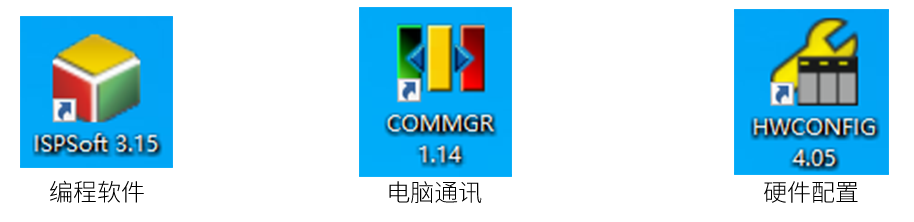
Software Composition:
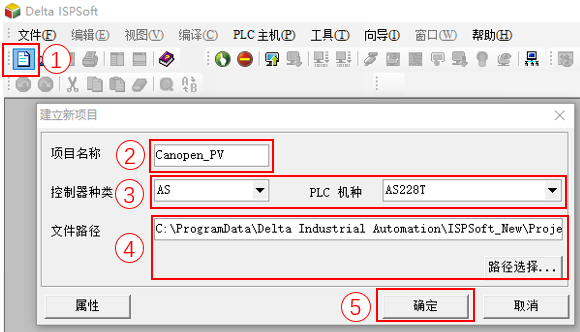
2. Establishing a New Project
1. Open the programming software ISPSoft315 and click “New Project”
2. Name the project
3. Select the type of controller and PLC model
4. Choose the file path
5. Click “OK”
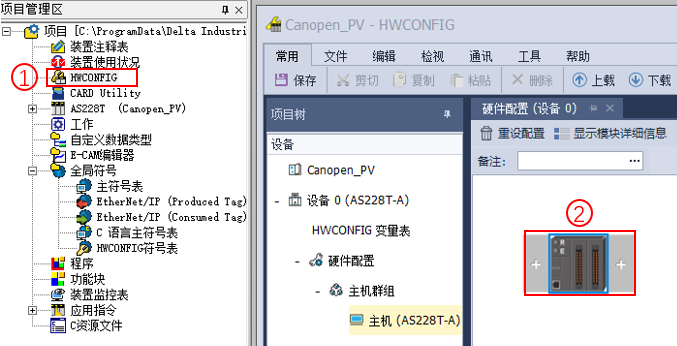
3. Hardware Configuration
1. Double-click “HWCONFIG” to enter the hardware configuration software
2. Double-click the module to enter the editing area
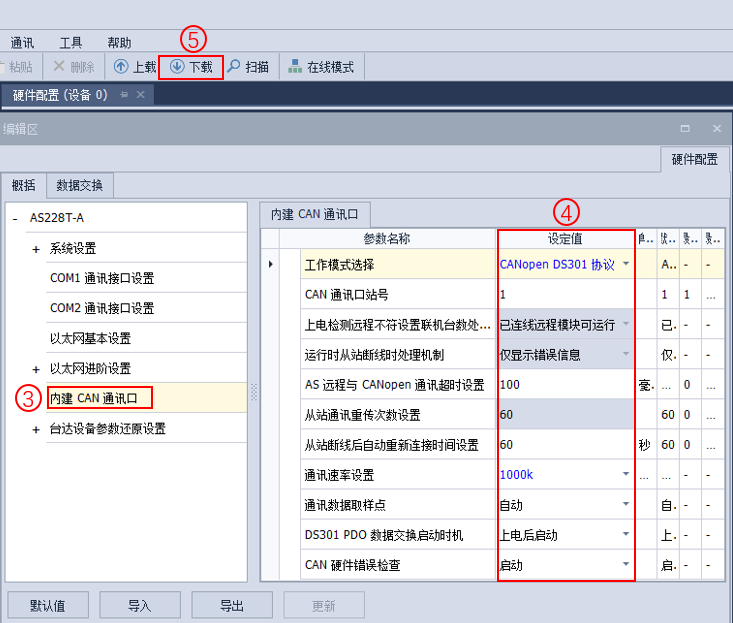
3. Click “Built-in CAN Communication Port”
4. Set the parameters
5. Click “Download”
4. Network Configuration
1. Click the module
2. Click “CANopen Builder” to enter the network configuration software
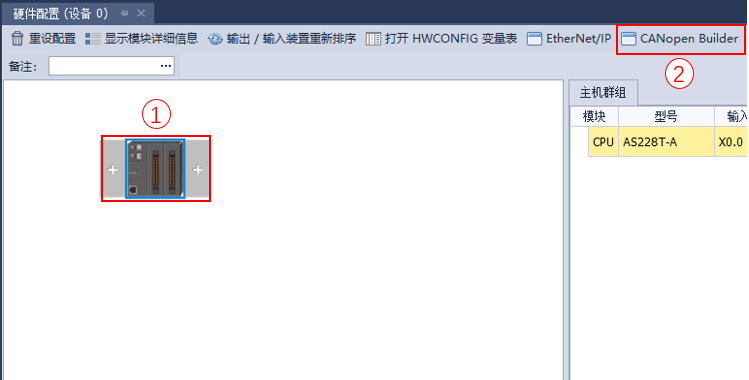
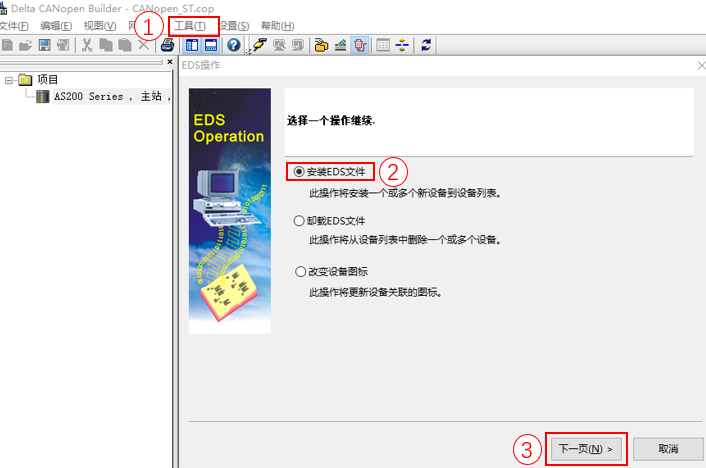
5. EDS File Installation
1. Click “Tools” and select EDS operation
2. Select “Install EDS File”
3. Click “Next”
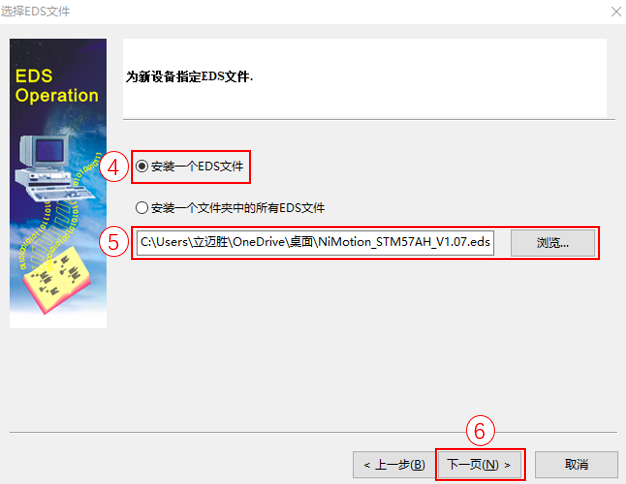
4. Choose “Install an EDS File”
5. Select the EDS file to be installed
6. Click “Next”
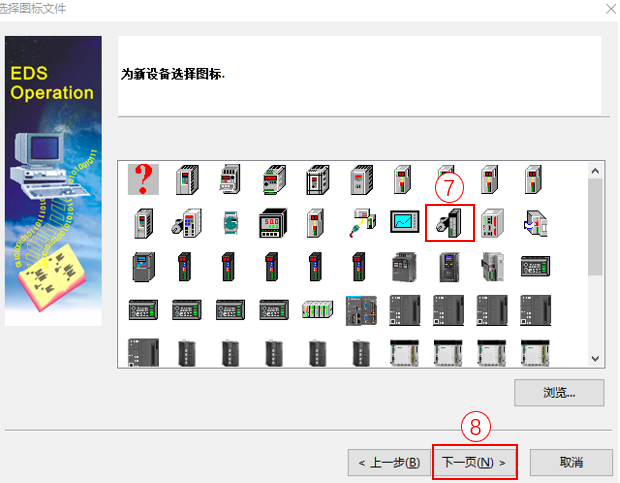
7. Choose any icon
8. Click “Next”
9. Click “Finish”
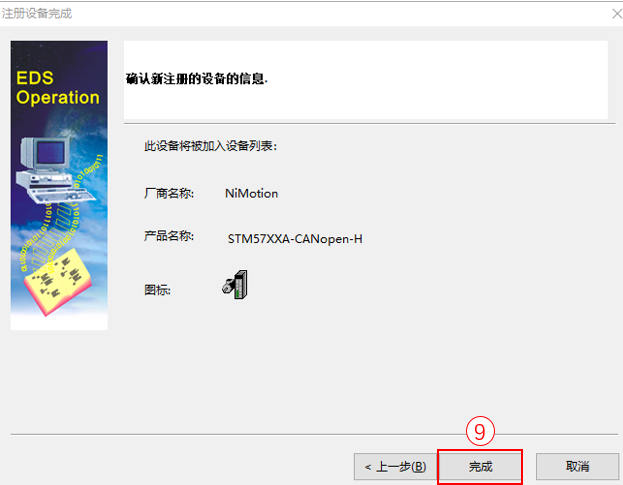
6. Node Configuration
1. Click “Device”
2. Expand NiMotion and double-click the installed EDS file “STM57XXA-CANopen-H”
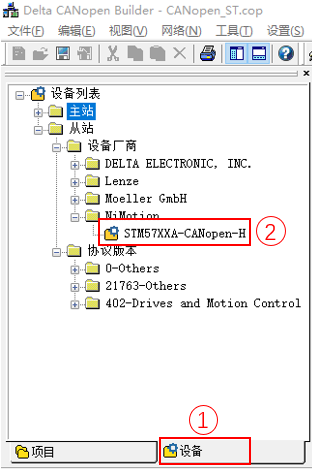
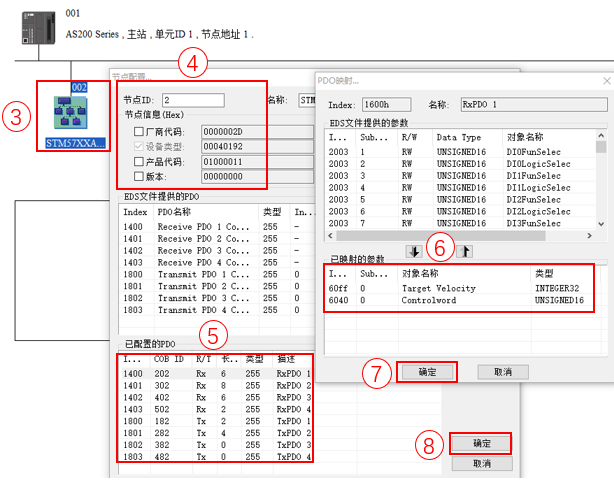
3. Double-click the icon “STM57XXA”
4. Configure node ID and node information
5. For the configured PDO, click RXPDO or TXPDO to map the PDO
6. Add PDO mapping parameters
7. Click “OK” to complete PDO mapping
8. Click “OK” to complete node configuration
7. Node List Configuration
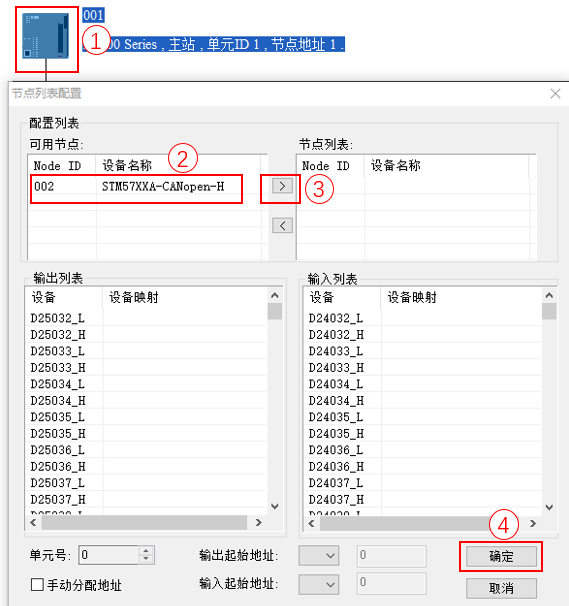
1. Double-click the master station module to enter the node list configuration page
2. Select node device
3. Click to add the node device to the node list
4. Click “OK” to complete node list configuration
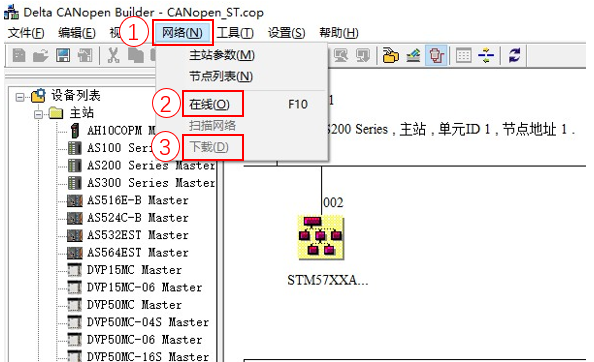
8. Network Configuration Download
9. Program Creation
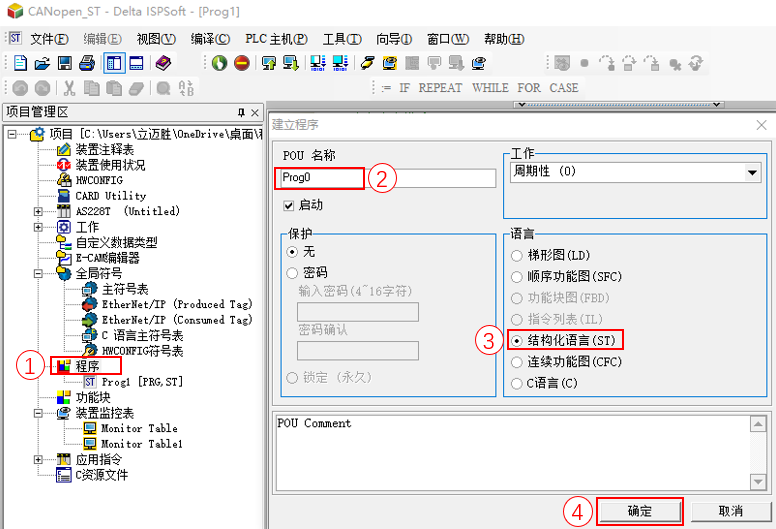
1. Right-click “Program” and click “Add New”
2. Name the POU
3. Select the programming language
4. Click “OK”
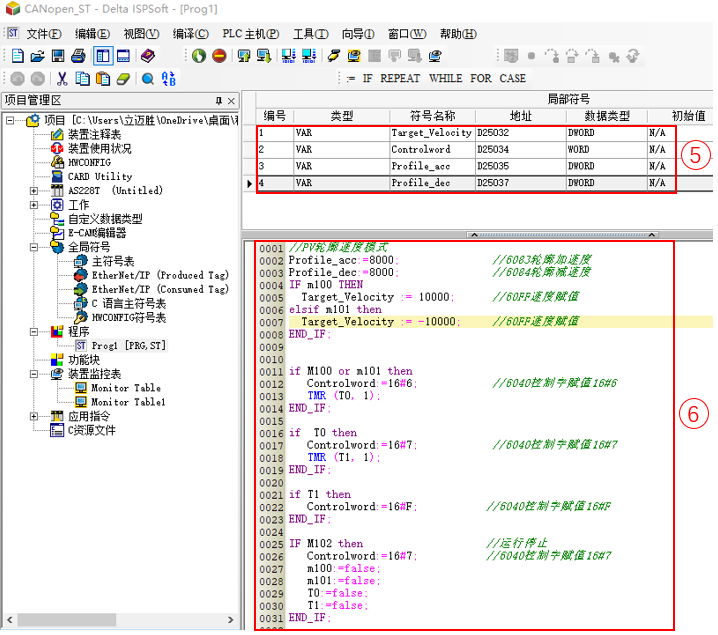
5. Define variables and associate with PLC addresses
6. Write the program
10. Communication Settings
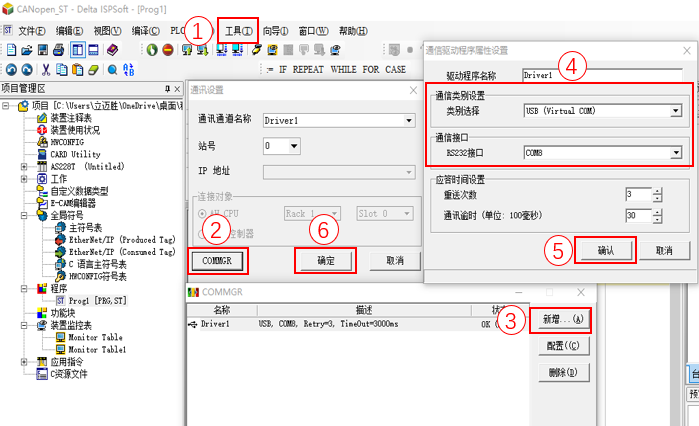
1. Click tools and select communication settings
2. Click “COMMGR”
3. Click “Add” and double-click to open
4. Set communication type and communication interface
5. Click “OK” to complete the driver settings
6. Click “OK” to complete the communication settings
11. Program Download
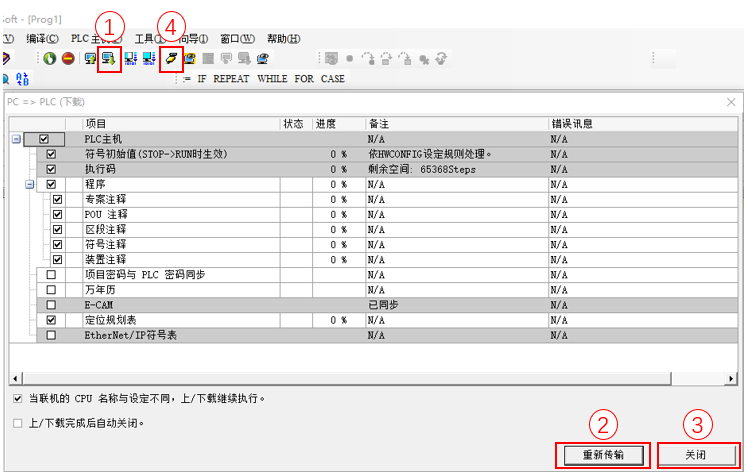
1. Click the download icon to pop up the download page
2. Click “Re-transfer” to download the program
3. After the download is complete, click the close button
4. Click the online icon to enter online mode
That concludes today’s sharing. For more exciting content, please follow us! Smart control, driving the future!

Scan the QR code
To get more exciting content
NiMotion
 NiMotion is committed to developing agile, exquisite, and efficient automation intelligent products, providing high-quality motion control system solutions for domestic and foreign professional intelligent equipment and robot manufacturers.Smart Control · Driving the Future