Allwinner V853 – High-Performance Edge AI Vision Processing Chip
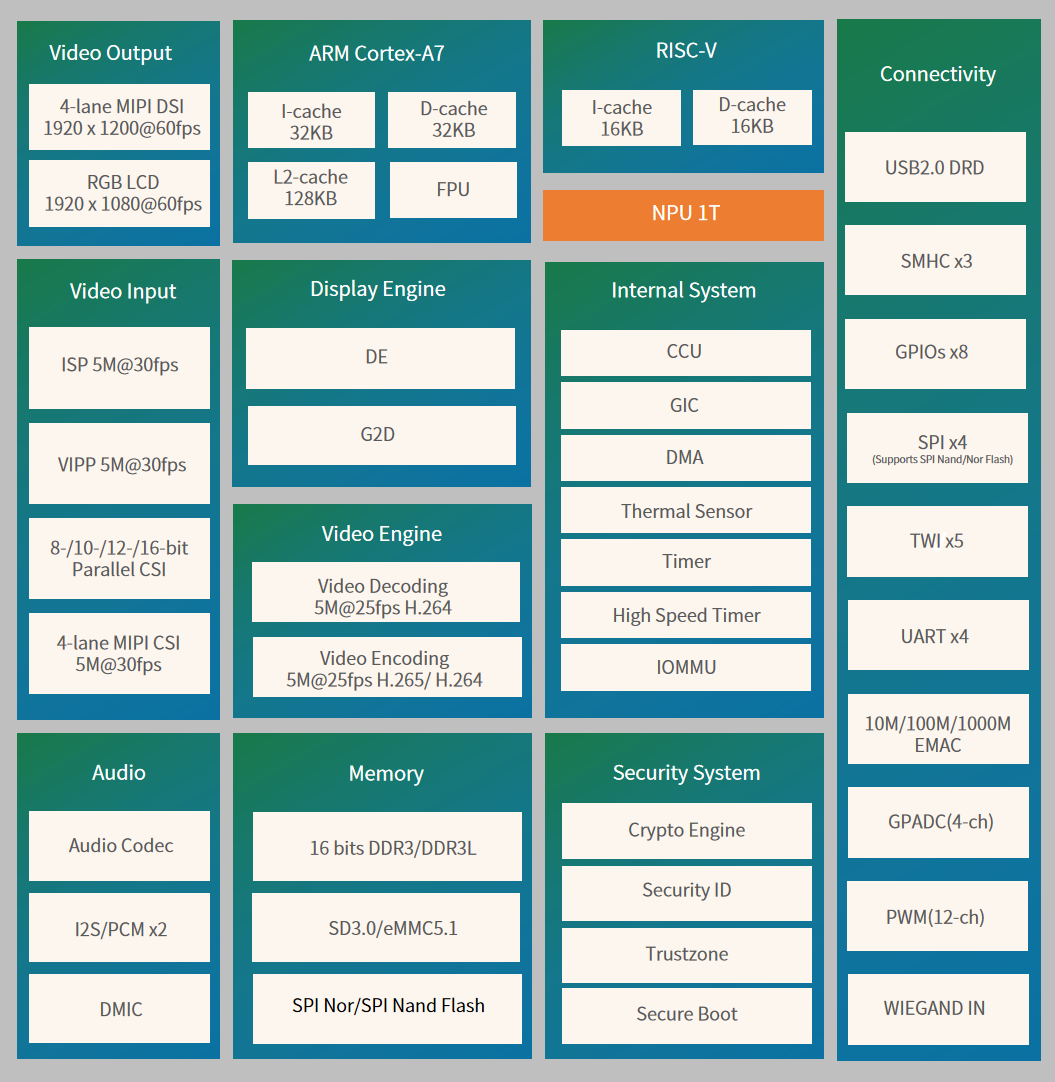
 The V853 is a next-generation high-performance, low-power processor SoC aimed at the smart vision field, widely used in industries related to smart upgrades such as smart locks, smart attendance access control, network cameras, dash cams, and smart desk lamps. The V853 integrates Arm Cortex-A7 and RISC-V E907 dual CPUs, with a built-in NPU capable of up to 1T computing power, utilizing Allwinner’s self-developed Smart video engine, supporting up to 5M@25fps H.265 encoding and 5M@25fps H.264 encoding/decoding, while also integrating a high-performance ISP image processor to provide professional-grade image quality. The V853 supports 16-bit DDR3/DDR3L to meet the high bandwidth requirements of various products; it supports a rich set of dedicated video input/output interfaces such as 4-lane MIPI-CSI/DVP/MIPI-DSI/RGB to meet the needs of various AI vision products; and it is manufactured using advanced 22nm technology, offering better power consumption and a smaller chip area.
Introduction to the Allwinner V853 Development Board
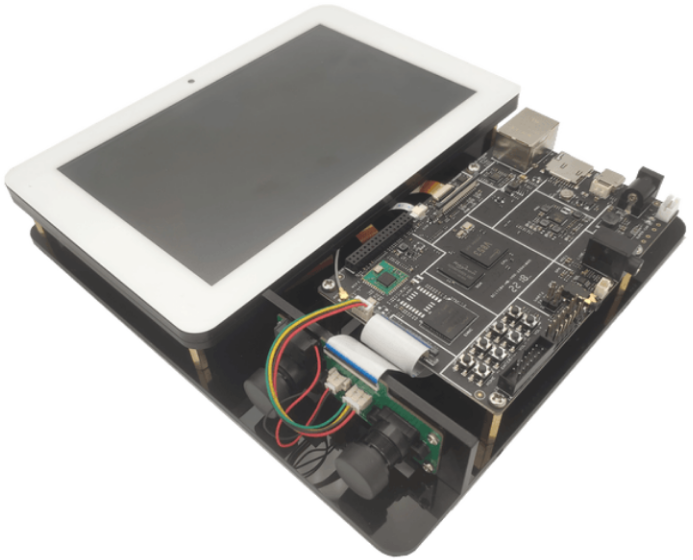
- I am honored to have received the Allwinner V853 development board firsthand. Next, I will introduce this development board.
- Specifications of the Allwinner V853 development board:
| Type | Description |
|---|---|
| Main Control | Allwinner V853 (Arm A7 1GHz + RISC-V E907 600MHz + 1T NPU) |
| DDR | 512MB DDR3 |
| Memory | 8GB eMMC |
| Wireless Network | 2.4G WiFi/BT (Model: Allwinner XR829 module) |
| Wired Network | 100Mbps Ethernet |
| Camera | 1080P dual-camera |
| Screen | 7-inch LCD screen |
| Microphone | Analog microphone *2 |
| DEBUG | Supports UART serial debugging, supports ADB USB debugging |
| USB | Type-C USB * 1, supports both power supply and data transmission |
| PMU | Allwinner AXP2101 |
- System configuration of the Allwinner V853: Officially supports the Tina Linux 5.0 system, based on the Linux 4.9 kernel and uboot-2018. Among them:
- Tina Linux is an embedded software system developed by Allwinner Technology based on the Linux kernel for smart hardware products.
- Tina Linux v5.0 includes the boot source code, kernel source code, drivers, tools, system middleware, and application packages needed for Linux system development. It allows for easy customization, compilation, and packaging to generate Linux firmware images.
- Tina Linux v5.0 supports building different build systems such as openWrt and buildroot; it also supports separately compiling BSP (Board Support Package); it can package and generate firmware packages, which can be flashed to the corresponding devices and run.
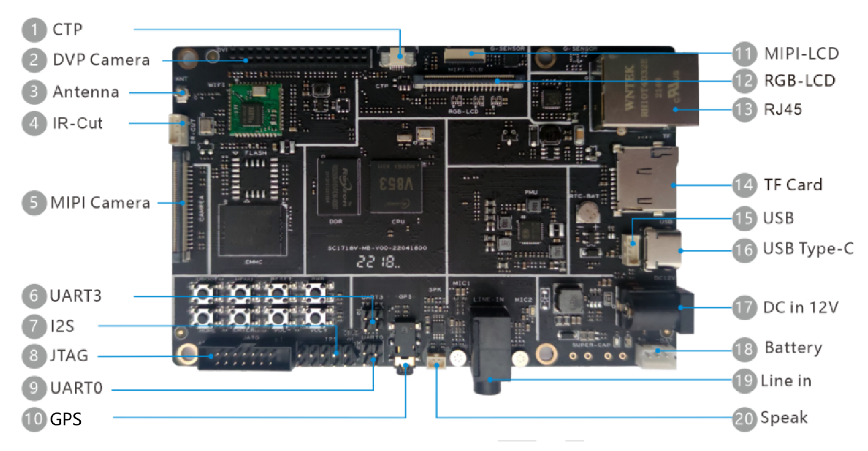
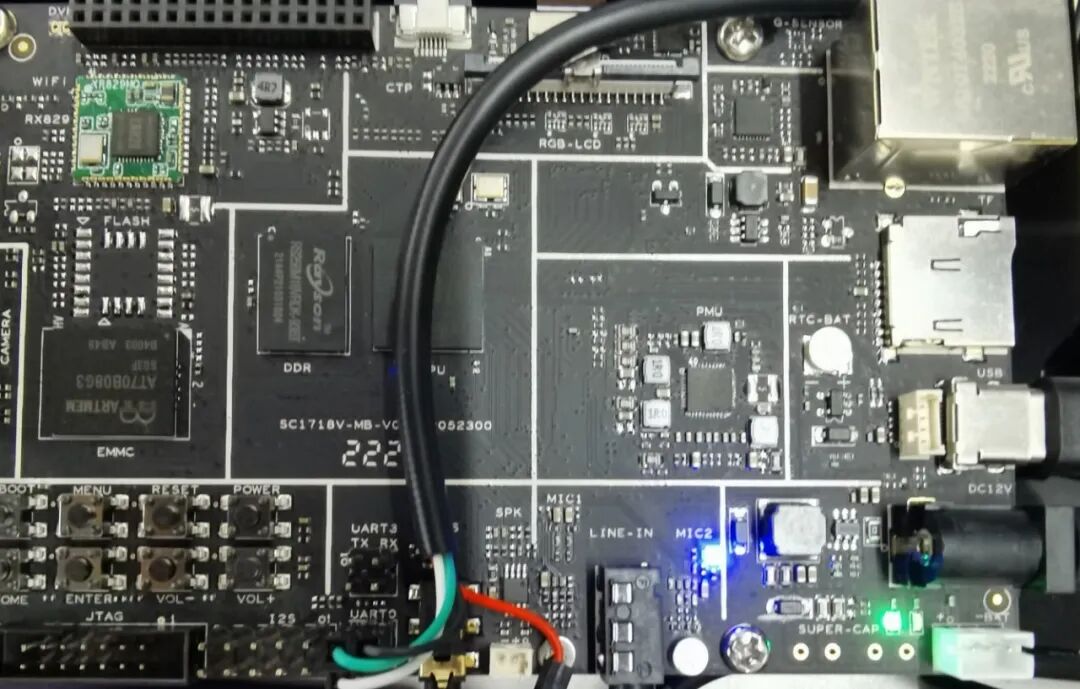
- Hardware peripherals of the Allwinner V853 development board
Initial Experience with the Allwinner V853 Development Board
-
Upon receiving the development board, I did not immediately compile the code but instead entered the default system on the board to see how well the peripherals were adapted. The V853 development board provides two debugging serial ports (namely: A7 debugging serial port (UART0) and E907 RV debugging serial port (UART3)). I connected to the corresponding serial ports; the A7 debugging serial port can output startup information but cannot accept commands. The E907 RV debugging serial port showed no logs at all, leading me to suspect that there was no code inside.
-
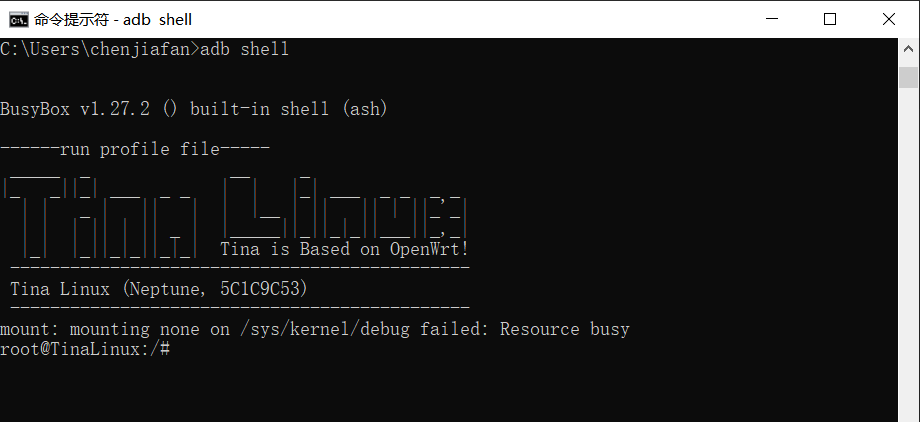
Although the A7 debugging serial port cannot accept command lines, it provides ADB Shell debugging.
- Download the Allwinner ADB tool: https://www.aw-ol.com/downloads?cat=5.
- After downloading and extracting, add the ADB working directory to the environment variable: Right-click “This PC”, properties, find advanced system settings, click environment variables, xxx user’s environment variables, Path, and add a new environment variable.
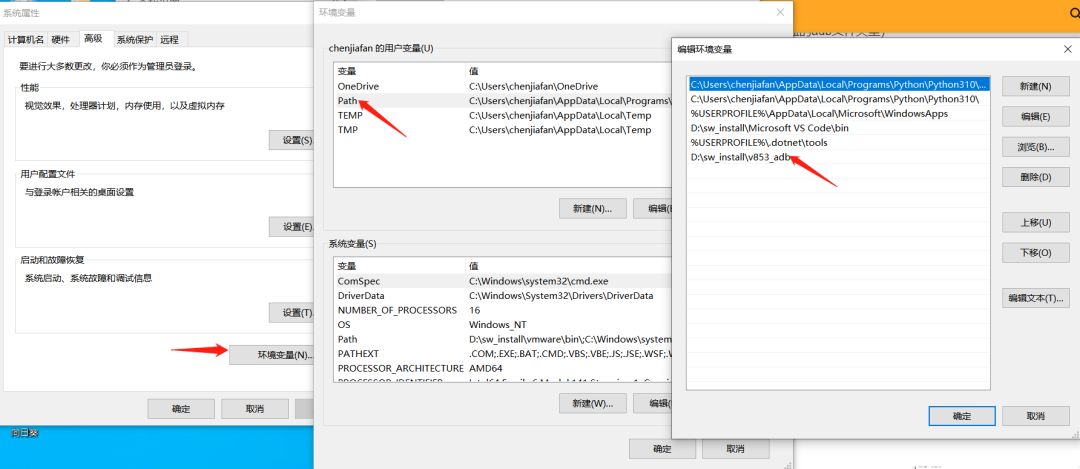
- After setting the environment, you can enter adb shell in the CMD terminal
GPIO LED Test
- When learning a programming language, the first thing to learn is to output “Hello world” in the terminal. When learning a development board, the first thing to learn is how to light up an LED. The indicator light of the development board is connected to pin PH11. Therefore, the GPIO number is: 7 * 32 + 11 = 235. Thus, we can directly operate GPIO235. The actual GPIO number on the board has already been exported.
root@TinaLinux:/# cd /sys/class/gpio/gpio235
root@TinaLinux:/sys/devices/platform/soc/pio/gpiochip0/gpio/gpio235# ls
active_low  direction   power       uevent
device      edge        subsystem   value
root@TinaLinux:/sys/devices/platform/soc/pio/gpiochip0/gpio/gpio235# echo 0 > value
root@TinaLinux:/sys/devices/platform/soc/pio/gpiochip0/gpio/gpio235# echo 1 > value
root@TinaLinux:/sys/devices/platform/soc/pio/gpiochip0/gpio/gpio235#
WIFI Test
- The V853 development board uses its own WiFi module – XR829, which supports Wi-Fi & BT. The WiFi part communicates with the V853 via the SDIO bus.
- Tina provides a simple and convenient WiFi testing suite, which allows you to set the WiFi working mode, scan networks, connect to networks, etc. Testing in WiFi STA mode:
root@TinaLinux:/# wifi -o sta
root@TinaLinux:/# wifi -c Rice 12345678
root@TinaLinux:/# ifconfig
lo        Link encap:Local Loopback
          inet addr:127.0.0.1  Mask:255.0.0.0
          inet6 addr: ::1/128 Scope:Host
          UP LOOPBACK RUNNING  MTU:65536  Metric:1
          RX packets:0 errors:0 dropped:0 overruns:0 frame:0
          TX packets:0 errors:0 dropped:0 overruns:0 carrier:0
          collisions:0 txqueuelen:1
          RX bytes:0 (0.0 B)  TX bytes:0 (0.0 B)

wlan0     Link encap:Ethernet  HWaddr 4C:34:1E:9A:F1:B0
          inet addr:192.168.137.37  Bcast:192.168.137.255  Mask:255.255.255.0
          inet6 addr: fe80::4e34:1eff:fe9a:f1b0/64 Scope:Link
          UP BROADCAST RUNNING MULTICAST  MTU:1500  Metric:1
          RX packets:4 errors:0 dropped:0 overruns:0 frame:0
          TX packets:11 errors:0 dropped:0 overruns:0 carrier:0
          collisions:0 txqueuelen:1000
          RX bytes:970 (970.0 B)  TX bytes:1730 (1.6 KiB)

root@TinaLinux:/# ping baidu.com
PING baidu.com (220.181.38.148): 56 data bytes
64 bytes from 220.181.38.148: seq=0 ttl=50 time=48.033 ms
64 bytes from 220.181.38.148: seq=1 ttl=50 time=55.773 ms
64 bytes from 220.181.38.148: seq=2 ttl=50 time=55.524 ms
64 bytes from 220.181.38.148: seq=3 ttl=50 time=50.839 ms
^C
--- baidu.com ping statistics ---
4 packets transmitted, 4 packets received, 0% packet loss
round-trip min/avg/max = 48.033/52.542/55.773 ms
root@TinaLinux:/#
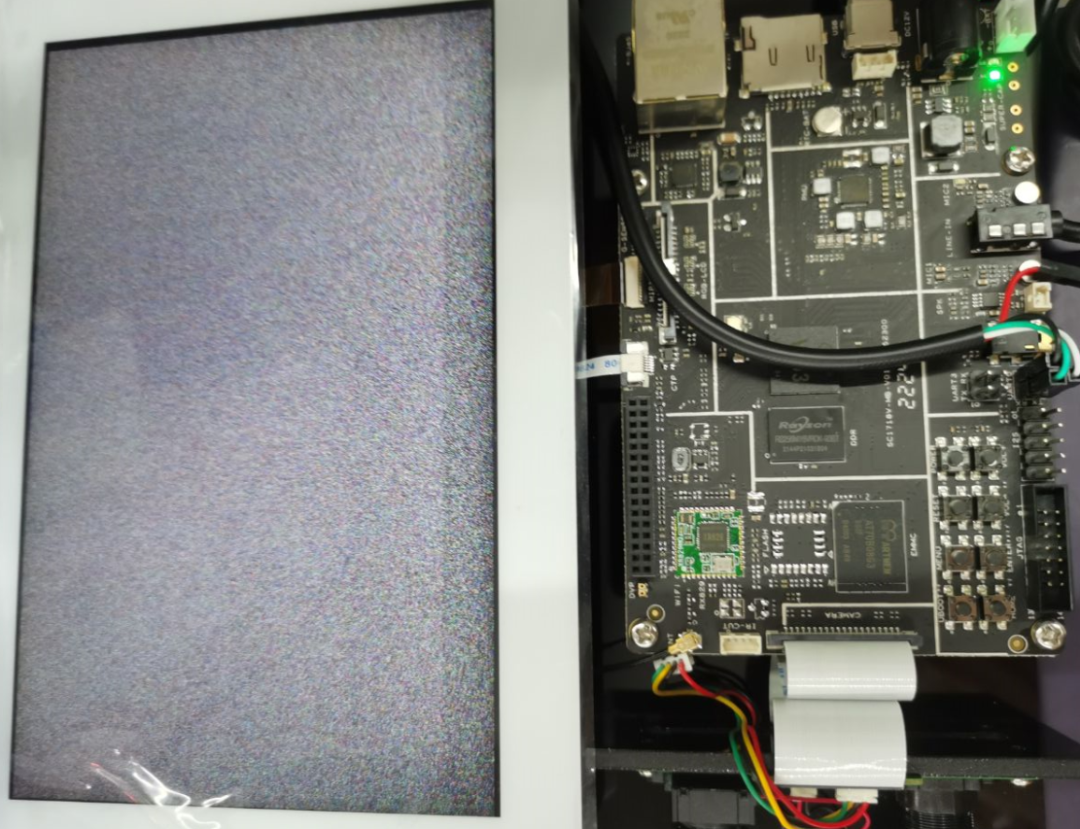
LCD Test
- The V853 development board comes with a 7-inch LCD screen and capacitive touch.
- Color screen test:
root@TinaLinux:/# cat /dev/urandom > /dev/fb0
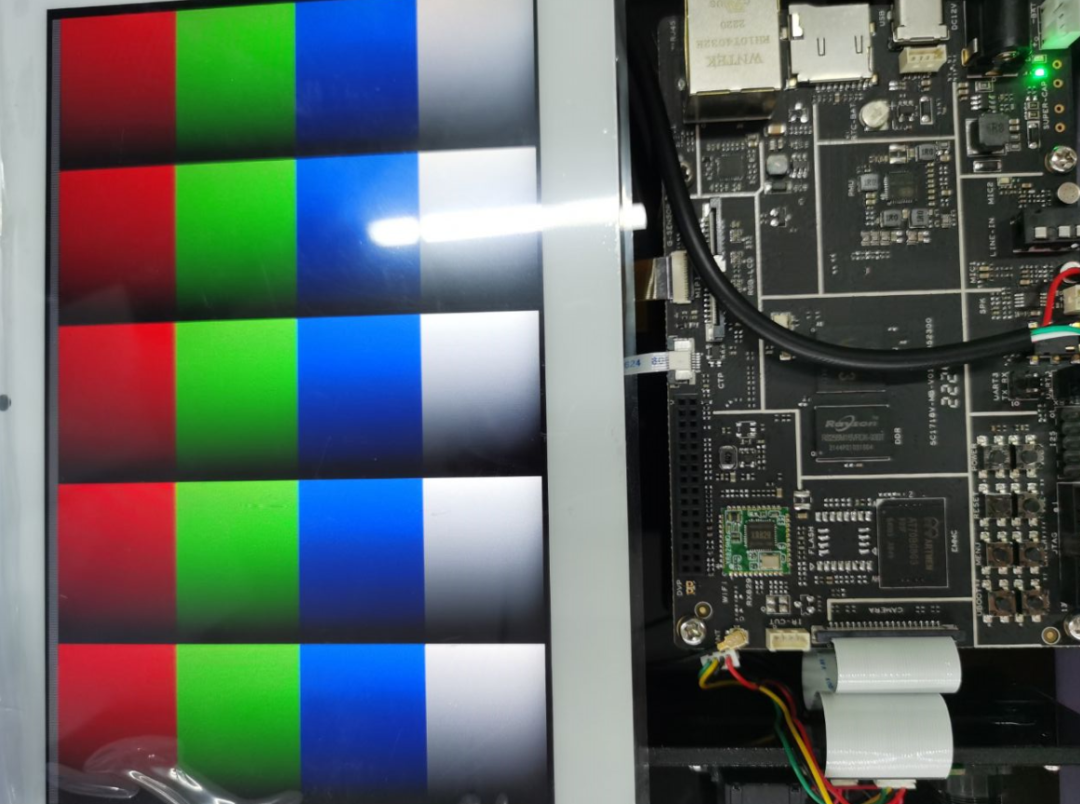
- Color stripe test:
root@TinaLinux:/# echo 1 > /sys/class/disp/disp/attr/colorbar
Setting Up the Compilation Environment
- The development environment used is: VMware + Ubuntu 18.04
- After installing Ubuntu, you can set up the compilation environment with just a few commands.
// Update the software list

v853@v853:~/v853$ sudo apt-get update

// Install various tools and packages
v853@v853:~/v853$ sudo apt-get install build-essential subversion git-core libncurses5-dev zlib1g-dev gawk flex quilt libssl-dev xsltproc libxml-parser-perl mercurial bzr ecj cvs unzip lib32z1 lib32z1-dev lib32stdc++6 libstdc++6 -y

// Set git user information
v853@v853:~/v853$ git config --global user.email "[email protected]"
v853@v853:~/v853$ git config --global user.name "RiceChen"
Building the V853 Project
- First, the source code needs to be downloaded from the Allwinner customer service platform. If you are not registered, you need to register and log in first. Link: https://open.allwinnertech.com/#/login?cas=true
- Add the development environment’s key pair to the Allwinner customer service platform.
- Generate a key pair:
v853@v853:~/v853$ ssh-keygen -t rsa
- Export the public key and copy it:
v853@v853:~/v853$ cat ~/.ssh/id_rsa.pub
- Paste the public key into the Allwinner customer service platform:
- Install the repo bootstrap script
- Download the repo bootstrap script:
v853@v853:~/v853$ git clone ssh://[email protected]/git_repo/repo.git
- Modify the username in the repo script:
REPO_URL='ssh://[email protected]/git_repo/repo.git'
Change to
REPO_URL='ssh://[email protected]/git_repo/repo.git'
- Add the repo bootstrap script to the environment:
v853@v853:~/v853$ sudo cp repo/repo /usr/bin/repo
v853@v853:~/v853$ sudo chmod 777 /usr/bin/repo
// Test if added successfully
v853@v853:~/v853$ repo help
- Download the SDK
- Create a folder to store the SDK and enter the folder
v853@v853:~/v853$ mkdir tina-v853
v853@v853:~/v853$ cd tina-v853
- Initialize the repo repository:
v853@v853:~/v853/tina-v853$ repo init -u ssh://[email protected]/git_repo/V853Tina_Open/manifest.git -b master -m tina-v853-open.xml
- Sync the repository code and create a branch:
v853@v853:~/v853/tina-v853$ repo sync
v853@v853:~/v853/tina-v853$ repo start product-v853 --all
- Build the V853 project
- Before building the project, you need to install mkimage:
sudo apt-get install u-boot-tools
- Configure the compilation mode:
v853@v853:~/v853/tina-v853$ ./build.sh config
========ACTION List: mk_config ;========
options :
All available platform:
   0. android
   1. linux
Choice [linux]: 1
All available linux_dev:
   0. bsp
   1. buildroot
   2. tinyos
   3. openwrt
Choice [openwrt]: 1
All available ic:
   0. v853
Choice [t113]: 0
All available board:
   0. vision
Choice [vision]: 0
All available flash:
   0. default
   1. nor
Choice [default]: 0
- Compile the firmware, then
v853@v853:~/v853/tina-v853$ ./build.sh

...
[GPU]: No GPU type is configured in /home/v853/v853/tina-v853/kernel/linux-4.9/.config.
regenerate rootfs cpio
16149 blocks
16150 blocks
build_ramfs
Copy boot.img to output directory ...
Copy modules to target ...
./scripts/build.sh

sun8iw21p1 compile Kernel successful


INFO: ----------------------------------------
INFO: build Tina OK.
INFO: ----------------------------------------
v853@v853:~/v853/tina-v853$
- Package the firmware:
v853@v853:~/v853/tina-v853$ ./build.sh pack

...
FileLength=7d7000Add partion rootfs.fex ROOTFS_FEX000000
Add partion very rootfs.fex ROOTFS_FEX000000
FilePath: rootfs.fex
FileLength=338ac00BuildImg 0
Dragon execute image.cfg SUCCESS !
----------image is at----------

72M /home/v853/v853/tina-v853/out/v853/vision/buildroot/v853_linux_vision_uart0.img

pack finish
v853@v853:~/v853/tina-v853$
Flashing and Verification
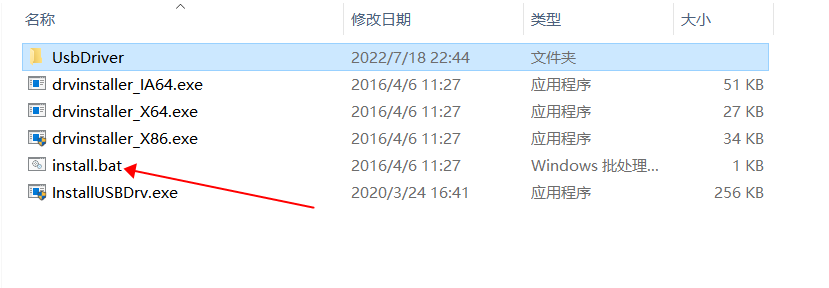
- Download the Allwinner USB driver, link: https://www.aw-ol.com/downloads/resources/15. Extract and click the batch script to install.
- Download the firmware flashing tool PhoenixSuit, link: https://www.aw-ol.com/downloads/resources/13.
- Extract and open the executable: PhoenixSuit.exe.
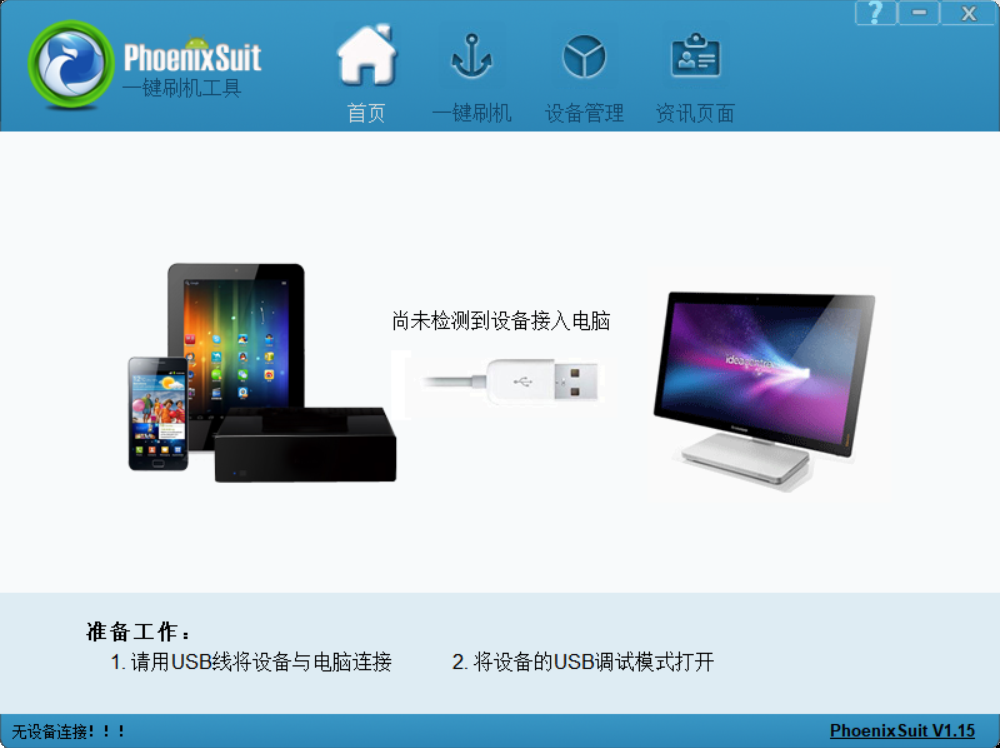
- Select the firmware and choose to upgrade immediately. Then press and hold the development’s uboot and reset buttons, releasing the reset button first. You will see the progress bar change.

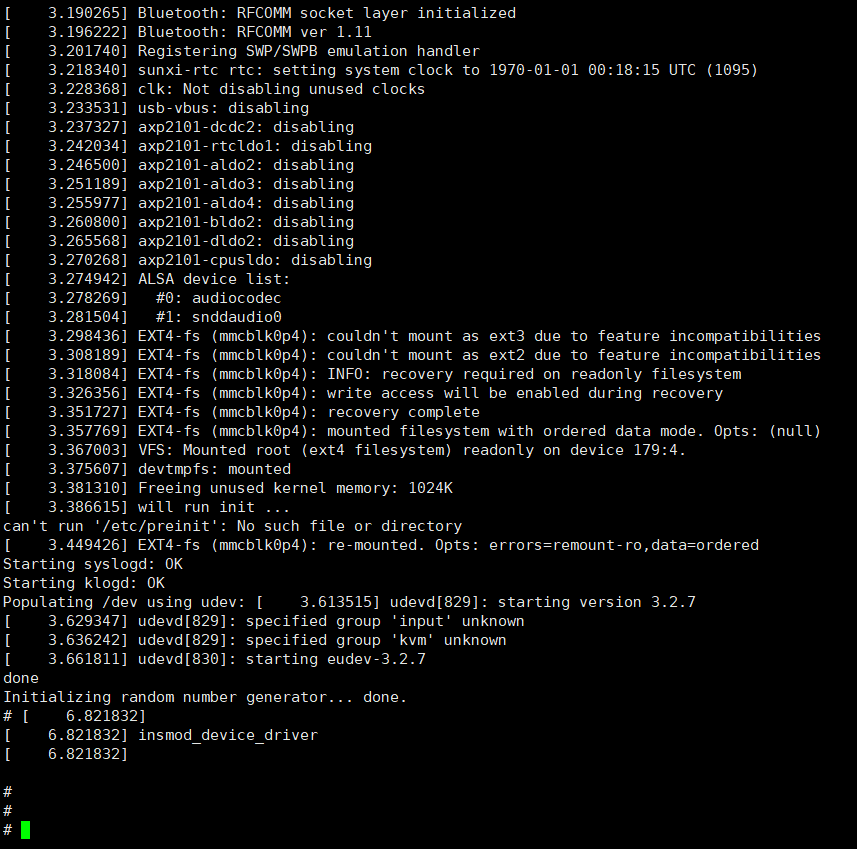
- After the download is complete, the serial terminal can output:
Follow the WeChat public account “Rice Embedded Development Technology Sharing”, reply “WeChat” in the background to add the author’s WeChat, and note “Join Group” to be invited into the technical exchange group.