Click the blue text above: “IoT Guesthouse” to follow us
In this section, we will guide you to update the Ai-Thinker ESP8266 MQTT transparent transmission AT firmware, and then use a serial tool to control the ESP8266 to connect to Wumart Smart.
1Hardware Preparation
(1) Prepare the ESP8266 module, we will use the Ai-Thinker ESP-12F module for this experiment

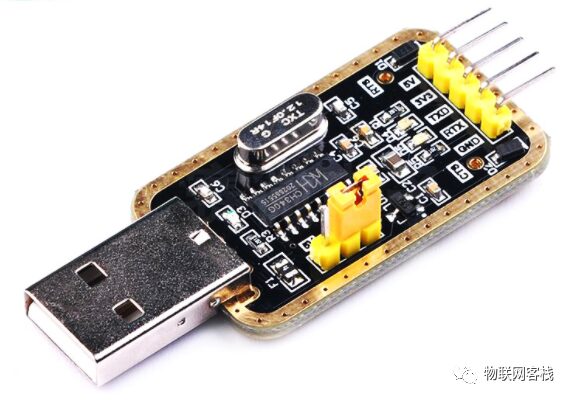
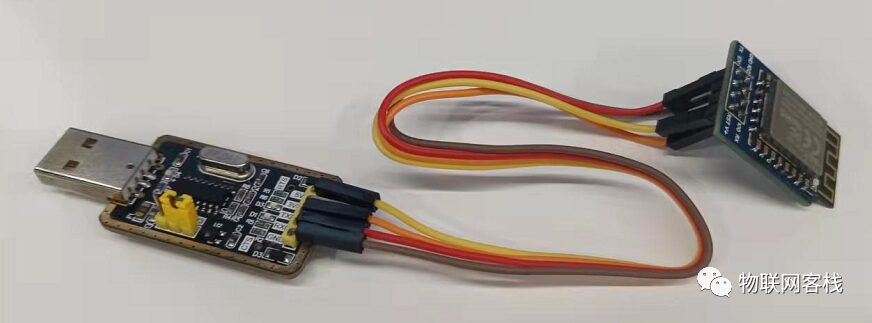
(2) Prepare a serial assistant
The serial tool used in this experiment is the CH340 driver. Be careful to install the driver according to your serial module, otherwise your computer will not recognize the serial driver!
2Software Preparation
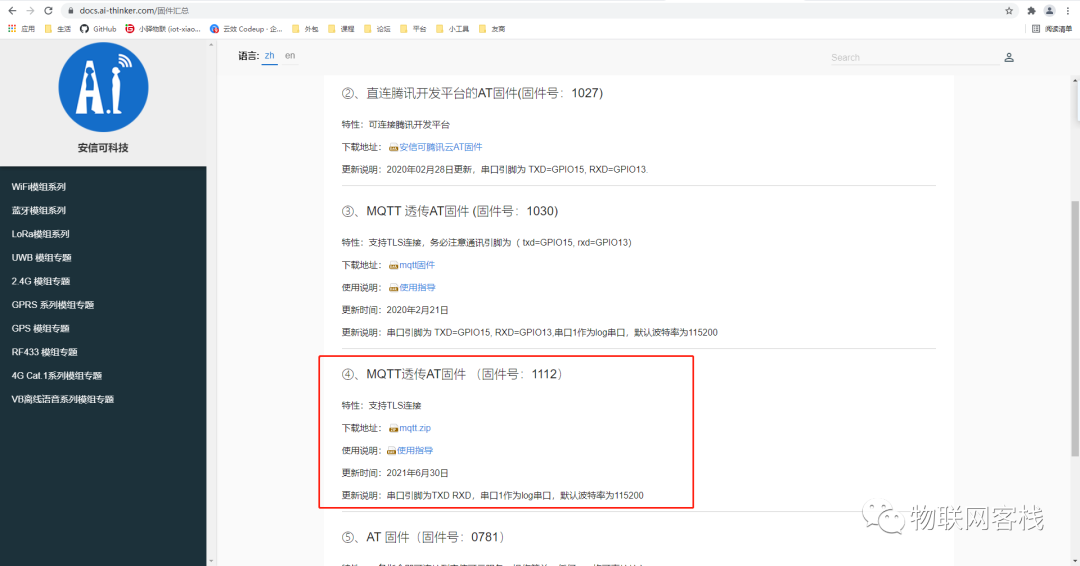
(1) Download the MQTT firmware
Download the MQTT transparent transmission AT firmware from the Ai-Thinker official website:https://docs.ai-thinker.com/%E5%9B%BA%E4%BB%B6%E6%B1%87%E6%80%BB
(2) Download the ESP8266 download tool
https://pan.baidu.com/s/1kQfQ_48po682kx4WW36QAw
Extraction code: gypf
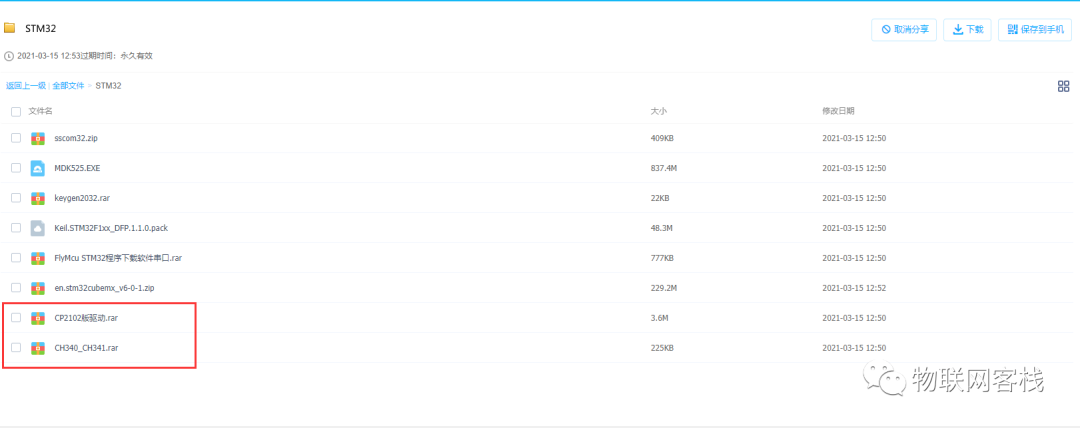
(3) Serial assistant driver
To control the ESP8266 using a computer serial port, you need to first install the serial driver. Be careful to install it according to the serial assistant you are using. The common drivers are CP2102 and CH340. The download link is as follows:
https://pan.baidu.com/s/1gbCmD0FqN6Spyk3iFj4QNw
Extraction code: qjwy
(4) Serial upper computer software
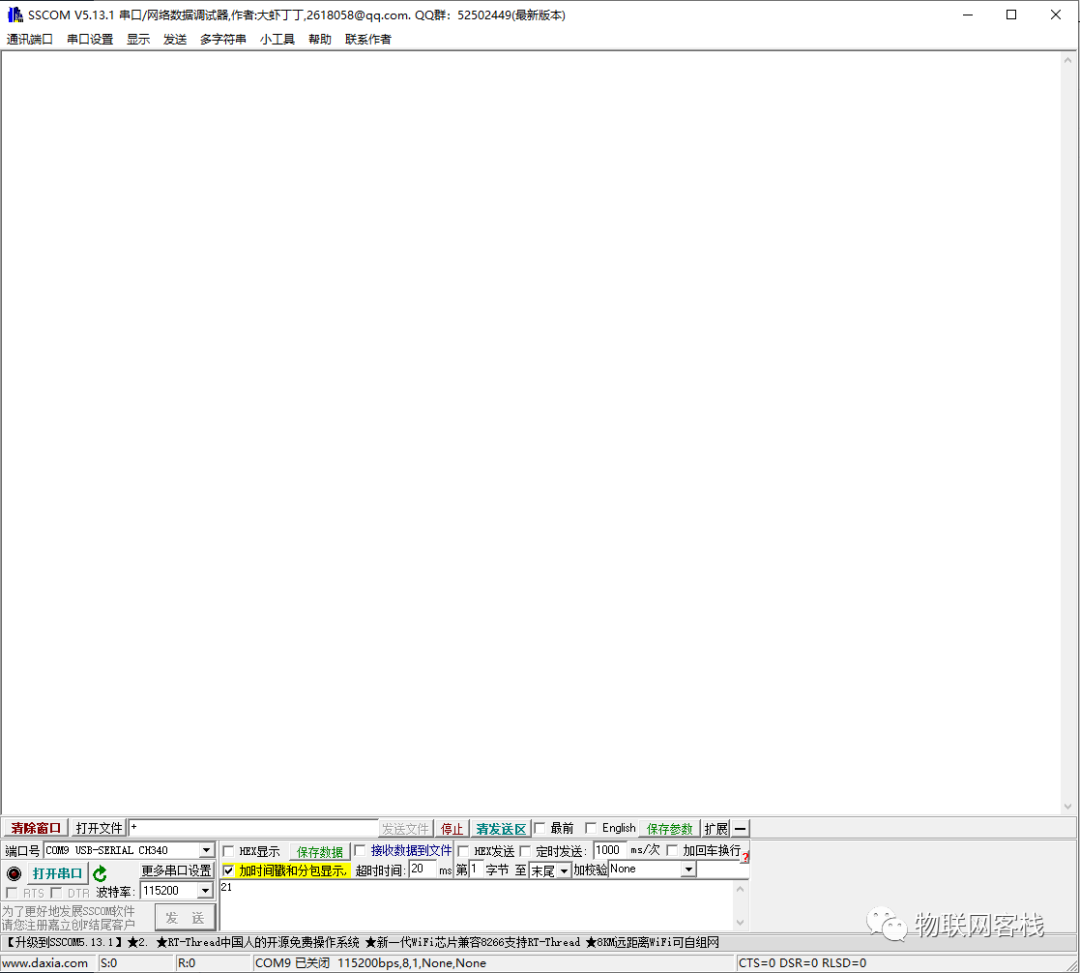
In this section, we will use the SSCOM serial upper computer software to control the ESP8266 to connect to Wumart. The SSCOM software can be obtained from the serial assistant driver download link.
1Hardware Connection
The connection method between the serial tool and the WIFI module is as follows:
Normal working mode:
|
ESP8266 |
Serial Tool |
|
VCC |
5v / 3v3 |
|
GND |
GND |
|
TXD |
RXD |
|
RXD |
TXD |
Download mode:
|
ESP8266 |
Serial Tool |
|
VCC |
5v / 3v3 |
|
GND |
GND |
|
TXD |
RXD |
|
RXD |
TXD |
|
IO |
GND |
Note: First pull down IO, then power the ESP8266
The hardware connection is as follows:
2Flashing Upper Computer Software Configuration
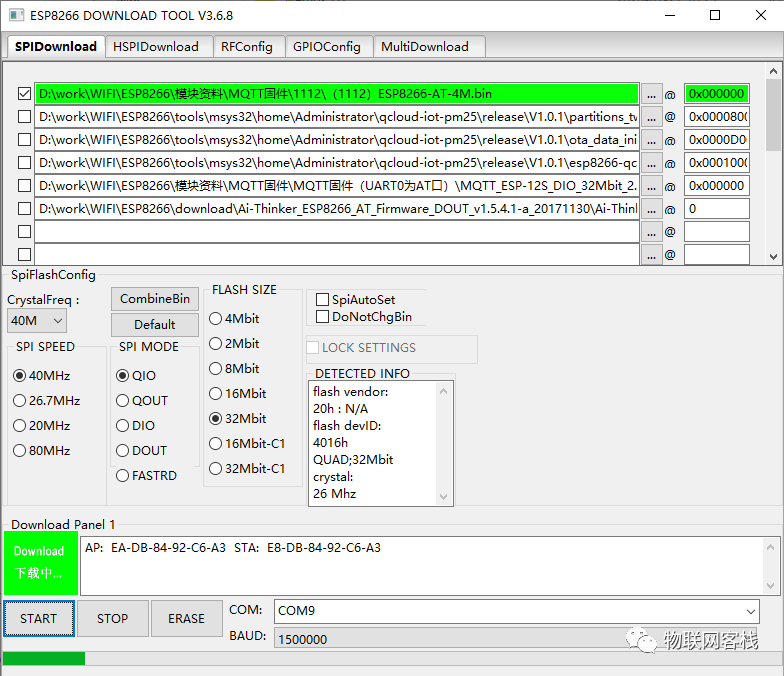
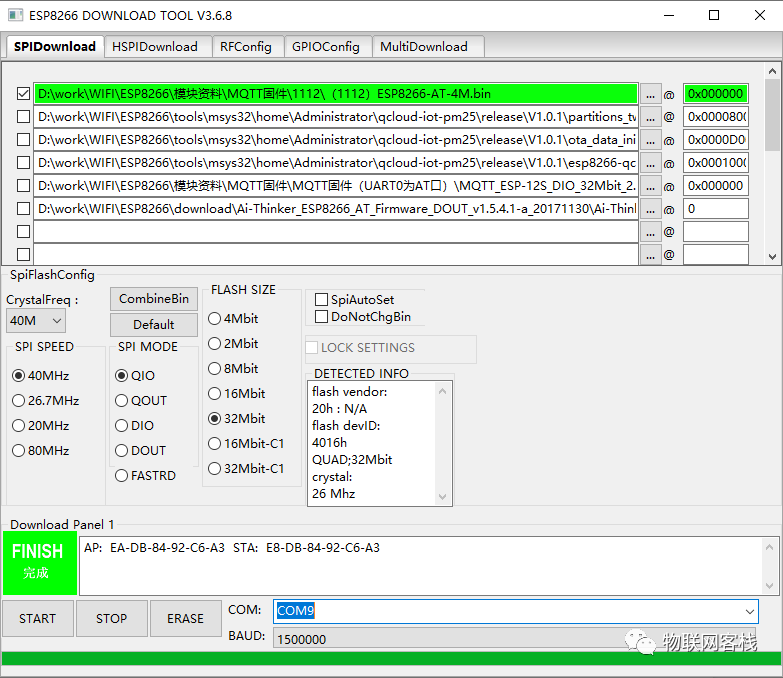
Open the installed tool “flash_download_tools_v3.6.8.exe – shortcut”
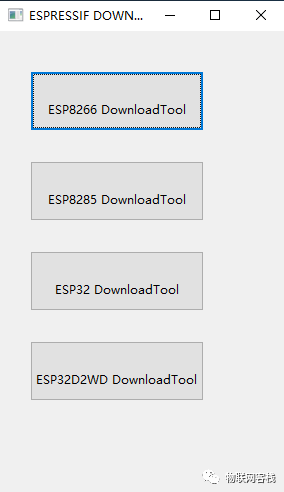
Select ESP8266 DownloadTool, then import the previously downloaded MQTT transparent transmission AT firmware, choose to flash from address 0
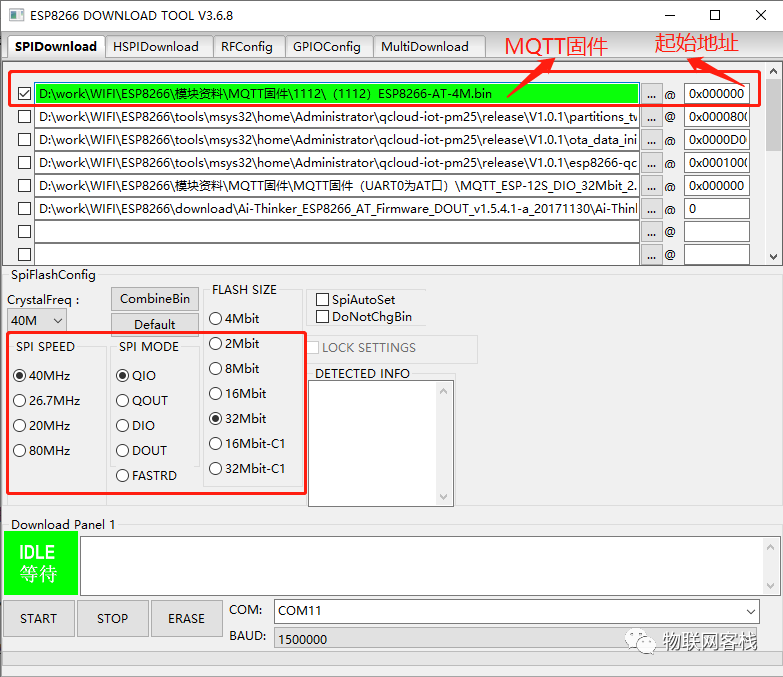
Then click the START button and wait for the flashing to complete
1MQTT Transparent Transmission AT Commands
|
Execution Order |
AT Command |
Explanation |
|
1 |
ATE0\r\n |
Disable echo |
|
2 |
AT+CWMODE=3\r\n |
Set AP+STA mode |
|
3 |
AT+CWJAP=”brown”,”12345678″\r\n |
Connect to router |
|
4 |
AT+MQTTUSERCFG=0,1,”50fccfefb50a48b98a93ce27bb04591f”,”admin”,”admin123″,0,0,””\r\n |
Configure MQTT information |
|
5 |
AT+MQTTCONN=0,”106.12.9.213″,1883,0\r\n |
Connect to MQTT server |
|
6 |
AT+MQTTSUB=0,”status/set/7CDFA1049ADB”,1\r\n |
Subscribe to topic |
|
7 |
AT+MQTTPUB=0,”status”,”{\”deviceNum\”:\”7CDFA1049ADB\”,\”relayStatus\”:0,\”lightStatus\”:1,\”isOnline\”:1,\”rssi\”:-54,\”deviceTemperature\”:40,\”airTemperature\”:0}”,0,0\r\n |
Report data |
1Actual Testing
First, you need to enter normal working mode. The pin connection method is as shown above for normal working mode. Note that IO can be left floating, it cannot be pulled low, otherwise it will enter download mode.
[22:25:34.038] Received ← ◆c6, 1 compile_time: Ai-Thinker | B&T wifi_mac: e8DB8492C6A3 sdk_version: v3.4-22-g967752e2 firmware_version: 2.2.0 compile_time: Jun 30 2021 13:41:22
ready
################################################[22:25:36.566] Sent → ◇ATE0□[22:25:36.572] Received ← ◆ATE0
OK
[22:25:38.992] Sent → ◇AT+CWMODE=3□[22:25:38.999] Received ← ◆OK
[22:25:40.200] Sent → ◇AT+CWJAP="brown","12345678"□[22:25:40.399] Received ← ◆WIFI CONNECTED
[22:25:40.987] Received ← ◆WIFI GOT IP
OK
[22:25:45.383] Sent → ◇AT+GMR□[22:25:45.391] Received ← ◆AT version: 2.3.0.0-dev(s-bcd64d2 - ESP8266 - Jun 23 2021 11:42:05) SDK version: v3.4-22-g967752e2 compile time(b498b58): Jun 30 2021 13:41:22 Bin version: 2.2.0(WROOM-02-N)
OK
[22:25:49.080] Sent → ◇AT+MQTTUSERCFG=0,1,"50fccfefb50a48b98a93ce27bb04591f","admin","admin123",0,0,""□[22:25:49.087] Received ← ◆OK
[22:25:50.254] Sent → ◇AT+MQTTCONN=0,"106.12.9.213",1883,0□[22:25:50.310] Received ← ◆+MQTTCONNECTED:0,1,"106.12.9.213","1883","",0
OK
[22:25:51.942] Sent → ◇AT+MQTTSUB=0,"status/set/7CDFA1049ADB",1□[22:25:51.977] Received ← ◆+MQTTSUBRECV:0,"status/set/7CDFA[22:25:51.994] Received ← ◆1049ADB",371,{"airTemperature":0.0,"blue":0,"brightness":0,"createBy":"","createTime":1630419657000,"deviceId":2,"deviceNum":"7CDFA1049ADB","deviceStatusId":3063,"deviceTemperature":40.0,"fadeTime":0,"green":0,"isOnline":1,"lightInterval":0,"lightStatus":0,"params":{},"red":0,"relayStatus":0,"remark":"{\"light\":60,\"value\":10}","rssi":-54,"updateBy":"","updateTime":1630419868000}
OK
[22:25:53.533] Sent → ◇AT+MQTTPUB=0,"status","{\"deviceNum\":\"7CDFA1049ADB\",\"relayStatus\":0,\"lightStatus\":1,\"isOnline\":1,\"rssi\":-54,\"deviceTemperature\":40,\"airTemperature\":0,\"remark\":{\"value\":10,\"light\":60}}",0,0□[22:25:53.545] Received ← ◆OK
[22:26:02.523] Received ← ◆+MQTTSUBRECV:0,"status/set/7CDFA1049ADB",344,{"airTemperature":0.0,"blue":0,"brightness":0,"createBy":"","createTime":1630419954000,"deviceId":2,"deviceNum":"7CDFA1049ADB","deviceStatusId":3064,"deviceTemperature":40.0,"fadeTime":0,"green":0,"isOnline":1,"lightInterval":0,"lightStatus":1,"params":{},"red":0,"relayStatus":1,"remark":"{\"light\":60,\"value\":10}","rssi":-54,"updateBy":""}
You can see that after the device connects to the Wumart platform, it can call the AT+MQTTPUB command to send data to the server, and the ESP8266 returns OK, indicating that the data has been successfully sent; when the server sends data, the device can receive data starting with +MQTTSUBRECV.
If you have any questions during use, please join the QQ group for further communication.
QQ group: 906015840 (Note: IoT project communication)
Hardware acquisition: Search “Xiao Yi IoT” on Taobao
Get hardware through the mini program
Xiao Yi IoT production: A grain of sand, a world; a leaf, a Bodhi