When it comes to smart homes, people might first think of impressive products from various major companies or innovative products. Just thinking about it feels complex; some use industrial control machines, some use Raspberry Pi, and others use Arduino. Regardless of what is used, it always involves a server for control, such as the Yeelink platform, Tencent’s smart hardware platform, etc. In fact, the real implementation is not as complicated as it seems; we can even achieve it with just a small microcontroller.
0×01 Microcontroller Implementation of Web Server
Articles discussing the use of microcontrollers to implement web servers can be found on Baidu, but there aren’t many detailed implementation methods. Here, we consider two approaches: one is a wired LAN module, such as W5500, which has some web service functionalities built-in, making it relatively simple to use but limited to LAN access. The other is to use microcontrollers like STM32 in conjunction with network modules. The simplest method I can think of is to use STM32 + ESP8266.
Based on the first method, I feel it is greatly affected by the module’s performance and lacks a sense of development due to module limitations. Therefore, I considered using the second method. In this method, some have used Arduino, which requires programming in C. Alternatively, we can consider using MicroPython, allowing us to implement it directly in Python. Here, I still use the Tpyboard V202.
0×02 Simulating a Home Intelligent Control Platform
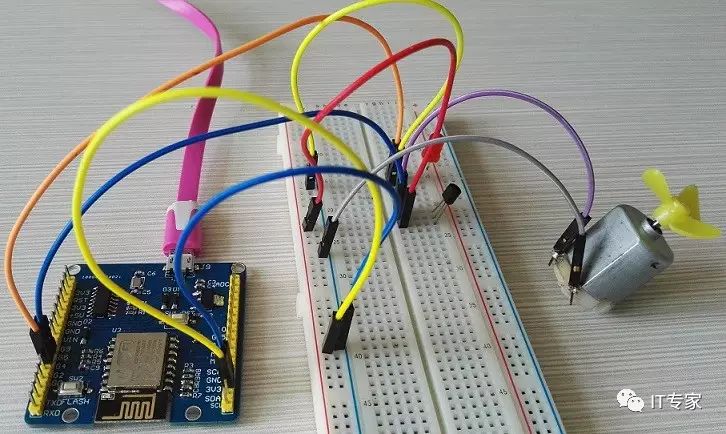
Since I haven’t decided how complex an experiment to conduct, I just want to simulate the effect. Therefore, throughout the module process, I chose the Tpyboard V202 development board as the main control board, using an LED to simulate a table lamp (in reality, a relay can be used to control the power of other devices), and a small DC motor with mini fan blades to represent a simulated electric fan. The entire implementation also uses a transistor (S9014, NPN) to control the DC motor.
0×03 Hardware Setup and Connection
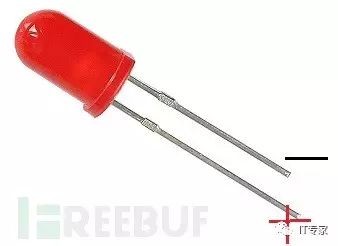
1. Using LEDs
Using LEDs is quite simple; just look at its two “legs”; the longer one is the positive terminal, and the shorter one is the negative terminal.
2. Using a DC Motor
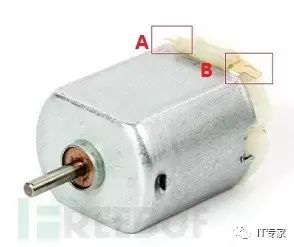
In the above image of the DC motor, the two terminals A and B in the red box can connect to either the positive or negative terminal; only the rotation direction will differ. This time, I connected terminal B to the positive terminal, resulting in clockwise rotation.
3. Using Transistor S9014 (NPN)
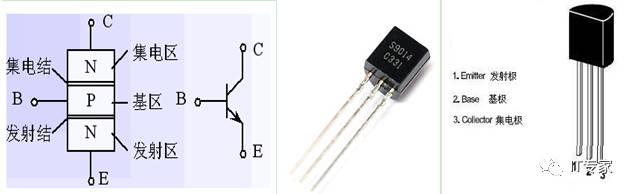
This time, we use the amplification and switching functions of S9014. The collector is connected to the 3.3V pin of V202, and the emitter is connected to one end of the motor. By applying high and low levels to the base, we control whether the emitter and collector are conducting, thus controlling the DC motor’s rotation or stop.
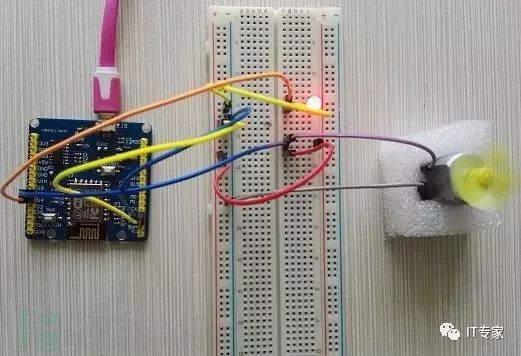
4. Wiring Method
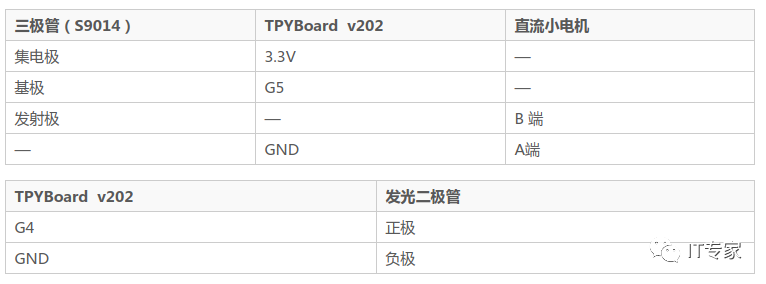
My physical connection diagram
0×04 Implementing a Web Server Using MicroPython
First, edit a main.py file. The V202 will automatically start the main.py file upon boot.
|
1 2 3 4 5 6 7 8 9 10 11 12 13 14 15 16 17 18 19 20 21 22 23 24 25 26 27 28 29 30 31 32 33 34 35 36 37 38 39 40 41 42 43 44 45 46 47 48 49 50 51 52 53 54 55 56 57 58 59 60 61 62 63 64 65 66 67 68 69 70 71 72 73 74 75 76 77 78 79 80 81 82 83 84 85 86 87 88 89 90 91 92 93 94 95 96 97 98 99 100 101 102 103 104 105 106 107 108 109 110 111 112 113 114 115 |
try: import usocket as socket except: import socket import network from machine import UART from machine import Pin led_flag=Pin(2, Pin.OUT)#ESP8266 module’s small light High level: off Low level: on led = Pin(4, Pin.OUT)#Control pin for LED motor = Pin(5, Pin.OUT)#Control pin for DC motor #Initialization led.low() motor.low() led_flag.high() def do_connect(ssid,pwd): sta_if = network.WLAN(network.STA_IF)#STA mode sta_if.active(False) if not sta_if.isconnected():#Check if connected sta_if.active(True) sta_if.connect(ssid,pwd)#ssid: WIFI name pwd: WIFI password while not sta_if.isconnected(): pass if sta_if.isconnected(): return sta_if.ifconfig()[0] def main(ip_,dev_data,login_data,name,pwd): s = socket.socket() ai = socket.getaddrinfo(ip_, 80) addr = ai[0][-1] s.setsockopt(socket.SOL_SOCKET, socket.SO_REUSEADDR, 1) s.bind(addr) s.listen(5) led_flag.low() #s_data=login_data while True: res = s.accept() client_s = res[0] client_addr = res[1] led_flag.high() req =client_s.readline() while True: h = client_s.readline() if h == b”” or h == b”\r\n”: break #print(h) req+=(h.decode(‘utf-8’).lower()) print(“Request:”) req=req.decode(‘utf-8’).lower().split(‘\r\n’) #HTTP header parsing req_data=req[0].lstrip().rstrip().replace(‘ ‘,”) print(req_data) if req_data.find(‘favicon.ico’)>-1: client_s.close() continue else: if len(req_data)<=12: #Indicates first access, input login.html s_data=login_data else: req_data=req_data.replace(‘get/?’,”).replace(‘http/1.1’,”) _name=req_data.find(‘name’) _pwd=req_data.find(‘pwd’) if _name>-1 and _pwd>-1: #Check if user login if req_data.find(name)>-1 and req_data.find(pwd)>-1: s_data=dev_data print(‘Login Success!’) else: f=open(‘fail.html’,’r’) s_data=f.read() f.close() print(‘Login Fail!’) else: #Check if controlling LED _index=req_data.find(‘led=’) if _index>-1: s_data=dev_data led_val=req_data[_index+4:_index+6].lstrip().rstrip() print(‘led:’,led_val) if led_val==’on’: led.value(1) else: led.value(0) #Check if controlling motor _index=req_data.find(‘motor=’) if _index>-1: s_data=dev_data motor_val=req_data[_index+6:_index+8].lstrip().rstrip() print(‘motor_val:’,motor_val) if motor_val==’on’: motor.value(1) else: motor.value(0) print(‘———–‘) client_s.send(s_data) client_s.close() led_flag.low() f=open(‘device.html’,’r’) dev_html=f.read() f.close() f=open(‘login.html’,’r’) login_html=f.read() f.close() f=open(‘info.txt’,’r’) info=f.read() f.close() name=info.split(‘,’)[0].lstrip().rstrip() pwd=info.split(‘,’)[1].lstrip().rstrip() print(‘name:’,name) print(‘pwd:’,pwd) myip_=do_connect(‘essid’,’pwd’)#Home network’s WIFI name and password print(myip_) main(myip_,dev_html,login_html,name,pwd) |
login.html Login Page
|
1 2 3 4 5 6 7 8 9 10 11 12 13 14 15 16 17 18 19 20 21 22 23 24 |
<html> <head> <title>Smart Home Network</title> <meta name=”viewport” content=”width=device-width, initial-scale=1″ /> <style type=”text/css”> h2 { margin-top:4%; margin-bottom:40px; } </style> </head> <body> <center> <h2>Welcome to the Smart Home Network Platform</h2> <form action=”/” method=”get” accept-charset=”utf-8″> <p>Username: <input type=”text” name=”name” /></p> <p>Password: <input type=”password” name=”pwd” /></p> <input type=”Submit” value=”Login” /> </form> </center> </body> </html> |
device.html Control Page
|
1 2 3 4 5 6 7 8 9 10 11 12 13 14 15 16 17 18 19 20 21 22 23 |
<html> <head> <title>Smart Home Network Platform</title> <meta name=”viewport” content=”width=device-width, initial-scale=1″ /> <style type=”text/css”> h2 { margin-top:4%; margin-bottom:40px; } </style> </head> <body> <center> <h2>Welcome to the Smart Home Network Control Platform</h2> <form action=”/” method=”get” accept-charset=”utf-8″> <p>Light: <input type=”Submit” value=”ON” name=”led” /> <input type=”Submit” value=”OFF” name=”led” /></p> <p>Fan: <input type=”Submit” value=”ON” name=”motor” /> <input type=”Submit” value=”OFF” name=”motor” /></p> </form> </center> </body> </html> |
fail.html Login Error Page (just a slight modification of login.html)
|
1 2 3 4 5 6 7 8 9 10 11 12 13 14 15 16 17 18 19 20 21 22 23 24 25 |
<html> <head> <title>Smart Home Network</title> <meta name=”viewport” content=”width=device-width, initial-scale=1″ /> <style type=”text/css”> h2 { margin-top:4%; margin-bottom:40px; } </style> </head> <body> <center> <h2>Welcome to the Smart Home Network Platform</h2> <form action=”/” method=”get” accept-charset=”utf-8″> <p style=”color:red”>Username or password incorrect!</p> <p>Username: <input type=”text” name=”name” /></p> <p>Password: <input type=”password” name=”pwd” /></p> <input type=”Submit” value=”Login” /> </form> </center> </body> </html> |
info.txt This is where the username and password are stored (separated by a comma), the first is the username, and the second is the password.
The username and password here are used to log into our smart home control platform.
|
1 |
admin,123456 |
0×05 Program Download Testing
Use the MicroPython File Uploader tool to download the source code to V202. Tool download address: http://tpyboard.com/download/tool/170.html
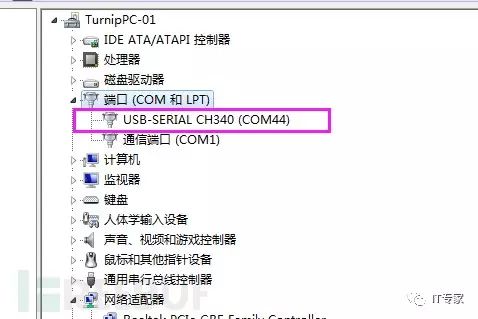
1. Use a USB data cable to connect V202 to the computer, open the device manager, and check the loaded port. Mine is COM44.
※If the driver installation fails, you can download the CH340 driver and install it manually. CH340 driver download address: http://tpyboard.com/download/drive/163.html
2. Open MicroPython File Uploader, select the port, and click [Open].
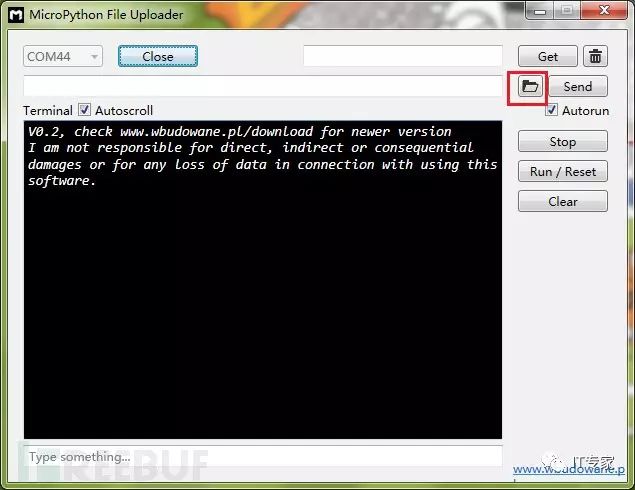
3. Uncheck [Autorun], click the folder icon in the red box, select the source code, and click [Send] to wait for the successful transmission.
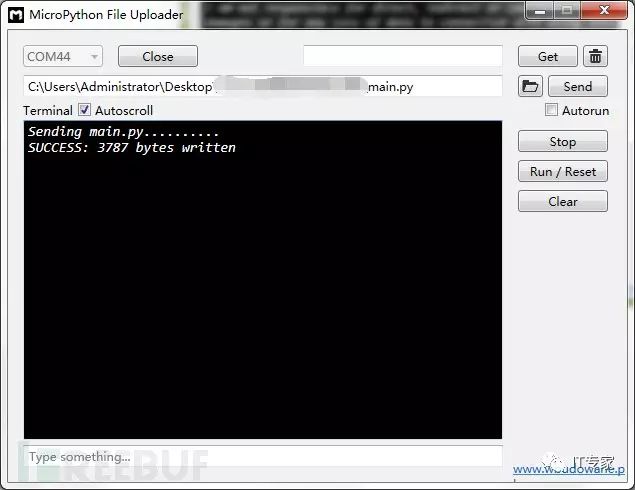
4. Download all the above source code files to V202. After downloading, click [Run/Reset] to start executing the code.
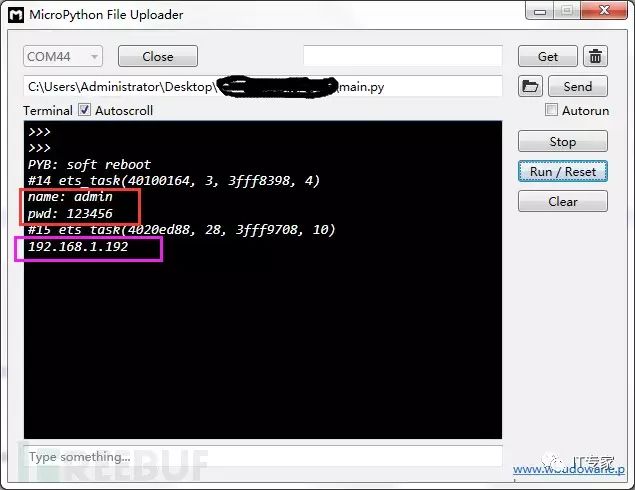
5. After starting, the red box prints the username and password we stored in info.txt, which can be customized.
6. The pink box below prints the IP address obtained by V202 from the router. As long as the IP address is printed, it indicates successful network access. My V202 obtained the IP address 192.168.1.192.
7. At this point, our web server is set up.
0×06 Using the Smart Home Network Platform
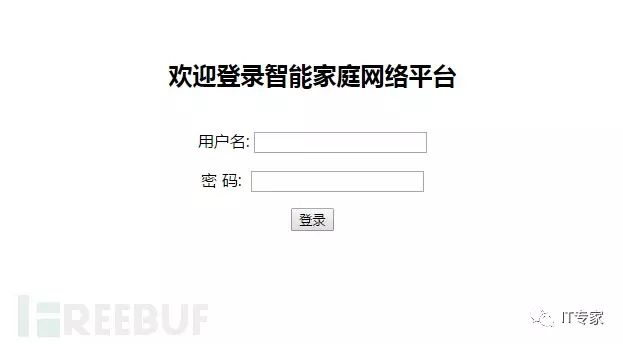
1. Within the home LAN, we can use a PC or mobile phone to open the browser and access 192.168.1.192 to see the login interface.
2. Default username admin password 123456, you can modify it by changing the info.txt file.
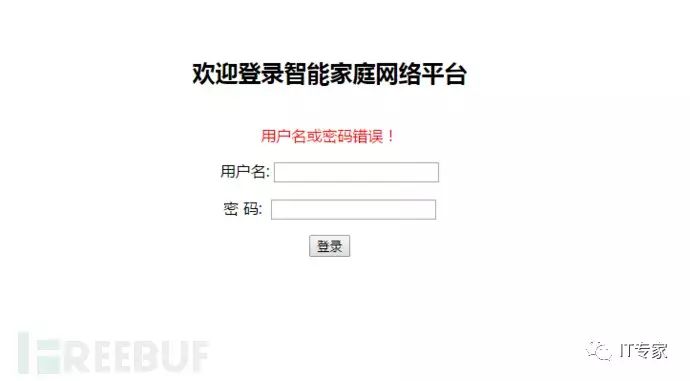
(1) Entering incorrect username and password will lead to the error page.
(2) Entering the correct one will lead to the control platform.
3. Next, we can control the lights and small fans through the web page. See my experimental effect pictures.
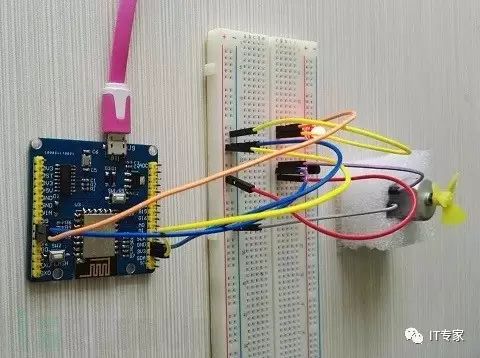
Here, I just made an example. Due to time constraints, I didn’t go deeper into the development. Everyone can combine their creativity to delve deeper. If you can set an external IP for the Tpyboard V202 through the router, you can access it from the outside network and thus control home devices from the external network.
 Focus on IT, Focus on innovation, For more information and the latest updates, please follow this WeChat account!