Have you ever seen a still image that creates the illusion of dynamic rotation? Today, we will unveil the mystery behind this amazing “Rotating Snake” optical illusion and guide you step by step on how to implement it using C++ code!
Unveiling the Principle of the Illusion
The secret of the “Rotating Snake” illusion lies in the time difference in how the human brain processes different color contrasts. High-contrast colors (like black and white) are processed much faster than low-contrast colors (like red and cyan). This difference in processing time creates the effect of relative motion in a still image, resulting in the illusion of rotation.
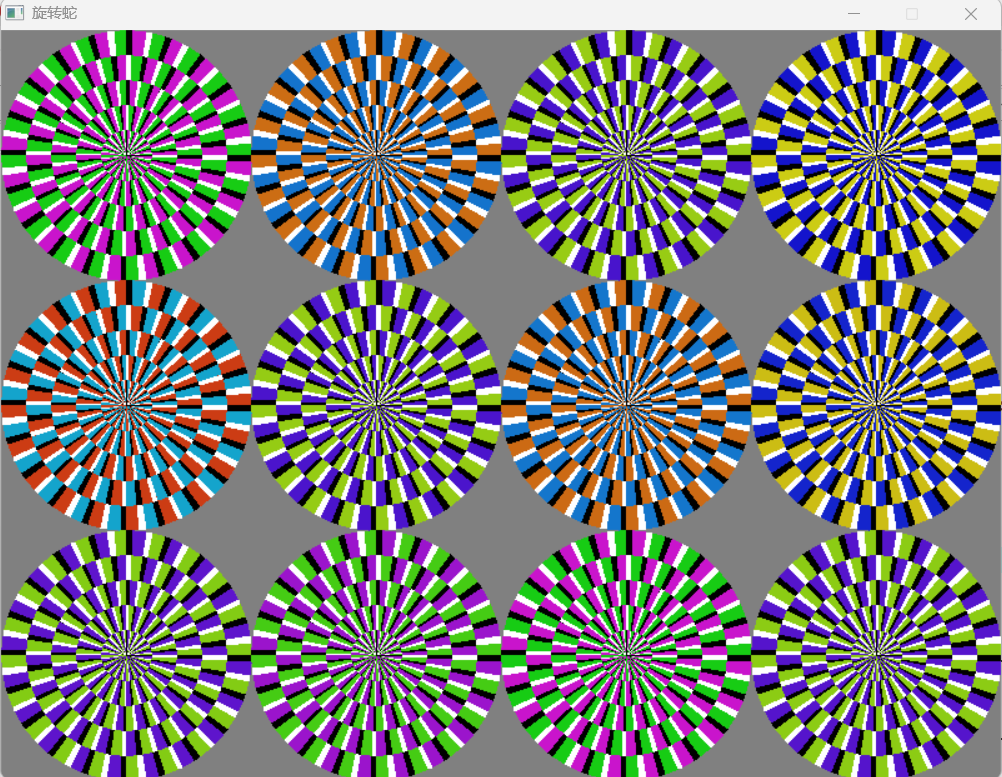
Below is an image of the “Rotating Snake”. Does it seem to be moving?
1. Basic Construction: Drawing Sector Units
The “Rotating Snake” illusion image is composed of different colored sectors.
First, we need to master the basic drawing functions. The <span><span>solidpie()</span></span> function from the EasyX graphics library can be used to draw filled sectors:
setfillcolor(RGB(R, G, B));  // Set fill color
solidpie(left, top, right, bottom, start_angle, end_angle);
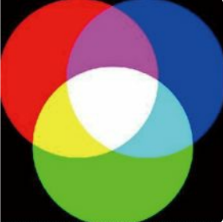
1. The <span><span>setfillcolor()</span></span> function sets the fill color. The RGB (Red, Green, Blue) color model uses three components to represent color, with each component ranging from 0 to 255:
- RGB(0,0,0) represents black
- RGB(255,255,255) represents white
- RGB(255,0,0) represents pure red
 2. The
 <span><span>solidpie()</span></span> function
- (left, top): Coordinates of the top-left corner of the bounding rectangle
- (right, bottom): Coordinates of the bottom-right corner of the bounding rectangle
- start_angle: Starting angle of the sector (in radians)
- end_angle: Ending angle of the sector (in radians)
Angle calculation: The code uses expressions like 2*PI/60 because: a complete circle = 2π radians = 360°, and each sector unit occupies 1/60 of the circle, which is 6°, thus 2*PI/60 represents the radian value corresponding to 6°.
#include<graphics.h>  // Graphics library header file, provides drawing functions
#include<conio.h>     // Console input/output header file, provides _getch() function
#include<stdio.h>     // Standard input/output header file
// Main function: program entry point
int main(){
    float PI = 3.14159;  // Define the approximate value of π
    initgraph(600, 600);  // Create a 600x600 pixel graphics window
    setbkcolor(RGB(128, 128, 128));  // Set background color to medium gray
    cleardevice();  // Clear the entire canvas with the background color
    // Define center and radius parameters
    int centerX = 300, centerY = 300;  // Center coordinates (300,300), located at the center of the window
    int radius = 200;  // Circle radius of 200 pixels
    // Calculate bounding rectangle coordinates for the sector
    int left = centerX - radius;   // Top-left x coordinate of the bounding rectangle
    int top = centerY - radius;    // Top-left y coordinate of the bounding rectangle
    int right = centerX + radius;  // Bottom-right x coordinate of the bounding rectangle
    int bottom = centerY + radius; // Bottom-right y coordinate of the bounding rectangle
    // Draw cyan sector
    setfillcolor(RGB(0, 240, 220));  // Set fill color to cyan
    solidpie(left, top, right, bottom, 0, 2*PI/60);  // Draw sector from 0° to 6°
    // Draw white sector
    setfillcolor(RGB(255, 255, 255));  // Set fill color to white
    solidpie(left, top, right, bottom, 2*PI/60, 3*PI/60);  // Draw sector from 6° to 9°
    // Draw red sector
    setfillcolor(RGB(200, 0, 0));  // Set fill color to dark red
    solidpie(left, top, right, bottom, 3*PI/60, 5*PI/60);  // Draw sector from 9° to 15°
    // Draw black sector
    setfillcolor(RGB(0, 0, 0));  // Set fill color to black
    solidpie(left, top, right, bottom, 5*PI/60, 6*PI/60);  // Draw sector from 15° to 18°
    // Pause the program, waiting for user input
    _getch();  // Pause program execution, waiting for keyboard input
    return 0;  // Program exits normally
}
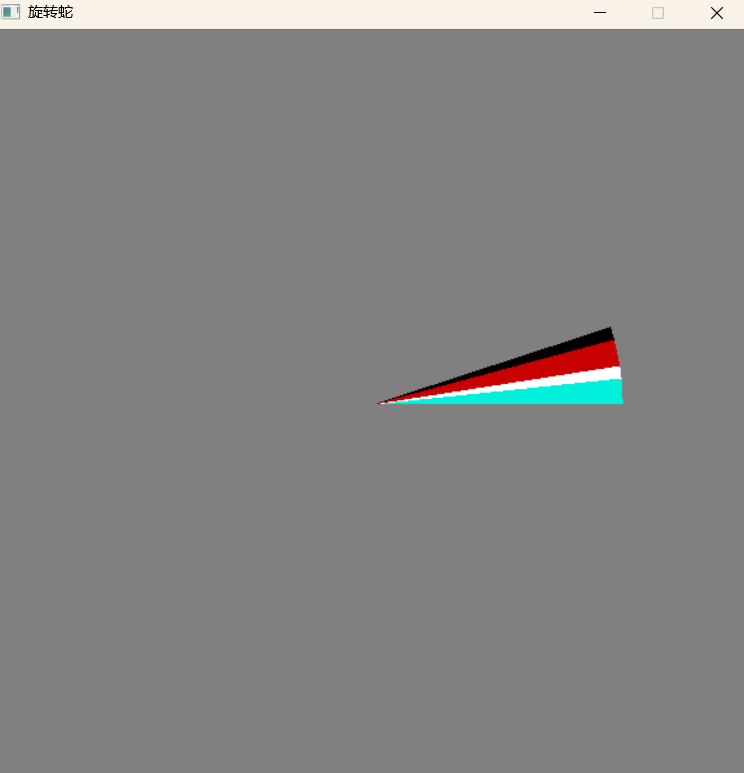
With this program, we can draw a pattern composed of four different colored sectors combined together.
2. Using for Loop: Copying Sector Units
To achieve a complete disc effect, we need to combine multiple sector units from above. Using a for loop can help us easily replicate multiple sector units:
// Use for loop to draw 20 groups of sector units, forming a complete rotating snake illusion disc
for(int i = 0; i < 20; i++)  // Loop 20 times, corresponding to the disc being divided into 20 sector units
{
    // Calculate the offset angle for the current sector group
    // PI/10 = 18°, the total angle for each group of sectors is 18°, and 20 groups perfectly cover 360°
    float offset = i * PI / 10;  // Offset angle for each group of sectors, i from 0 to 19, offset from 0° to 342°
    // Draw cyan sector - first sector area
    setfillcolor(RGB(0, 240, 220));  // Set fill color to cyan (RGB values: R=0, G=240, B=220)
    // Draw sector: angle range is [offset, offset+6°], occupying 1/60 of the circle
    solidpie(left, top, right, bottom, offset, 2*PI/60 + offset);
    // Draw white sector - second sector area
    setfillcolor(RGB(255, 255, 255));  // Set fill color to pure white
    // Draw sector: angle range is [offset+6°, offset+9°], occupying 1/120 of the circle
    solidpie(left, top, right, bottom, 2*PI/60 + offset, 3*PI/60 + offset);
    // Draw red sector - third sector area
    setfillcolor(RGB(200, 0, 0));  // Set fill color to dark red (not pure red, lower brightness)
    // Draw sector: angle range is [offset+9°, offset+15°], occupying 1/60 of the circle
    solidpie(left, top, right, bottom, 3*PI/60 + offset, 5*PI/60 + offset);
    // Draw black sector - fourth sector area
    setfillcolor(RGB(0, 0, 0));  // Set fill color to pure black
    // Draw sector: angle range is [offset+15°, offset+18°], occupying 1/120 of the circle
    solidpie(left, top, right, bottom, 5*PI/60 + offset, 6*PI/60 + offset);
    // After completing one group of sector drawings, the loop variable i increments, and the offset angle increases accordingly to draw the next group of sectors
}
After the loop ends, we have obtained a disc composed of 20 groups of sector units: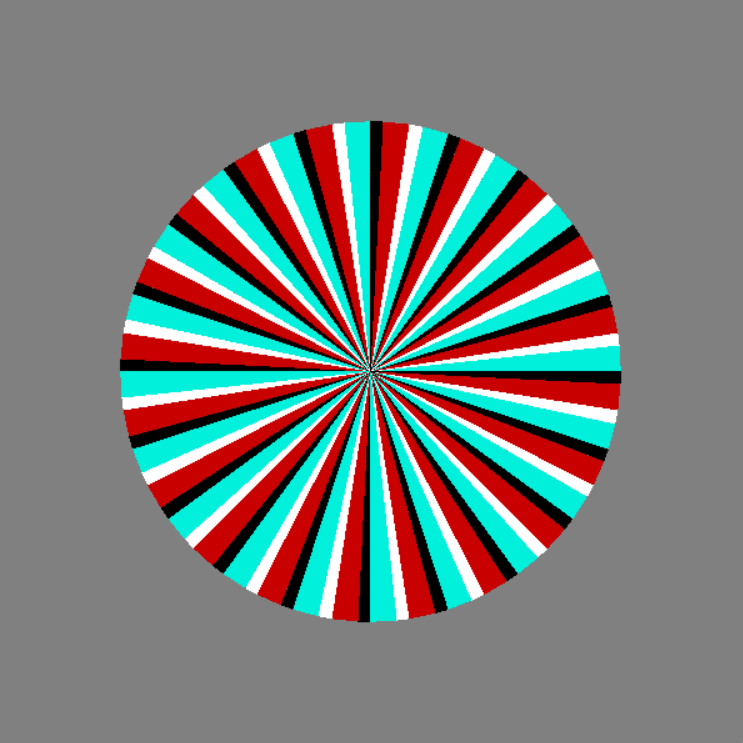
3. Advanced Effects: Multi-layer Discs and Color Changes
By nesting loops, we can create more complex effects:1. Multi-layer concentric discs: The outer loop controls the radius of the disc, drawing multiple layers of concentric discs from large to small.
// Outer loop: controls the radius of the disc, drawing multiple layers of concentric discs from large to small
for(int radius = 200; radius > 0; radius = radius - 50) // Initial radius is 200 pixels, reducing by 50 pixels each loop until the radius is greater than 0
{
    // Calculate the bounding rectangle coordinates for the current radius
    // As radius decreases, the rectangle size also shrinks, forming concentric circle effects
    int left = centerX - radius;   // Current disc bounding rectangle top-left x coordinate
    int top = centerY - radius;    // Current disc bounding rectangle top-left y coordinate
    int right = centerX + radius;  // Current disc bounding rectangle bottom-right x coordinate
    int bottom = centerY + radius; // Current disc bounding rectangle bottom-right y coordinate
    // Inner loop: draw 20 groups of sector units on each disc
    for(int i = 0; i < 20; i++)
    {
        // Draw four sectors in cyan, white, red, and black, forming the basic illusion unit
        // Each group of sectors rotates 18° relative to the previous group, covering the entire disc
    }
    // Inter-layer angle offset: after completing one disc, increase the angle offset for the next disc
    totalOffset = totalOffset + PI/20; // The angle offset between different radii is PI/20
    // This offset causes the sector patterns of different radius discs to be staggered, enhancing the three-dimensional and dynamic effect
}
After the loop ends, four concentric discs (radii 200, 150, 100, 50 pixels) will be drawn, with each disc’s sector pattern having a 9° angle offset, creating a spiraling visual effect.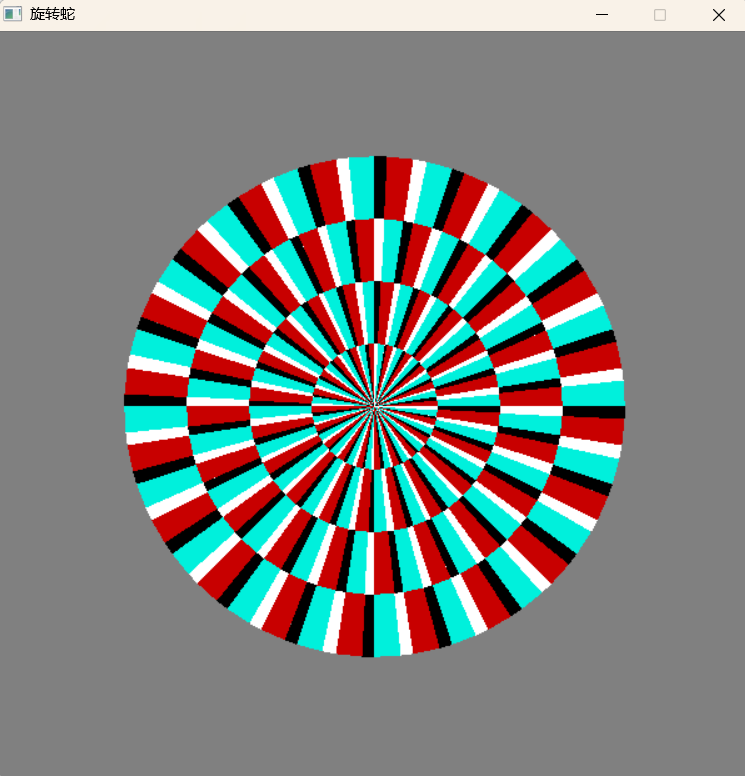 2. Application of the HSV Color Model
Using the HSV color model can generate richer and more colorful effects:
// Generate random hue values, ranging from 0-179 degrees
float h = rand() % 180;  // Random hue, %180 ensures the value is between 0-179
// Use HSV color model to generate complementary colors
COLORREF color1 = HSVtoRGB(h, 0.9, 0.8);        // Primary color
COLORREF color2 = HSVtoRGB(h + 180, 0.9, 0.8);  // Complementary color
HSV is a color description method that is more intuitive for humans. It defines colors through three intuitive parameters, making it easier to understand and use than the traditional RGB model.
Three elements of HSV:
-
H (Hue): Color type, ranging from 0-360°, corresponding to the position on the color wheel
-
S (Saturation): Color purity, ranging from 0-1, the higher the value, the more vivid the color
-
V (Value): Color brightness, ranging from 0-1, the higher the value, the brighter the color
Below is the complete “Rotating Snake” illusion program:
#include<graphics.h>
#include<conio.h>
#include<stdio.h>
#include<time.h>
int main(){
    // Initialization
    const float PI = 3.14159f;           // Constant for π
    initgraph(800, 600);                 // Create an 800×600 graphics window
    setbkcolor(RGB(128, 128, 128));      // Medium gray background
    cleardevice();                       // Clear the canvas
    srand((unsigned int)time(NULL));     // Initialize random number seed with time
    // Main loop framework
    while(true)  // Infinite loop for continuous interaction
    {
        // Create a 4×3 matrix of rotating snake patterns on the window
        for(int centerX = 100; centerX < 800; centerX += 200)
        {
            for(int centerY = 100; centerY < 600; centerY += 200)
            {
                // Initialize a single rotating snake unit
                float layerOffset = 0.0f;                    // Accumulated inter-layer angle offset
                // Random color generation system
                float hue = (float)(rand() % 180);           // Random hue (0-179°)
                COLORREF primaryColor = HSVtoRGB(hue, 0.9f, 0.8f);      // Primary hue
                COLORREF complementaryColor = HSVtoRGB(hue + 180.0f, 0.9f, 0.8f); // Complementary hue
                // Draw multi-layer concentric discs
                for(int radius = 100; radius > 0; radius -= 20)
                {
                    // Dynamically calculate bounding rectangle coordinates
                    int left   = centerX - radius;
                    int top    = centerY - radius;
                    int right  = centerX + radius;
                    int bottom = centerY + radius;
                    // Loop to draw sector units
                    for(int sectorIndex = 0; sectorIndex < 20; sectorIndex++)
                    {
                        // Angle calculation
                        float sectorOffset = sectorIndex * PI / 10.0f + layerOffset;
                        // Draw sector sequence (the key structure that creates the illusion)
                        // 1. Primary hue sector (replacing the original cyan area)
                        setfillcolor(primaryColor);
                        solidpie(left, top, right, bottom, sectorOffset, sectorOffset + 2*PI/60);
                        // 2. White high-contrast sector
                        setfillcolor(RGB(255, 255, 255));
                        solidpie(left, top, right, bottom,sectorOffset + 2*PI/60,sectorOffset + 3*PI/60);
                        // 3. Complementary hue sector (replacing the original red area)
                        setfillcolor(complementaryColor);
                        solidpie(left, top, right, bottom,sectorOffset + 3*PI/60,sectorOffset + 5*PI/60);
                        // 4. Black high-contrast sector
                        setfillcolor(RGB(0, 0, 0));
                        solidpie(left, top, right, bottom,sectorOffset + 5*PI/60,sectorOffset + 6*PI/60);
                    }
                    // Enhance inter-layer visual offset
                    layerOffset += PI / 20.0f;  // Increase offset by 9° for each layer
                }
            }
        }
        _getch();        // Wait for user input
        cleardevice();    // Clear screen to prepare for the next drawing
    }
    return 0;  // Program exits normally
}