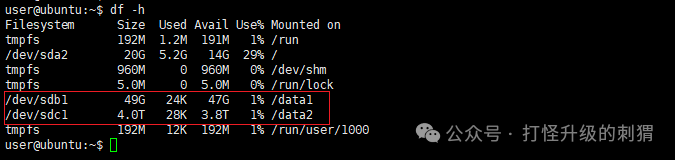
The demonstration system uses an Ubuntu 24.04 virtual machine, adding two hard drives: one 50GB and one 4TB.1. After adding the hard drives, power on the virtual machine. Once in the system, use the fdisk -l command to check the disk status. I logged in as a regular user and can see the unmounted disk letters and sizes.
sudo fdisk -l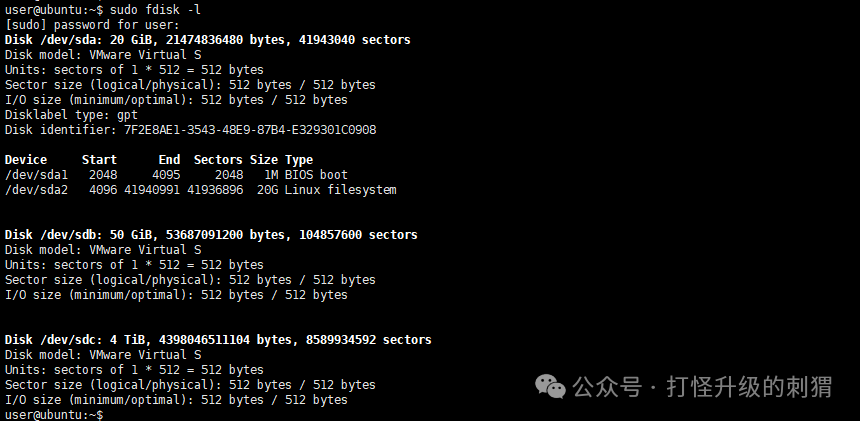 2. To add a hard drive, use fdisk /dev/sdX, replacing the drive letter as appropriate.
sudo fdisk /dev/sdb
sudo fdisk /dev/sdc
First, add the 50GB hard drive. Enter n (to add a new hard drive), p for primary partition (default), and press enter for the next two default values. Finally, enter w to save, as detailed in the image.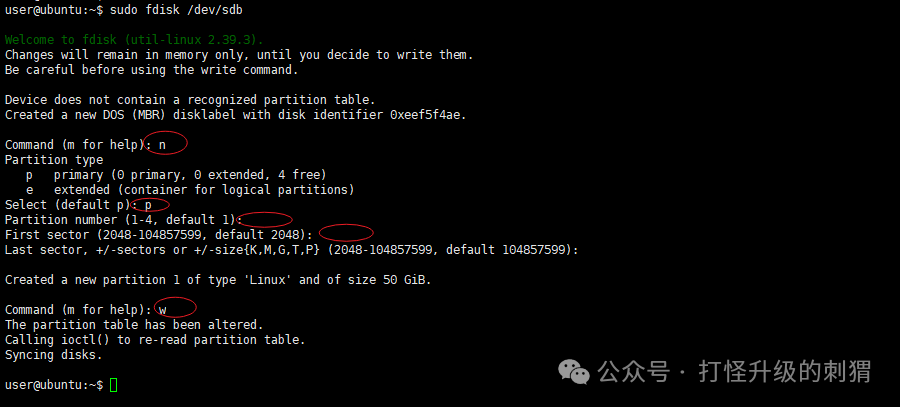 Next, add the 4TB hard drive. Due to the large disk capacity, it is necessary to convert the disk format first, as indicated in the red section. (First enter g, then n, default, default, and enter w to save.)
The size of this disk is 4 TiB (4398046511104 bytes). DOS partition table format cannot be used on drives for volumes larger than 2199023255040 bytes for 512-byte sectors. Use GUID partition table format (GPT).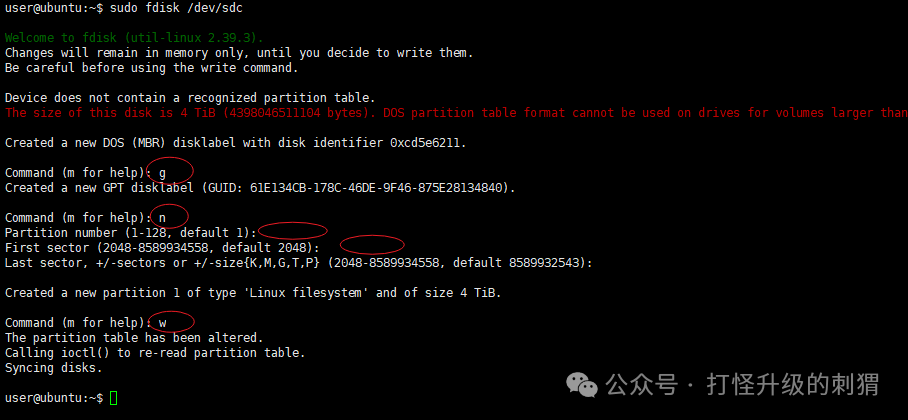 3. To check the mounted disk information, do not use sudo. As a regular user, the result will only show the system disk sda1. The added hard drives are /dev/sdb1 and /dev/sdc1.
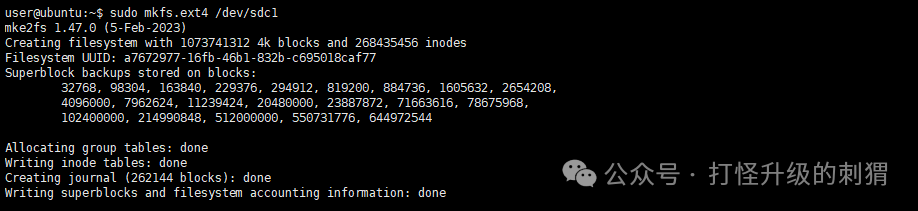
sudo blkid 4. Format the disks. The ext4 format is widely used and offers good performance and stability.
sudo mkfs.ext4 /dev/sdb1
sudo mkfs.ext4 /dev/sdc1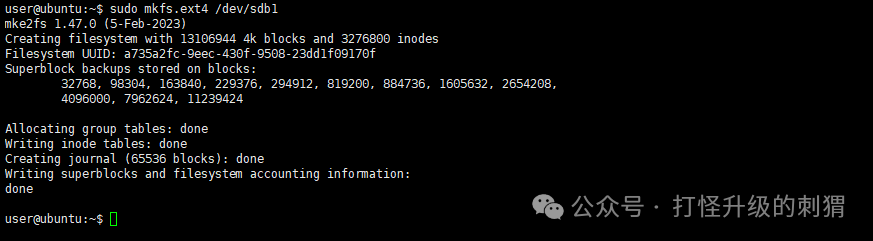
 5. Create mount points and mount the disks.
# Create mount points, here named data1 and data2
sudo mkdir /data1
sudo mkdir /data2
# Temporary mount, will not persist after reboot
sudo mount /dev/sdb1 /data1
sudo mount /dev/sdc1 /data2
# Unmount the disk
sudo umount /data1
To permanently mount the disks: Write the information into the disk file and obtain the UUID information using the blkid command.
sudo vim /etc/fstab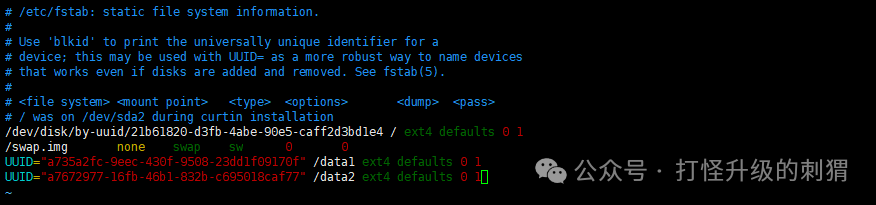 6. Restart the system and check the disk mount status.