🔥 Step-by-Step Guide to Installing Mitsubishi PLC Programming Tool GX Works3! A 19-Step Detailed Illustrated Guide 🔥

📦 Software Download
Name: GX Works3Language: Simplified ChineseSize: 2.54GInstallation Environment: Windows 7 and above (64-bit) operating systemDownload Address: Reply GXWorks3 on the public account
📚 Software Introduction
GX Works is a Mitsubishi PLC programming software that allows controllers to execute logical operations, sequential control, timing, and other user-oriented commands. It can also control various types of machinery or production processes through digital or analog input/output. It supports programming languages such as Ladder Diagram, ST, and SFC. Mitsubishi PLCs use two programming software: GX Works2 and GX Works3, with the difference being the supported PLCs. For example, the R series PLC can only use GX Works3, while the Q series can only use GX Works2. It is not that GX Works3 is an upgraded version of GX Works2; it depends on which PLC you are using to choose the appropriate programming software.
✅ Installation Requirements
| Item | Requirements/Description | Notes |
|---|---|---|
| Operating System | Windows 7 and above | Must be a 64-bit system |
| Disk Space | At least 3GB of available space | It is recommended to reserve additional space |
| Key Components | .NET Framework 3.5 | Must be enabled in advance |
| Installation Key | 570 986818410 | Must be entered accurately |
| Administrator Privileges | Administrator privileges are required throughout the installation | Avoid installation failure |
🛠️ Detailed Installation Steps (Follow the 19 Steps Strictly)
📌 Step 1: Extract the Installation Package
Right-click on the 【GX Works3(64bit)】 compressed package, select the extraction software installed on your computer, and click 【Extract to GX Works3(64bit)】.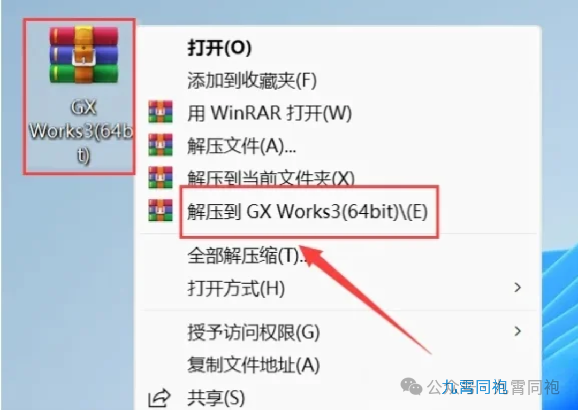
📌 Step 2: Open the Extracted Folder
Open the extracted folder and double-click to open the 【Setup】 folder.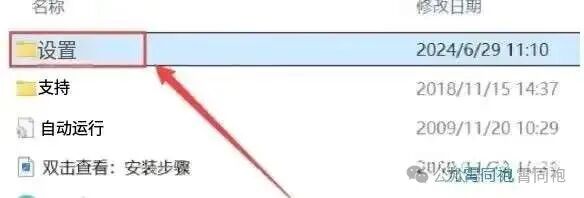
📌 Step 3: Run as Administrator
Right-click on 【Setup】 and select 【Run as Administrator】.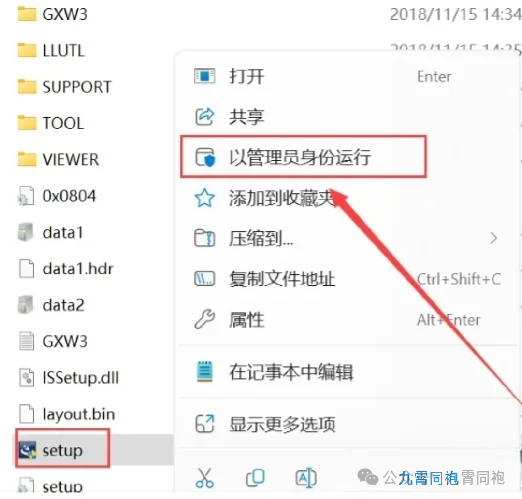
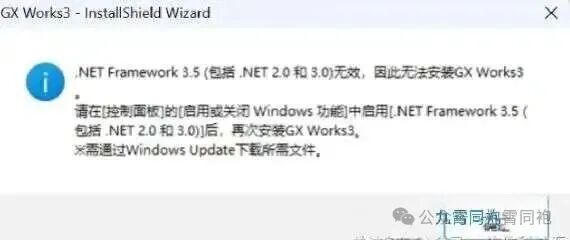
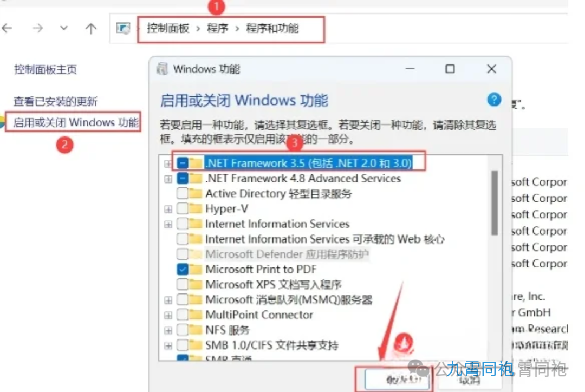
💡 If prompted for missing components:① Open 【Control Panel】 → 【Programs and Features】② Click 【Turn Windows features on or off】③ Check 【.NET Framework 3.5】④ Click 【OK】
📌 Step 4: Confirm Action
Click 【OK】.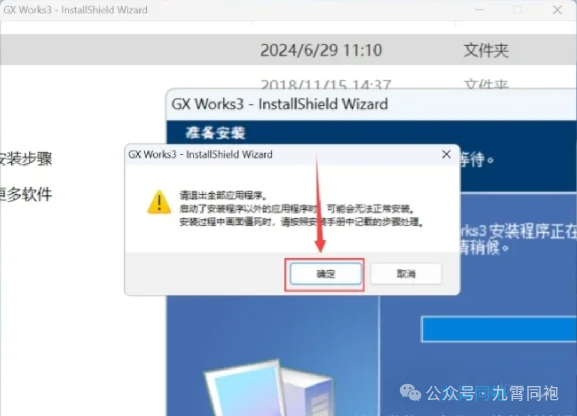
📌 Step 5: Enter Installation Wizard
Click 【Next】.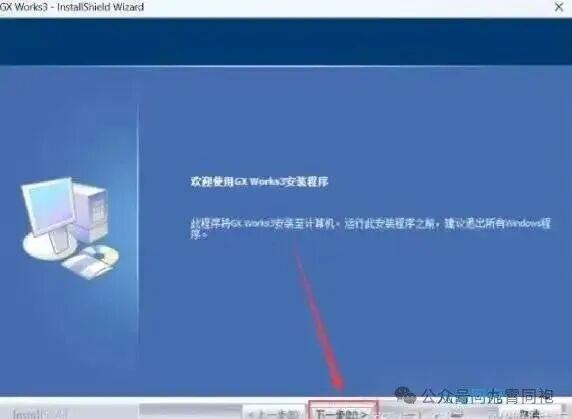
📌 Step 6: Enter User Information
Enter your name, company name (can be anything)Enter Product ID 【570 986818410】Click 【Next】.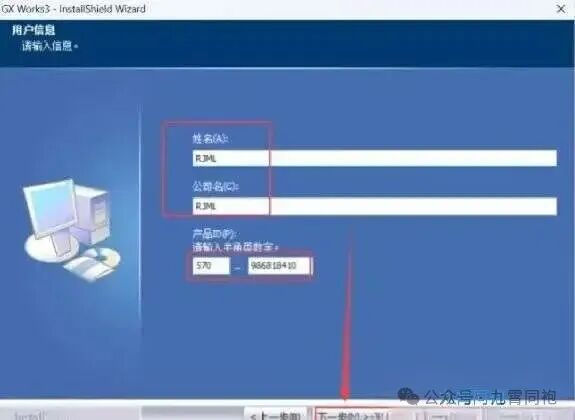
📌 Step 7: Select Installation Components
Check 【GX Works3】 and click 【Next】.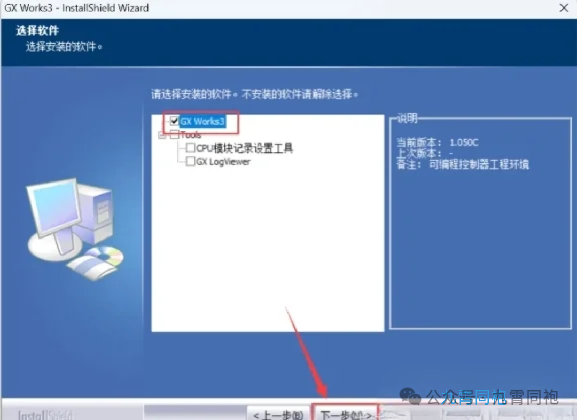
📌 Step 8: Modify Installation Location
① Click 【Change】② Modify the first character of the path address from C to change the installation location (e.g., change C to D to install the software on drive D)③ Click 【OK】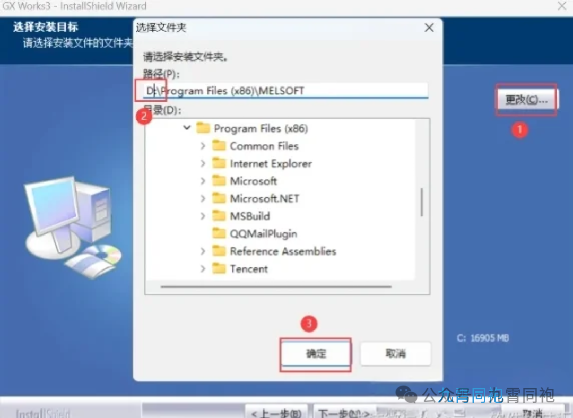
📌 Step 9: Confirm Installation Path
Click 【Next】.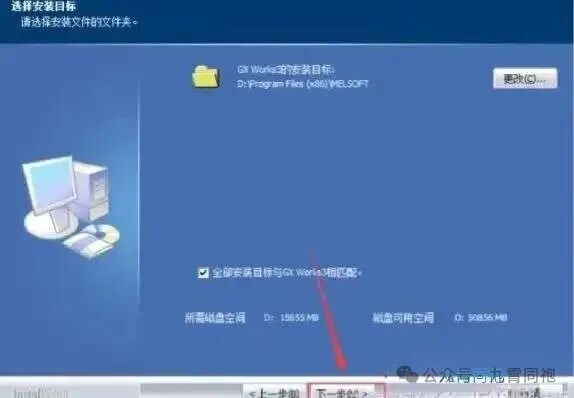
📌 Step 10: Prepare for Installation
Click 【Next】.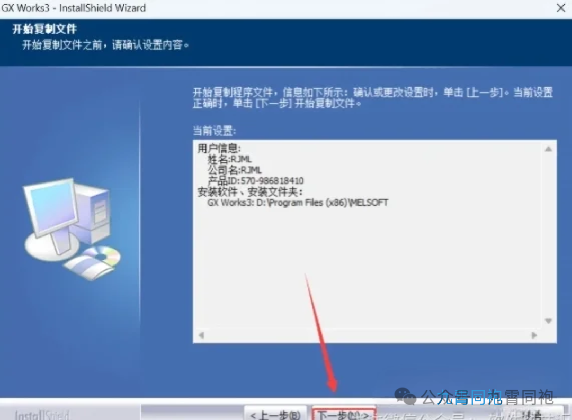
📌 Step 11: Installation in Progress
Installing…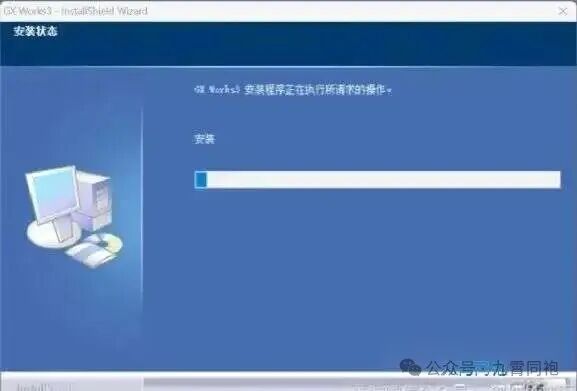
📌 Step 12: Install Core Components
Click 【Install】.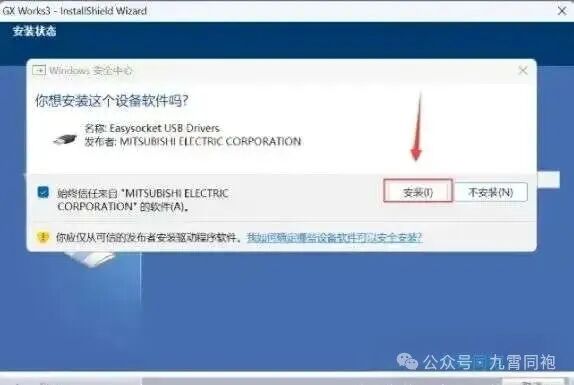
📌 Step 13: Continue Installation
Click 【Install】.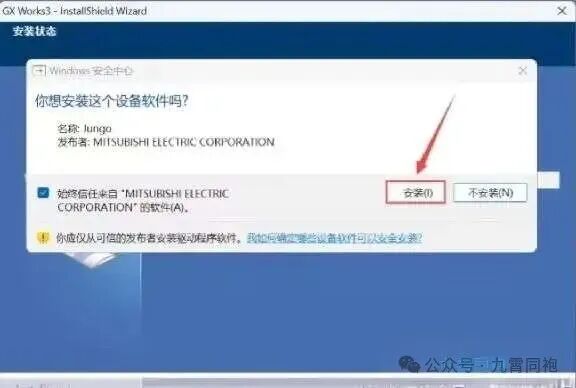
📌 Step 14: Complete Main Program Installation
Click 【Next】.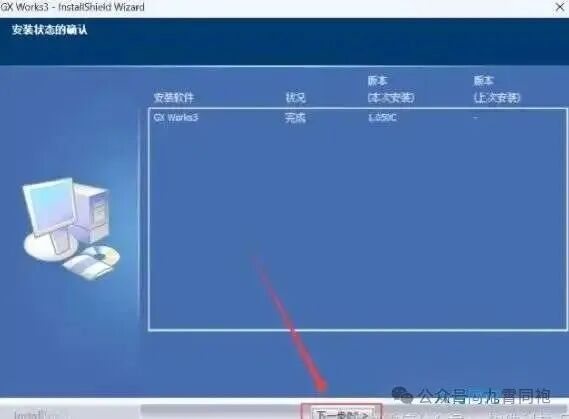
📌 Step 15: Select Monitoring Plugin
Check 【GX Works3】 and click 【OK】.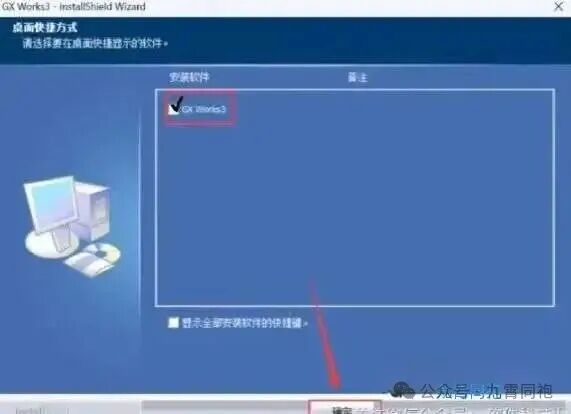
📌 Step 16: Confirm Installation Completion
Click 【OK】.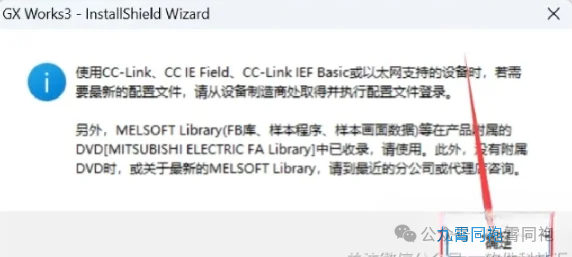
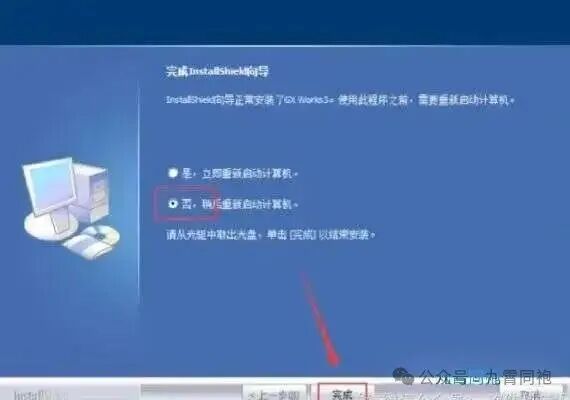
📌 Step 17: Restart Option
Select 【No, restart later…】 and click 【Finish】.
📌 Step 18: Launch the Software
Double-click the 【GX Works3】 icon on the desktop to launch the software.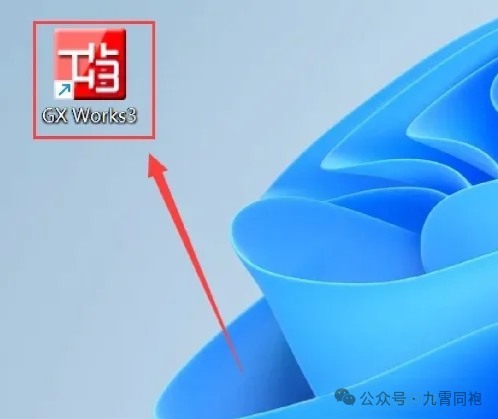
📌 Step 19: Installation Complete
Installation successful!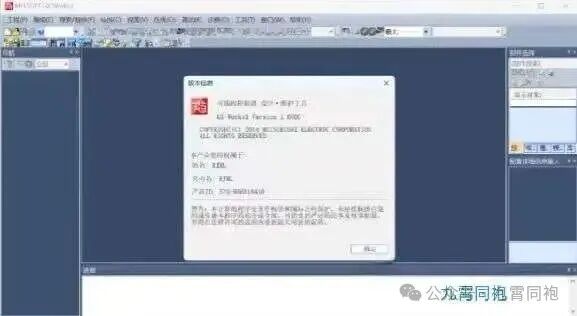
💡 Tips for Use
After installation, it is recommended to:
- Create a desktop shortcut for quick access
- Adjust the interface language and default save path in the software settings
- For first-time use, it is recommended to open the sample program to familiarize yourself with the interface
🎯 Efficient Learning Resources
Follow us for more: ✔️ Practical PLC programming case studies✔️ Installation tutorials for the entire series of Mitsubishi software✔️ Latest technology analysis in industrial automation
🌟 Did this article solve your installation confusion? Feel free to share your installation experience or challenges you encountered below 👇, and we will select typical questions for in-depth analysis! Don’t forget to like and support us~ Your recognition is our motivation for continuous creation! 🎉