The content shared below showcases the static version of my blog https://blog.yunx.top.
The content on the site is currently updated automatically through various Agent workflows I previously shared.
Future content generated by automated workflows will also be published here.
1. Background and Approach
EdgeOne Pages: A one-stop static website hosting platform launched by Tencent Cloud, supporting one-click deployment, global acceleration, and automatic SSL configuration. It is suitable for quickly launching personal blogs, corporate websites, or web applications, with a generous free tier and simple operation, making it a “lightweight website building tool” for developers and content creators.
Hexo: A fast static blog framework based on Node.js that generates all static files with a single command. It offers a rich variety of themes and plugins, one-click Git deployment, and can turn Markdown into a visually appealing personal blog in just three minutes, making it a “writing tool” favored by programmers.
WordPress: No introduction is needed; it is the world’s most popular all-in-one website building tool, with an overwhelming number of templates and plugins. You can create a blog, e-commerce site, or corporate site in just ten minutes without any coding; it has an easy-to-use backend and is SEO-friendly, used by everyone from individuals to Fortune 500 companies.
- 1. WordPress is very powerful and flexible in content management, but during deployment and operation, it faces issues such as performance degradation due to complex modules, complicated front-end styles, and high operational costs.
- 2. Static frameworks like Hexo and Gatsby can efficiently and conveniently achieve static content for WordPress blogs. This way, WordPress can serve as the database for the content management system (CMS), while Hexo acts as the front-end static solution.
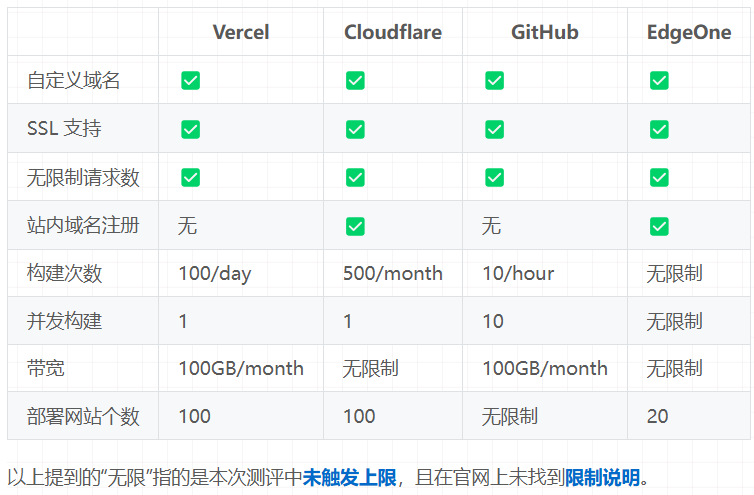
- 3. EdgeOne Pages provides a one-stop static hosting solution, and currently, it is almost free and unlimited to use. Combined with the above solutions, it can achieve nearly zero-cost deployment and global acceleration for WordPress.
- 4. The only missing step in the above solution is how to trigger the staticization of Hexo and the redeployment of EdgeOne Pages when WordPress content is updated. Fortunately, WordPress’s powerful plugin system and the deployment hooks provided by EdgeOne Pages solve this problem. You only need to install two plugins and deploy a webhook to complete the entire automated process.
- 5. This solution not only addresses the operational cost issues of WordPress and improves stability but also offloads website security, load pressure, and access experience issues to EdgeOne Pages at almost zero cost. This is especially worth considering for overseas projects.
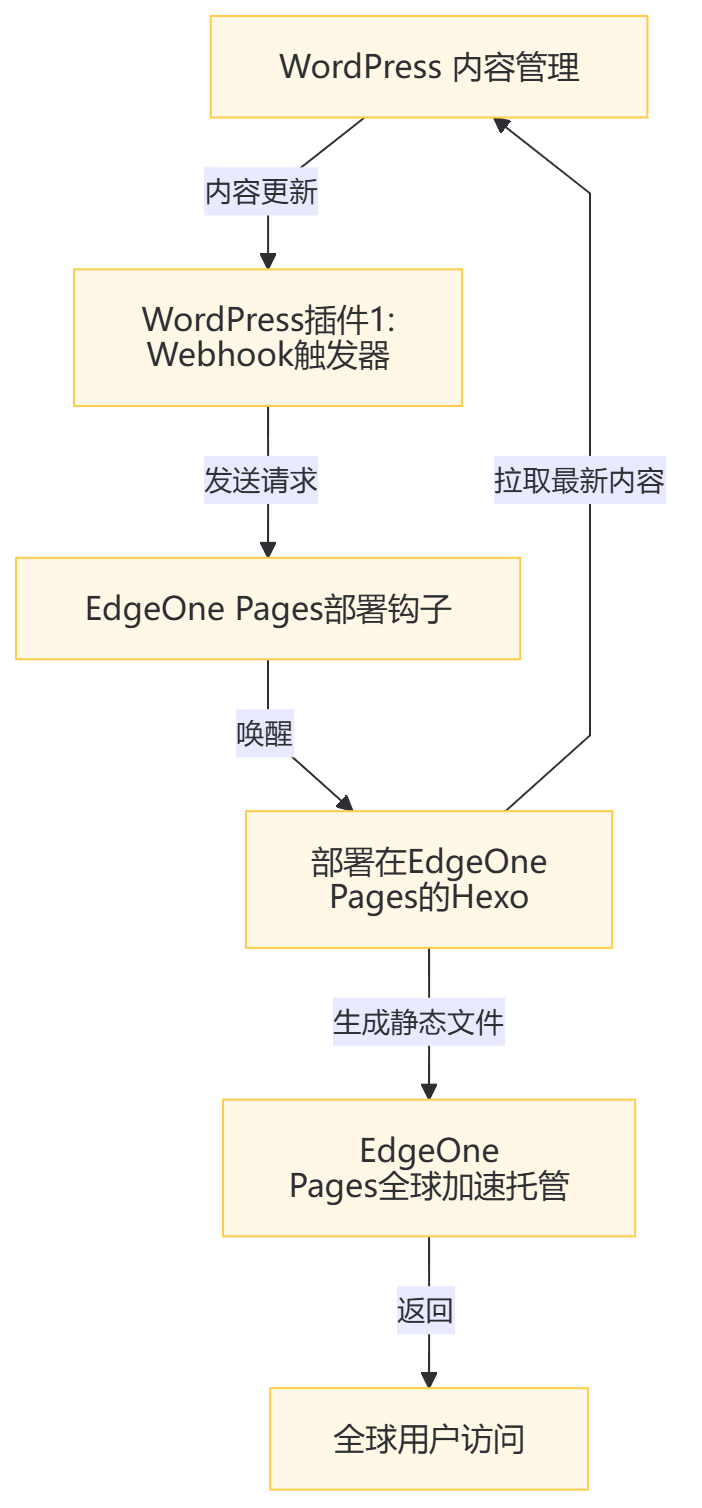
Below is a brief introduction to the implementation process.
2. Deployment Plan
WordPress Deployment
We will not repeat the deployment of WordPress this time, as many methods have been introduced before. You can check them out.
“Using Leaflow to Deploy WordPress and Automatically Update Blogs via N8N, Earning Traffic While Lying Flat”
“Azure Can Actually Deploy WordPress for Free, Is It Really Free?”
The advantage of this solution is that it does not have high requirements for WordPress deployment; it only needs to be accessible during the execution of Hexo staticization.
Installing Plugins
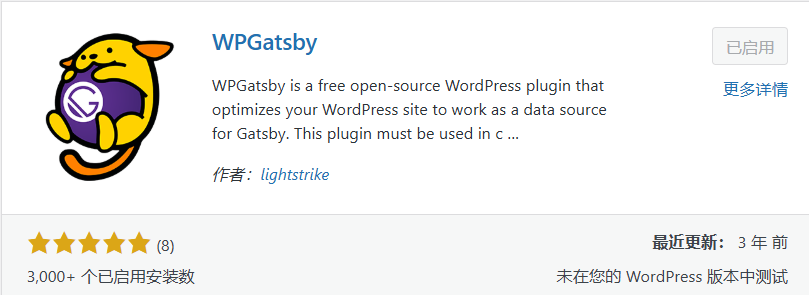
To achieve the automated deployment mentioned above after content updates, you need to install two plugins in WordPress: WPGraphQL and WP Gatsby. Simply search for them in the WP plugin market, install, and activate them.
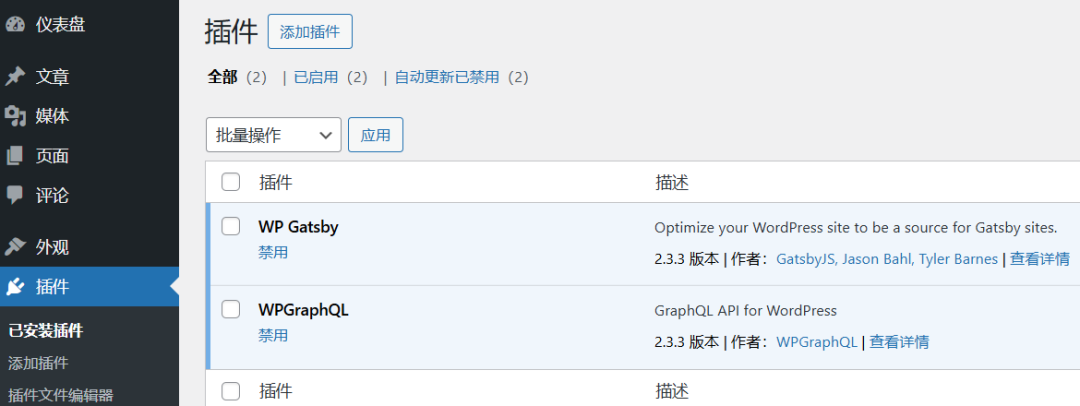
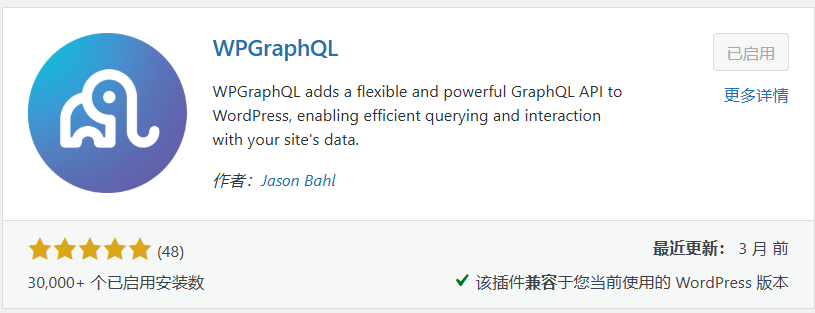
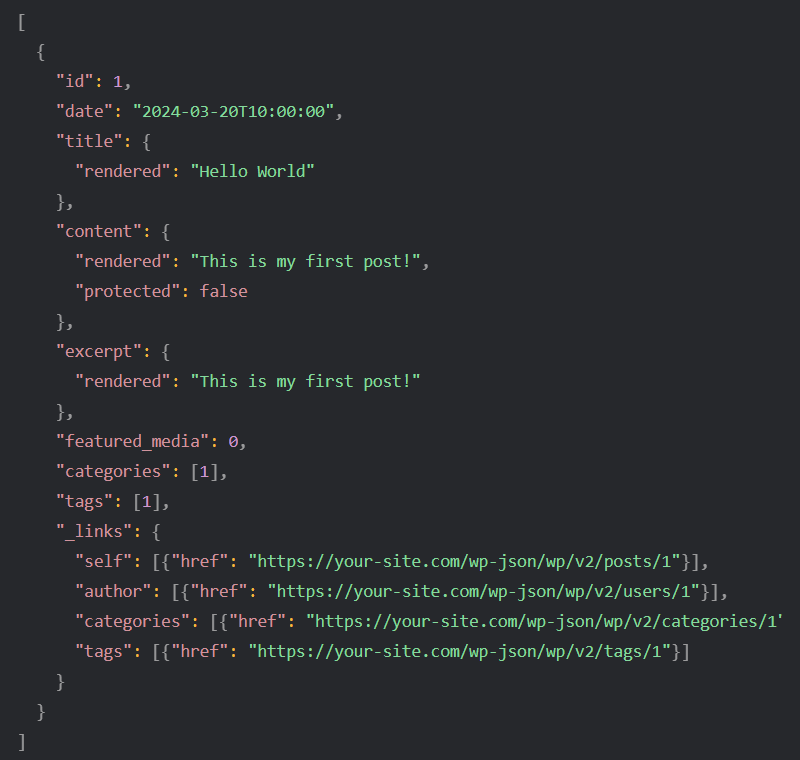
The WPGraphQL plugin is responsible for providing an API query interface for WordPress content, allowing Hexo to access WP data during staticization. This plugin can be activated directly after installation without additional configuration. You can test it by accessing this URL: https://your-site.com/wp-json/wp/v2/posts. If it returns similar content, everything is fine.
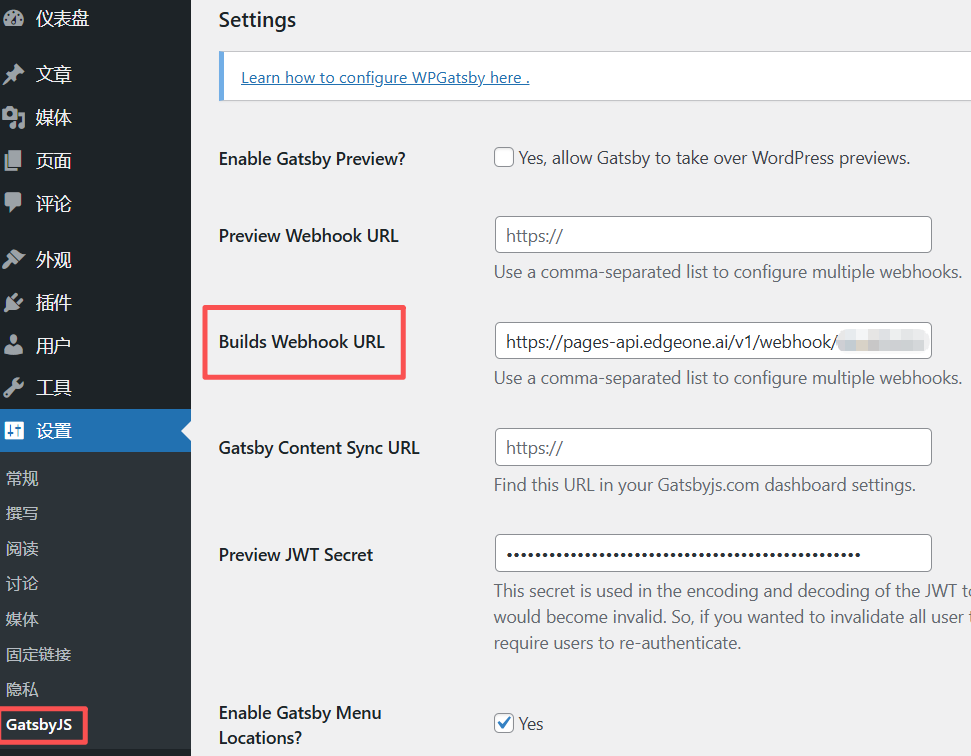
The WP Gatsby plugin is responsible for connecting to the deployment hooks of EdgeOne Pages. When WP content is updated, this plugin triggers the hook to notify Hexo on EdgeOne Pages to perform staticization. After installing and enabling this plugin, you need to set the “Builds Webhook URL” in the WP settings under “Settings-GatsbyJS”. The URL in the red box is the deployment hook, and I will explain where to find the parameters later.
Hexo Static Deployment to EdgeOne Pages
EdgeOne Pages offers a very generous free plan, especially the international version, which is rare and works smoothly for domestic access.
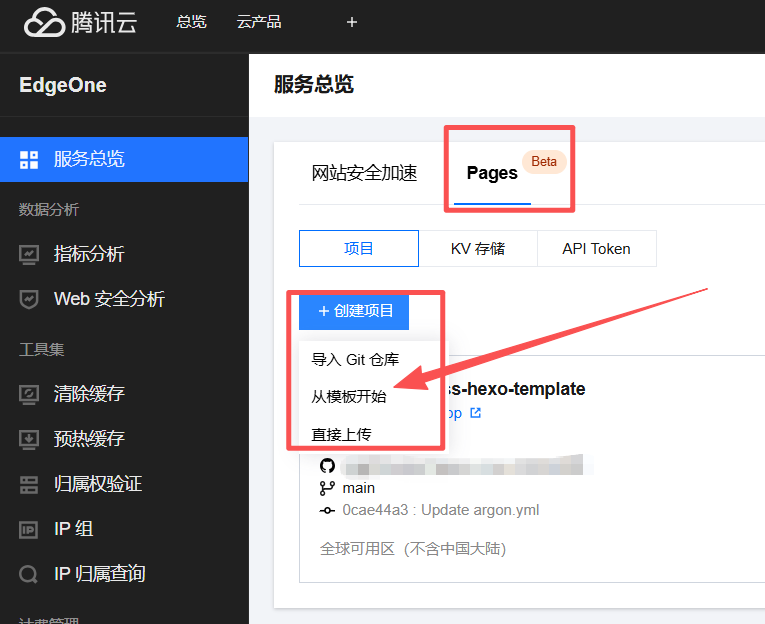
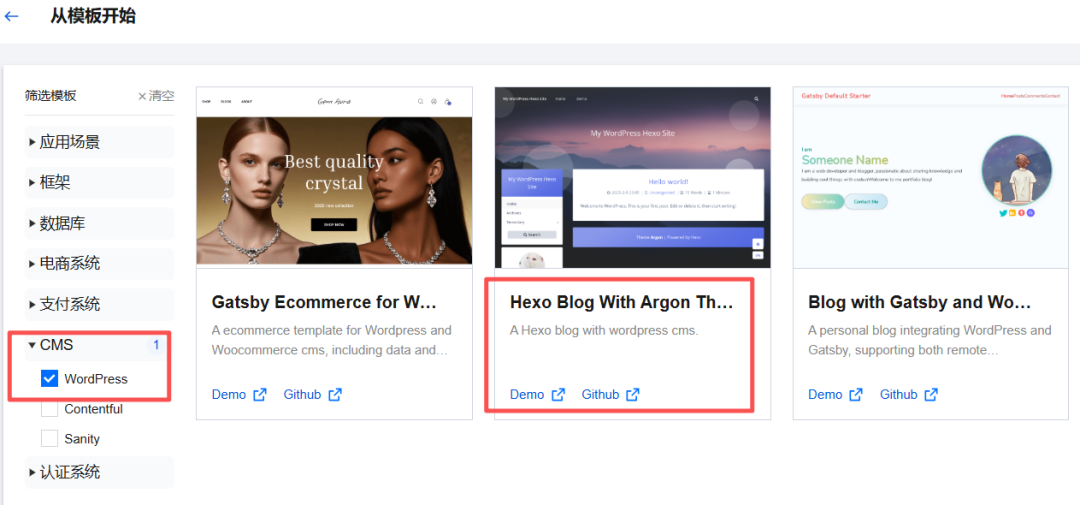
I won’t go into detail about how to use EdgeOne Pages this time. For this deployment plan, there are ready-made templates available. Just click on “Start from Template” in the image below.
On the template page, you will see three WordPress static deployment templates. The one in the middle is the Hexo framework solution we are using this time, while the other two are based on the Gatsby framework, which are also applicable and can be chosen based on your website building needs.
Clicking on the template image will open the deployment page associated with your GitHub or other Git platform account, as shown below. You can customize the project name, and the repository name is the name of the cloned template on your Git platform (the parameters for the static website are edited in various ways in your Git platform after cloning); the acceleration region is the free acceleration service provided by EdgeOne Pages. If you have a domain name that has been filed in China, you can choose global acceleration (including mainland). Even if you don’t have a filed domain name, you can choose global acceleration without mainland, and access will still be smooth in China; the key point is the environment variable, where the value of the variable name WP_URL is the URL of your WordPress blog.
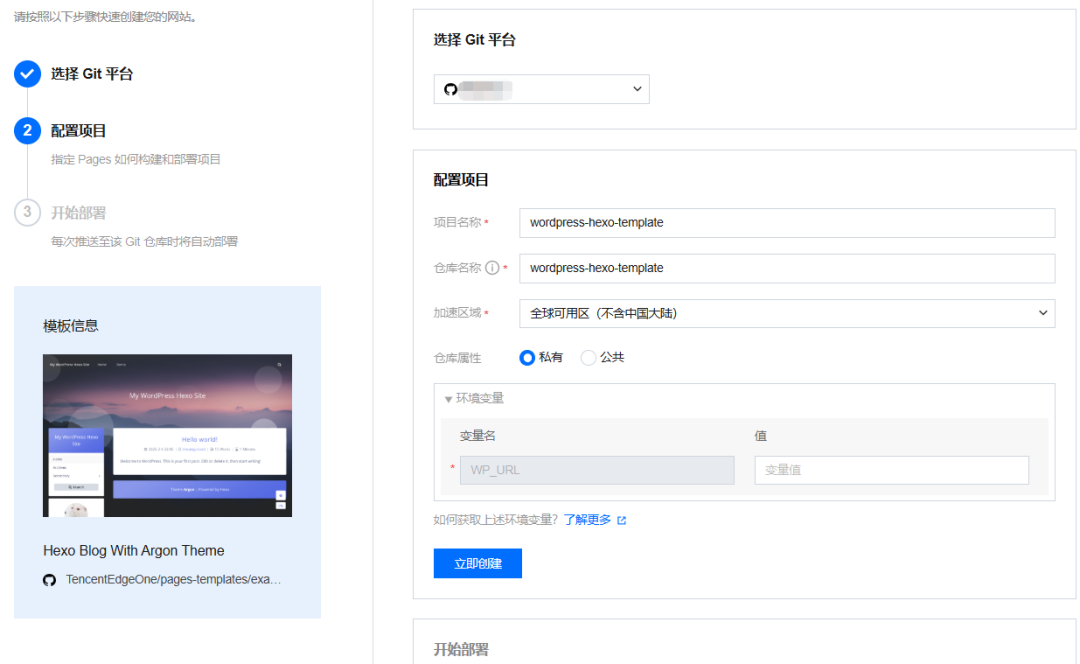
No excessive settings are needed; just click “Create Now” above to proceed with the Hexo static deployment of the blog content. The deployment process is quick (also depending on the amount of existing content on the WP blog), and it can be online and accessible in just a few minutes.
After successful deployment, in the deployed project, there is a domain management module in the project overview and settings page where you can add a custom domain name, and it can automatically deploy a free SSL certificate, which is very simple and convenient.
Implementing Automated Updates with Deployment Hooks
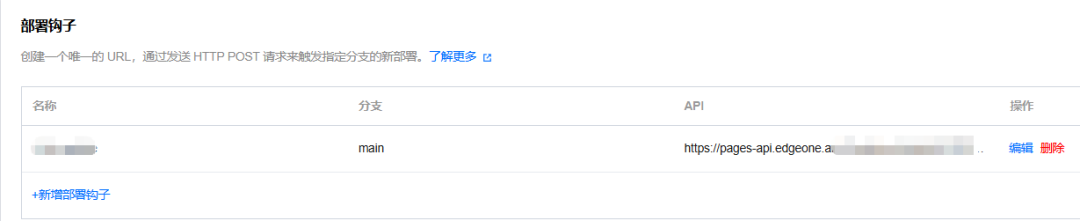
After the above project is deployed, go to the project’s settings page, scroll to the bottom, find the deployment hook module, click on Add Deployment Hook, then copy the webhook URL from the API column and fill it in the “Builds Webhook URL” in the WordPress “Settings-GatsbyJS” page. This completes the automated update solution, and every time WP content is updated, it will trigger Hexo’s redeployment operation, achieving timely updates of the static pages.
Personalized Configuration of Hexo Static Site
After deploying the Hexo static site mentioned above, the site’s title, categories, links, search, and other content are all default. You can personalize the configuration according to your needs. Here are some simple configuration paths.
As mentioned above, you have cloned the template content to your Git platform project, for example, in GitHub, the directory structure of the project files is shown below:
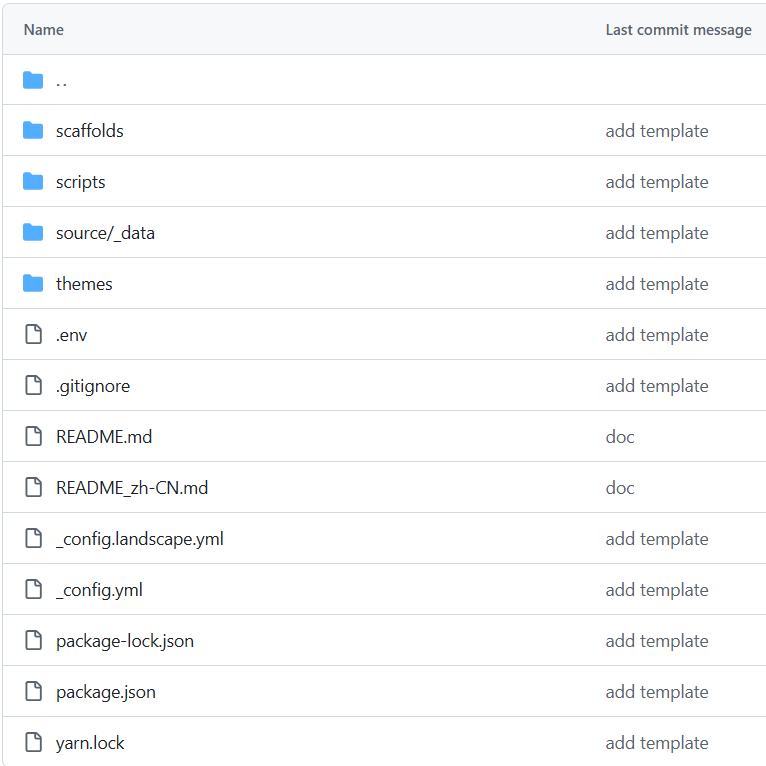
Among them:
- • Site title, link format, and other configurations are in the _config.yml file in the root directory.
- • Hexo theme settings, such as the top and left navigation bar information, are in the /source/_data/argon.yml file.
- • If you want to enable the search function for the static site, you need to add an installation command npm install hexo-generator-search –save to the Hexo deployment command. Specifically, you can find the “Build Deployment Configuration” module on the project’s settings page, add this command to the installation command, and redeploy.
- • Additionally, for cases where there are Chinese titles in WP content, the static URLs may have redirection issues. You can also implement this by adding a component during deployment. Add the hexo-abbrlink component to the installation command, and the completed installation command will look like this: npm install hexo-abbrlink hexo-generator-search –save; then in the _config.yml file in the project root, change the default permalink: :year/:month/:day/:title/ to the following:
permalink: posts/:abbrlink.html
abbrlink:
  alg: crc32
  rep: hex
Other personalized configuration content can be explored on your own.
In Conclusion
That’s all for today. I hope you find it useful. Recently, I have been a bit detached from my AI main business, but I will return to sharing AI content starting tomorrow.
If you are interested in AI, you can follow the WeChat public account “Evil Person’s Notes” for ongoing communication and sharing.