‖ System Learning
Life is like a marathon; sometimes you need to pause and enjoy the scenery to go further.
Last time, I worked on a modbus_tcp communication protocol. I wonder if everyone has seen it. This time, I will present the implementation of the Modbus protocol using C# WinForms based on the Nmodbus4 library, and how to communicate with Xinjie PLC.
First, let’s look at the results of this session.
Project Setup
Step 1Open VS2022, create a project, and select Windows Forms Application, or .NET Framework. Choose .NET 8.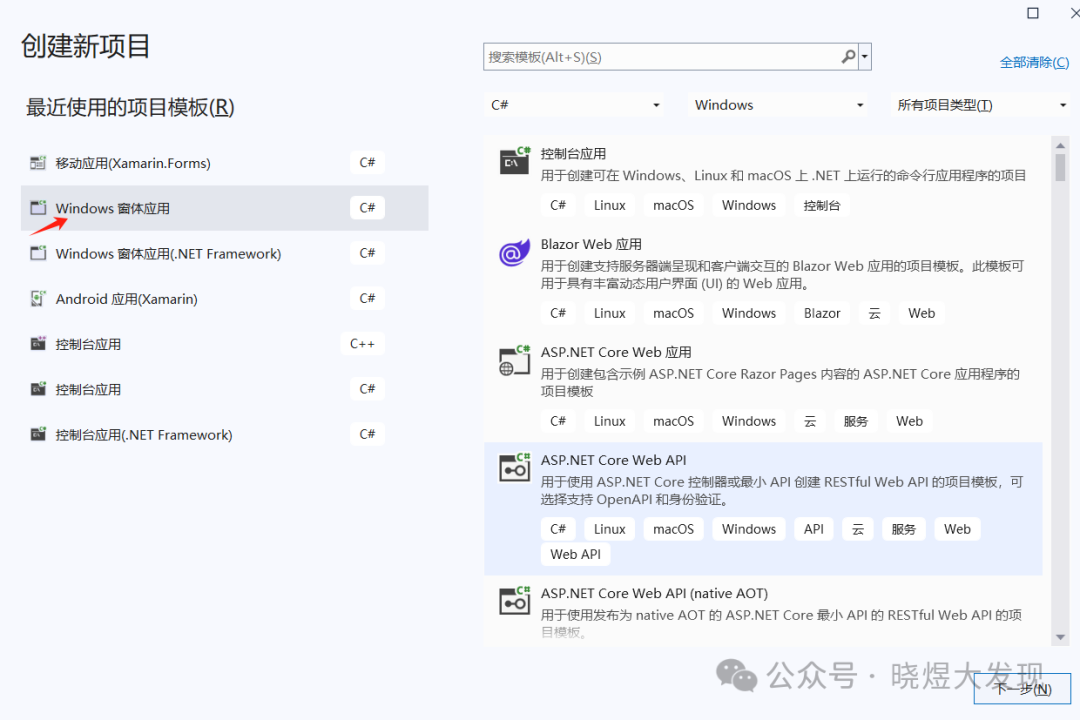
Step 2
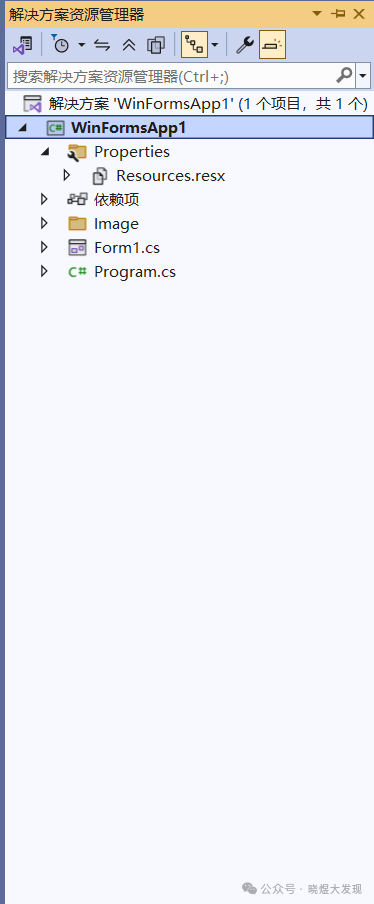
Right-click on the project name and select Package Management.
Step 3
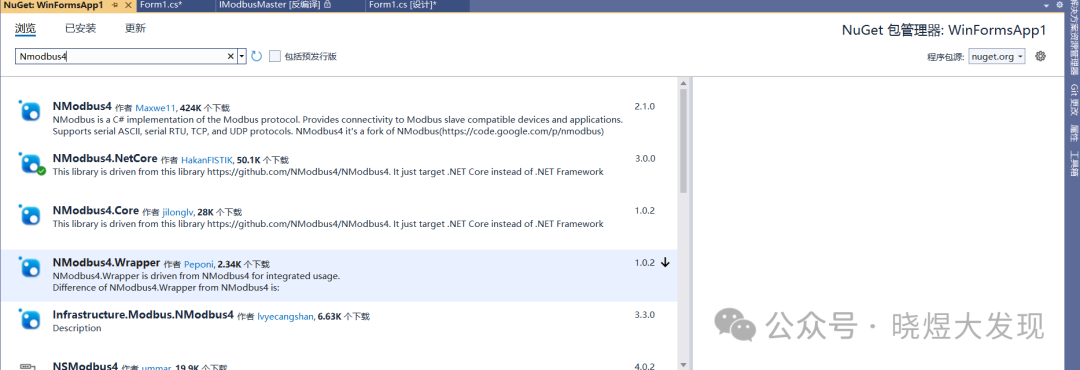
Add the Nmodbus4.netCore package.
Step 4
Return to the program and import the namespace.
using Modbus.Device;using System.Net.Sockets;
Program Development
The interface consists of simple button controls and text boxes, nothing more.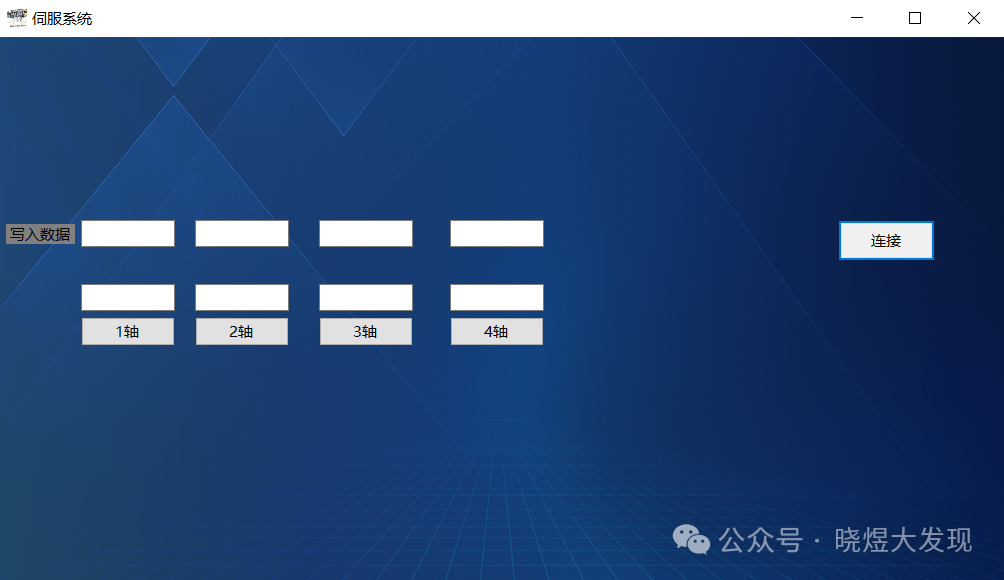 Inpublic partial class Form1 : Form, add global variables.
TcpClient client = new TcpClient(); // Create a new connectionIModbusMaster master = null; // Library nameprivate bool[] M = new bool[101]; // Store the status of the switch Mprivate ushort[] D = new ushort[101]; // Store D status1. Establishing ConnectionHere, I only use button1 to connect. If the connection is valid, it will succeed; otherwise, a prompt box will pop up.
private void button1_Click(object sender, EventArgs e) { try { client.Connect("192.168.6.6", 502); if (client.Connected) // If connected successfully { master = ModbusIpMaster.CreateIp(client); // Initialize class fields MessageBox.Show("Connection successful!"); // Show connected prompt button1.Text = "Connected"; button1.BackColor = Color.Green; } } catch (Exception ex) { MessageBox.Show($"Connection failed: {ex.Message}"); // Show error message } }2. Data ReadingI used a timer for automatic reading, so I created two functions for the function codes.For reading function code 01, I store all the read function codes in the custom variable M array.
private void Read01(){ bool[] date = master.ReadCoils(1, 0, 10); // Read 10 starting from 0 for (int i = 0; i < date.Length; i++) { M[i] = date[i]; // Populate M array }}For reading function code 03,I store all the read function codes in the custom variable D array.
private void Read03(){ ushort[] date = master.ReadHoldingRegisters(1, 0, 10);// Read 10 starting from 0 for (int i = 0; i < date.Length; i++) { D[i] = date[i]; // Populate D array }}Finally, I put it into a timer to read once per second.
private void timer1_Tick(object sender, EventArgs e){ try { if (client.Connected) // If connected successfully { Read01(); // Function code 01 Read03(); // Function code 03 b_Color();// Change color of switches Date_show();// Display values } } catch (Exception ex) { MessageBox.Show($"Connection failed: {ex.Message}"); // Show error message }}3. Data Application
You can see that when I click the button, it changes color. The method implemented here is by reading the M array and checking if it is true; if so, it turns green; if not, it remains default. Regarding case0–case3, these are the names of my buttons, and since there are multiple, I used an array for the loop instead of writing them one by one.
private void b_Color(){ // Switch controls System.Windows.Forms.Button[] cases = new System.Windows.Forms.Button[] { case0, case1, case2, case3 }; for (int i = 0; i < cases.Length; i++) { if (i < M.Length && M[i]) { cases[i].BackColor = Color.Green; } else { cases[i].BackColor = SystemColors.Control; // Restore default color } }}Also, for data display, I used the same method for data application.
private void Date_show(){ System.Windows.Forms.TextBox[] Axis = new System.Windows.Forms.TextBox[] { Axis0, Axis1, Axis2, Axis3 }; for (int i = 0; i < Axis.Length; i++) { Axis[i].Text = D[i].ToString(); }}Finally, adding these two functions to the timer will enable data display.
4. Data Writing
For writing switch values, I used the WriteSingleCoil method, which is provided by the library.
The main operation is to check if the current value is 1 when the communication button is pressed; if so, set it to 0, otherwise, it is an inversion operation.
private void case1_Click(object sender, EventArgs e) { ushort date = 1; if (client.Connected) // If connected successfully { if (M[date]) master.WriteSingleCoil(1, date, false); else master.WriteSingleCoil(1, date, true); } }For writing analog values, I used the value change event of the text box to enter data writing.
private void setDate0_TextChanged(object sender, EventArgs e) { string input = setDate0.Text; // Get input string from textBox if (ushort.TryParse(input, out ushort date)) // Try to convert string to ushort { // If connected successfully // Write to register if (client.Connected) master.WriteSingleRegister(1, 0, date); } else MessageBox.Show("Please enter a valid number."); // Handle conversion failure, e.g., show error message }5. Closing Connection
Here, I implemented a close operation when the window closes, but it can also be done with a button.
// Ensure resources are released when the form closesprivate void Form1_FormClosing(object sender, FormClosingEventArgs e){ if (client != null && client.Connected) { client.Close(); }}
Nmodbus Library Explanation
Method Name
|
Method Name |
Function |
Required Parameters |
Return Value |
Corresponding Function Code |
|
ReadCoils |
Read the status of DO |
Slave Address (8 bits) byte slaveAddress Starting Address (16 bits)
ushort startAddress Number of Points to Read (16 bits) ushort numberOfPoints |
bool[] |
01 |
|
ReadInputs |
Read the status of DI |
Slave Address (8 bits) byte slaveAddress Starting Address (16 bits)
ushort startAddress Number of Points to Read (16 bits) ushort numberOfPoints |
bool[] |
02 |
|
ReadHoldingRegisters |
Read the value of AO |
Slave Address (8 bits) byte slaveAddress Starting Address (16 bits) ushort startAddress Number of Points to Read (16 bits) ushort numberOfPoints |
ushort[] |
03 |
|
ReadInputRegisters |
Read the value of AI |
Slave Address (8 bits) byte slaveAddress Starting Address (16 bits) ushort startAddress Number of Points to Read (16 bits) ushort numberOfPoints |
ushort[] |
04 |
|
WriteSingleCoil |
Write value to DO |
Slave Address (8 bits) byte slaveAddress Coil Address (16 bits) ushort coilAddress Value to Write (Boolean) bool value |
No return value |
05 |
|
WriteSingleRegister |
Write value to AO |
Slave Address (8 bits) byte slaveAddress Register Address (16 bits) ushort registerAddress Value to Write (16-bit) ushort value |
No return value |
06 |
|
WriteMultipleCoils |
Write multiple coil registers |
Slave Address (8 bits) byte slaveAddress Starting Address (16 bits) ushort startAddress Value to Write (Boolean array) bool[] data |
No return value |
15 |
|
WriteMultipleRegisters |
Write multiple holding registers |
Slave Address (8 bits) byte slaveAddress Starting Address (16 bits) ushort startAddress, Register Values (16-bit integer array) ushort[] data |
No return value |
16 |
|
ReadWriteMultipleRegisters |
Read and write multiple holding registers |
Slave Address (8 bits) byte slaveAddress Read Starting Address (16 bits) ushort startReadAddress Number of Points to Read (16 bits) ushort numberOfPointsToRead, Write Starting Address (16 bits) ushort startWriteAddress, Write Values (16-bit integer array) ushort[] writeData |
ushort[] |
23 |
Conclusion
This is just a simple application. For real projects, threading is needed for connections. If interested, you can refer to the source code.Link: https://pan.quark.cn/s/f192bb0861c2Teaching someone to fish is better than giving them fish.
