This article will delve into a compact quadruped robot project based on the ESP32 (the project address is no longer maintained and is for reference and learning purposes only). Although the original project has been discontinued, its design concepts and implementation methods still hold educational value. Let us explore the fascinating world of this small robotic dog together.
Hardware Configuration
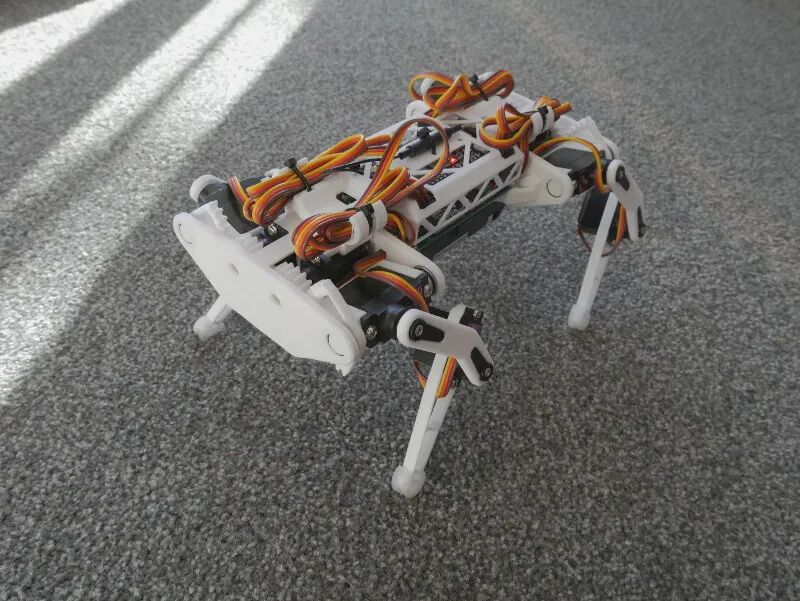
The core of this project is the ESP32 microcontroller, which is responsible for processing all control logic and sensor data. Unfortunately, the IMU (Inertial Measurement Unit) was not implemented in the final version, which limits the robot dog’s balance and dynamic performance. The robot dog is driven by 12 TowerPro MG90D servos, with three servos controlling each leg to achieve complex leg movements. In terms of power supply, it uses two 18650 batteries. It is worth noting that the project did not design a dedicated PCB, which increases the difficulty of assembly and debugging.
Software Architecture
The project is developed using Arduino IDE compatible code. The code implementation includes servo control, leg movement algorithms, and other functionalities. However, since the project has stopped maintenance, some libraries have been updated, and the original code may no longer be compatible with the current environment, requiring corresponding modifications and adaptations.
Servo Calibration
Servo calibration is a key step for the success of this project. Due to the angle deviations and individual differences of the servos, precise calibration is necessary to ensure the normal movement of the robot dog. The project provides a calibration tool (a scaled disk) to assist with servo calibration. The calibration process is roughly as follows:
-
1. Print the calibration tool and install the servos onto the tool.
-
2. Use the provided
<span>servoCalib.ino</span>program to connect the servos to pin 14 of the ESP32. -
3. Input 1500 (pulse width value) via the serial port to make the servo point to the middle position.
-
4. Adjust the pulse width value to find the minimum angle of the servo (
<span>degMin</span>) and the maximum angle (<span>degMax</span>). -
5. Further refine the calibration to find the pulse width values corresponding to key angles such as 30°, 50°…130°, 150°.
Leg Assembly and Calibration
Leg assembly requires a certain level of skill and patience. The project provides a leg assembly template to assist with assembly. After assembly is complete, leg calibration is necessary to ensure the movement range and angles of each leg are accurate. The calibration process includes:
-
1. Print the leg assembly template, one in the forward direction and one mirrored.
-
2. Install the servos into the leg structure and adjust the initial positions of the servos according to the template.
-
3. Use the provided command line tool (
<span>set servo_to_calib</span>) to set all servos to the preset positions in the template. -
4. Use the leg angle calibration tool to fine-tune the angles of each servo. Adjust the servo’s trim values using the
<span>XX_HAL_trim_xxxx</span>command (for example,<span>LF_HAL_trim_alpha</span>) until the leg aligns precisely with the template.<span>XX</span>represents the leg position (LF: left front, RF: right front, LR: left rear, RR: right rear), and<span>xxxx</span>represents the angle (alpha, beta, gamma).
Conclusion
Although this ESP32 quadruped robot project has ceased maintenance, it still provides us with a valuable learning case. Through this project, we can learn about the application of the ESP32, servo control, robotic kinematics, and related hardware and software development techniques. The shortcomings present in the project also remind us that a complete robot project requires thorough planning, comprehensive testing, and ongoing maintenance. Although the original author no longer provides support, this project can still serve as a resource for learning and reference, helping us better understand the design and implementation of small robots.
Project address: https://github.com/SovGVD/esp32-robot-dog-code