1
Introduction to Proteus
Proteus is a popular software for simulating electronic circuits and physical characteristics, widely used among electronic engineers and educators. This software provides a comprehensive environment for circuit design, simulation, and PCB (printed circuit board) design, allowing users to complete the development process from concept design to product prototype on a single platform.
-
Typically, Proteus is used in conjunction with the Keil development tools for co-simulation. This method involves designing the circuit diagram of the system in Proteus, while writing the corresponding program code and generating Hex files in Keil. After completing these steps, the Hex file is imported into Proteus for simulation to verify the theoretical performance of the circuit and program.
-
It is worth noting that while Proteus provides powerful simulation capabilities, the simulation results are primarily used to verify the feasibility of the design and cannot completely replace physical testing. Actual hardware systems may exhibit different behaviors due to various factors not considered in the simulation, therefore, even if the simulation performs well, the final hardware system must undergo thorough on-site debugging and verification. This process helps identify and resolve issues that may not have been foreseen in the simulation, ensuring that the final performance of the system meets the expected requirements.
2
Downloading and Installing Proteus
Installation package acquisition method is at the end of the article
1. Installation Method:
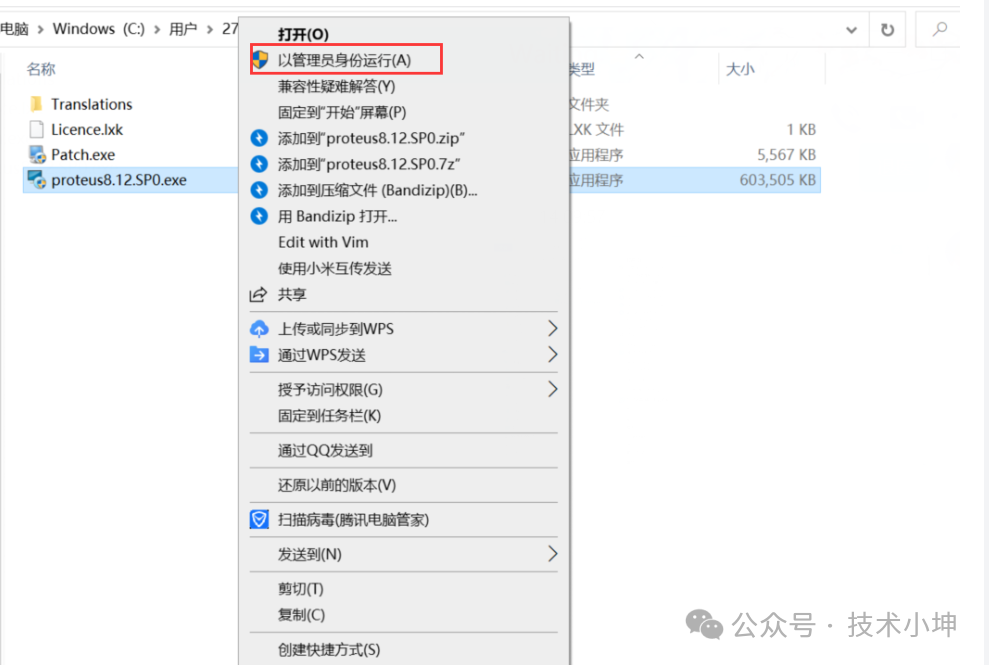
As shown, click on proteus8.12.SP0.exe file, right-click the mouse and select run as administrator
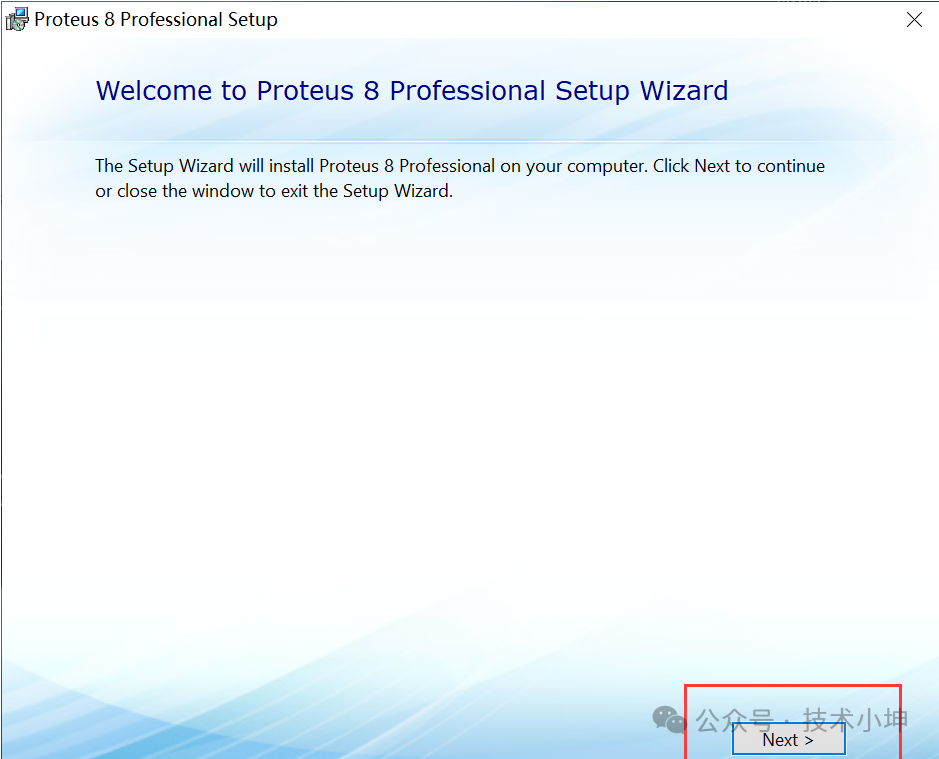
Step 2: As shown, clickNext to proceed to the next step
Step 3: As shown, first check (I accept the terms of this agreement), then clickNext to proceed.

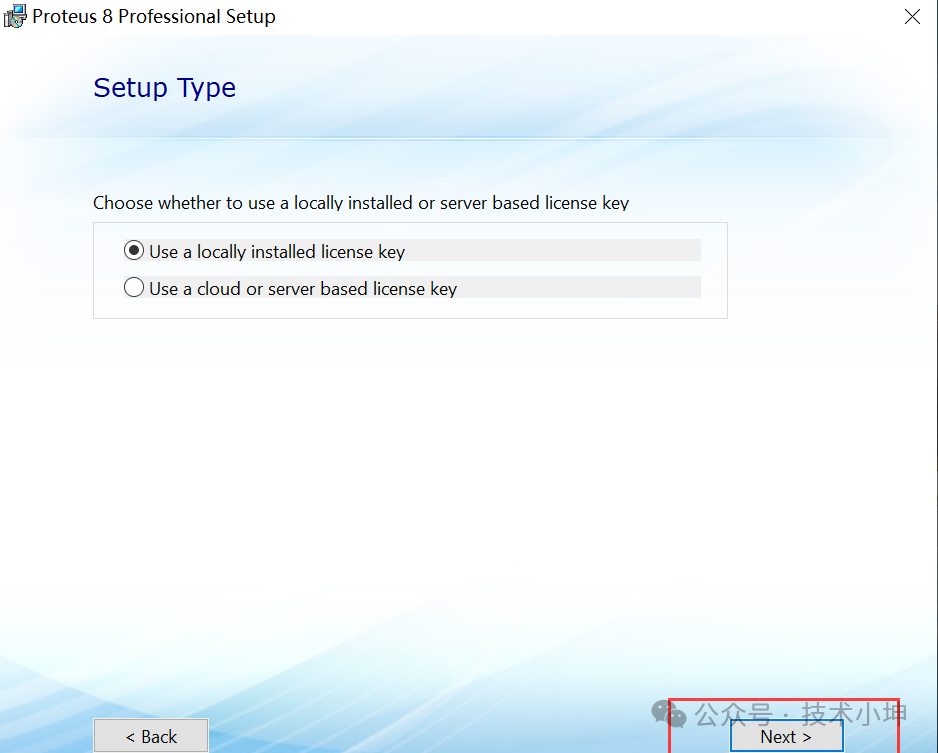
Step 4: As shown, select the first option (local activation), clickNext
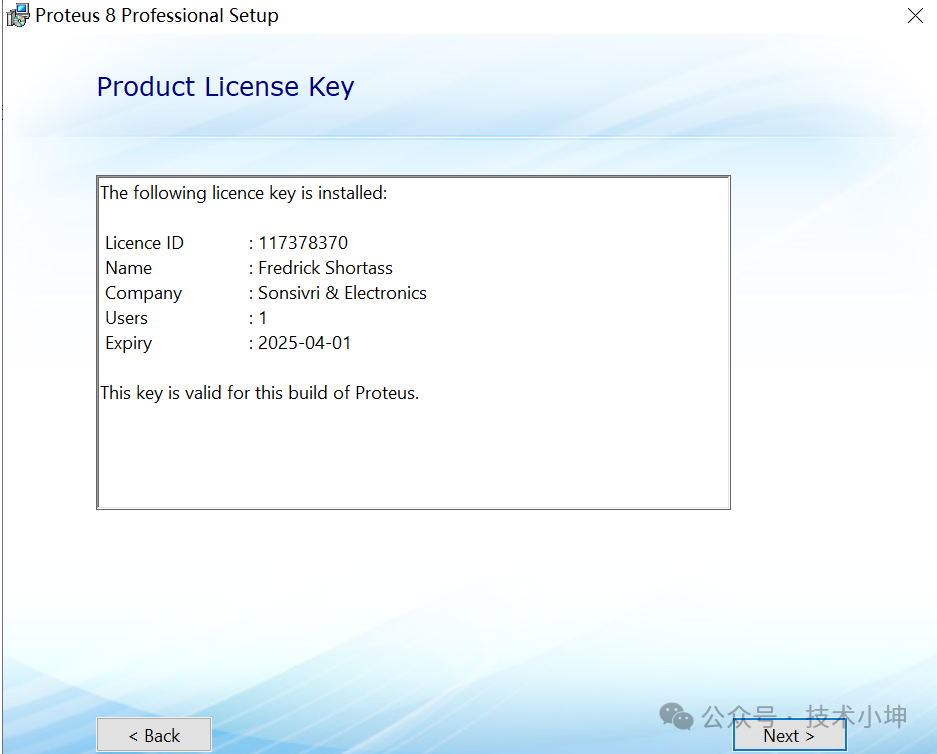
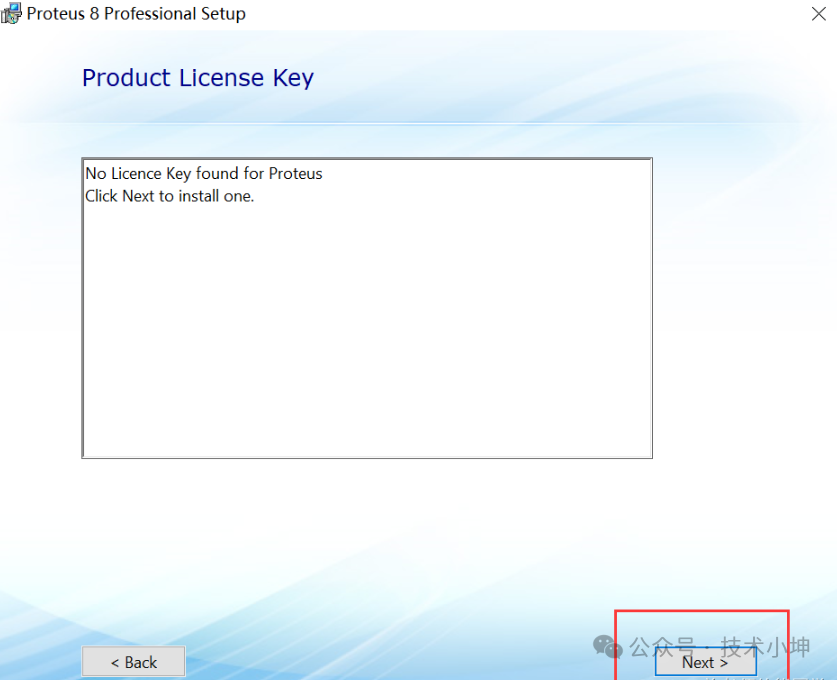
Step 5: If a license key was previously installed, as shown, clickNext
If the license key has not been installed, the interface below will appear, clickNext
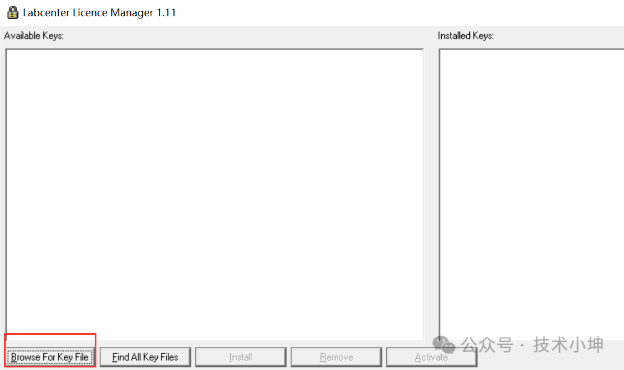
Then clickBrowse For Key File to select the key file
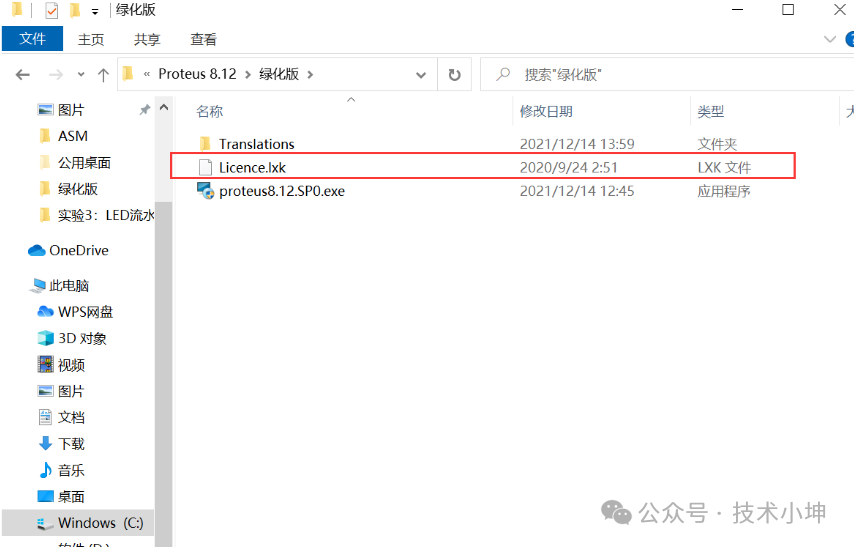
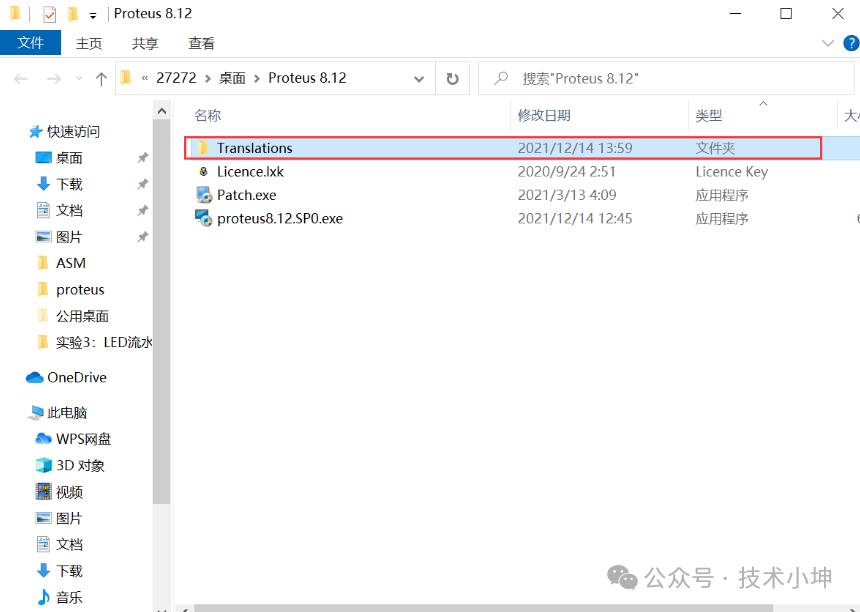
Select the file Licence.lxk in the installation package folder
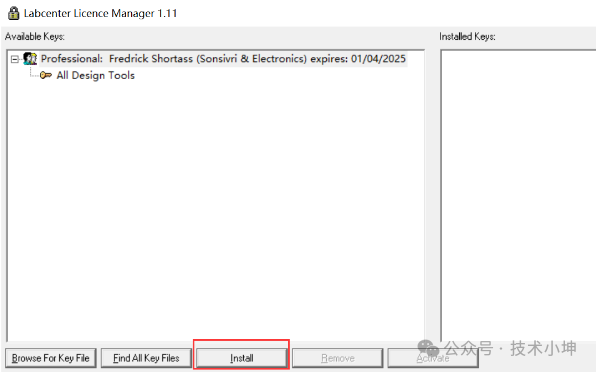
ClickInsrall to install the license
ClickClose to complete the license installation
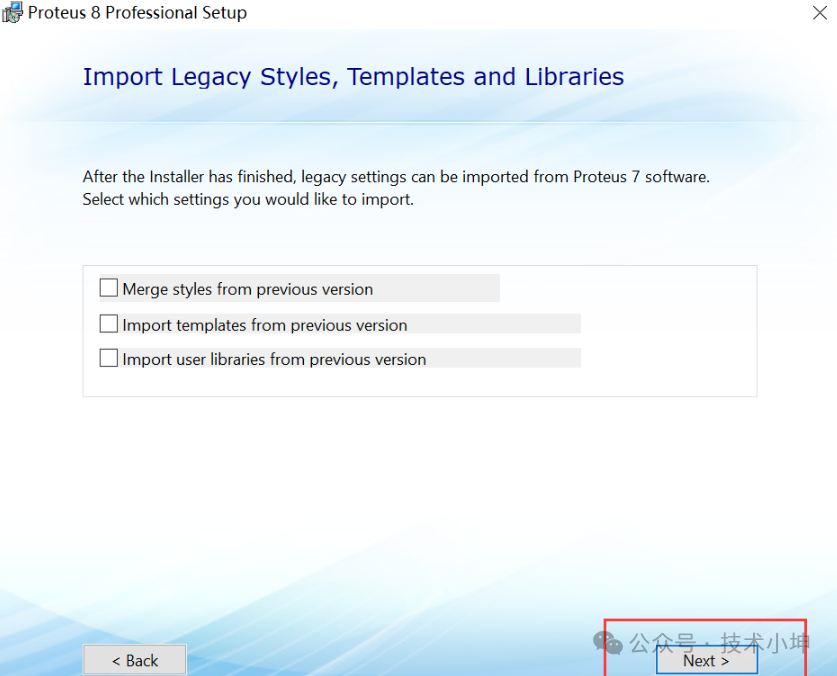
Step 6: ClickNext directly, we do not select by default
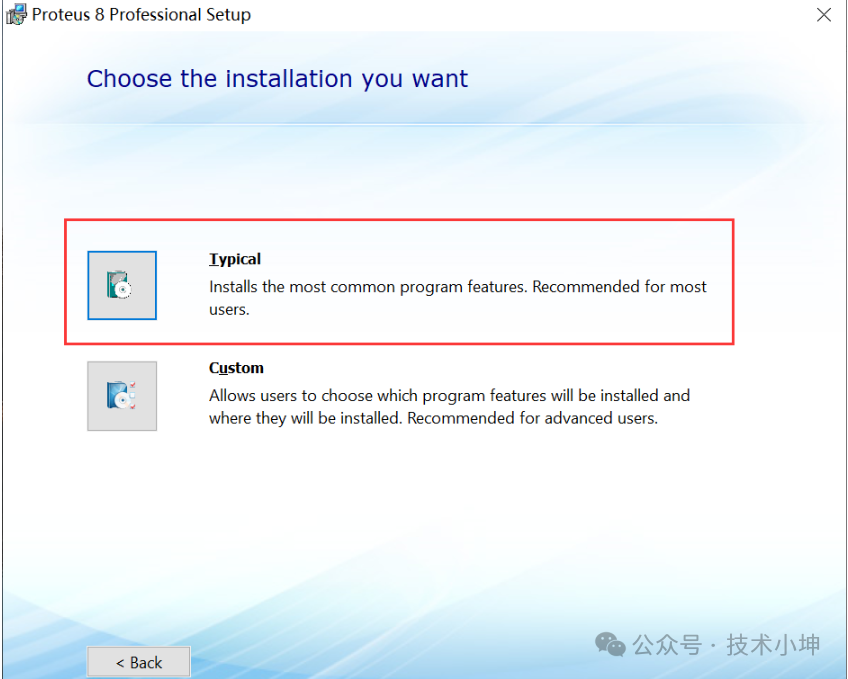
Step 7: We select default installation
Wait for the installation to complete.
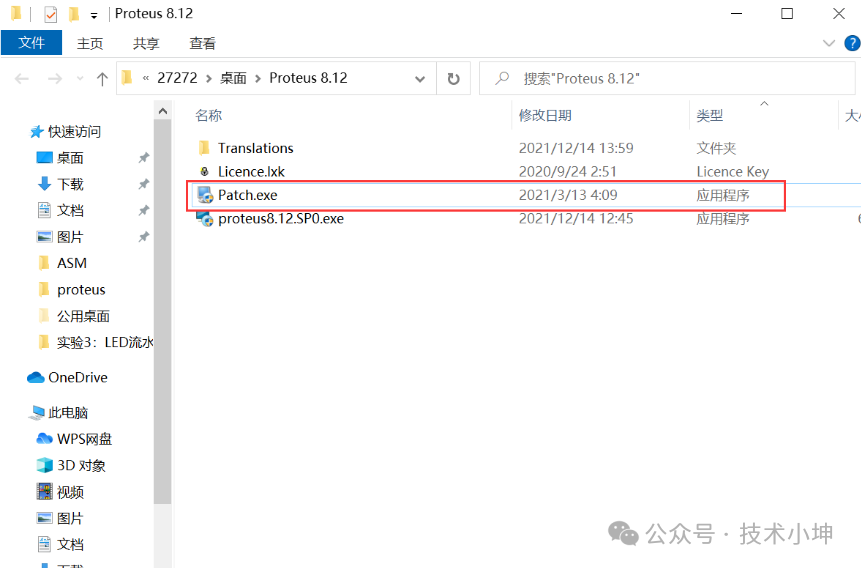
2. Adding Software Patch for Proteus 8.12
Step 1: As shown, return to the folder where our installation package is located, copy the file Patch.exe
Step 2: As shown, find the installation location of our software, C:\Program Files (x86)\Labcenter Electronics\Proteus 8 Professional\BIN, and paste the file copied from the previous step here.
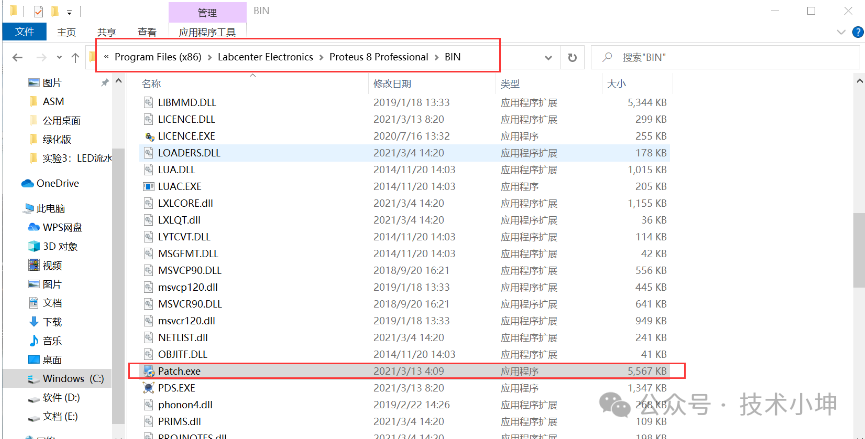
Step 3: As shown, clickPatch.exe, right-click to run as administrator, wait for 10 seconds to complete
3. Setting Up Chinese Interface for Proteus 8.12
Step 1: As shown, return to the folder where our installation package is located, copy the Translations folder
Step 2: As shown, find the installation location of the software, C:\Program Files (x86)\Labcenter Electronics\Proteus 8 Professional, and paste the copied folder here, then a prompt box will pop up, we selectreplace the files in the destination.

3
Creating a New Project in Proteus
Creating a New Project in Proteus
1. After installation is complete, open the Proteus software, click on New Project:
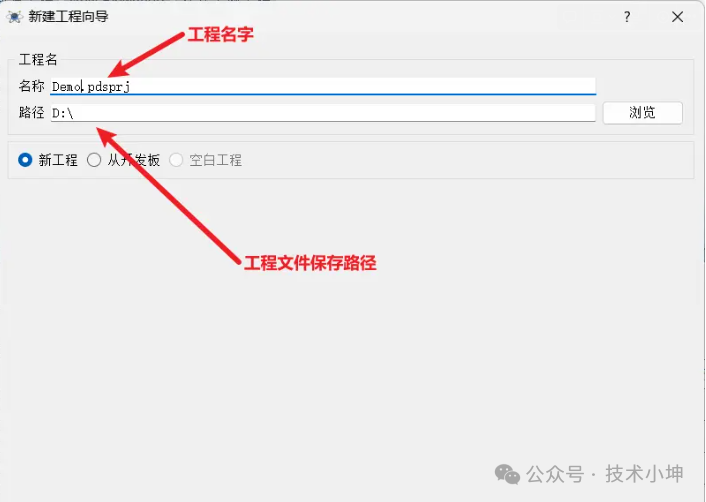
2. Modify the project name and project save path:
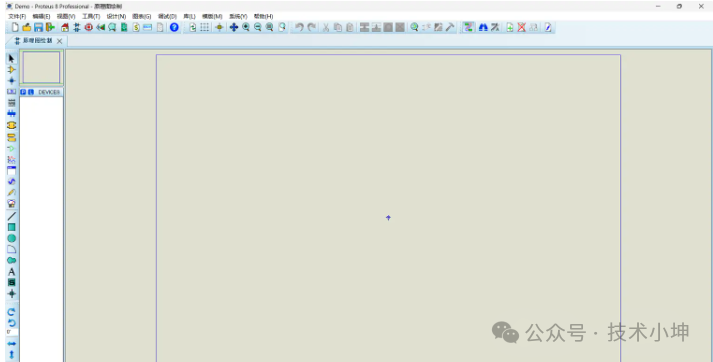
3. Then keep clicking Next, and finally click Finish, the project creation is complete:
4. Adding Components to the Project
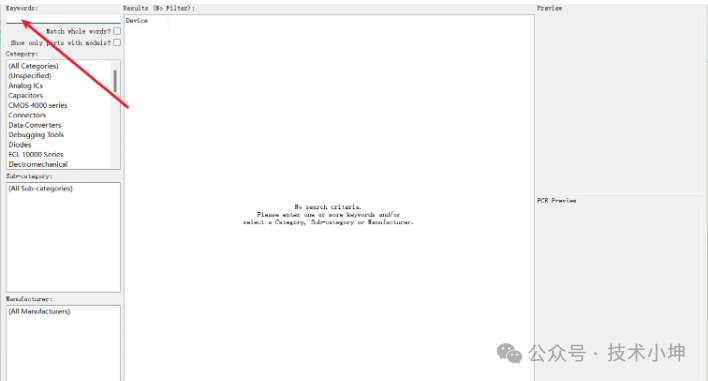
Click the P button in the upper left corner:

In the keyword search box, enter the corresponding component abbreviation or chip model (for example, resistor):
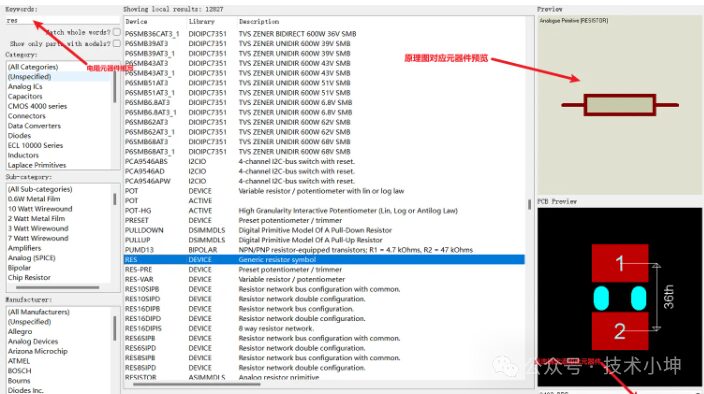
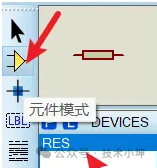
After adding components, click on component mode, it will display the components that have been added:
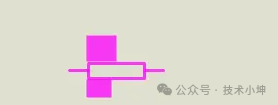
Click on the corresponding component, move the mouse to the schematic position, a purple component will appear, at this time select the position, after choosing a suitable position, click the mouse to successfully add the component to the schematic:
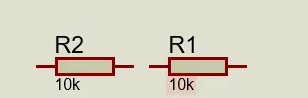
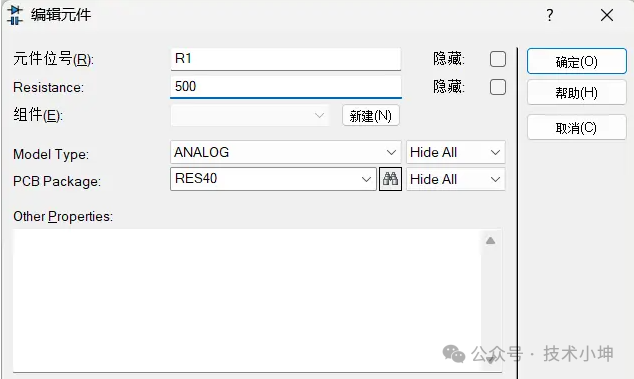
5. Double-click the component to change its properties:
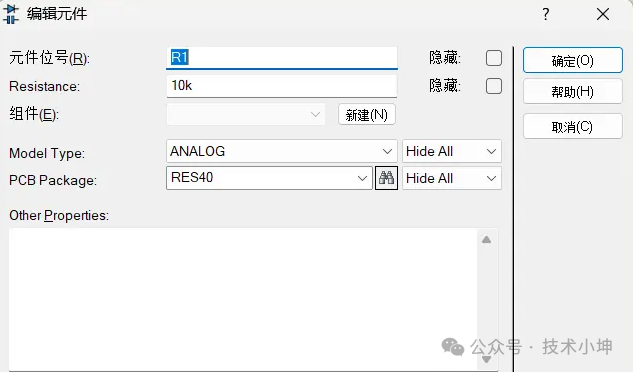
For example, you can change the resistor value to -> 500 ohms:
Similarly: for capacitors, you can change the capacitance value; for microcontrollers, you can change the oscillation frequency; for motors, you can change the maximum speed, etc.
Common component abbreviations: 1. Resistor: RES 2. Capacitor: CAP (polarized capacitor: CAP-ELEC) 3. Crystal: CRYSTAL 4. Button: BUTTON 5. Switch: SWITCH 6. Resistor pack: RESPACK 7. Light-emitting diode (LED): LED-BIBY 8. Diode: DIODE 9. Transistor: PNP/NPN 10. Buzzer: BUZZER (active for active buzzer) 11. Ultrasonic sensor: HCSR04 12. DC motor: MOTOR-DC 13. Microcontroller: AT89C51/AT89C52/STM32XX 14. LCD1602: LM016L 15. OLED screen: OLED12864I2C 16. Potentiometer: POT (-HG for 1% accuracy, -LIN/-LOG accuracy for 10%) 17. Relay: RELAY


If you are interested in Proteus, you can follow the public account below! Reply “Pro” to get the installation package!