Welcome to the “Five Minutes of Science and Technology” column of the Precision Instrument Department. This column will introduce the achievements of science and technology every week, push the latest dynamics, provide a platform for technical exchanges, and also have popular science explanations aimed at younger students.
This issue will introduce Raspberry Pi – a microcomputer motherboard based on ARM, including its configuration and simple usage.
01
What is Raspberry Pi
Raspberry Pi is a small computer the size of a credit card, capable of running some Linux distributions and Windows IoT systems. You can connect Raspberry Pi to devices such as TVs, monitors, keyboards, and mice.
Raspberry Pi can replace a desktop computer for various purposes, including word processing, spreadsheets, media centers, and even gaming. It can also play high-definition videos up to 1080p. It can be said that “though small, it is complete with all essential parts.”

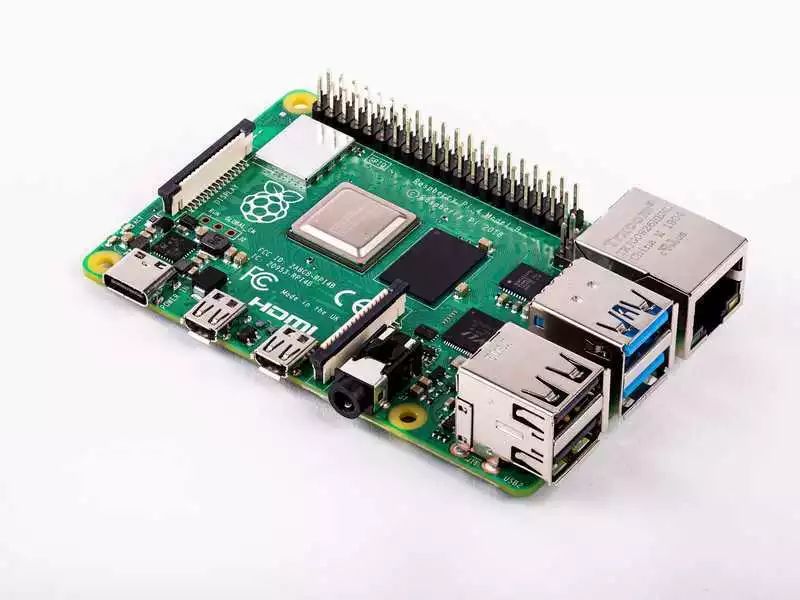

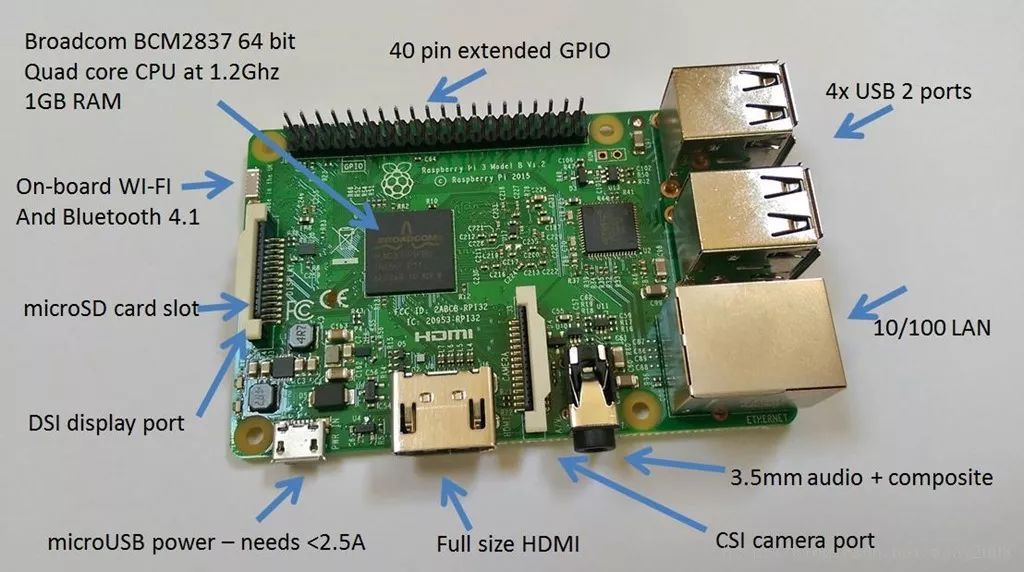
The Raspberry Pi can connect to several places: USB, network card, HDMI, power supply, GPIO, Micro SD card slot, CSI camera, DSI display, etc. In this experiment, we will use GPIO to light up an LED, so we will use the GPIO interface.
02
Materials Preparation
Since the Raspberry Pi is just a motherboard, we need to prepare some hardware materials and peripherals before starting to use it, including:
-
Micro SD card × 1
-
Card reader × 1
-
Micro USB cable × 1
-
HDMI cable × 1
-
Monitor × 1
-
Mouse × 1
-
Keyboard × 1
-
Breadboard × 1
-
Dupont wires × 2
-
Direct insert LED × 1
-
Small resistor × 1
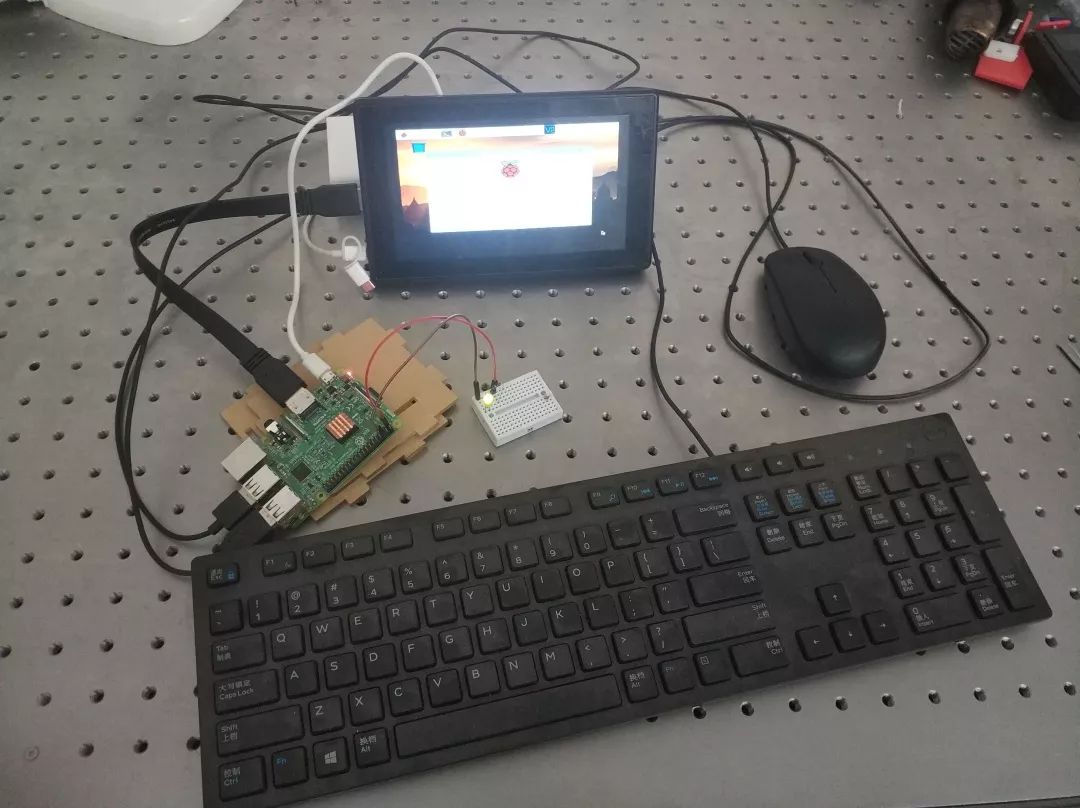
Among these, peripherals like the monitor, mouse, and keyboard can be discarded after configuring remote access.
Additionally, some software preparations are needed, including system images, burning software, ssh connection software, etc. You can click on “Read the original text” to obtain these software (using the campus network does not count data usage).
(Please do not mind the messy placement)
03
Burning the System
As we all know, every computer has its own operating system, and the Raspberry Pi is no exception. However, the Raspberry Pi does not have built-in storage; it needs a Micro SD card to store data, so the operating system needs to be burned onto the Micro SD card in advance for the Raspberry Pi to work properly.
In this step, you will need the following hardware and software (please click “Read the original text” to obtain):
-
Micro SD card × 1
-
Card reader × 1
-
Computer × 1
-
Win32DiskImager
-
Raspbian image
The burning steps are as follows:
-
Insert the Micro SD card into the card reader and connect the card reader to the computer.
-
Unzip the Raspbian image
-
Open the Win32DiskImager folder that was just unzipped, double-click the Win32DiskImager program, and follow the on-screen instructions.
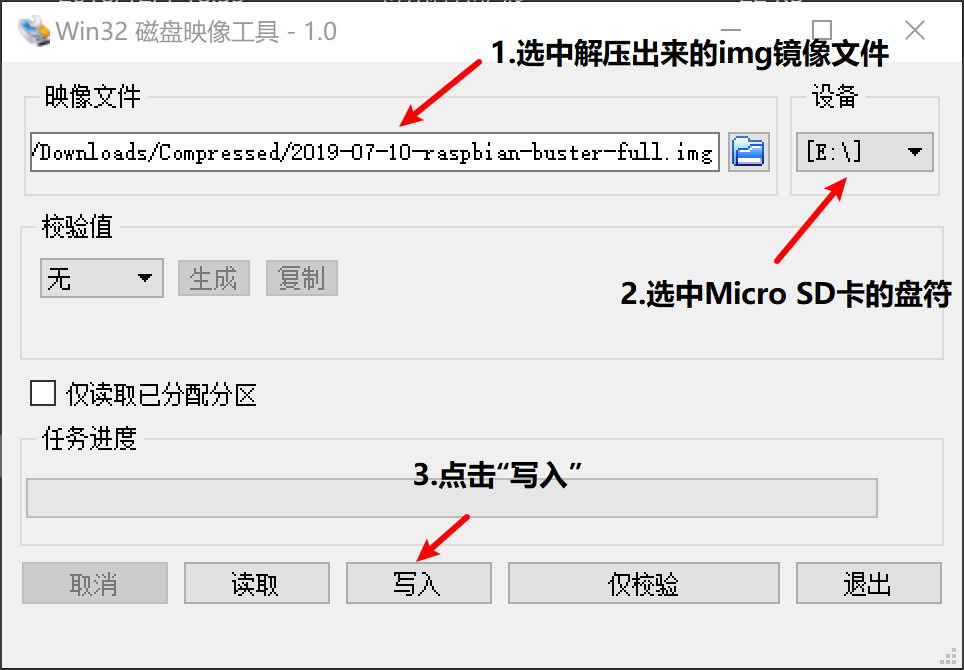
4. After writing is complete, remove the Micro SD card.
Thus, the system burning is complete.
04
Basic Configuration and Operation
After burning the system, you can insert the micro SD card into the Raspberry Pi and boot it. In this step, you will need to prepare (please click “Read the original text” to obtain):
-
Raspberry Pi × 1
-
Micro USB cable × 1
-
HDMI cable × 1
-
Monitor × 1
-
Mouse × 1
-
Keyboard × 1
-
SSH connection software (recommended Mobaxterm)
-
VNC connection software (recommended VNC Viewer)
Connect the Raspberry Pi to the monitor and plug in the keyboard, mouse, and other peripherals, then power it on. You will see the following screen:
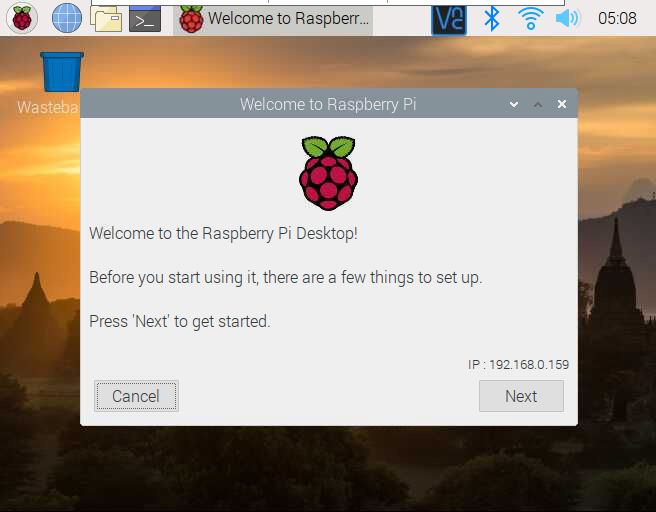
Next, perform some simple configurations.
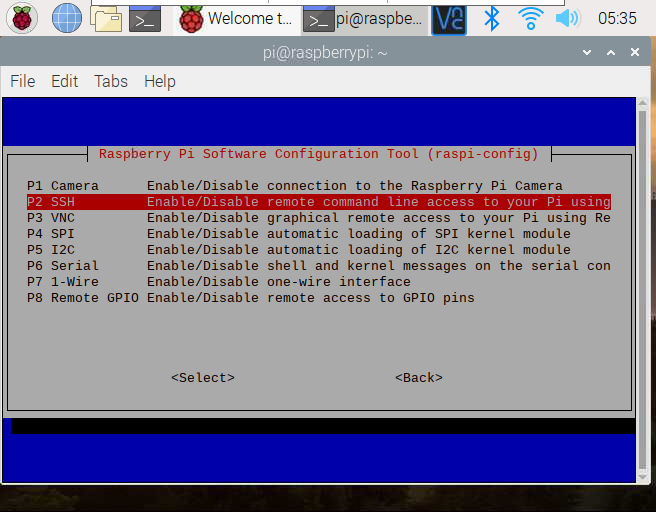
1. Enable SSH, VNC, GPIO
SSH is a communication protocol commonly used for remote control in Linux, VNC refers to the Virtual Network Console, commonly used for visual control, and GPIO is used to control the input and output of Raspberry Pi pins. These provide great convenience for using Raspberry Pi.
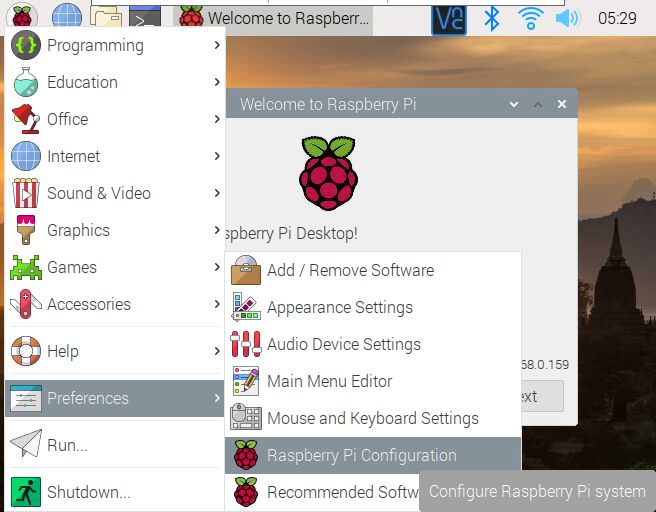
Graphical Method
In the menu, select Raspberry Pi Configuration.
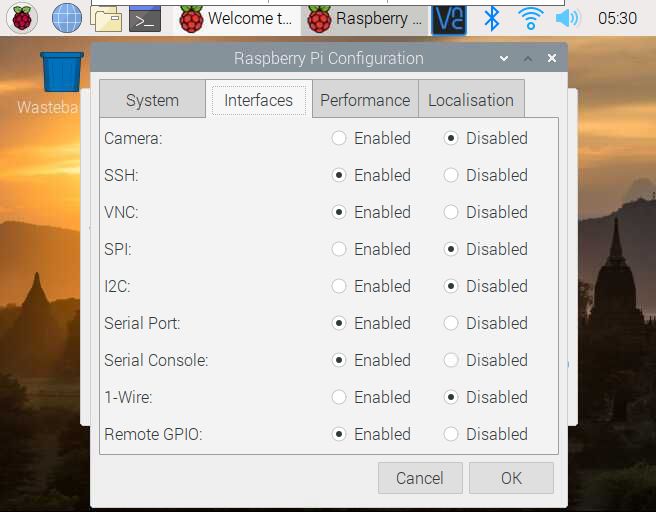
Select the Interfaces tab, change the options for SSH, VNC, REMOTE GPIO from Disabled to Enabled, click OK, and restart.
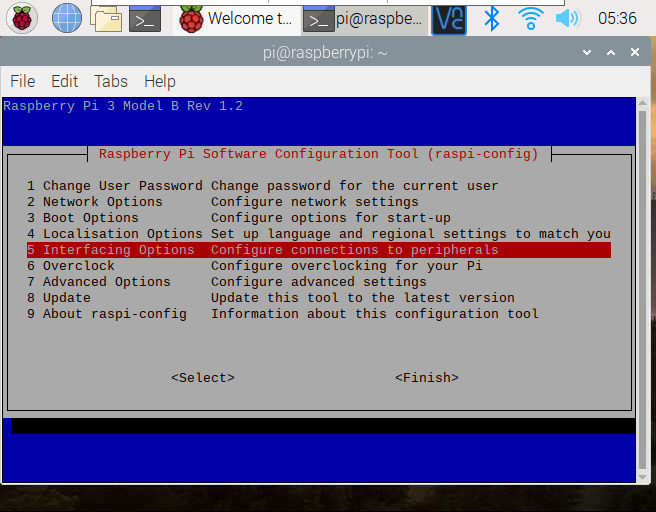
Command Line Method
Open the command line and enter the command
sudo raspi-config
Enter the Interfacing Options tab, and change the options for SSH, VNC, etc. to Enabled.
2. Change Keyboard Layout
Raspberry Pi is a British product, and the default keyboard layout is British (GB). The keyboard layout we usually use is generally American (US). Therefore, it is necessary to change the keyboard layout so that we can correctly type symbols.
Graphical Method
In the menu, select Mouse and Keyboard Settings.
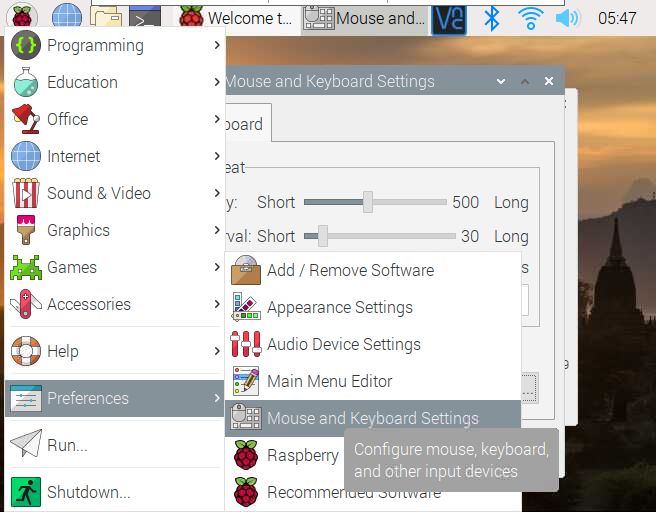
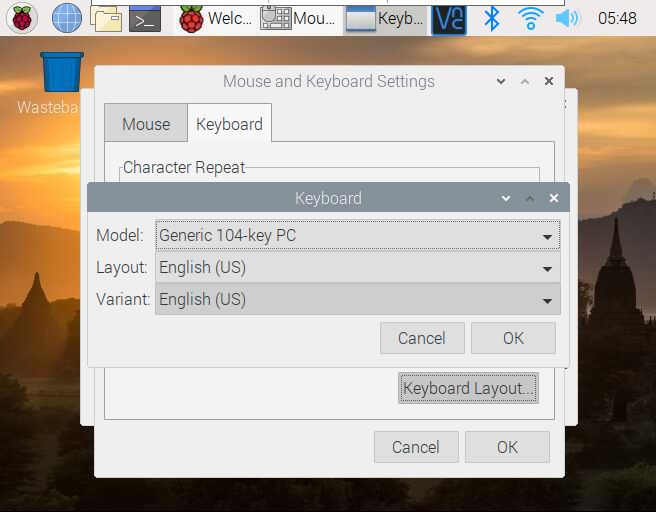
In the Keyboard tab, click Keyboard Layout.

Change the options to match the image below, all set to English (US).
3. Connect to WiFi
Click the WiFi icon in the upper right corner, select the WiFi name to connect, and enter the password to connect.

Next are some basic operations of Raspberry Pi.
1. Basic Command Line Operations
In Raspberry Pi, many operations are performed through the command line, so you need to learn some basic command line operations.
Basic Command Format: command – parameters / target
For example, the command to view all files in the /home directory is ls -a /home.
Where ls is a basic command meaning list, which lists the files in the current directory. The following -a is a parameter meaning all, indicating that hidden files will not be ignored. The target /home indicates that this command will list all files in the /home folder. Most Linux commands follow this format. After typing the command, press Enter to execute it.
Note:
-
Parameters are used to limit the execution method of the command and can be added or omitted.
-
The command, parameters, and target must be separated by spaces.
-
When executing commands, these rules are usually followed, except in special cases.
Here are some common commands:
pwd: View the current directory of the user
cd: Change directory
ls: Display file or directory information
mkdir: Create an empty directory in the current directory
touch: Create an empty file or change the file’s timestamp
cp: Copy files or directories
mv: Move files or directories, rename files or directories
rm: Delete files or directories
cat: View the contents of a text file
passwd: Change password
Tips: Use the tab key for auto-completion when entering commands.
If you encounter an unfamiliar command, you can generally read the usage instructions by adding the –help parameter or typing man command.
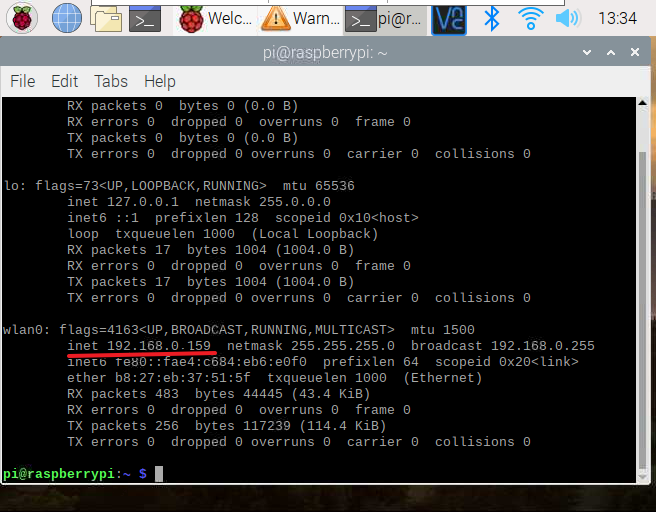
2. Get IP Address
To get the current Raspberry Pi’s IP address, press Ctrl+Alt+T in the graphical interface or click the terminal icon in the upper left corner and enter the ifconfig command.
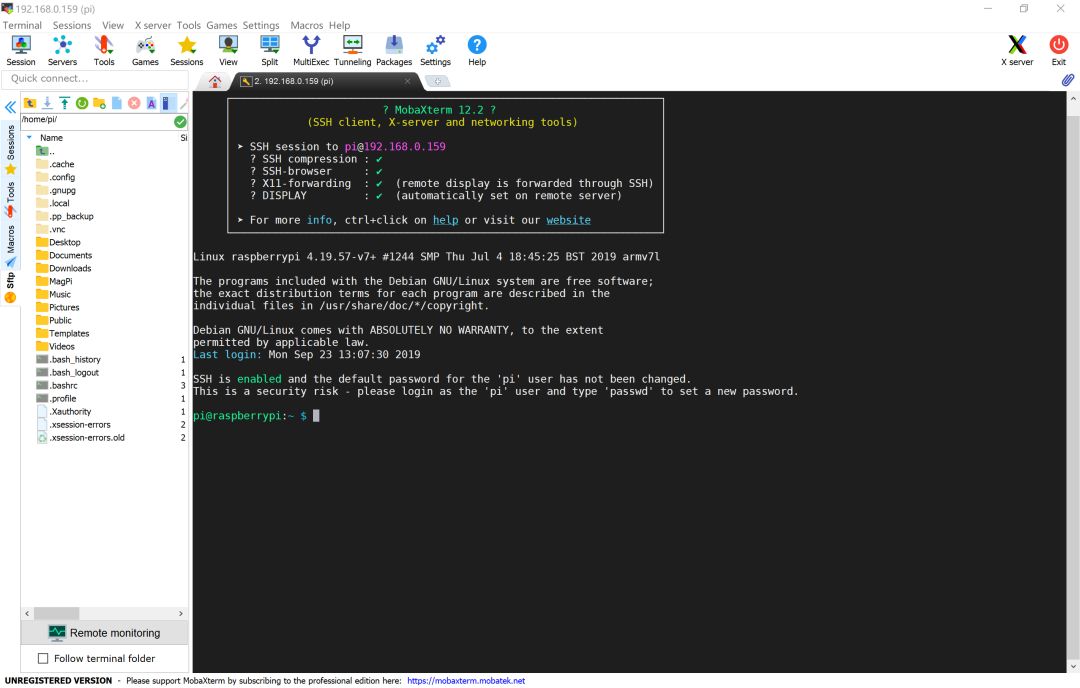
3. Use SSH Client to Connect
In most cases, we connect to Raspberry Pi via SSH. Next, I’ll demonstrate the SSH connection process using Mobaxterm as an example. The default username for Raspberry Pi is pi, and the password is raspberry.
1. Unzip the Mobaxterm package, open Mobaxterm, click on Session in the upper left corner, and enter the Raspberry Pi’s IP address and username in the window.

2. Enter the password to access the command line interface. The left side is the automatically opened SFTP service, which allows you to upload files directly to the Raspberry Pi.
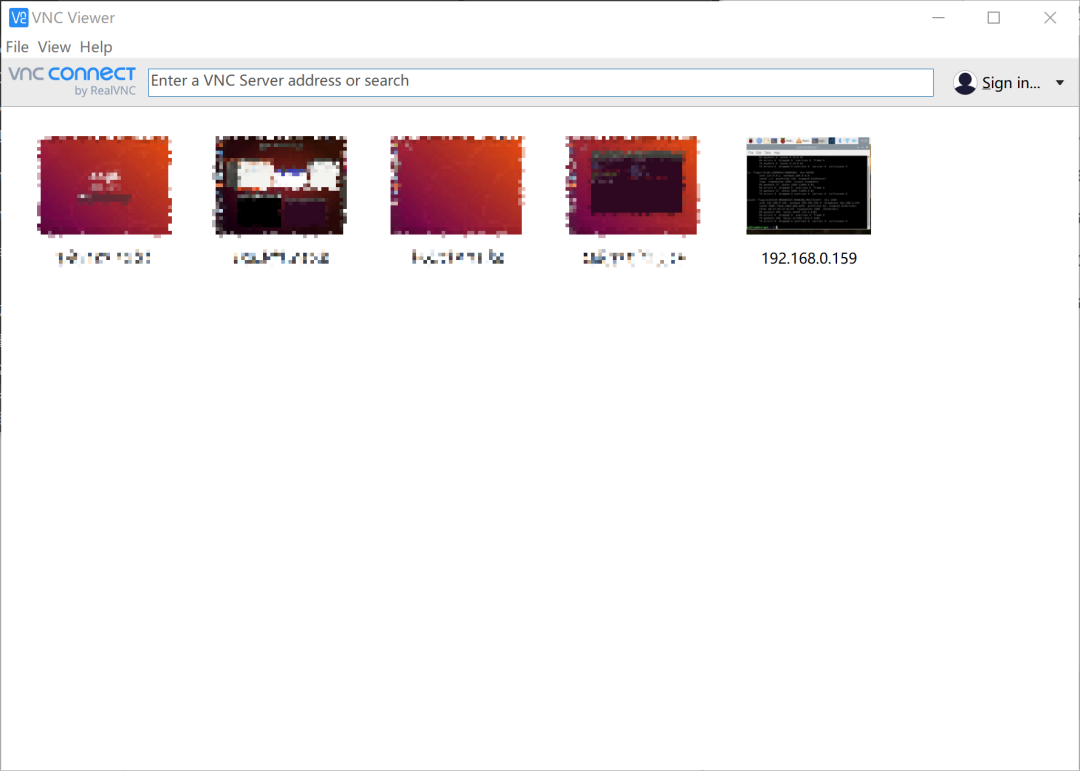
4. Use VNC Client to Connect
If you need to run programs that can only run in a graphical interface, you can use VNC to connect. Next, I will demonstrate the connection process using VNC Viewer as an example.
1. Open the VNC Viewer program and enter the Raspberry Pi’s IP address in the top input box.
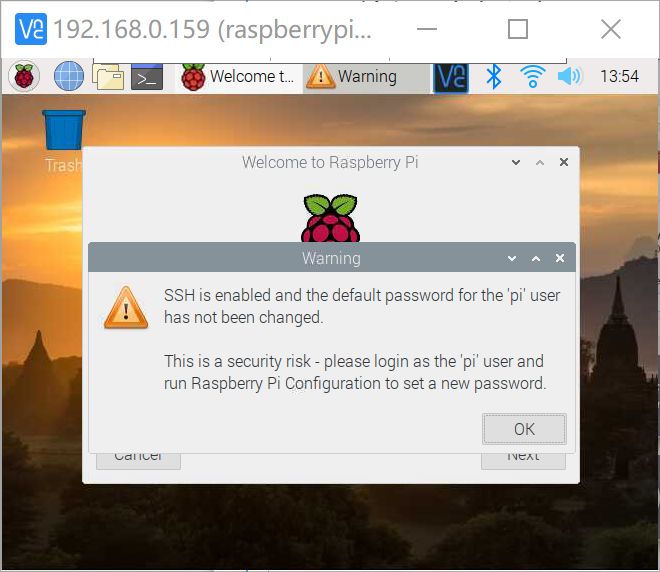
2. Enter the username and password.

3. Complete the connection.
5. Configure Software Sources and Install Software
The default software source for Raspbian is slow, so it is best to switch to a domestic software source to speed things up. The method to switch to the Tuna source is as follows:
# Edit the /etc/apt/sources.list file, delete all content of the original file, and replace it with the following content: deb http://mirrors.tuna.tsinghua.edu.cn/raspbian/raspbian/ buster main non-free contrib deb-src http://mirrors.tuna.tsinghua.edu.cn/raspbian/raspbian/ buster main non-free contrib # Edit the /etc/apt/sources.list.d/raspi.list file, delete all content of the original file, and replace it with the following content: deb http://mirrors.tuna.tsinghua.edu.cn/raspberrypi/ buster main ui
After editing the mirror station, please use the sudo apt-get update command to update the software source list and check if the edits are correct.
If you need to install new software, you can use the sudo apt-get software name command to install it.
05
Use GPIO to Light Up an LED
The last part is a simple example about Raspberry Pi IO – using GPIO to light up an LED.
Many peripherals can be connected through the Raspberry Pi IO port, such as servos, infrared sending and receiving modules, relays, stepper motors, and various compatible sensors and screens. Many interesting designs can be made through these peripherals.
The driving capability of the Raspberry Pi IO port is relatively weak, with a driving level of 3.3V. The high-level driving capability is slightly weaker than the low-level driving capability, but it is sufficient to drive the LED. For ease of understanding, the following experiment will use a high-level driving method. When the IO port outputs a high level, the LED lights up; when it outputs a low level, it goes out.
In this step, you will need to prepare (please click “Read the original text” to obtain):
-
Raspberry Pi × 1
-
Micro USB cable × 1
-
SSH connection software (recommended Mobaxterm)
-
Breadboard × 1
-
Dupont wires × 2
-
Direct insert LED × 1
-
Small resistor × 1
1. Introduction to GPIO
GPIO (General Purpose I/O Ports) refers to general input/output ports. In simple terms, they are some pins that can output high and low levels or read the status of the pins – whether it is high or low. GPIO is a very important concept, allowing users to interact with hardware through GPIO ports (such as UART), control hardware operation (such as LED, buzzer, etc.), and read the working status signals of hardware (such as interrupt signals). The use of GPIO ports is widespread, and mastering GPIO is almost equivalent to mastering the ability to operate hardware.
There are 40 GPIOs that can be operated in Raspberry Pi, as shown in the pin diagram below:
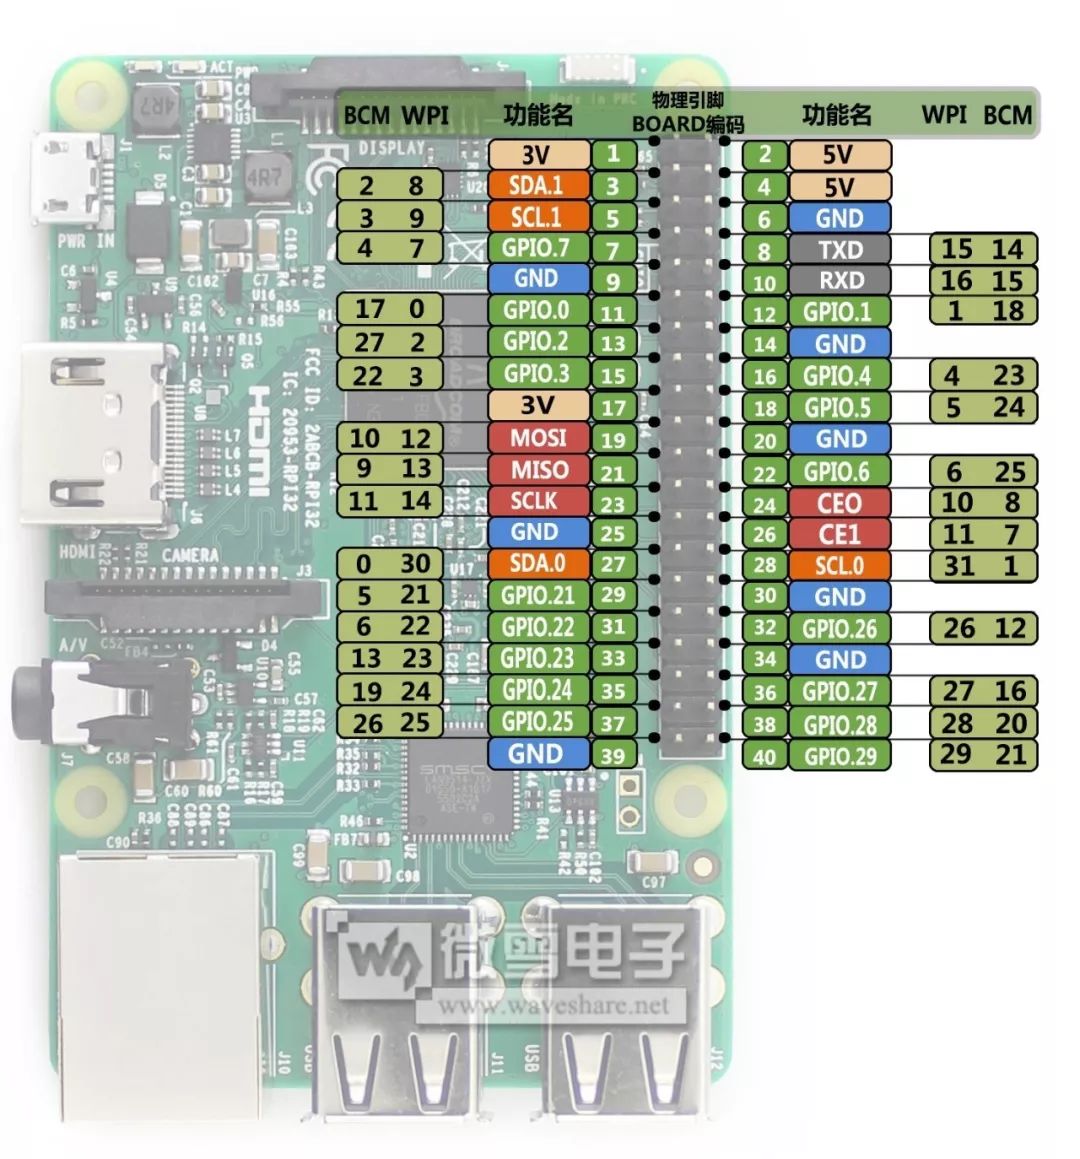
The Raspberry Pi pins have three encoding methods:
The first is Board encoding, which corresponds to the pin numbering on the Raspberry Pi motherboard from 1 to 40.
The second is BCM encoding, which refers to the channel number of the Broadcom SOC, focusing on CPU registers. This encoding is commonly used in BCM libraries or Python programming.
The third is WPI encoding, which is the WiringPi encoding, starting from 0 for the extended GPIO ports. This encoding is used in WiringPi library programming.
2. Connect the Circuit
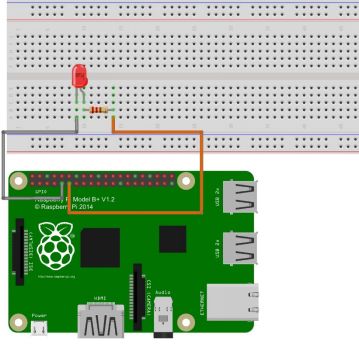
This experiment uses GPIO.0, which is the 17 interface of the Raspberry Pi in BCM encoding, and the 11 interface in Board encoding.
The circuit schematic is as follows:
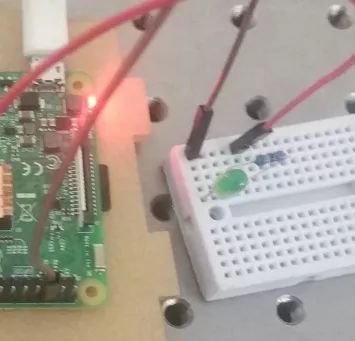
The actual connection effect is as follows:
3. Use SSH to Connect to Raspberry Pi (Omitted)
4. Edit Code and Run (C Language Version)
Enter the command:
nano test.c
Paste the following program into the file:
#include <wiringPi.h>
int main(void) {
wiringPiSetup();
pinMode(4, OUTPUT);
for (;;){
digitalWrite(0, HIGH);
delay(500);
digitalWrite(0, LOW);
delay(500);
}
return 0;
}
Next, press Ctrl+x to save and exit, then compile the C program:
gcc test.c -o test -lwiringPi
-
gcc is the declaration for compiling C language,
-
-o test outputs the project file to the blink file (the executable file that follows)
-
test.c is the C language program just written
-
-lwiringPi is the library call
Run the program:
sudo ./test
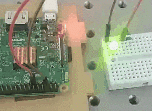
You will see the LED on the breadboard blinking.
5. Edit Code and Run (Python Version)
Enter the command:
nano test.py
Paste the following program into the file:
# -*- coding: utf-8 -*-
import RPi.GPIO as GPIO
import time
pin = 11 ## Use pin 11
GPIO.setmode(GPIO.BOARD) ## Use BOARD pin numbering, additionally GPIO.BCM is available
GPIO.setup(pin, GPIO.OUT) ## Set pin 11 as output
while 1: ## Repeat
GPIO.output(pin, GPIO.HIGH) ## Turn on GPIO pin (HIGH)
time.sleep(1) ## Wait 1 second
GPIO.output(pin, GPIO.LOW) ## Turn off GPIO pin (LOW)
time.sleep(1) ## Wait 1 second
GPIO.cleanup() ## Clean up
Next, press Ctrl+x to save and exit, and run the Python program:
python test.py
You will see similar results.
Raspberry Pi can install MC, serve as its own server (for downloading from Beiyou, hosting personal webpages, hosting personal cloud drives), can act as a monitoring camera, and can serve as an embedded central controller for large intelligent robots (Linux is especially suitable for setting up AI). More possibilities await your exploration!
Okay, this issue of the Science and Technology Association “Five Minutes” ends here. I hope students interested and capable of doing scientific innovation can go further on this path.
Editor Hu Keqin
Reviewer Lin Yihan