I remember when I first started in the industry, I received a company code that included a Lib library. Although there were not many places where it was called, it was very frustrating because I couldn’t step into the code during debugging and couldn’t see the source code. My supervisor said this was the company’s core code, which had been patented…
As my work experience grew, I gradually understood this approach, which also has its advantages, such as: preventing accidental code leakage, avoiding unauthorized modifications, and speeding up compilation time.
There are many situations where providing source code is not appropriate. In such cases, you can compile the code into a Lib library file. Below are the detailed steps.
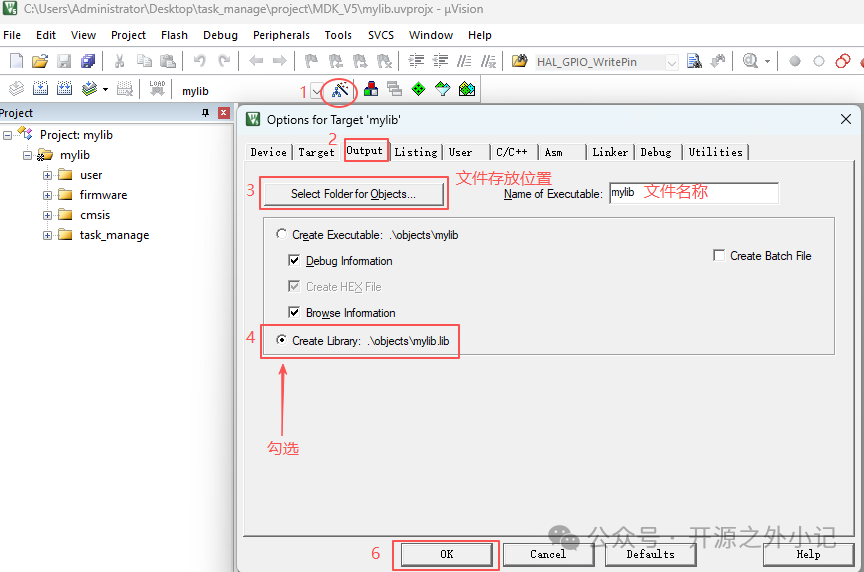
1. Set the compilation output to lib
You can set the name of the generated lib file, output path, etc.
2. Remove files that do not need to be compiled into the Lib
If there are multiple groups in the project and you only want to package one or a few, you can uncheck “Include in Target Build” for the groups you do not need. Right-click on the group and select Options for Group -> Properties, and in the pop-up dialog,
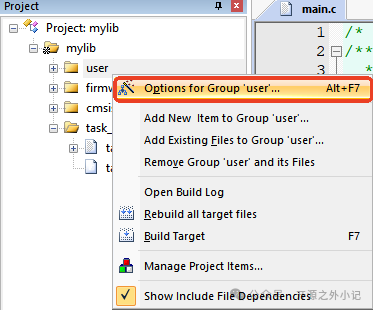
uncheck the box before “Include in Target Build”.
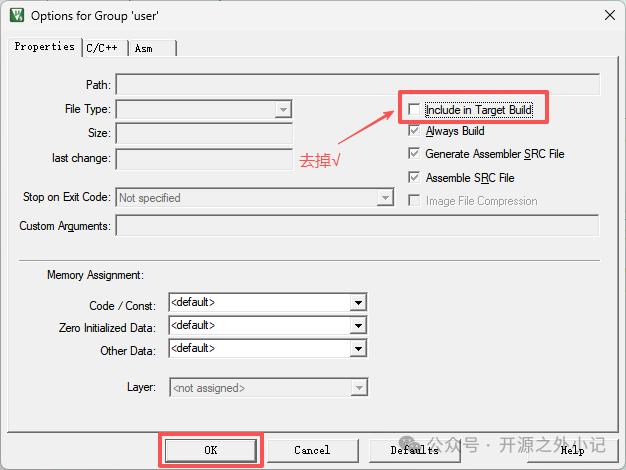
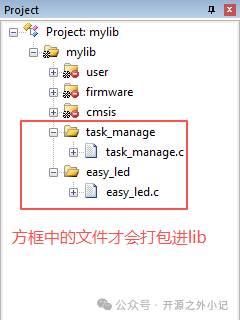
The generated Lib file will not include files from the unchecked groups.
3. Generate the Lib library
Click to compile.

Finally, the Lib file is generated in the target directory.
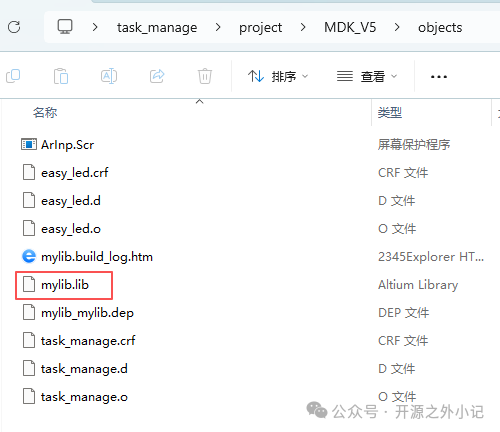
4. Using the Lib library
Add the lib library to the project, and include
to use the functions within!
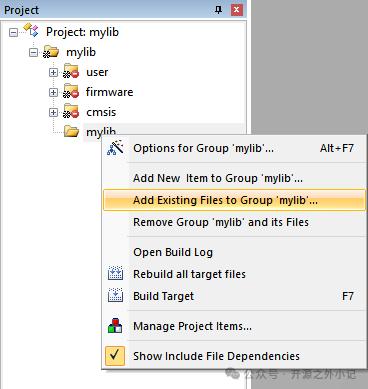
Select the group that needs to be added to the Lib library.
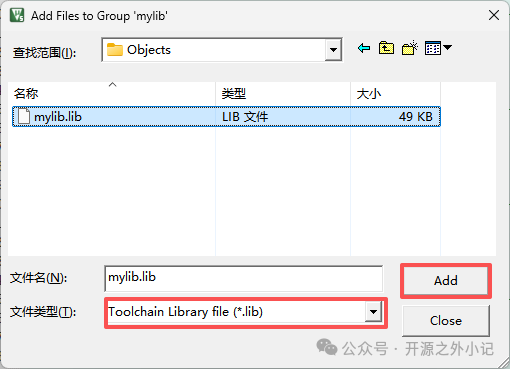
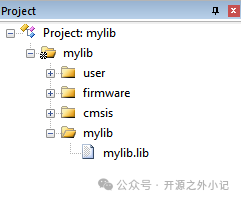
Then you can call the API interface just like using the source code. If you need to provide it for third-party use, you can provide (*.Lib + header file).
It is worth noting that if you change the MCU to another series, you will need to recompile to generate the Lib library.