The benefits of IPv6 include:
-
More IP Addresses: IPv6 provides nearly unlimited IP addresses to meet foreseeable future demands.
-
Simplified Network Configuration: IPv6 supports Stateless Address Autoconfiguration (SLAAC), allowing devices to automatically obtain IP addresses without a DHCP server, simplifying network configuration.
-
Higher Routing Efficiency: The header structure of IPv6 is simpler than that of IPv4, enabling routers to handle packets more efficiently.
-
Better Network Security: IPv6 was designed with more consideration for network security, including provisions for supporting IPsec (a protocol for encrypting and authenticating data streams).
-
Improved Quality of Service (QoS): IPv6 better supports data stream prioritization, which helps improve the performance of audio, video, and other real-time applications.
-
Greater Scalability: IPv6 has better scalability, making it easier to support new features and expansions.
Although IPv6 brings many benefits, its global deployment is still relatively slow. This is mainly due to the incompatibility between IPv6 and IPv4, requiring additional configuration and management. However, as IPv4 addresses become exhausted and new technologies and services demand more IP addresses, the adoption and application of IPv6 will gradually accelerate.
For example, with China Mobile’s broadband, if you enable IPv6, you will obtain a public IPv6 address. This allows your home devices to be accessible. However, your devices are also exposed to the public internet, so security precautions are necessary. With a public IP, we no longer need NAT traversal, perfectly utilizing the upload bandwidth at home. The benefits of PCDN will also increase. However, IPv6 is not yet fully widespread; pure IPv4 networks cannot access IPv6 websites, and conversely, pure IPv6 cannot access pure IPv4 websites.
This tutorial will guide you on how to enable and configure IPv6 on an OpenWRT router. IPv6 is the next generation of internet protocol designed to address the exhaustion of IPv4 addresses.
Prerequisites
-
A router running OpenWRT
-
A broadband service provider (ISP) that supports IPv6
Step 1: Check IPv6 Support
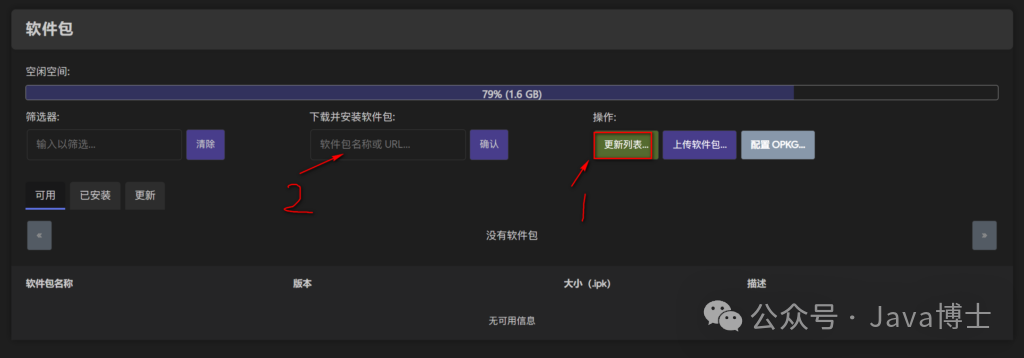
First, we need to ensure that your OpenWRT firmware includes the necessary IPv6 support. Log in to the OpenWRT LuCI management interface, then go to “System” → “Software”. In the “Installed Packages” list, search for the following packages:
-
ip6tables -
kmod-ipv6 -
kmod-ip6tables -
odhcp6c -
luci-proto-ipv6
If you cannot find these packages, you need to enter the package names in the “Download and Install Packages” section on the “Software” page, then click “Install”.
Step 2: Configure WAN Interface (DHCP Client Mode)
-
Go to “Network” → “Interfaces”, then click on the “WAN” interface.
-
In the “General Settings” tab, find “Protocol” and select “DHCPv6 Client”.
-
In the “Advanced Settings” tab, check “Use built-in IPv6 management”.
-
In the “IPv6 Settings” tab, ensure that “Request IPv6 Address” is set to “Automatic”.
-
Click “Save & Apply” to save the changes.
PPPoE Dial-Up
You need to go to Network → Interfaces → WAN → Edit → Advanced Settings and set the IPv6 address acquisition to automatic.
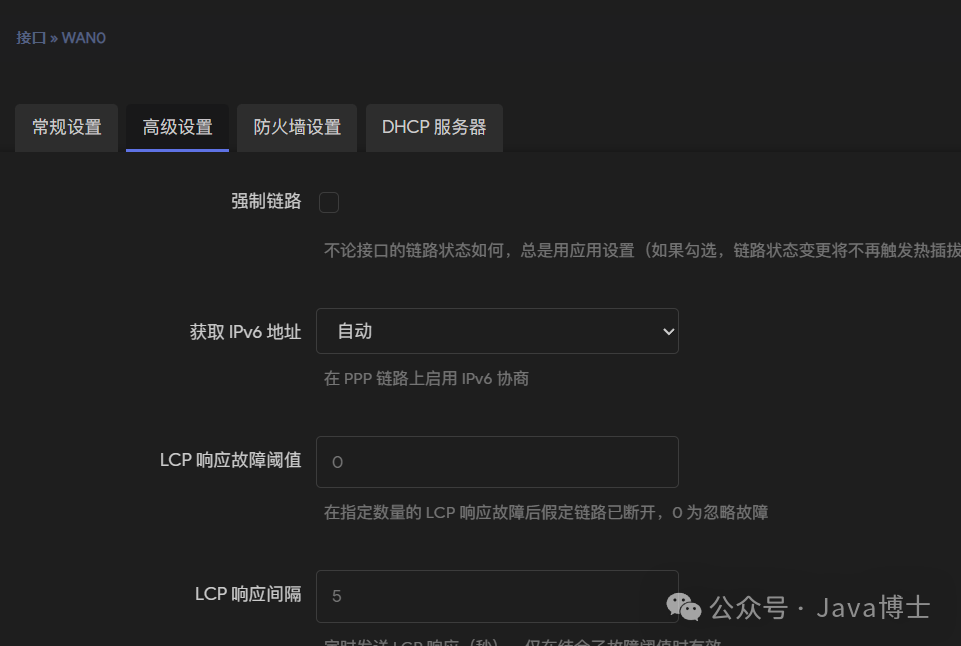
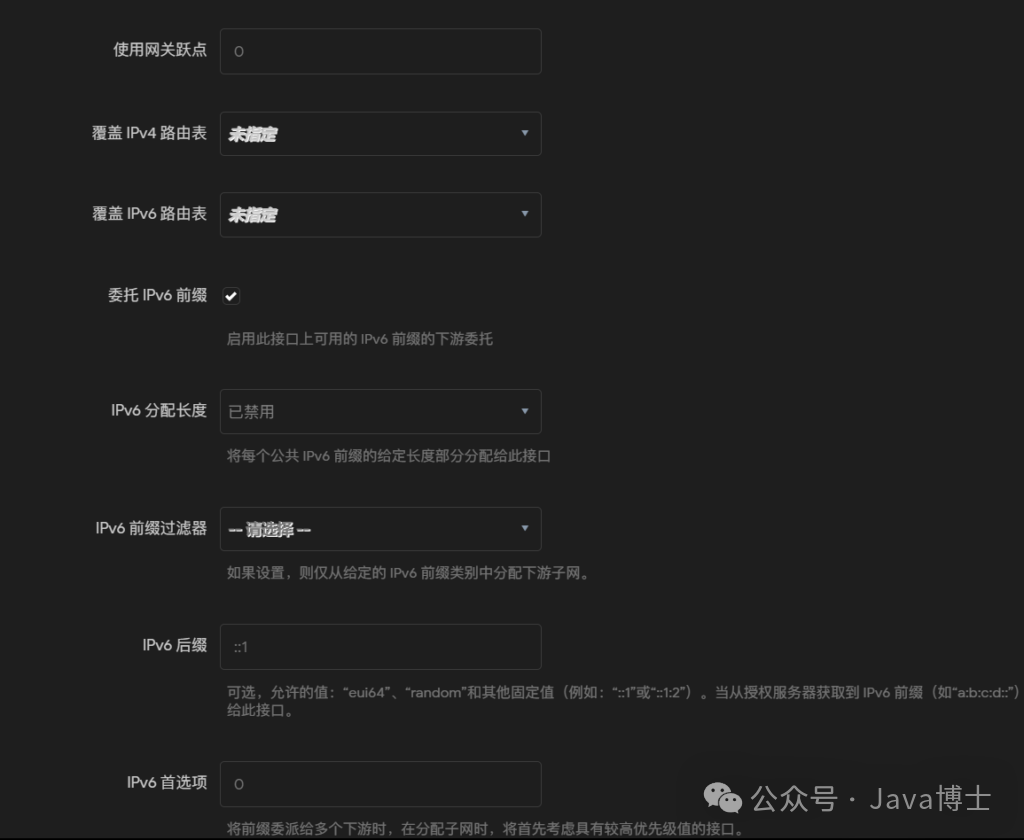
If a wan6 virtual dynamic interface appears, it indicates that the IPv6 address has been successfully obtained. If the obtained address starts with fe80, unfortunately, this is not a public address, and you need to contact your ISP for consultation.

Step 3: Configure LAN Interface
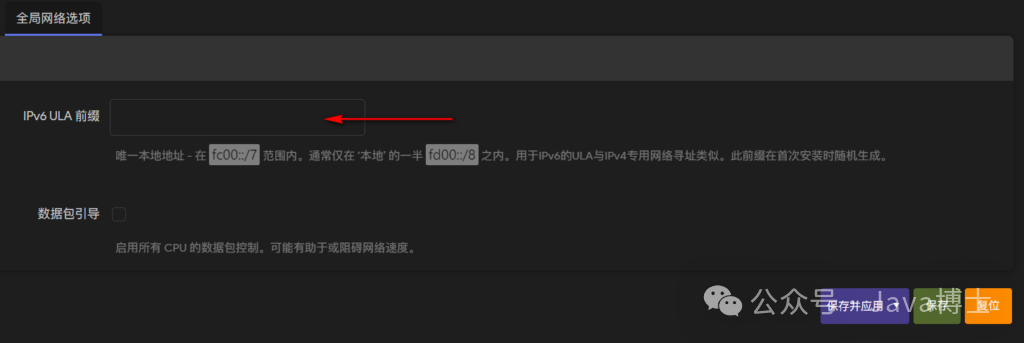
First, you need to delete the IPv6 ULA prefix in the global network options, then save and apply.
-
Go to “Network” → “Interfaces”, then click on the “LAN” interface.
-
In the “General Settings” tab, find “IPv6 Assignment Length” and enter the appropriate prefix length. Typically, the broadband service provider will assign a /64 prefix, but please refer to your ISP documentation for the exact value. Here, look at the /64 after the IPv6 address obtained from the WAN port; fill in the same number as the assignment length.
-
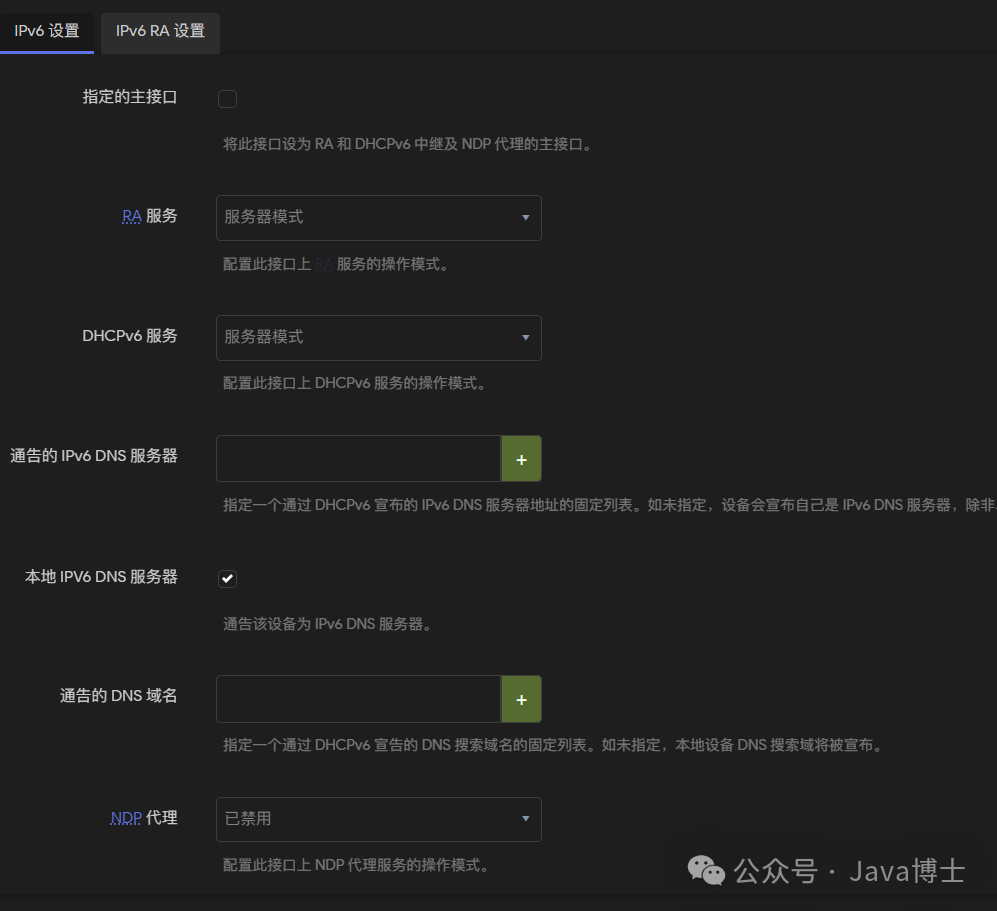
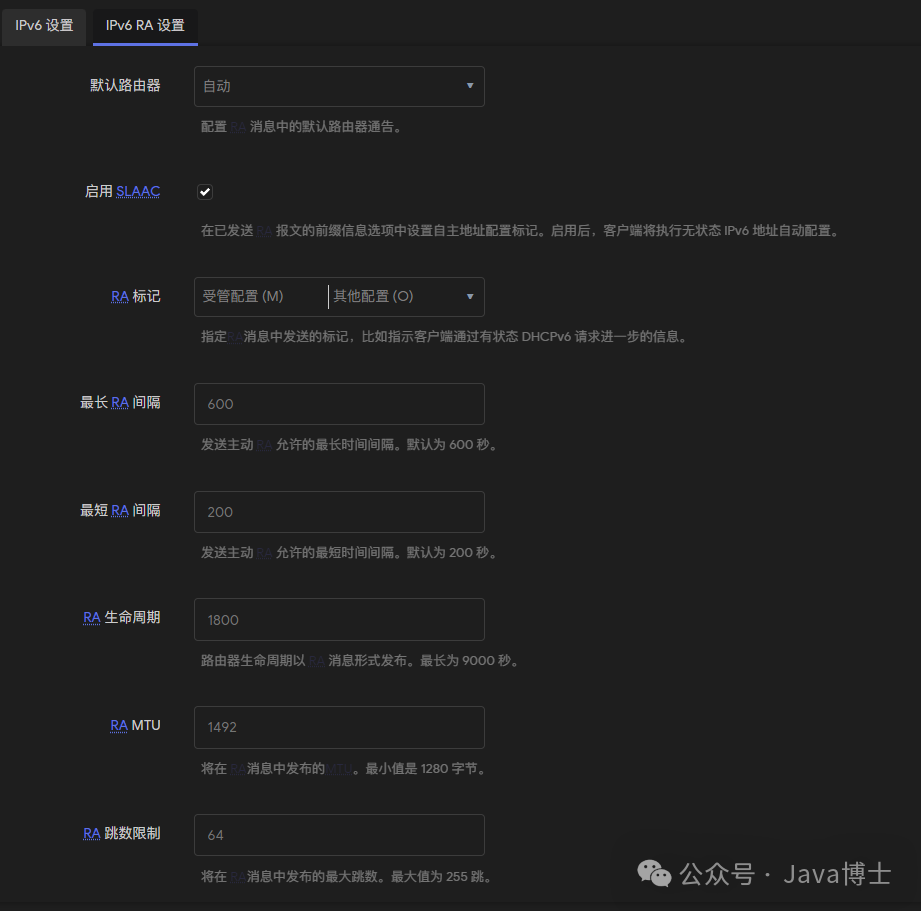
In the “DHCP Server” tab, expand the “IPv6 Settings” section. Ensure that “Router Advertisement Service (RAS)” and “DHCPv6 Service” are enabled. The specific settings are as shown in the following image:
-
Click “Save & Apply” to save the changes.
Step 4: Confirm IPv6 Connection
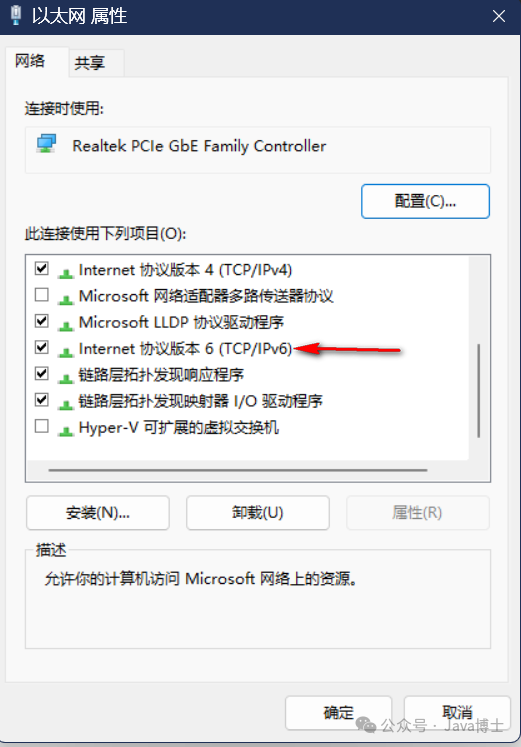
If you are using a Windows computer, ensure that you have enabled IPv6 and correctly obtained an IPv6 address.
Visit ipw.cn; if prompted that IPv6 is preferred and you have correctly obtained an IPv6 address, congratulations, you have successfully configured IPv6.
If you have any questions, please comment. I will do my best to answer.
Frequently Asked Questions
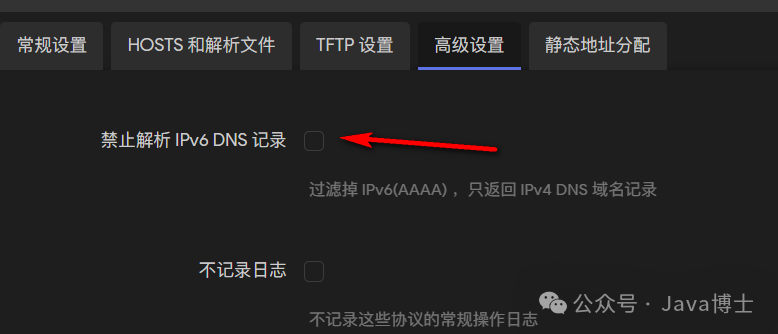
If you are unable to connect to the IPv6 internet after configuration, please check “DHCP/DNS” > “Advanced Settings” > “Disable IPv6 DNS Records” to ensure it is unchecked.
