This article is about installing OpenWrt on an ESXi system.
Preparation
OpenWrt Firmware
You can choose to download the firmware yourself, which can generally be divided into two categories: one is the custom firmware compiled by various experts, which integrates many pre-installed applications for immediate use; the other is the official original firmware, which only contains the basic functionalities, and additional features need to be installed manually.
It is important to note that the expert-compiled firmware is generally based on the LEDE source code, making it relatively simple and convenient to use, while the official version requires adding various functions, which can be quite challenging.
This guide uses the official original firmware as a baseline.
Official website: https://downloads.openwrt.org/releases/

-
combined-ext4.img.gz: rootfs working area storage format is ext4. -
combined-squashfs.img.gz: squashfs acts as firmware that can restore factory settings; if there is a configuration error during use, default settings can be restored directly. -
generic-rootfs.tar.gz: rootfs image, no bootloader, can be defined to boot using grub or syslinux. -
rootfs-ext4.img.gz: rootfs image, no bootloader, can be defined to boot using grub or syslinux, requires storage area to be ext4. -
rootfs-squashfs.img.gz: rootfs image, no bootloader, can be defined to boot using grub or syslinux; if there is a configuration error during use, default settings can be restored directly.
Other Tools
StarWind V2V Image Converter
Download from: https://www.starwindsoftware.com/tmplink/starwindconverter.exe
Creating OpenWrt Virtual Machine
Refer to the previous article on installing iKuai.
The specific configuration is as follows:
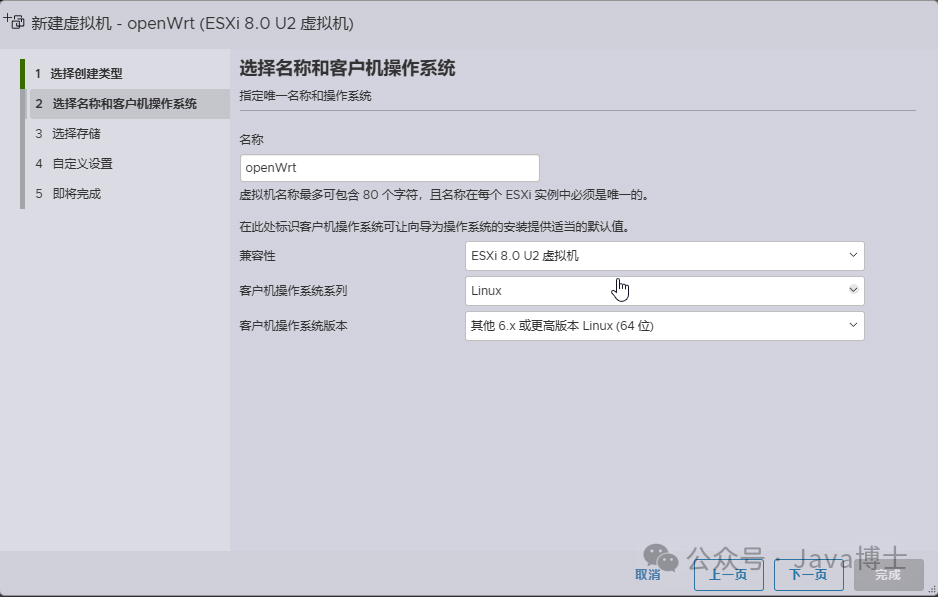
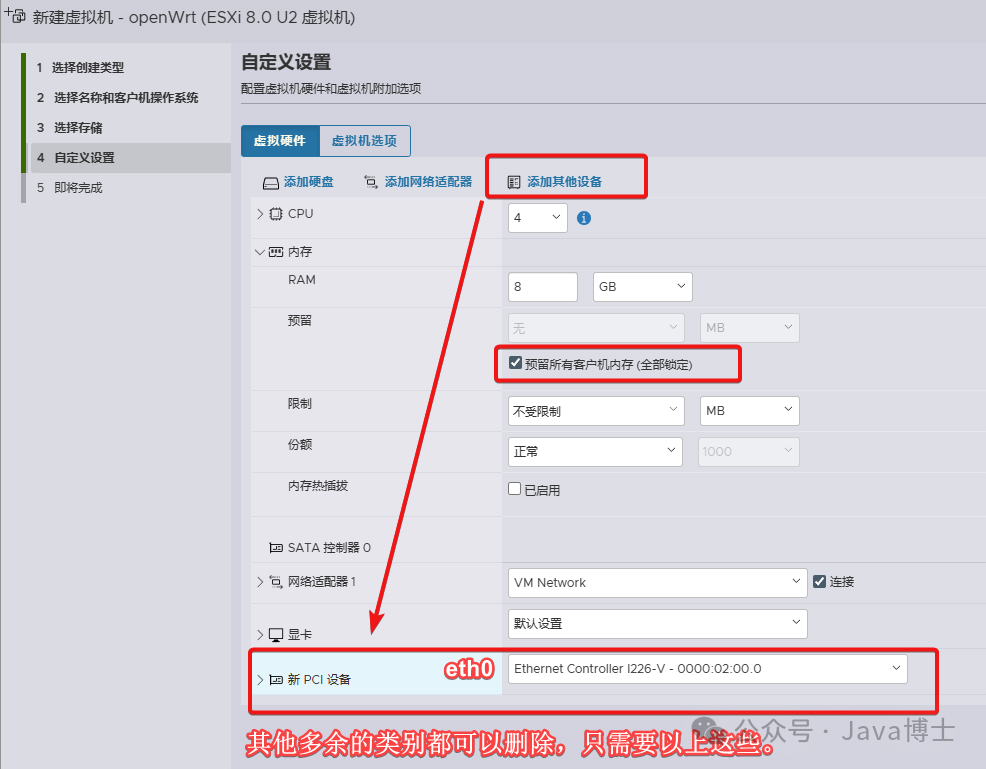
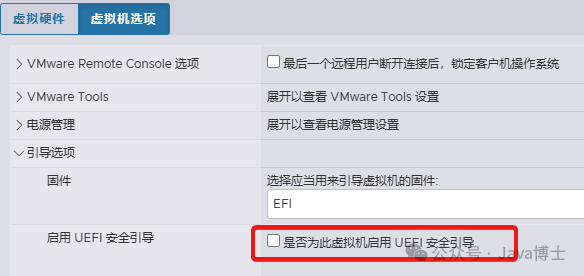
After completion, do not start the virtual machine as the image has not yet been written, so it cannot boot.
Open the StarWind V2V Converter program and follow these steps to write the OpenWrt image file into the virtual machine:
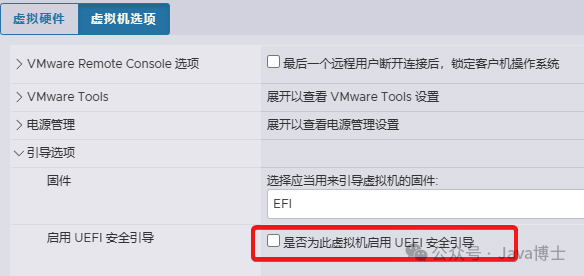

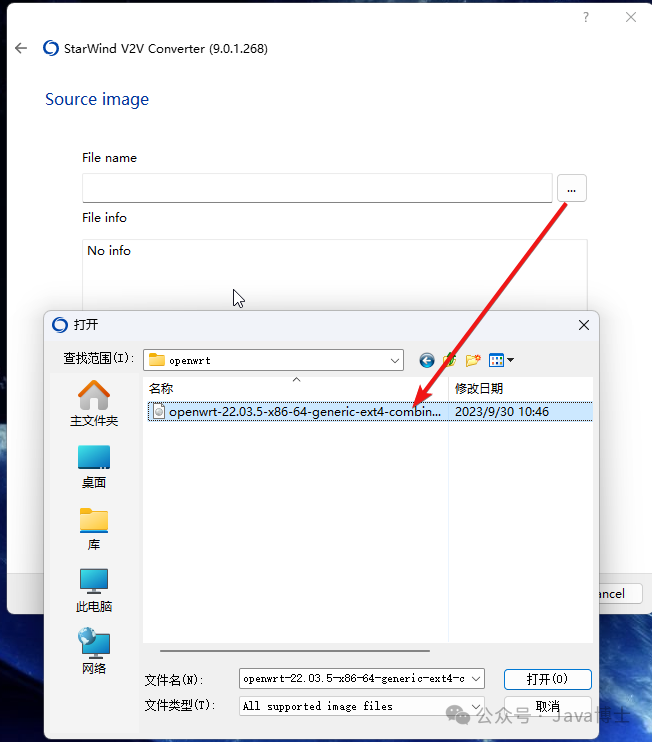
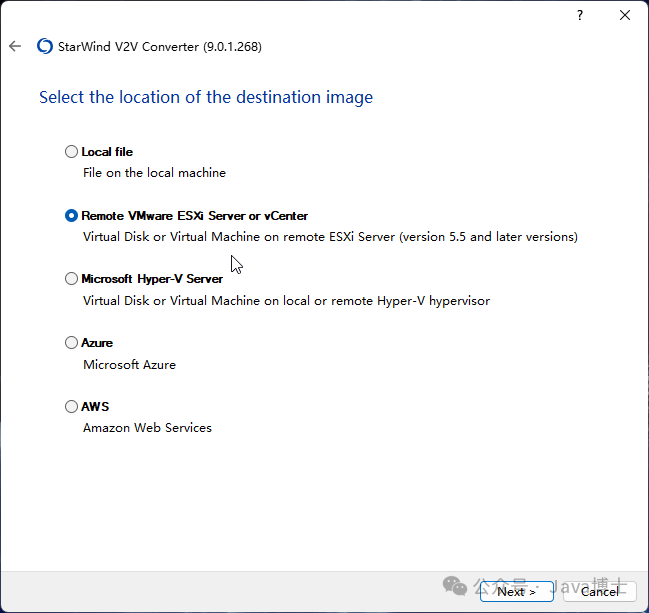
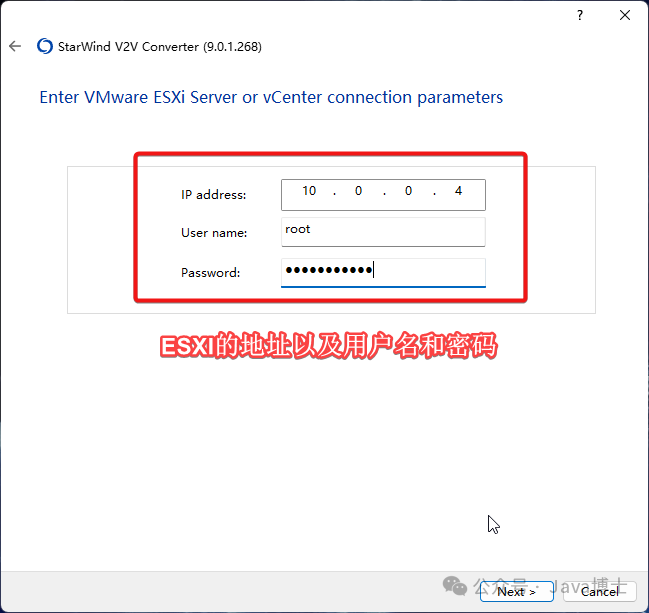
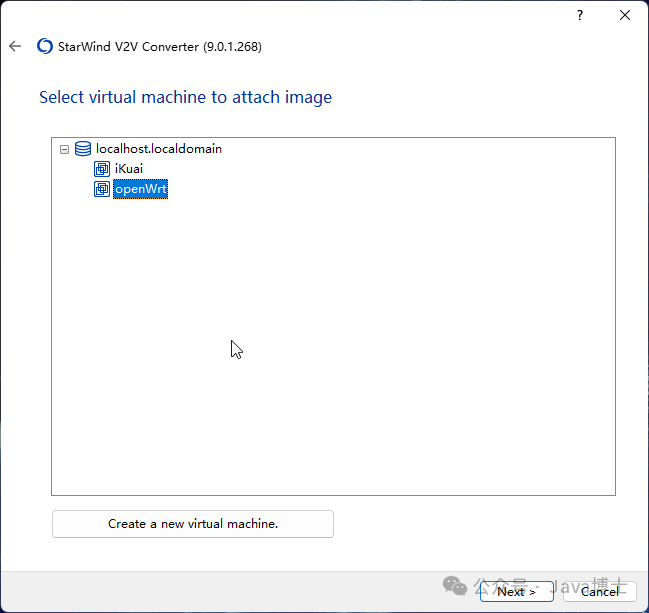

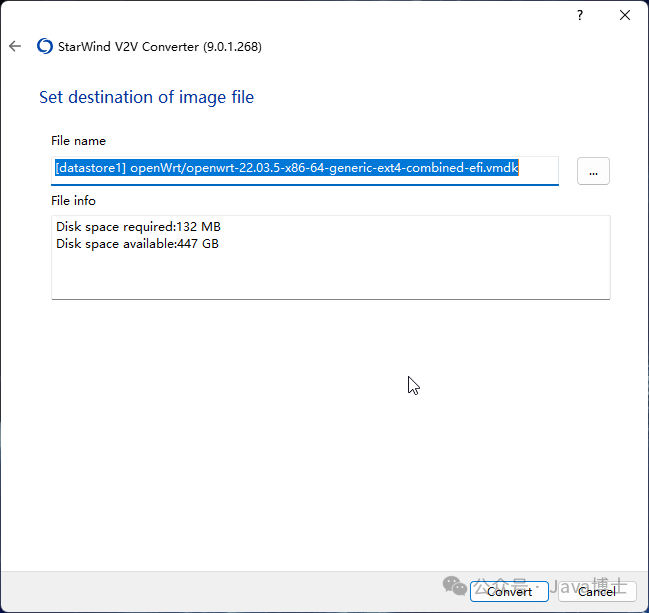
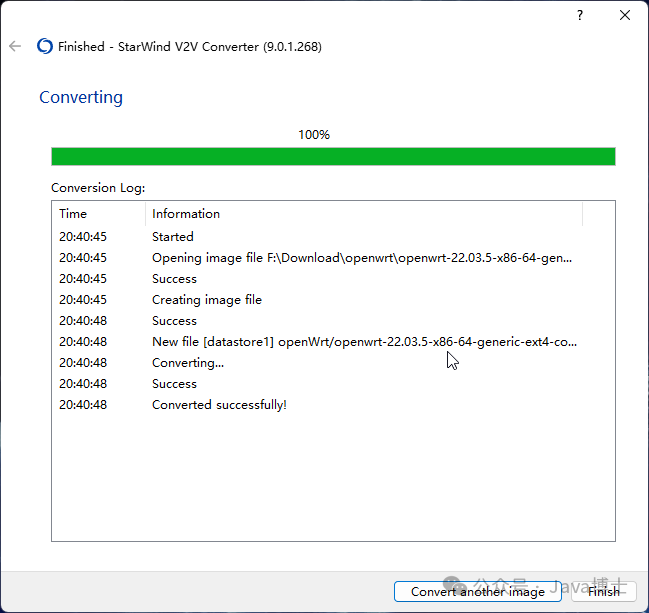
Once done, power on the OpenWrt virtual machine.
After the code runs, press Enter a few times to check; when the following interface appears, it indicates that it has loaded successfully.
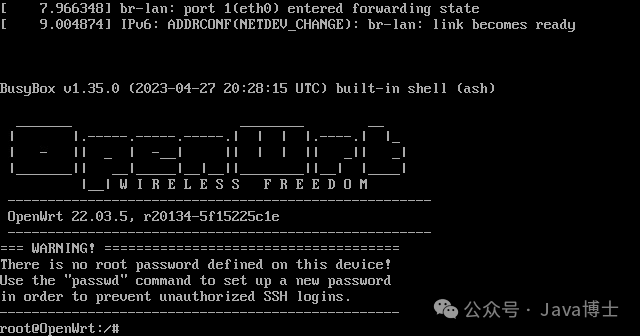
To be honest, the official version of OpenWrt loads particularly fast.
Enter the following code in the command line and press Enter:
|
|
Move the cursor to 192.168.1.1, press i to enter edit mode, delete 192.168.1.1, and re-enter our OpenWrt address: 10.0.0.2. Then press Esc to exit edit mode, in English writing mode, type :wq and press Enter (this saves and exits, which will be displayed in the lower left corner).
Due to some version issues, you may not be able to input
:wq, in which case you can also pressZtwice in uppercase mode.
Then enter reboot to restart.
Configuring OpenWrt
Enter http://10.0.0.2 in the browser to open the OpenWrt management interface. The initial login password is empty.
Network Settings
Click on the top 【Network】-【Interfaces】, find the 【lan】 interface on the right side and click Edit to edit:
In the 【General Settings】 interface, set IPv4 Gateway to 10.0.0.1 (the gateway for iKuai);
In the 【Advanced Settings】 interface:
Use custom DNS servers add any public DNS, here we fill in Tencent’s 119.29.29.29
IPv6 assignment length specify 64 bits, IPv6 suffix fill in ::1
In the 【DHCP Server】’s 【General Setup】 interface, check Ignore interface (ignore this interface, do not provide DHCP service); in the 【Advanced Settings】 interface, uncheck Dynamic DHCP; in the 【IPv6 Settings】 interface, check Designated master and set RA-Service and DHCPv6-Service to disabled.
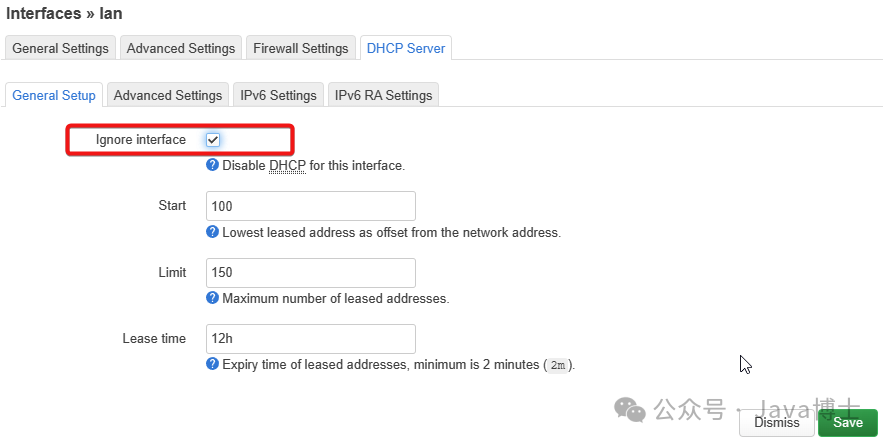
Click the 【Save】 button below, return to the 【Interfaces】 interface, and click 【Save & Apply】 below.
Click on the top 【Network】-【Diagnostics】 (network diagnostics), click any button to test the network:
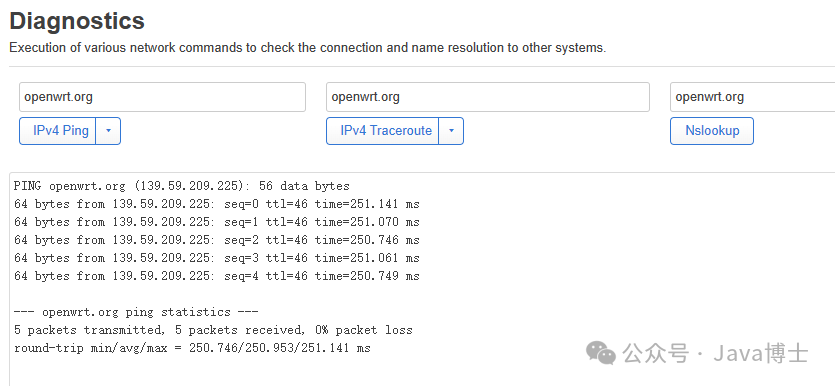
Great job!
Software Source Settings
Accessing OpenWrt’s servers in China is relatively slow, and sometimes they may be unavailable or unconnectable due to regional issues. Switching to domestic software sources can help access and download faster.
Click on 【System】-【Software】 at the top, and click the 【Configure opkg…】 button.

Change the address in /etc/opkg/distfeeds.conf to any of the following domestic source addresses.
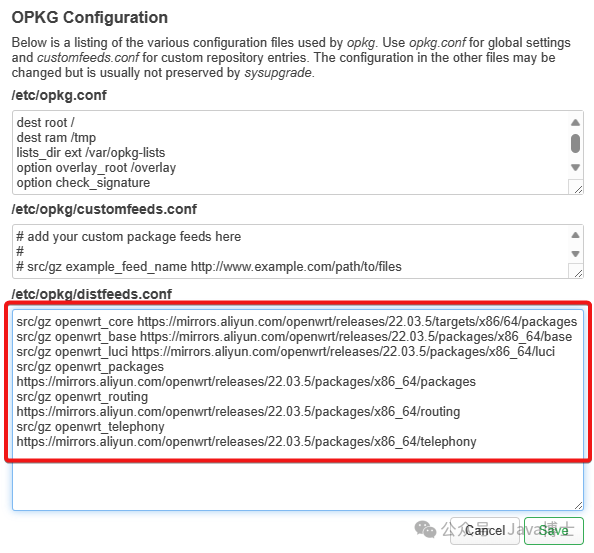
Aliyun
|
|
Tencent Cloud
|
|
Tsinghua University
|
|
University of Science and Technology of China
|
|
Before changing the source, ensure your system version and CPU architecture are consistent with the above. The above shows the
OpenWrt 22.03.5 x86_64architecture software sources.
Click 【Update lists…】 on the page:
Displaying Signature check passed. indicates that the signature check has passed.
Chinese Language Settings
Following the above steps, after clicking 【Update lists…】, enter zh-cn in the 【Filter:】 column, and you will get a result:
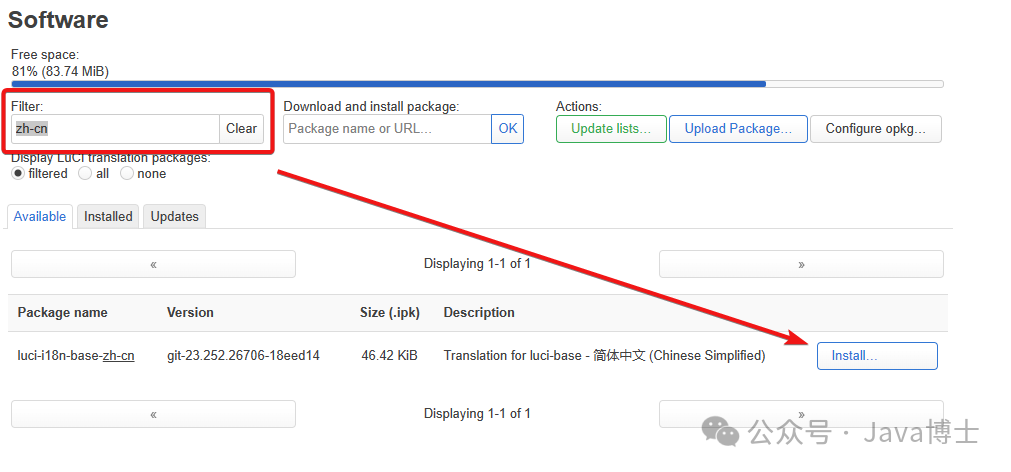
Click 【Install…】 to install:
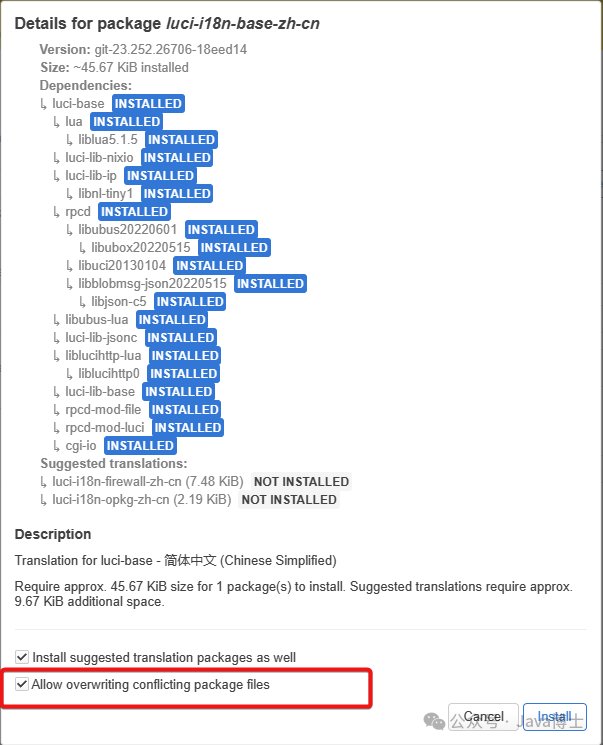
Generally, it is recommended to check
Allow overwriting conflicting package files, which allows overwriting conflicting package files.
After successful installation, refresh the page to switch to the Chinese page.
Other Settings
In the 【System】-【System Properties】 page, general settings, select timezone Asia/Shanghai;
In the 【System】-【Management Rights】 page, set the router password yourself.
IPv6 Settings
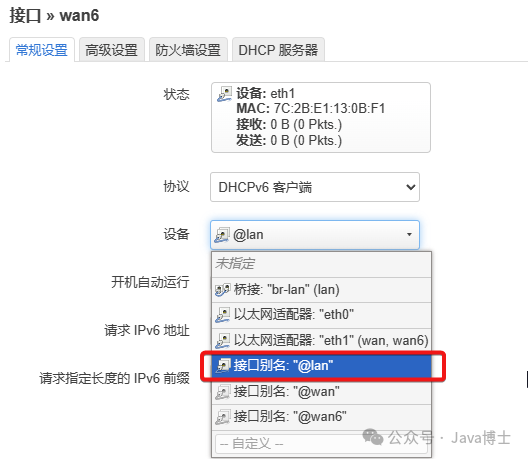
In the 【Network】-【Interfaces】 interface, there is a ready-made 【wan6】 interface, click 【Edit】:

In the 【General Settings】, select @lan for the Device:
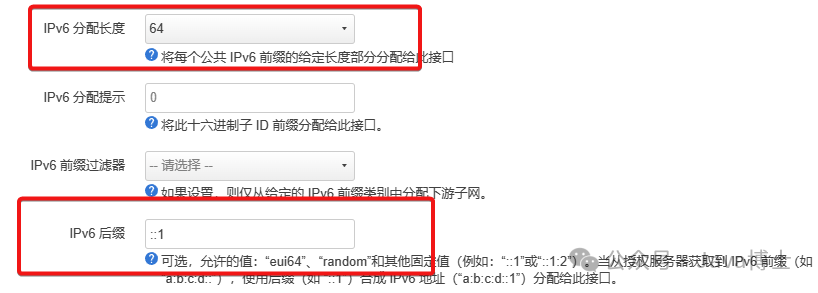
In the 【Advanced Settings】, set IPv6 assignment length to 64; fill in IPv6 suffix as ::1:
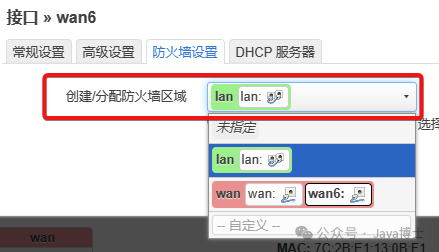
In the 【Firewall Settings】, for Create/Assign Firewall Zone, select lan:
Save and apply.

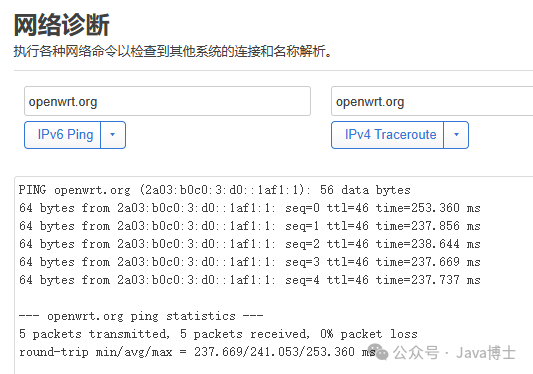
You have been assigned an IPv6 address; in the 【Network】-【Network Diagnostics】 interface, use 【IPv6 Ping】 to test!
Installation Complete
Thus, the installation and configuration of OpenWrt is complete.
Some configurations are not very good, such as the DNS settings, where only a Tencent public DNS address is filled in, as the following scheme will optimize this part, so for now, just ensure that internet access works.