1. Introduction
The Internet of Things (IoT) technology is developing rapidly, requiring the application of multiple sensors. However, many sensors output analog signals, which leads to the need for an Analog Front End (AFE). You might think of a multitude of devices, but in this case, a single chip can solve all problems. For this purpose, Cypress has designed a new generation of PSoC Analog Coprocessors. The PSoC Analog Coprocessor features flexible configuration options and rich resources, including an AFE, programmable analog filters, high-resolution ADCs, and a Cortex-M0+ core, allowing it to process sensor signals without the need for the main processor’s intervention.

2. Positioning
The PSoC Analog Coprocessor series is based on the ARM Cortex-M0+ core, equipped with 32KB of flash memory with a read accelerator and 4KB of SRAM. The device operates at a frequency of up to 48MHz and features programmable analog modules, capacitive sensing, segment LCD driving, and programmable digital peripherals. The analog modules include: Universal Analog Block (UAB), dedicated data converters, self-timed analog front ends, DACs, etc. These functions provide strong support for analog signal processing.
The detailed functional block diagram of the PSoC Analog Coprocessor series is shown below: 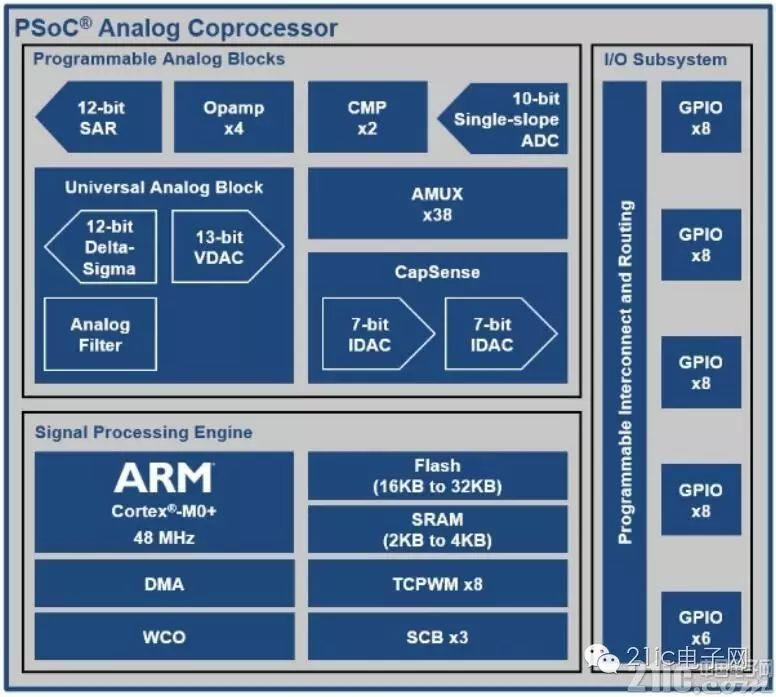
Today, I received the CY8CKIT-048 evaluation board based on the PSoC Analog Coprocessor series.
3. Unboxing
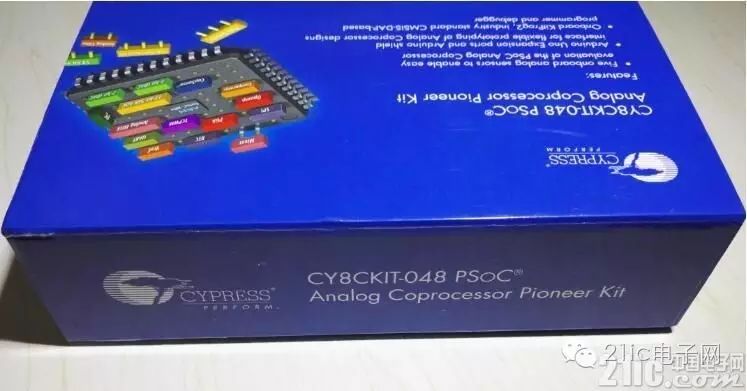
The packaging of the kit is similar to previous Cypress packaging, featuring a blue-themed box, as shown below:
 The side of the packaging also displays the model of the development kit, as shown below:
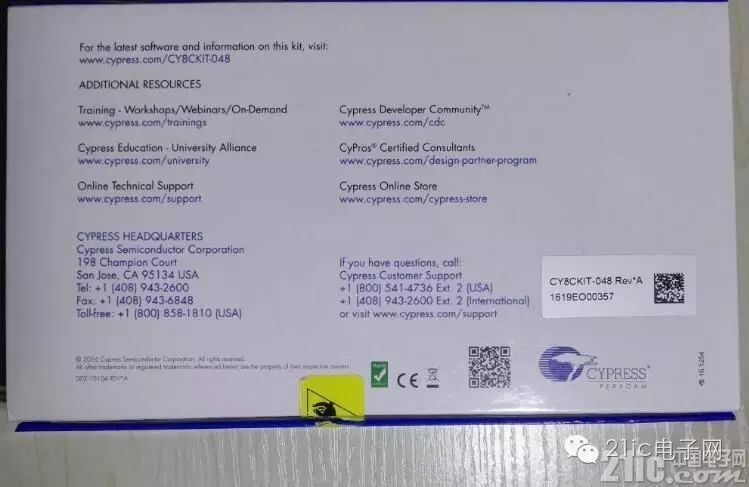
 The back of the packaging contains the address for the development board documentation and the Cypress community address, along with a sticker showing the kit’s name, version, and number, as shown below:
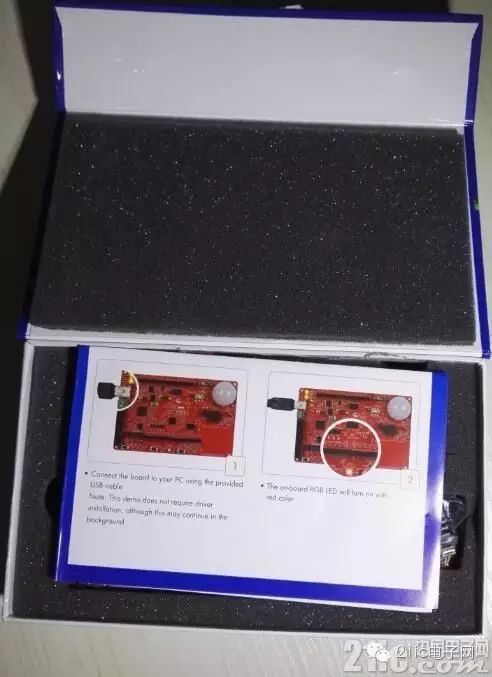
 The CY8CKIT-048 development board packaging is specialized, similar to previous packaging but larger and more refined. Upon opening, a quick start guide is visible, as shown below:
 The quick start guide is shown below:
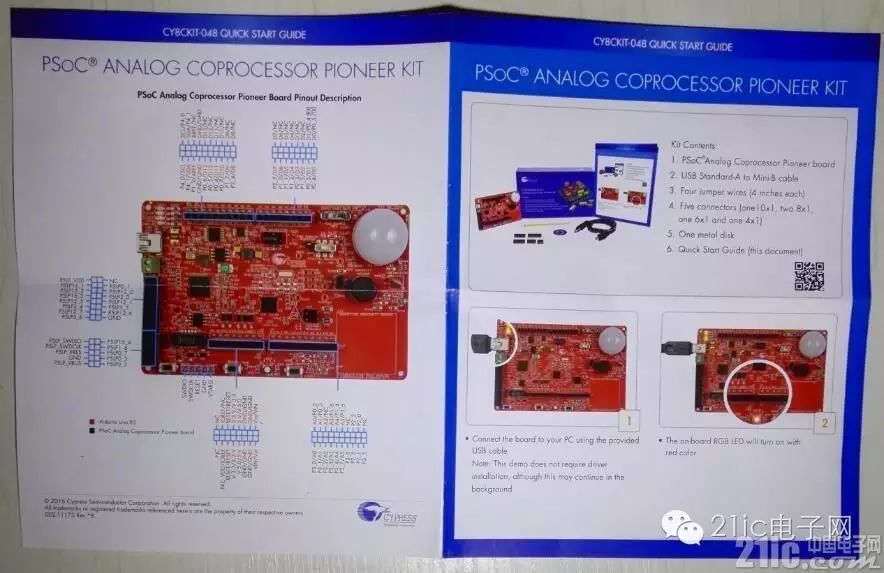
 The quick start guide introduces the kit’s inventory, documentation download addresses, on-board interface function descriptions, resource distribution on the board, and basic usage methods and steps. The quick start guide is printed in color, on thick paper, and is clear and concise, making it a great helper for getting started.
After removing the quick start guide, the development board and accessories are visible, as shown below: 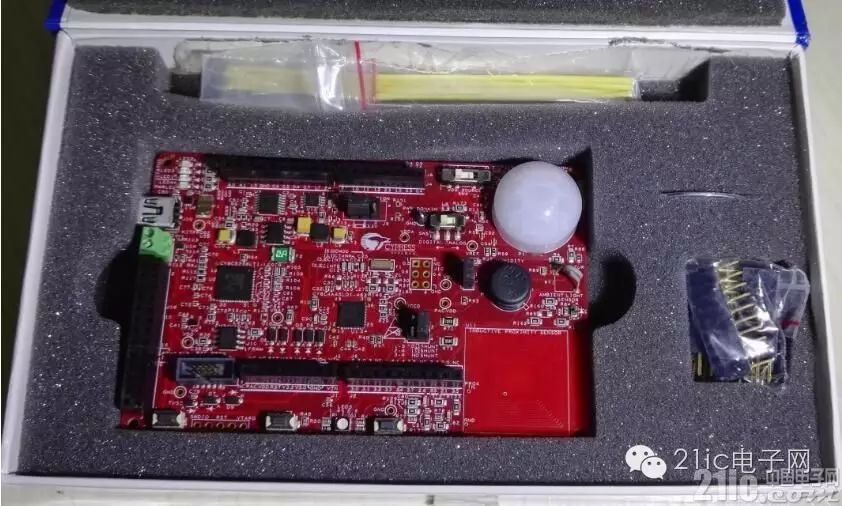
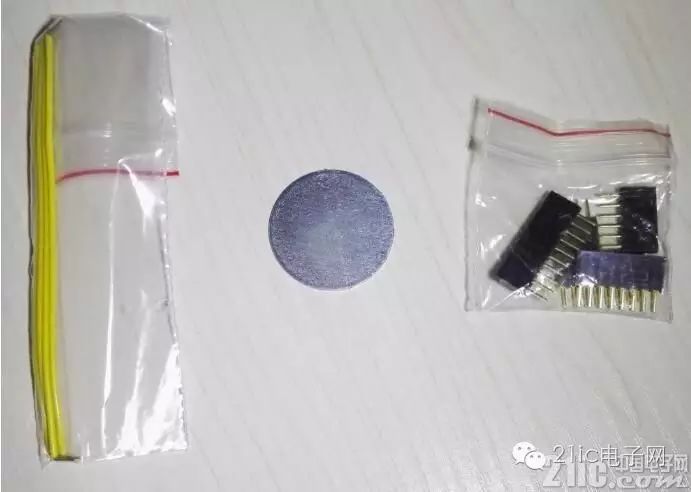
The development kit includes four wires, a metal plate, and several headers, as shown below:
 Upon removing the development board, a USB Type A Male to Mini USB Type B Male data cable is included below the board, as shown below:
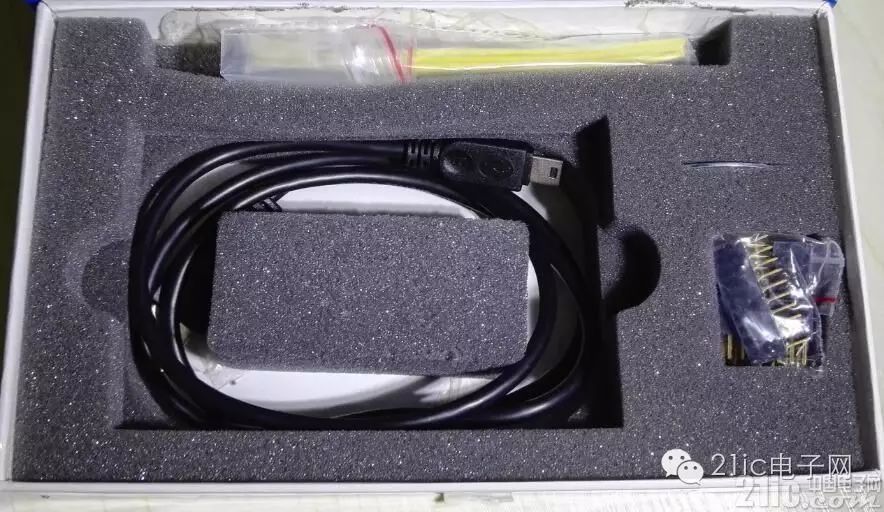 The development board, data cable, wires, and other accessories are embedded in protective foam within the packaging, providing excellent protection. The inside of the box lid is also lined with foam, ensuring thorough protection.
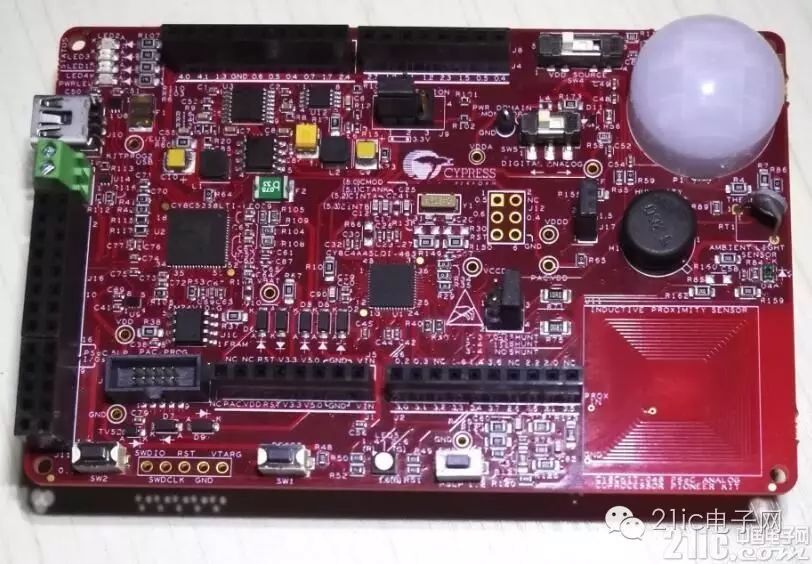
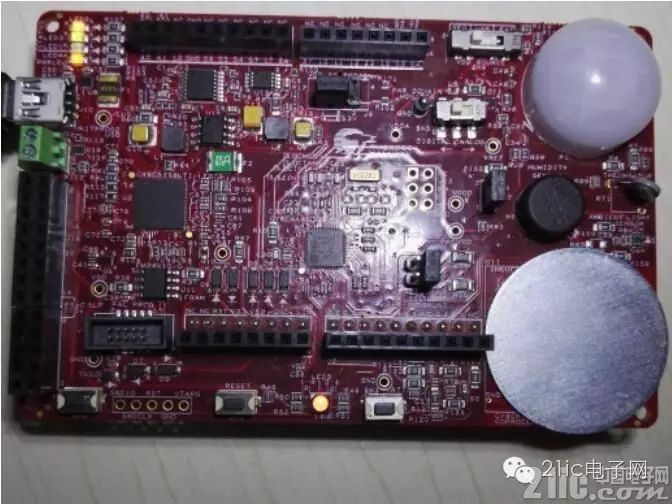
The beautiful red development board is shown below:
 The back is shown below:
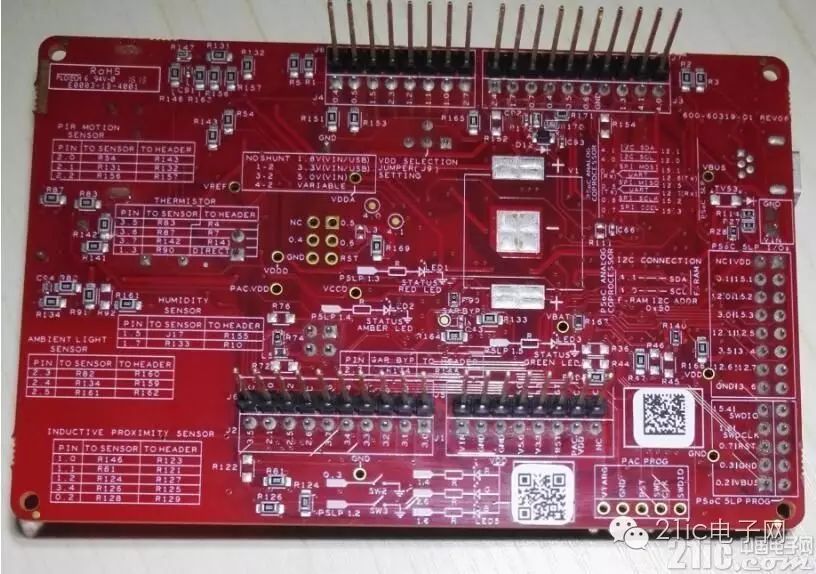
From the packaging to the quick start guide to the development board, everything is designed in accordance with Cypress’s traditional style. Overall, it is a very good development kit.
4. Product Features

1. Kit Characteristics
(1) CY8C4A45LQI-483 MCU
(2) Reset button
(3) Arduino Uno interface
(4) User button x 1
(5) On-board debugger
(6) USB debugging power supply interface
(7) 10-pin programming/debugging interface
(8) Infrared sensor
(9) Temperature sensor
(10) Humidity sensor
(11) Light sensor
(12) Inductive proximity sensor
(13) RGB LED
2. CY8C4A45LQI-483 Chip Features:
(1) CPU Cortex-M0+ with a frequency of up to 48MHz
(2) 32KBytes of Flash with read acceleration
(3) 4KBytes of SRAM
(4) Universal Analog Block (UAB)
(5) 12-bit SAR ADC
(6) 10-bit single-slope ADC
(7) Analog Front End (AFE)
(8) Current DAC
(9) Capacitive sensor
(10) Segment LCD driver
(11) Three independent serial communication modules
(12) Eight 16-bit timers
(13) Up to 38 GPIOs
(14) Eight smart I/Os capable of Boolean operations
Product Design
1. Structural Design
The board adopts a rounded rectangular design, with chamfered corners. The edges of three sides are designed with postage hole technology, while one side is cut. The postage hole edges have some burrs. The board uses a gold immersion process, and there are many components on the board, with passive components in 0402, 0603, and 0805 packages. The components are arranged closely and neatly.
Debugging interfaces, USB interfaces, and external power supply interfaces are reserved on the board. Some jumpers and switches are reserved for mode selection, including power selection, debugging selection, and signal type selection, etc.
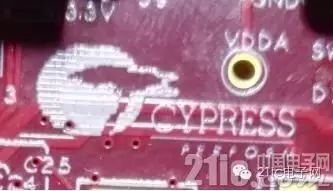
The silkscreen on the board is clear and intuitive, with the Cypress logo printed on it, as shown below:
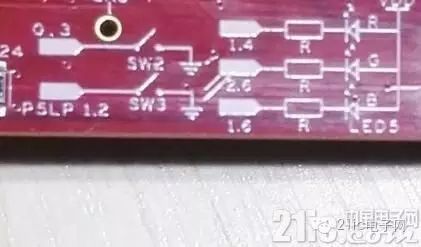
The silkscreen on the board is very detailed, and the back of the board also prints the connection methods for the LEDs and buttons, as shown below:
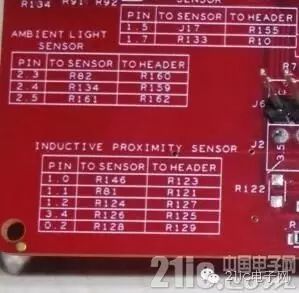
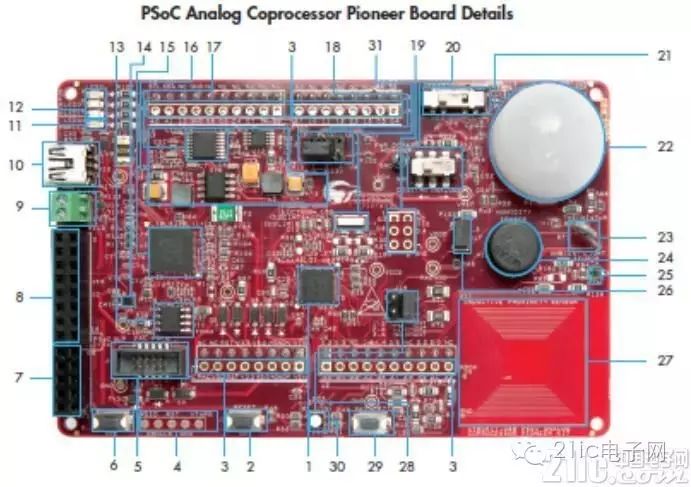
The back of the board also prints the pin definitions for the interfaces, showing the connections between the sensors, MCU, and headers, as shown below:
 Overall, the design of the board is very thoughtful and meticulous, with careful attention to detail.
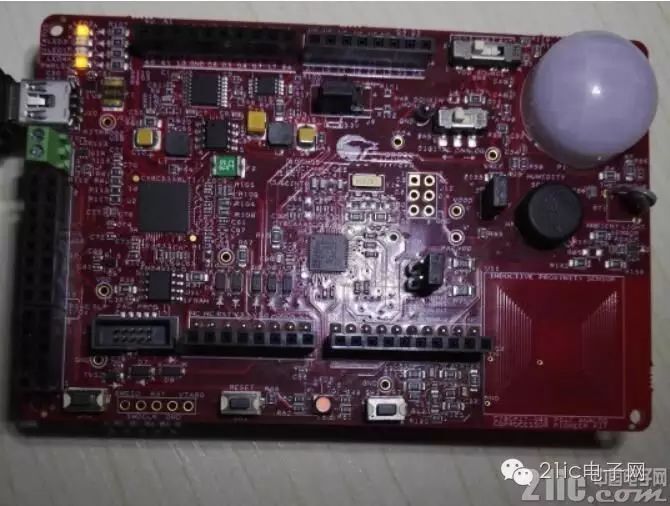
2. Appearance and Interfaces
3. Function Settings
(1) Power Supply Options
The CY8CKIT-048 development board provides multiple power supply options, as shown below:
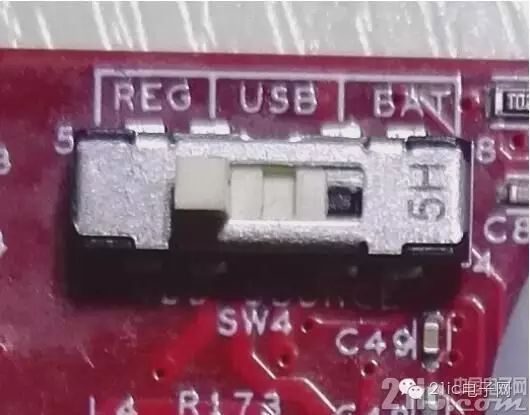 The power supply method for the development board can be selected via a switch.
(2) Infrared Sensor
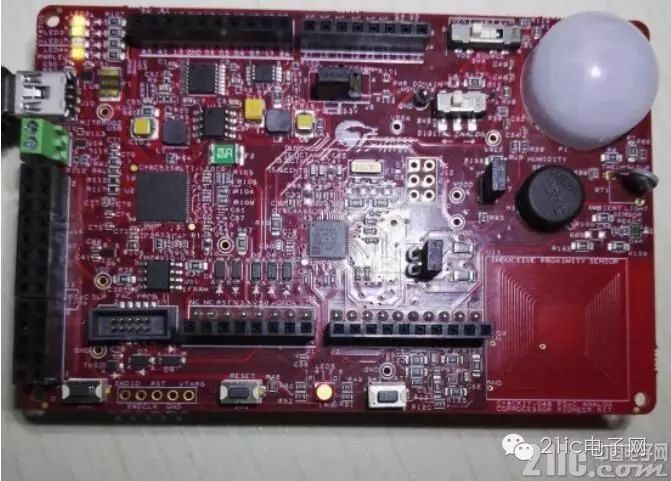
The board is equipped with an infrared detection sensor to detect objects that actively emit infrared rays, such as the human body, as shown below:
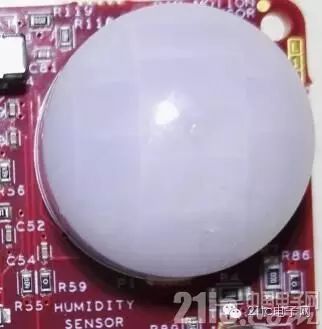
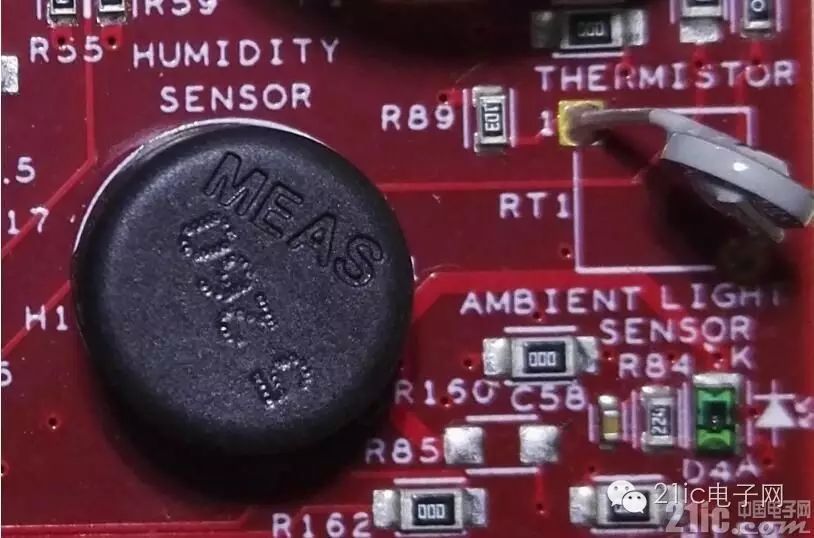
(3) Light, Temperature, and Humidity Sensors
The board provides a light sensor, temperature sensor, and humidity sensor, as shown below:
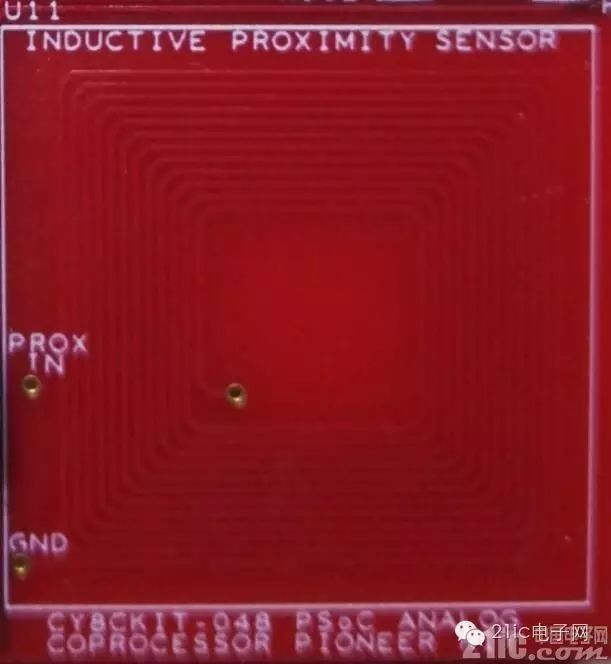
(4) Inductive Proximity Sensor
The board is designed with a PCB coil to detect changes in inductance when metal objects approach, as shown below:
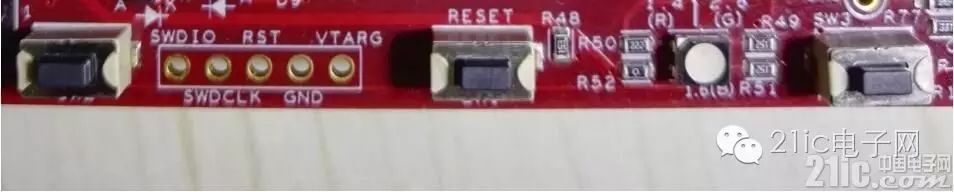
(5) RGB LED and Buttons
The board provides an RGB LED and buttons, as shown below:
 The selection of sensors is very meticulous, including voltage, current, resistance, capacitance, inductance, and signal type sensors, as shown below:
 This demonstrates the powerful analog signal processing capabilities of PSoC products.
The above items are the main functions of the CY8CKIT-48 development board.
5. Product Usage Scenarios
1. Quick Start Instructions
The official website provides relevant usage documents needed for the kit, as shown below: 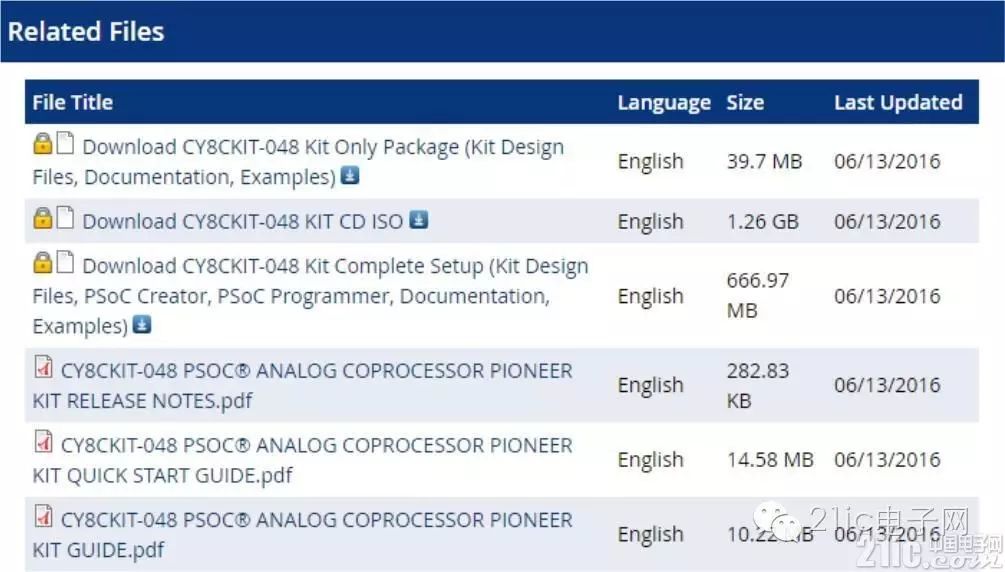
The kit includes a quick start guide, which explains the distribution of resources on the board and the usage steps. Overall, it is relatively easy to use, and the steps are shown below:
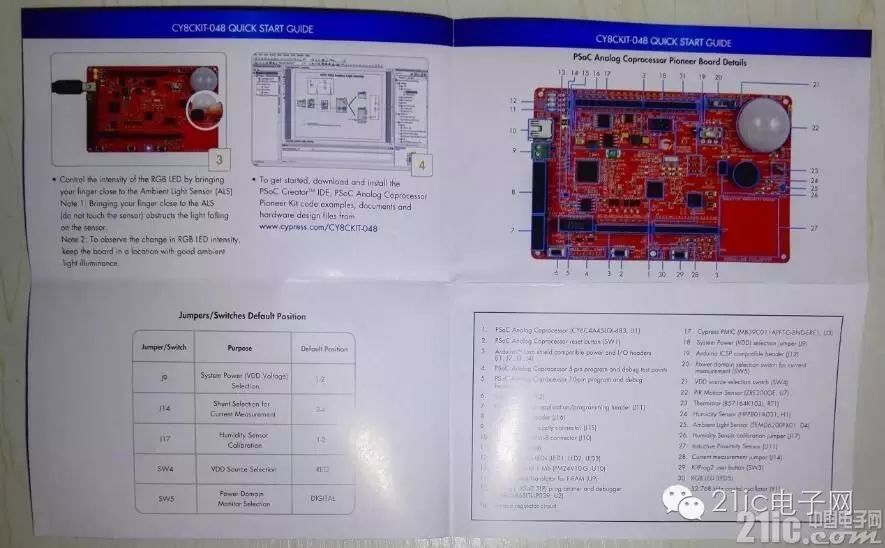
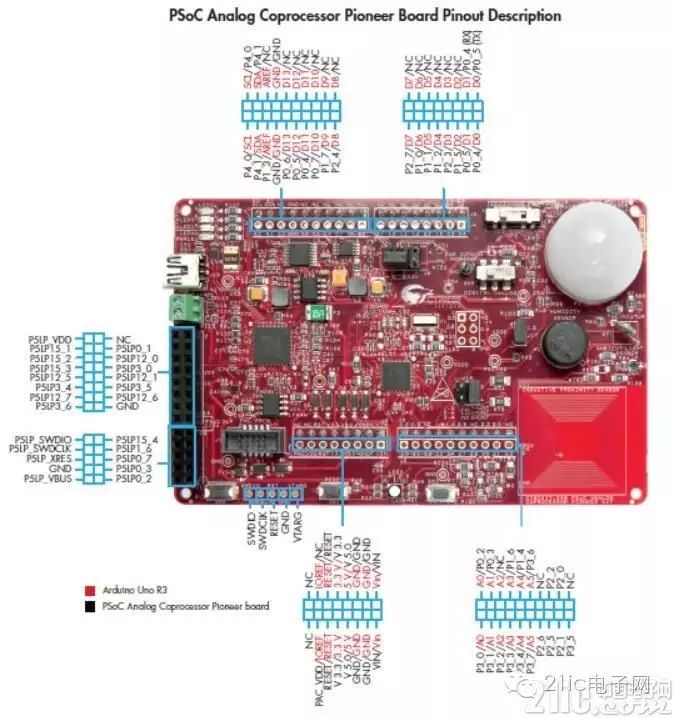
 The resource distribution is shown below:
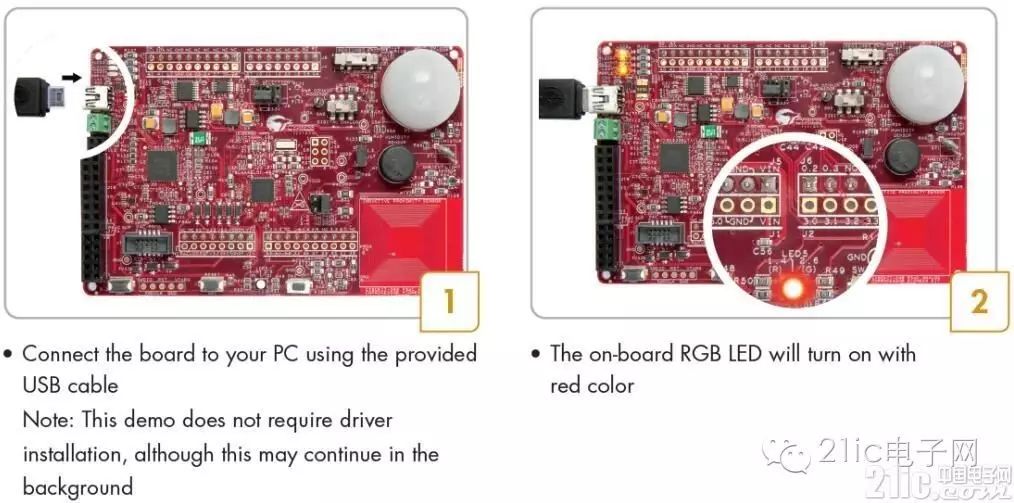
2. Connecting to a Computer
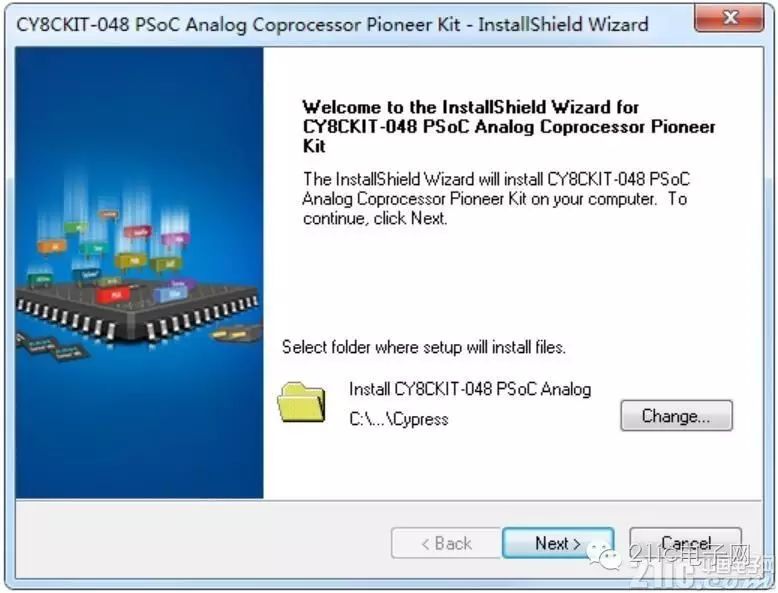
Install the following software
 The installation process is as follows:
 The installation process is shown below:
 Select the installation type, choosing typical installation, as shown below:
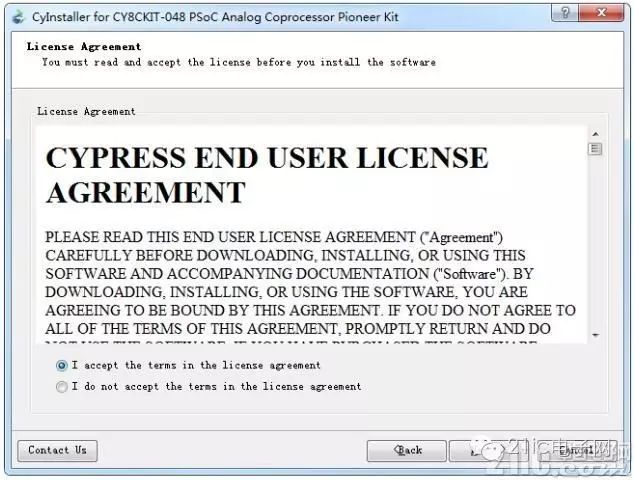
 Agree to the software license agreement, as shown below:
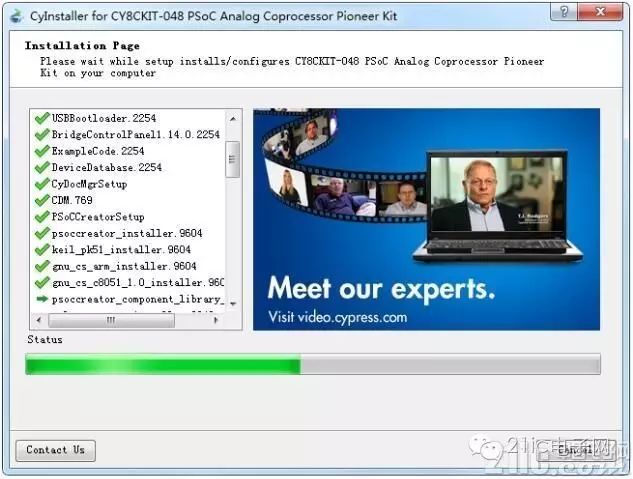
 Install all components, as shown below:
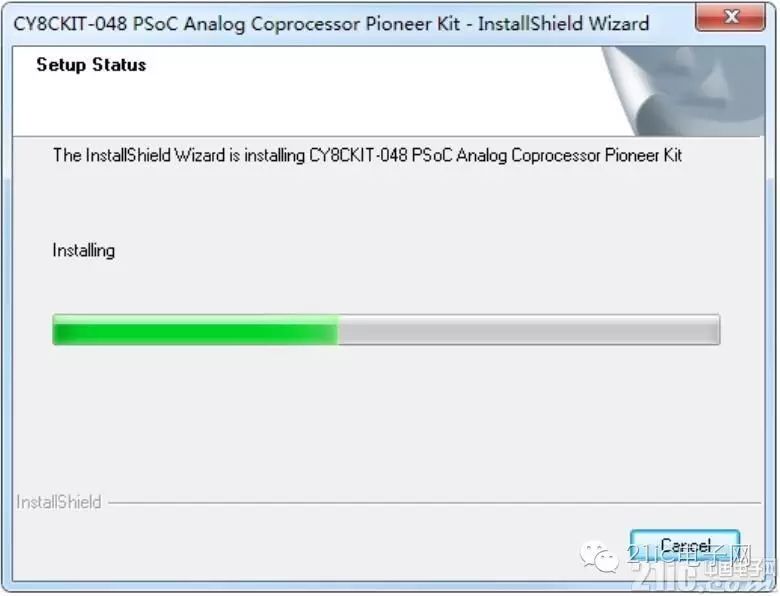
 Installation complete, as shown below:
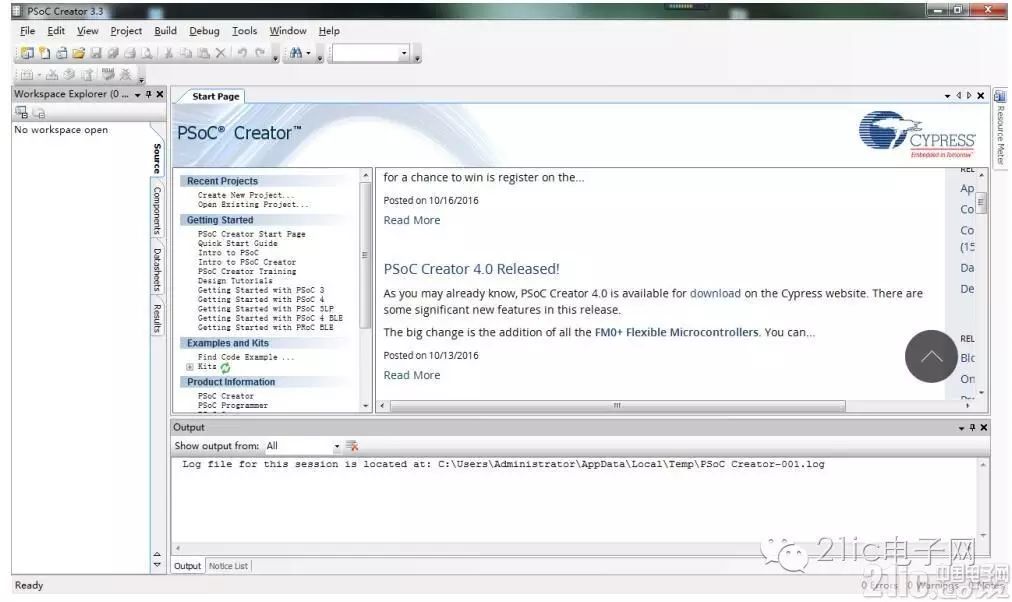
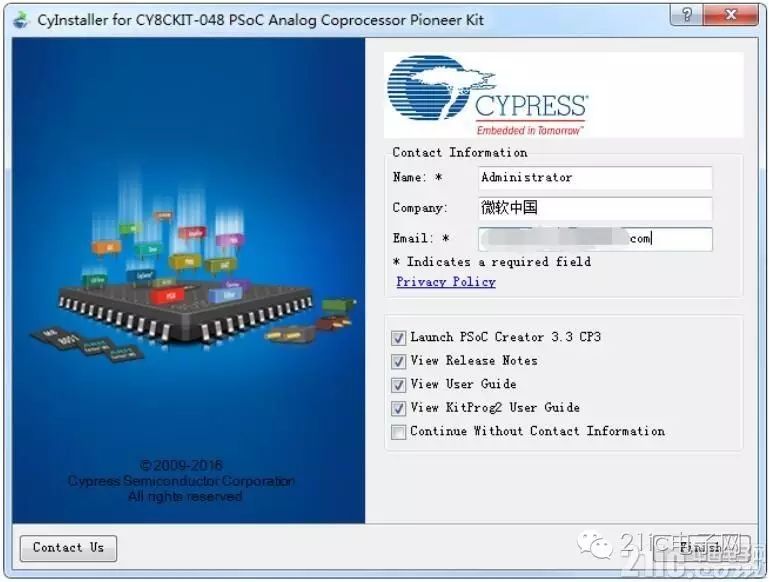 Launch the software, as shown below:
 Next, we will start using the development board.
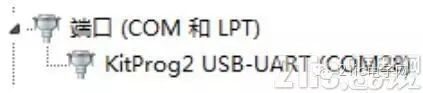
Use the USB data cable provided in the kit to connect the development board to the computer. The computer will display the device as shown below:
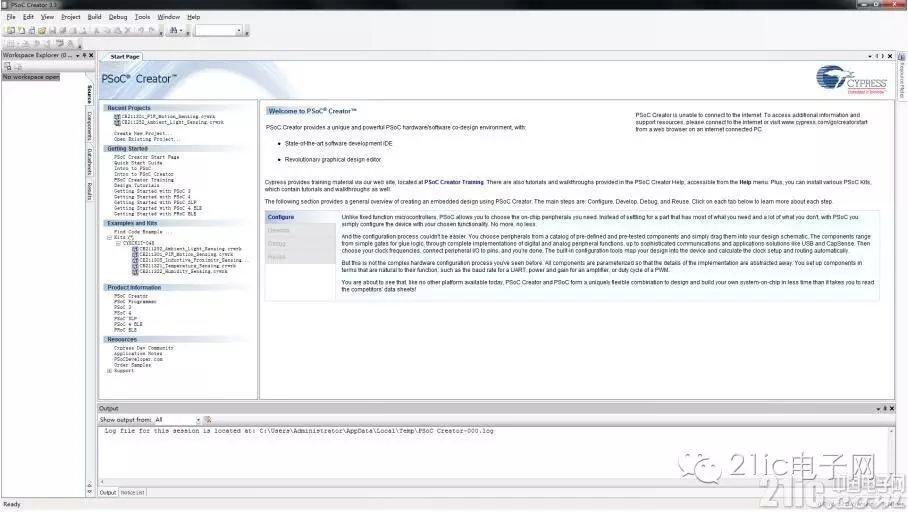
 Open the integrated development environment, as shown below:
 Open the example program
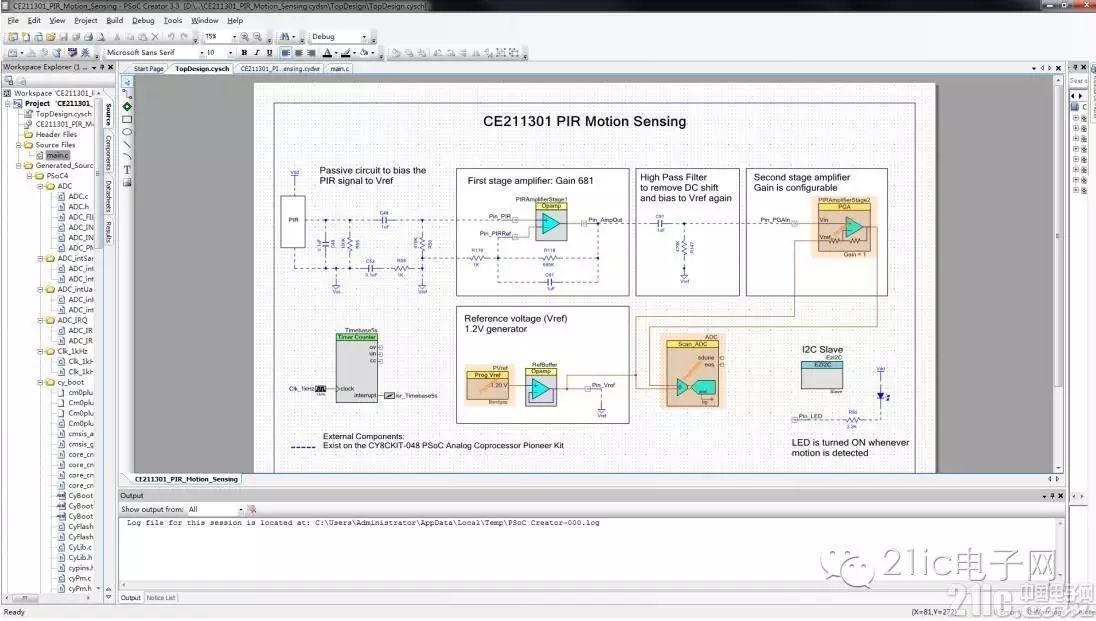
TopDesign, as shown below:
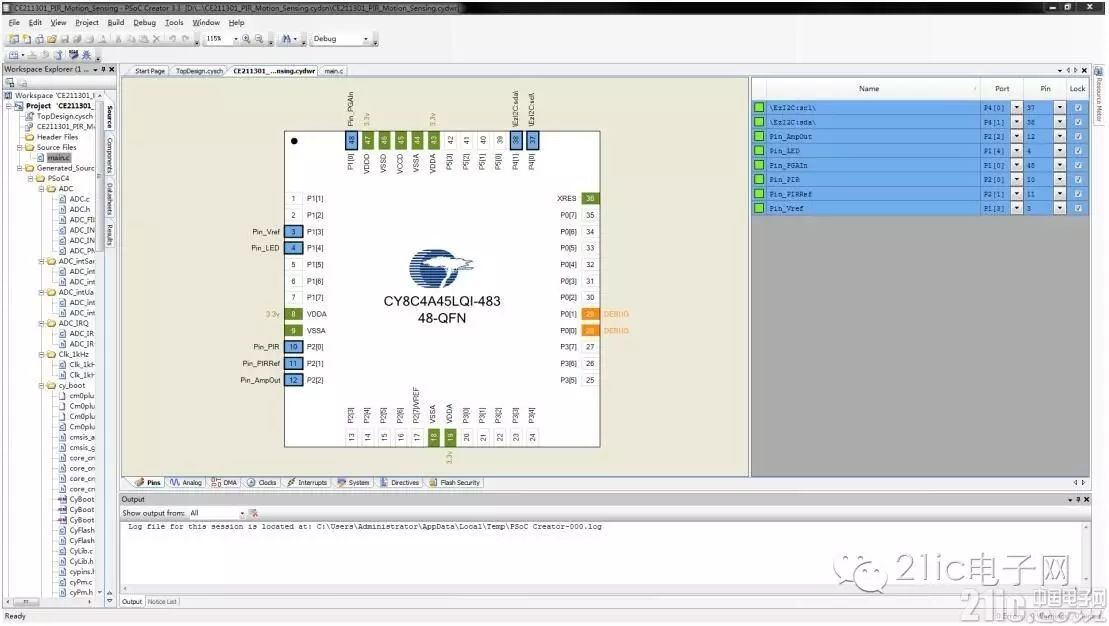
 Pin configuration, as shown below:
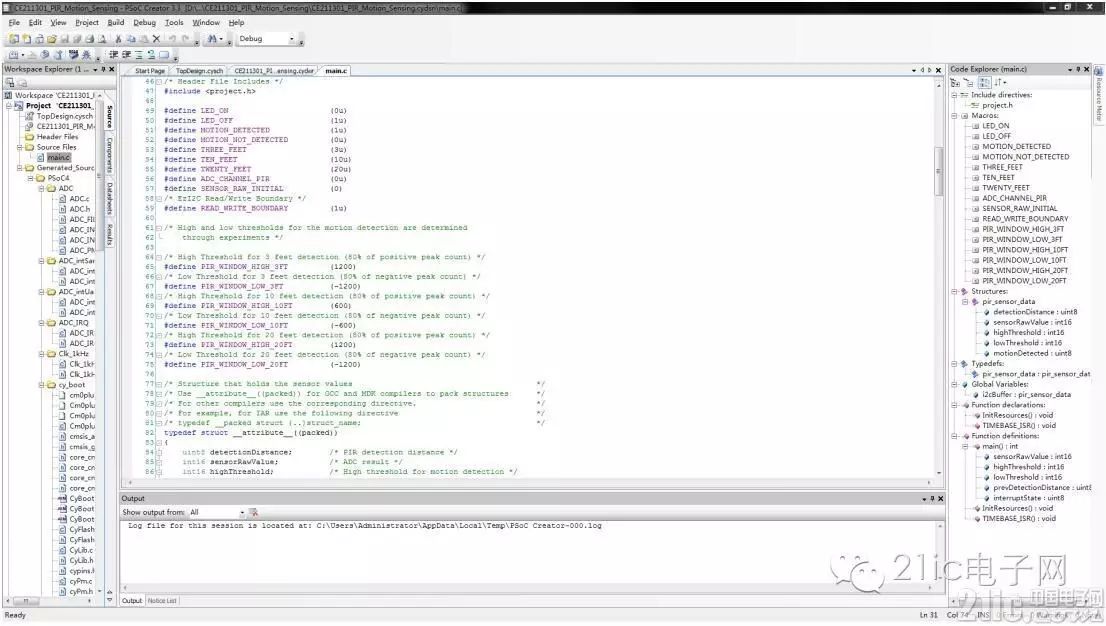
 Main code
 Compile the project, as shown below:
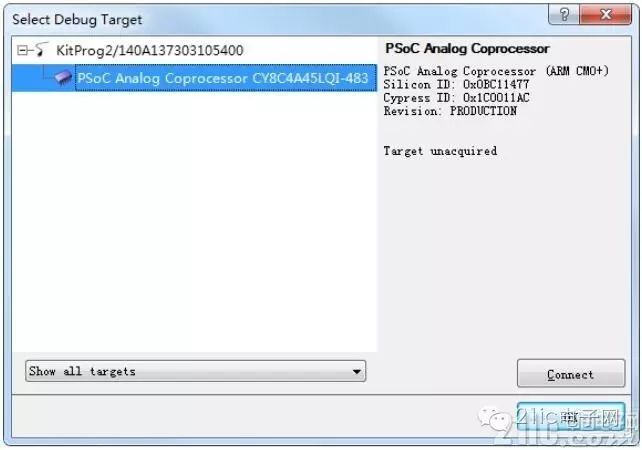
 Connect to the target board, as shown below:
 Start running the example program
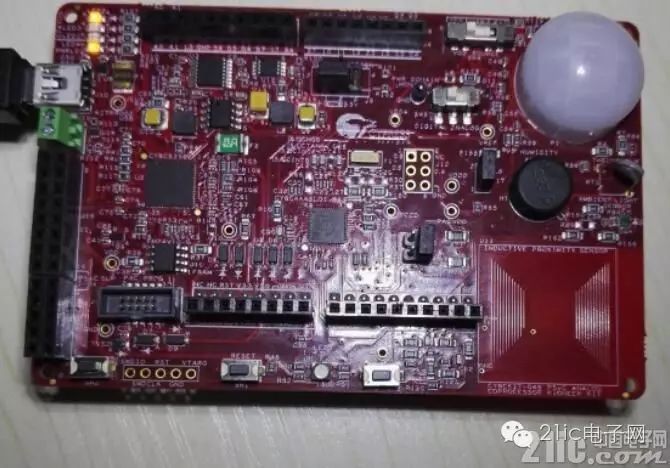
Run the inductance detection program, as shown below:
The distance of the metal plate from the development board will reflect different inductance values, and the brightness of the LED will change with the inductance value.
Run the light detection program, as shown below:
The brightness of the LED will change with the external light conditions.
Similarly, the PIR, temperature, and humidity detection programs are also reflected in the brightness of the LED. The PIR response is relatively slow with some delay, while the temperature and humidity changes are not easily noticeable. When blowing on the humidity sensor, a significant change in the LED can be observed, but I won’t elaborate further here.
Overall, the CY8CKIT-048 development board provided by Cypress is comprehensive in functionality, well-made, and the provided accessories are very thoughtful. The related development tools are intuitive and easy to use, allowing developers to quickly get started while also accelerating development progress. The PSoC Analog Coprocessor series products are very suitable for IoT applications, and I believe this series will accelerate the development of IoT.
6. Additional Resources
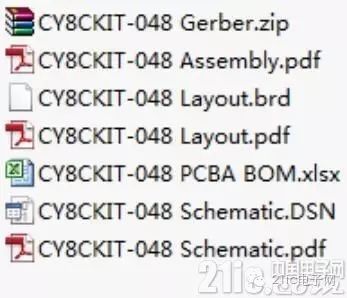
The official website provides a wealth of detailed resources, including design files, driver files, quick start guides, and source files, which are provided in ISO format, as shown below:
The schematic and PCB files are designed using Cadence, which can provide references for design, as shown below:
 In addition to these design files, there are other files worth studying.
7. Conclusion
In this rapidly developing era of the Internet of Things, sensor signal processing is of utmost importance, and the processing of analog signals is key. Cypress seems to have targeted this market, developing this series of products for it. However, such applications are not limited to IoT; many other fields have similar applications. I hope to see Cypress’s products shine in various fields in the near future.
8. Selection and Materials
We have previously introduced many Cypress development boards, and for such large manufacturers, there is no need to worry about materials, as shown below:
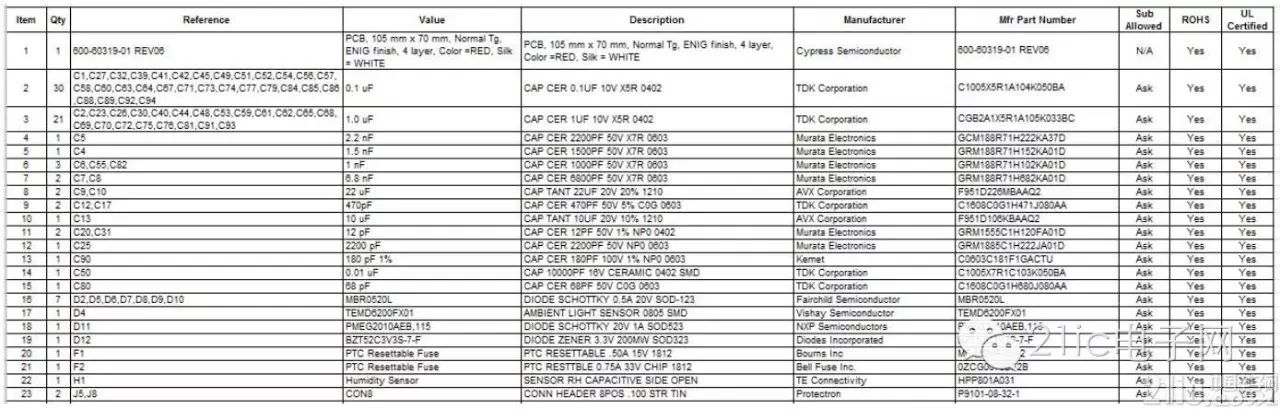 So we won’t elaborate on the materials.
9. Official Resources
Cypress Official Website
CY8CKIT-048 PSoC Analog Coprocessor Pioneer Kit
Highly Recommended
The mutual disdain between “analog electronics” and “digital electronics” led to a meeting, and the result was…

Understanding VCC, VDD, VEE, VSS voltages

Gain knowledge! Experts guide you to comprehensively understand the reliability design of embedded C language