Detailed Steps for Button Creation
Basic Operations for Button Creation
In the GT Designer3 software for Mitsubishi touch screens, button creation is done through the “Object” menu in the menu bar under the **”Switch” item**. After dragging to create a button, configuration settings can be made.
First, select the “Bit Switch” from the “Switch” item in the “Object” menu on the menu bar, then drag on the touch screen interface to generate a button, and finally, complete the button creation by making the corresponding configuration settings.
Detailed Settings for Soft Components
In the soft component settings phase, we typically choose M variables instead of the PLC input points as variables. This is because we need to associate with the auxiliary relays, not the input points. Next, we need to set the corresponding action states for the selected associated variables, which usually include the following four types:
-
Set Function: When the touch switch is pressed, its state will be set to ON, and it will remain ON after being released.
-
Reset Function: After touching the switch, its state will change to OFF, and it will remain OFF after being released.
-
Toggle Function: Each time the switch is touched, its current state will change.
-
Momentary Function: While holding the switch, its state is ON; when released, it becomes OFF.
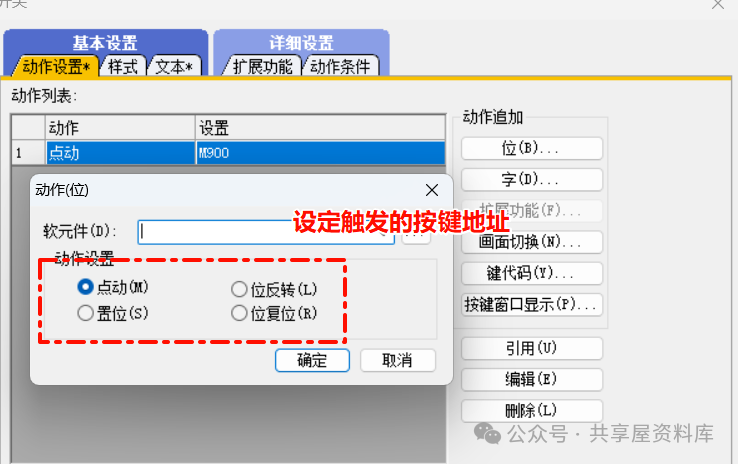
Selecting M variables instead of PLC input points for association and setting action states for the associated variables, including Set, Reset, Toggle, and Momentary Functions.
Style and Text Settings
In the style settings, you can freely choose the shape of the switch button, adjust the border color, change the fill color, etc., to meet your personalized needs. In the text settings, you can name the button for clearer identification of its function. For example, if the button represents a start or stop operation, you can choose to name it directly by inputting the actual function name or use an indirect naming method by adding comments to describe its role. Mastering these basic steps will help you better perform each operation!
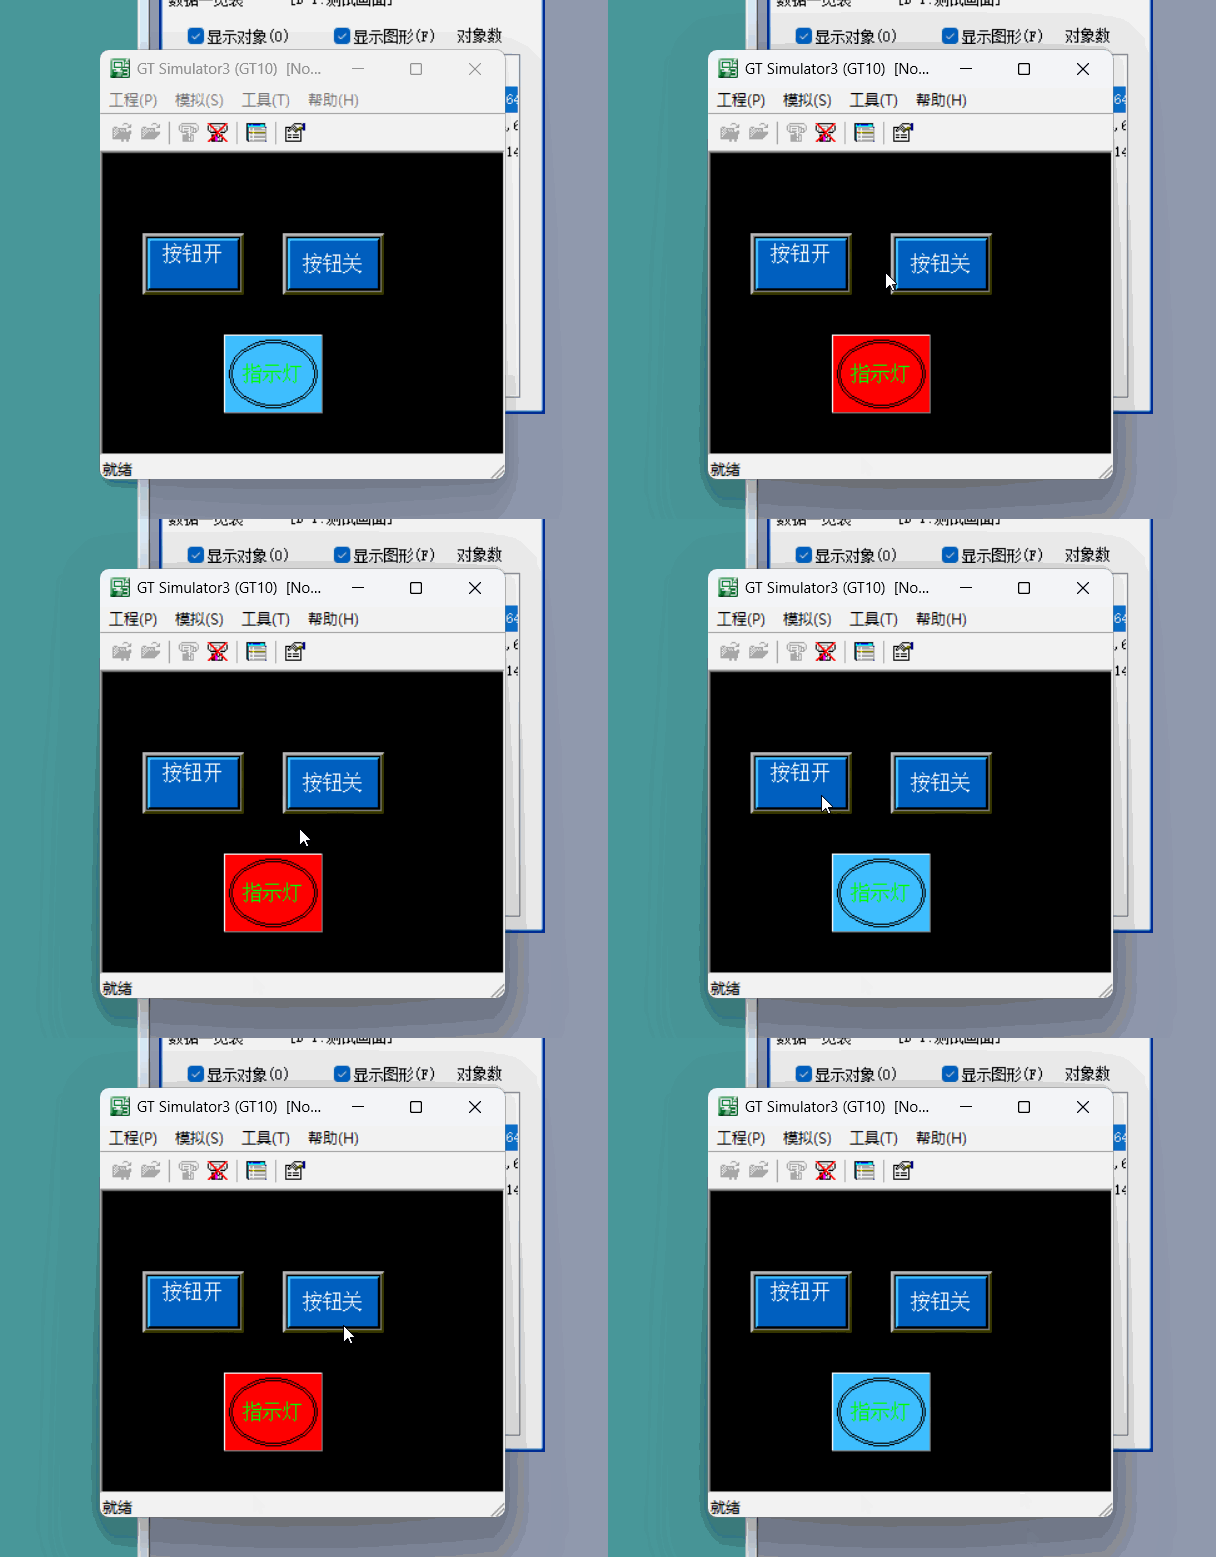
By linking the created button address and indicator light with the PLC, you can see the actual effect, which is more intuitive than directly viewing the PLC logic.
If this article has been helpful to you, feel free to share it with your friends to pass on this knowledge and wisdom. Also, don’t forget to follow our WeChat account for more exciting content! Click 【Read the original text】 to see more learning material download links.
Previous Articles:Mitsubishi Learning | Interpretation of Common PLC Signals for Mitsubishi M80Mitsubishi Learning | Mitsubishi Parameter Guide Function, Familiarize with Parameters Without a ManualMitsubishi Learning | Mitsubishi M80 System Backup Processing Program OperationMitsubishi Learning | How to Diagnose the Operating Status of the Mitsubishi System Through the System Screen?
Mitsubishi Learning | Practice Starting Processing Programs Using Mitsubishi Simulation Software
Mitsubishi Learning | Practice Creating a Processing Program Using Mitsubishi Simulation Software
Mitsubishi Learning | Practice Basic PLC Backup Operations Using Mitsubishi Simulation Software (II)
Mitsubishi Learning | Practice Basic PLC Backup Operations Using Mitsubishi Simulation Software (I)
Mitsubishi Learning | Instruction Manual for Mitsubishi Simulation Software NC Trainer & NC Trainer Plus Learning Three
Mitsubishi Learning | Instruction Manual for Mitsubishi Simulation Software NC Trainer & NC Trainer Plus Learning Two
Mitsubishi Learning | Instruction Manual for Mitsubishi Simulation Software NC Trainer & NC Trainer Plus Learning One
Mitsubishi Learning | Create an M80 System Learning Using NC Trainer2
Mitsubishi Learning | What Systems are Supported by Mitsubishi Simulation Software NC Trainer2 Plus A9?
Mitsubishi Learning | Mitsubishi Simulation Software Learning Group 【NCTrainer2plus】
Mitsubishi Learning | Installation Tutorial for Mitsubishi M80 System Simulation Software NC Trainer2 Plus A9
Shared WeChat: 136959805