1. Introduction
Android Studio is used for developing Android apps, and its interface is quite similar to that of WebStorm, with a more intuitive feel and faster loading speed. It also offers some new features.
1.1 Understanding Android
Android – Wikipedia provides a story-like introduction to the history of Android development, the concept of SDK, and the differences between Android versions and SDK versions, summarized as follows:
- Android is an operating system, an open-source project developed based on the Linux kernel;
- The Android system was open-sourced in 2008, and within just ten years, its user base surpassed that of Windows desktop systems;
- Applications (apps) are software that runs on the Android system, similar to desktop operating systems;
- To develop apps on the Android system, the operating system provides low-level APIs, known as SDKs, for accessing system time, adjusting system brightness, and other interfaces.
1.2 What is SDK
To develop apps on the Android system, the operating system provides low-level APIs, referred to as SDK (Software Development Kit).
Android Versions: Android is an operating system that releases new versions periodically, either to fix underlying bugs or to add new features. These modifications are targeted at the internal workings of the operating system. The Android 9.0 version, named Pie, was released in August 2018.
SDK Versions: The fourth column in the table below indicates the API level, which corresponds to the SDK version. Each version of the operating system continuously changes the low-level interfaces it provides, reflecting the changes in the Android operating system’s external interfaces.
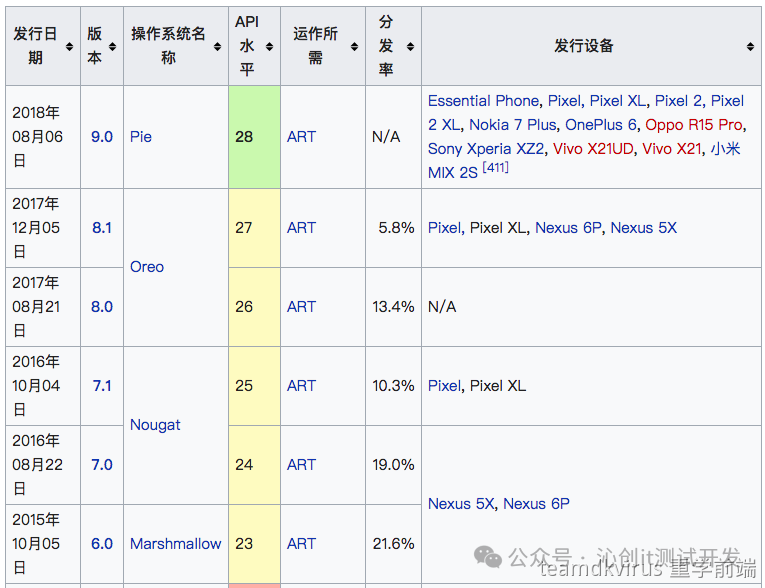
During the setup of the development environment, you will choose the Android system version and SDK version. If you select a lower Android version, the developed app will also run on older Android phones. You can check your phone’s Android system version in the settings; for example, some phones still use Android 6.0.
It is advisable to choose a higher SDK version, as higher versions generally support more features.
Now that we understand that the SDK is the low-level interface provided by the Android system for apps running on it, we will encounter several similarly named tools during the actual environment setup, which need to be downloaded:
- SDK tools: Interfaces provided by the underlying operating system;
- SDK build tools: SDK compilation tools, which convert written code into .apk installation packages for installation on Android phones;
- SDK platform tools: The purpose of this is unclear; it is speculated to be related to the application store?
1.3 What is AVD
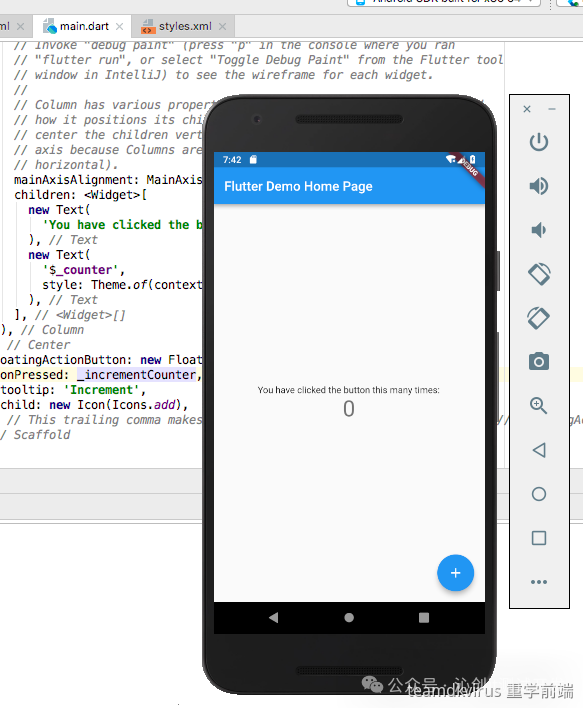
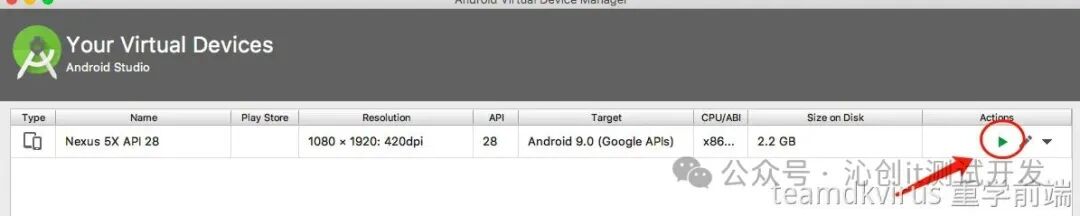
AVD (Android Virtual Device) is an Android virtual device. During the actual development process, when you write some code and want to see the effect, you can create an apk installation package to test on a real phone, but this can be cumbersome. The Android Studio development tool allows you to set up an Android virtual device to simulate a phone on your computer, enabling you to see the running effect directly, thus improving development efficiency, as shown in the figure below:
For more information about AVD, see the AVD official documentation.
1.4 What is Gradle
Android can be written in Java, and those who have written Java should be familiar with Maven, a project management tool. Gradle is also a project management tool, and Android Studio uses it by default.
- Gradle – Wikipedia
- Gradle official website: Running demo code and launching applications requires Gradle, and there are many pitfalls; solutions are provided below. If you write code later, you will need to learn the project management tool systematically.
1.5 Frontend Android Development Frameworks
Currently, the two frontend development frameworks for Android apps that I know of are as follows. Regardless of which one you choose, the first step is to set up the development environment, which will be introduced below.
- React Native
- Flutter
2. Installation
2.1 Download Tools
The Android development tool Android Studio has download guides for various operating systems. On the official website, there are two items that need to be downloaded; scroll down the page to find the sections with the following titles and download the corresponding tools for your operating system.
- Android Studio downloads: Development tools. Below, I will explain using macOS as an example;
- Command line tools only: Command line tools. As mentioned earlier, SDK tools are needed. Originally, these toolkits would be automatically downloaded when Android Studio is first launched, but I have tried many times without success (even with a VPN configured). The command line tools can be downloaded manually, which is still very convenient.
2.2 Command Line Tools
After downloading the command line tools locally, the directory name is tools. You can add tools/bin to the environment variable, allowing you to use the sdkmanager tool in the bin directory. Common commands for sdkmanager are as follows; for more information about sdkmanager, see the sdkmanager official documentation.
# View help documentation
$ sdkmanager --help
# View all installable packages, as shown in the figure below
$ sdkmanager --list
# Install android build tools 28.0.0
# The item in double quotes is the value in the first column of the figure below
# This installation is indeed successful, but I don't know where it was installed
$ sdkmanager "build-tools;28.0.0"
# Specify the installation directory; the downloaded package will be moved to the specified directory
$ sdkmanager "build-tools;28.0.0" --sdk_root=/Users/dkvirus/Library/Android/sdk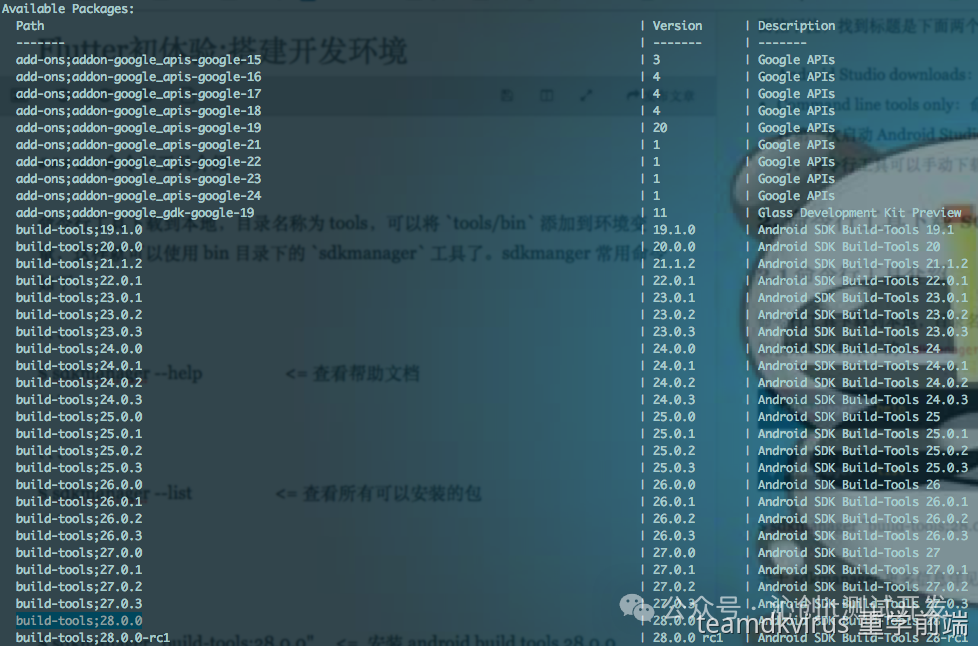
3. Usage
3.1 Common Shortcuts
<span>command + ,</span>opens the settings panel, the most commonly used, remember this;<span>command + O</span>searches for files by class name (not zero);<span>shift + command + O</span>searches for files by file name;<span>shift + space</span>provides code completion;<span>ctrl + click on a method</span>enters that method;<span>shift + shift</span>searches everywhere;<span>command + 1</span>shows/hides the left project view panel;<span>command + E</span>shows the most recently opened files.
The command key on Windows systems is the win key (the one with the icon in the lower left corner).
3.2 Configuring SDK
3.2.1 Download SDK Packages with Command Line Tools
The first major point mentions that three SDK tools are needed for actual development, which will be downloaded here. The –sdk_root directory can be specified by yourself; on a Mac, the default SDK path is /Users/[username]/Library/Android/sdk.
$ sdkmanager "build-tools;28.0.3" --sdk_root=/Users/dkvirus/Library/Android/sdk
$ sdkmanager "platforms;android-28" --sdk_root=/Users/dkvirus/Library/Android/sdk
$ sdkmanager "tools" --sdk_root=/Users/dkvirus/Library/Android/sdk
3.2.2 Configuring SDK Directory Path in Development Tools
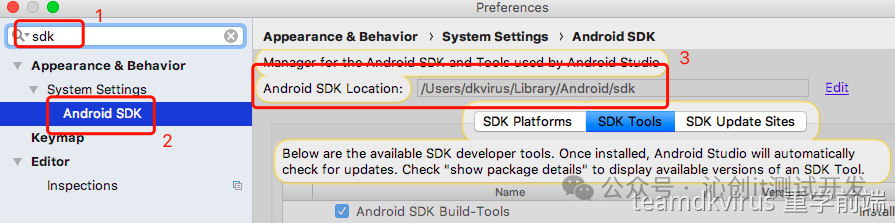
After specifying where the SDK packages are downloaded, configure the SDK directory path in the image below so that Android Studio can find the downloaded SDK toolkits.
3.3 Configuring AVD

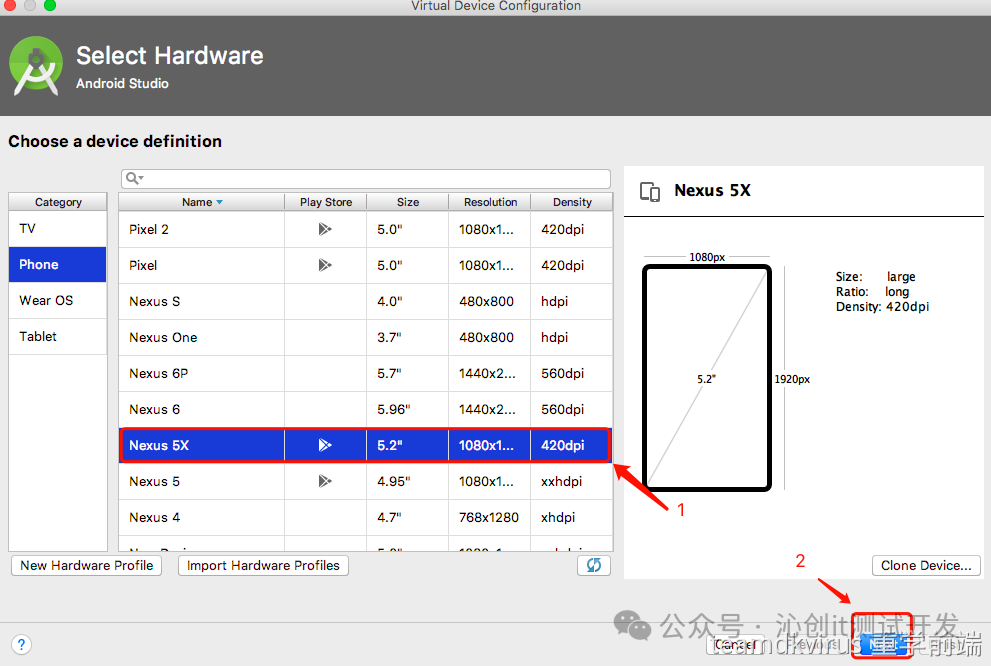
Click the AVD management icon in the upper right corner to open the panel, then click the “Create Virtual Device” button in the lower left corner to create a new virtual device.
Select a device, then click next to choose the system image; here, select Nexus 5X.
Select the system image. Choose x86 Images; when I first opened it, there was nothing in the red text areas, so I manually downloaded the Image using the sdkmanager tool and restarted the development tool.
$ sdkmanager "system-images;android-28;default;x86" --sdk_root=/Users/dkvirus/Library/Android/sdk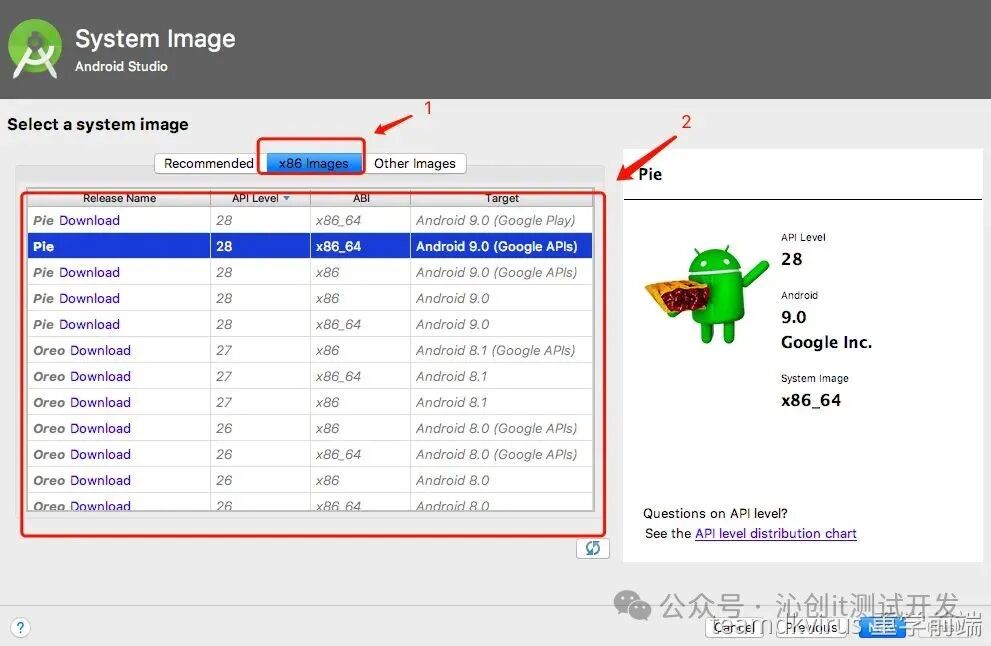 After it appears, select next to complete the configuration. Then click the AVD management icon in the upper right corner to open the dialog, and click the start button shown in the image below; after a moment, the Android virtual device will open on your computer.
 3.4 Configuring GradleWhen running sample code, if an error occurs, it is often related to Gradle; below are the corresponding solutions.●[Android Studio Series (5)] How to Manually Configure Gradle in Android Studio●As a beginner in Flutter, I just finished setting up the environment and encountered the following issue: * Error running Gradle: I don’t know how to start looking for it!●Gradle plugin version3.5 Configuring Flutter Development EnvironmentTo develop Flutter applications using Android Studio, two plugins need to be installed.
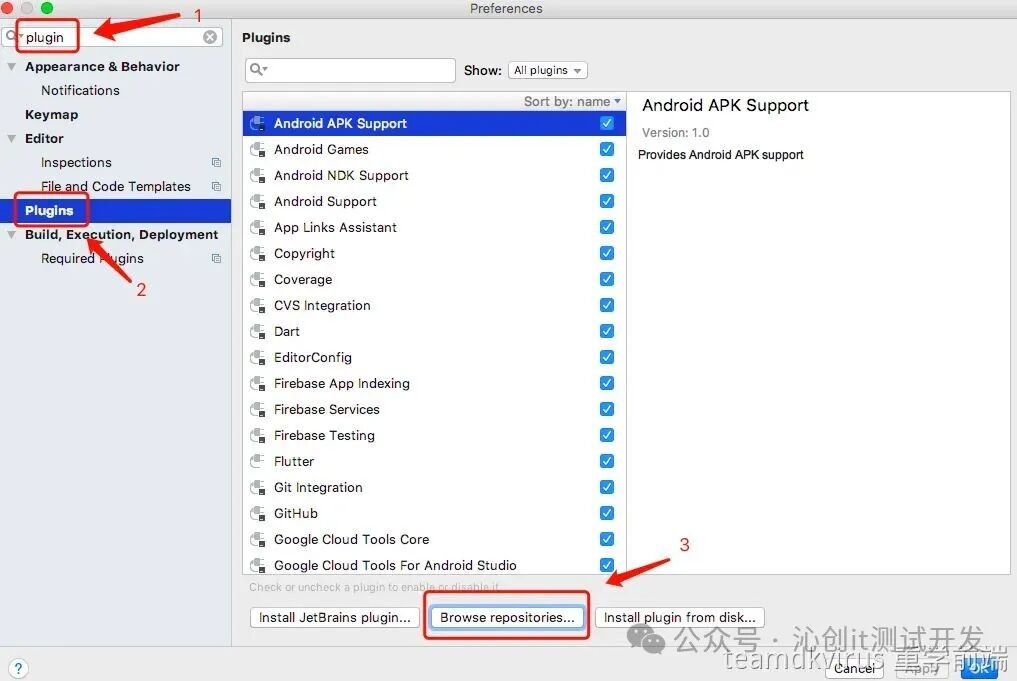
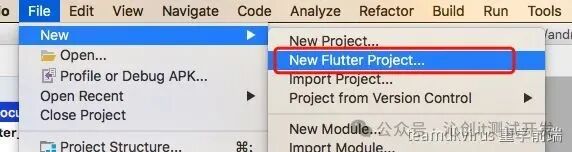
In the new dialog that opens, enter “Flutter” in the search box and click the install button on the right to install it. This process will also install the Dart plugin. After installation, restart the application, and you can directly create a Flutter prototype project under File > New > New Flutter Project, which is simple and straightforward.