Ozone is SEGGER’s free embedded software debugger. It is a powerful tool that allows you to gain deep insights into what is happening within embedded systems. It is particularly useful when debugging nRF9160 Zephyr applications. Organizing multiple threads and multi-image builds can be challenging, but this is the tool you want.
In our previous blog post, “Taking the Next Step: Debugging with SEGGER Ozone and SystemView on Zephyr” (blog link: https://blog.golioth.io/taking-the-next-step-debugging-with-segger-ozone-and-systemview-on-zephyr/), Chris Gammell wrote about how to set up a SEGGER Ozone project to debug Zephyr applications running on the i.MX RT1060 evaluation kit. This is a great introduction to debugging Zephyr applications in Ozone and analyzing RTOS runtime behavior.
When I tried to set up a similar Ozone project to debug the Nordic nRF9160 SIP development board, I encountered some difficulties along the way. Today, I will share what I learned.
In this article, I will cover how to:
• Configure the nRF9160 Zephyr application for thread-aware debugging.
• Create an Ozone project for the nRF9160 using the New Project Wizard.
• Modify the Ozone project to support debugging the nRF9160 multi-image build.
Hardware Configuration

In the example below, I will use the Nordic nRF9160 DK board. This development kit from Nordic has a built-in SEGGER J-Link OB debugger on the board, so no external J-Link debugger is needed to follow along with the example (SEGGER Ozone requires J-Link support).
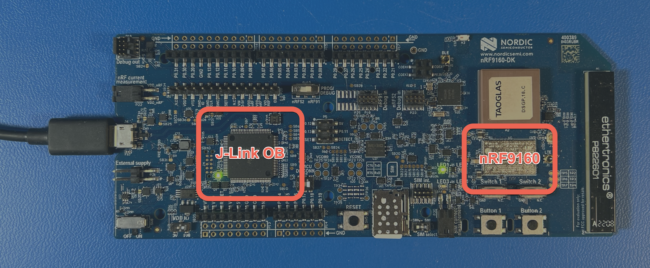
Thread Awareness Support in Zephyr
In a typical Zephyr application built using the Golioth Zephyr SDK, there will be multiple threads. For example, one for the main loop of the application, one for the Golioth system client, and others for UART shell, logging subsystems, network management, etc.
SEGGER provides a Zephyr RTOS plugin for Ozone that displays the status of each thread, but it requires the Zephyr firmware to support thread-aware debugging at build time. Zephyr provides a CONFIG_DEBUG_THREAD_INFO Kconfig symbol that instructs the kernel to maintain a list of all threads, making the thread names visible in Ozone.
While you can simply add CONFIG_DEBUG_THREAD_INFO=y to the application’s prj.conf file, you might want to enable this additional debug information only at build time. We can create an extra debug.conf Kconfig file that will only be merged when we pass the -DEXTRA_CONF_FILE=debug.conf parameter to the build system.
Since this article is about using Ozone for thread-aware debugging, we will use the zephyr/samples/basic/threads/ application from the nRF Connect SDK Zephyr repository as the example application for this article.
If this is your first time building one of the Zephyr example applications, make sure to complete the nRF Connect SDK installation first and ensure your development environment is set up correctly.
How to Enable Thread Awareness
First, create a zephyr/samples/basic/threads/debug.conf file and add the following command lines:
zephyr/samples/basic/threads/debug.conf
CONFIG_DEBUG_THREAD_INFO=y# CONFIG_DEBUG_THREAD_INFO needs the heap memory pool to# be defined for this appCONFIG_HEAP_MEM_POOL_SIZE=256Next, build the firmware, specifying the required debug.conf file to be merged into the build configuration:
cd <your ncs workspace>/west build -p -b nrf9160dk_nrf9160_ns zephyr/samples/basic/threads/ -- -DEXTRA_CONF_FILE="debug.conf"If the build completes successfully, you will see the build/zephyr/zephyr.elf file needed to start a debug session in Ozone.
Creating an Ozone Project
Now that we have built the firmware, we can launch Ozone and create an Ozone project using the New Project Wizard:
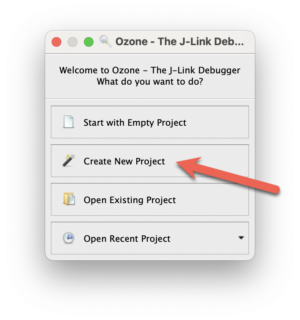
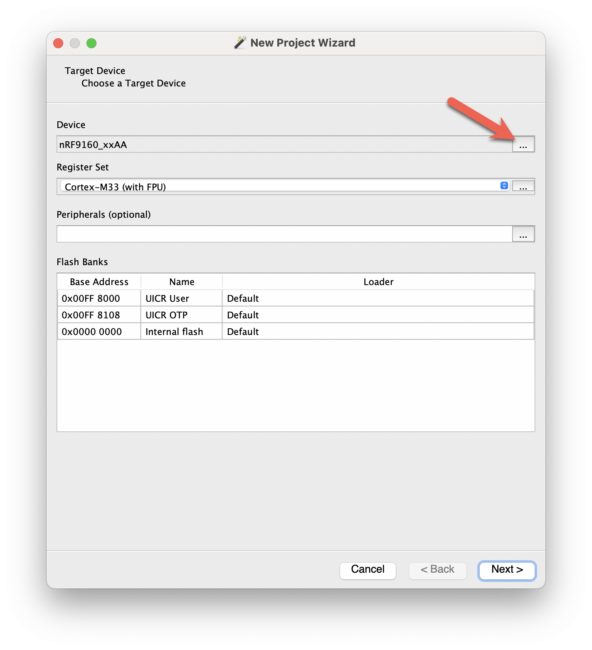
Select the nRF9160_xxAA chip.
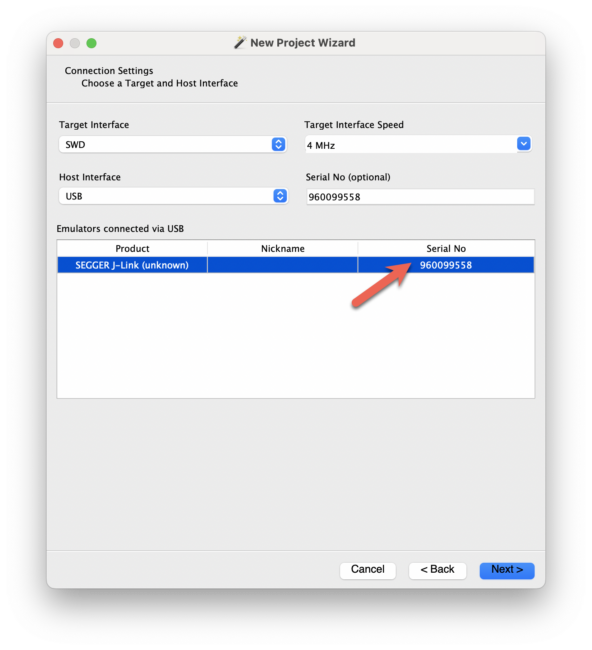
Select to use the J-Link emulator.
Select the build/zephyr/zephyr.elf file that was generated in the previous discussion.
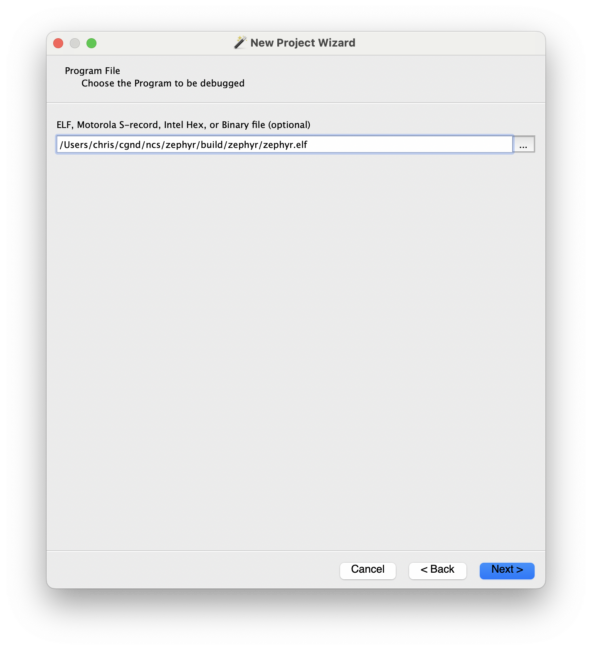
Leave the other selections as defaults.
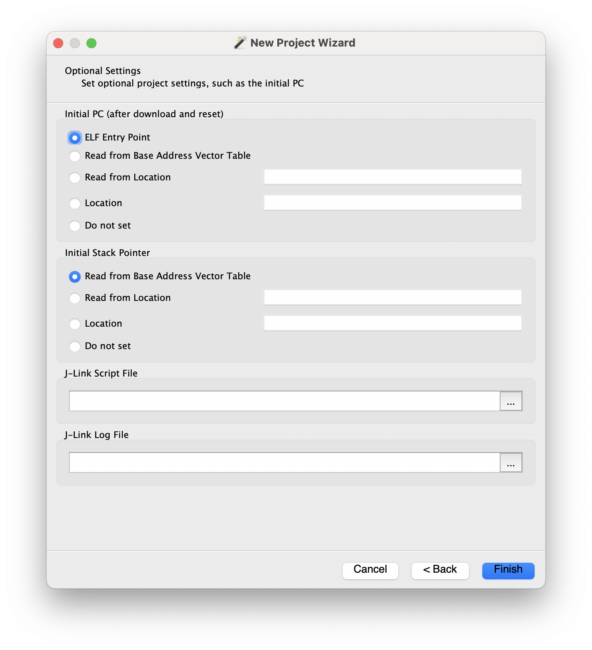
After clicking “Finish,” you will see the Ozone project window appear. In the “Console” window, run the following command to load the Zephyr RTOS plugin:
Project.SetOSPlugin("ZephyrPlugin.js");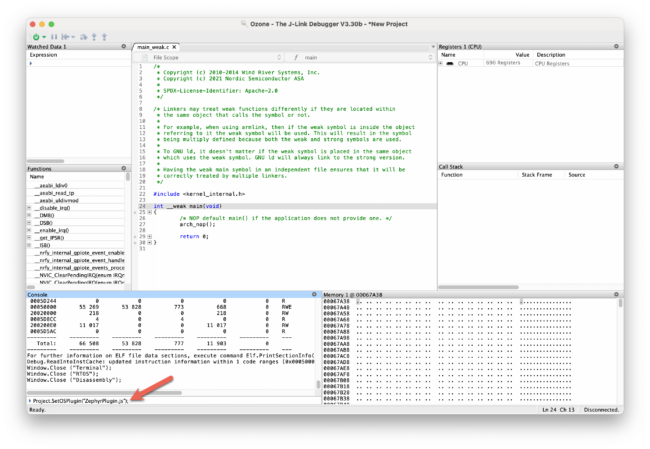
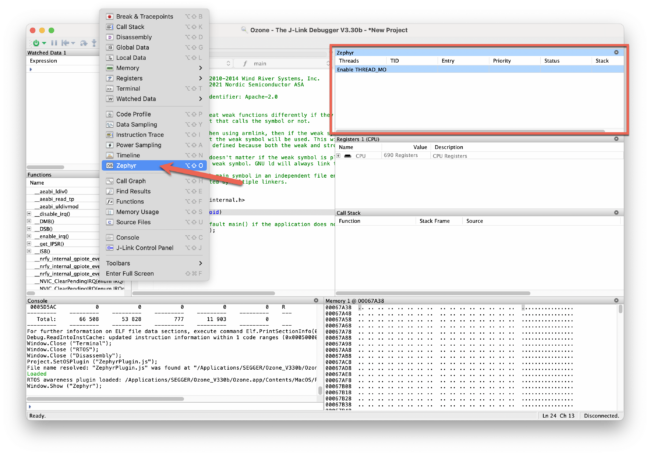
Now, you should see a new “Zephyr” window in the Ozone project (if not, click “View”→”Zephyr” to display the window):
Finally, save the project file by clicking “File”→”Save Project as…”:
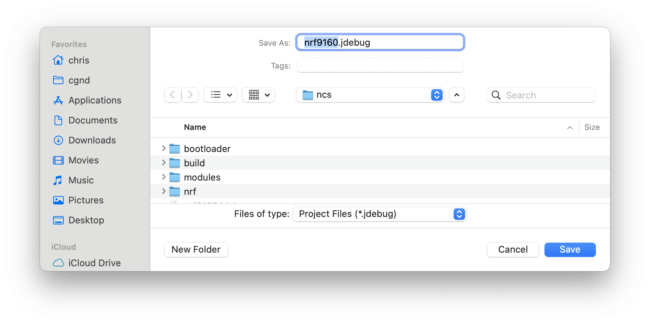
Starting the Debug Session
Now that we have configured the Ozone project, we can start the debug session.
Click “Debug”→”Start Debug Session”→”Download & Reset Pro”
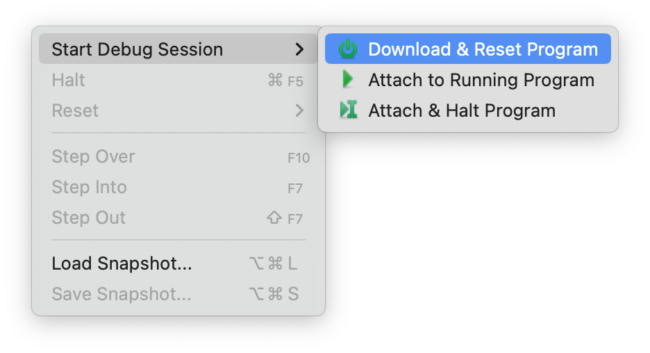
Strangely, when the firmware starts running, a pop-up window will indicate that the target has stopped in a HardFault exception state!
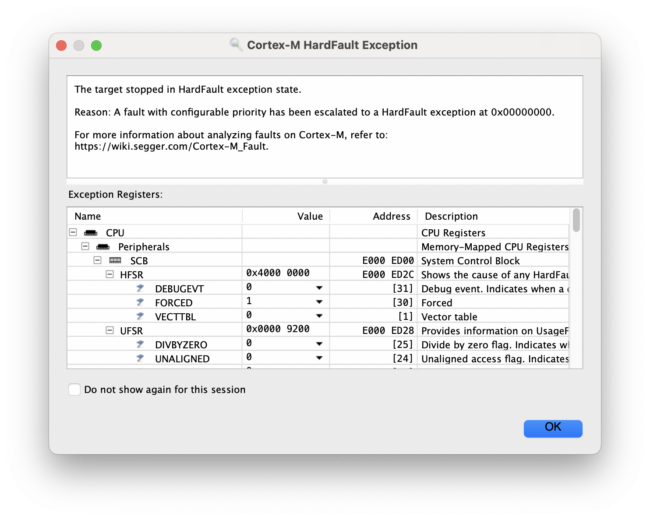
At this point, you might be wondering what is happening here……
Here’s a hint: the answer relates to the multi-image build.
https://docs.nordicsemi.com/bundle/ncs-latest/page/nrf/config_and_build/multi_image.html
Missing Steps:
Burn the Merged File Image
You may have noticed that we pass the board parameter (nrf9160dk_nrf9160_ns) to west build with a _ns suffix. This suffix indicates that the firmware will be built with Trusted Firmware-M (TF-M). This is the reference implementation of ARM’s IoT security framework called Platform Security Architecture (PSA).
TF-M uses the ARM TrustZone security features of the nRF9160’s Cortex-M33 MCU to partition the MCU into a Secure Processing Environment (SPE) and a Non-Secure Processing Environment (NSPE).
In short, the boot process works as follows:
1. When the MCU starts, it begins execution in the secure environment (SPE).
2. The boot process may choose to begin with a secure bootloader chain using NSIB and/or MCUboot.
3. If used, the bootloader will start TF-M, which will configure part of the MCU’s memory and peripherals as non-secure.
4. TF-M starts the Zephyr application running in the non-secure environment (NSPE).
When we build targeting _ns, the TF-M image is automatically built and linked with the Zephyr application. If you look at the build/zephyr/ output directory, you will see a file named merged.hex, which is a merged file containing the MCUboot bootloader (optional), TF-M secure image, and the non-secure Zephyr application.
Fixing the Ozone Project File
We will make some changes directly in the Ozone project file, which can be opened in Ozone by clicking “File”→”Edit Project File”:
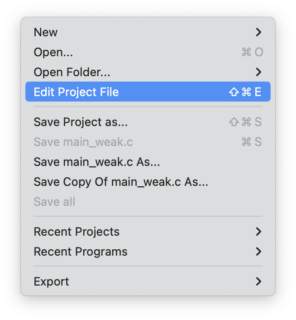
Burning the Merged Image
Navigate to the TargetDownload section of the Ozone project file and add the following content to configure Ozone to flash the merged image (change the path to match the merged image file in your project):
/*********************************************************************** TargetDownload** Function description* Replaces the default program download routine. Optional.************************************************************************/void TargetDownload(void){Exec.Download("$(ProjectDir)/build/zephyr/merged.hex");}Fix the vector table and PC address
Navigate to the _SetupTarget section of the Ozone project file and make the following changes:
1. Set the vector table address to 0
2. Read the entry point program counter address from the vector table
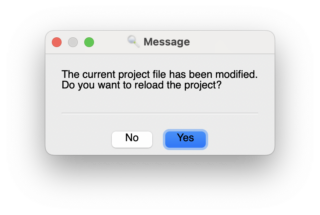
/*********************************************************************** _SetupTarget** Function description* Setup the target.* Called by AfterTargetReset() and AfterTargetDownload().** Auto-generated function. May be overridden by Ozone.************************************************************************/void _SetupTarget(void) {unsigned int SP;unsigned int PC;unsigned int VectorTableAddr;VectorTableAddr = 0;//// Set up initial stack pointer//SP = Target.ReadU32(VectorTableAddr);if (SP != 0xFFFFFFFF) {Target.SetReg("SP", SP);}//// Set up entry point PC//PC = Target.ReadU32(VectorTableAddr + 4);if (PC != 0xFFFFFFFF) {Target.SetReg("PC", PC);} else {Util.Error("Project script error: failed to set up entry point PC", 1);}}When you save the project file, you should see a prompt asking if you want to reload the project.
Select “Yes”:
Starting the Debug Session
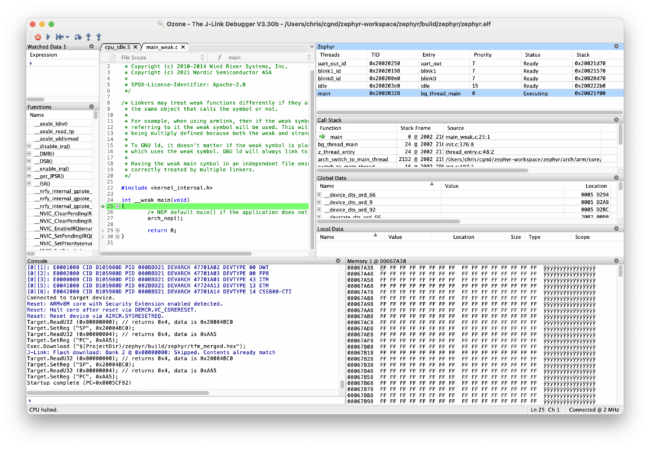
After the image file is flashed onto the chip, you should see the debugger stop at the main location:
Click “Debug”→”Continue”:
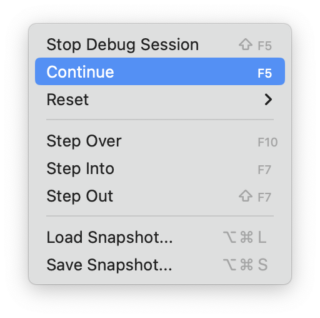
This time, the firmware runs normally without any exceptions.
Conclusion
I hope this helps you get started debugging the nRF9160 with Ozone. The nRF9160 has full support in Zephyr projects and the highest level of support in the Golioth IoT device management platform. With Golioth, you can connect and secure devices, send sensor data to the web, wirelessly update firmware, and expand your coverage using the IoT cloud.
Mictech Technology is the agent for SEGGER products in China, with over 20 years of market, service, and training experience in embedded real-time operating systems and tools. We have recorded many SEGGER video courses and written blog posts. For more product information, contact Mictech Technology [email protected].
Welcome to follow our WeChat public account 【Mictech Technology】, reply with “Join Group” to join the technical exchange group as prompted.
Product Consultation:
Beijing: 010-62975900
Shanghai: 021-62127690
Shenzhen: 0755-82977971