Quietly, it has been upgraded again.
The latest version of Atmel Studio is 7.0.2389, feel free to upgrade.
https://www.microchip.com/mplab/avr-support/atmel-studio-7
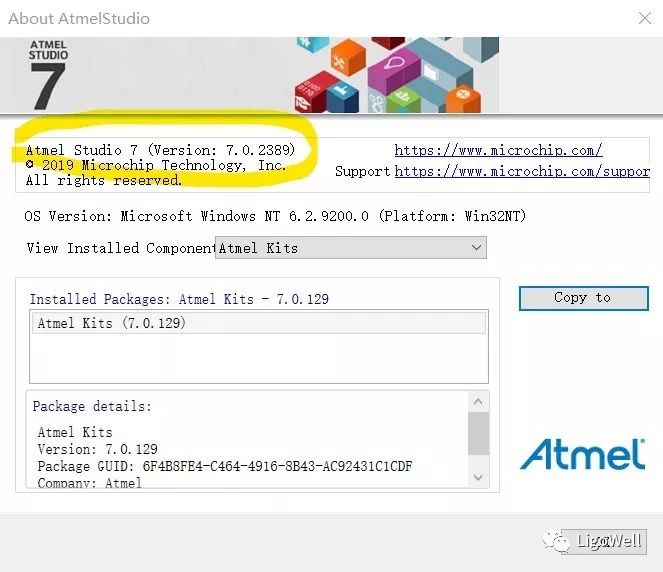
Here, I will discuss AS7’s perfect support for PICKIT 4 and how to package ELF files.
====================
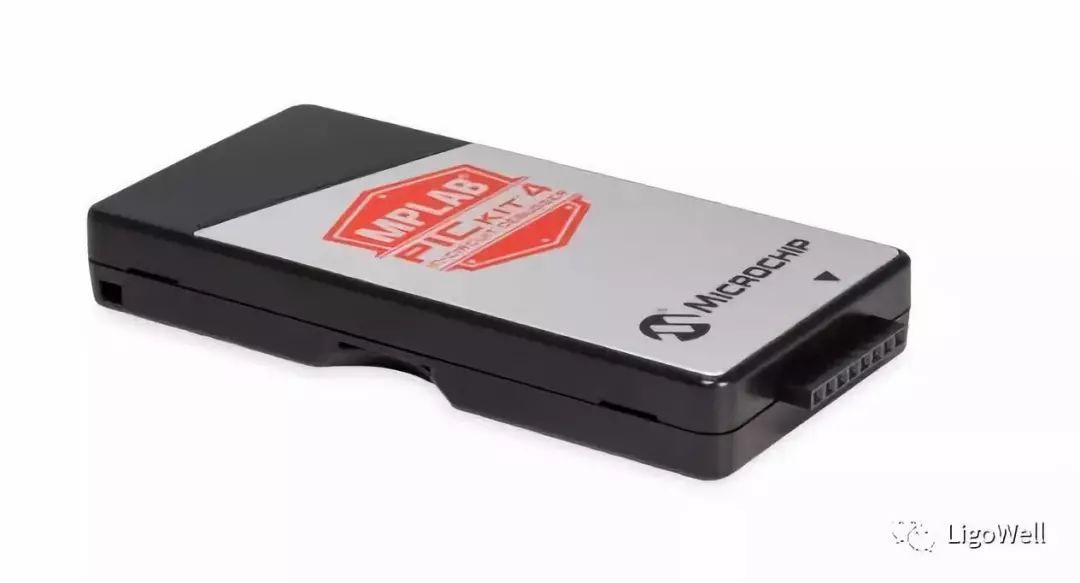
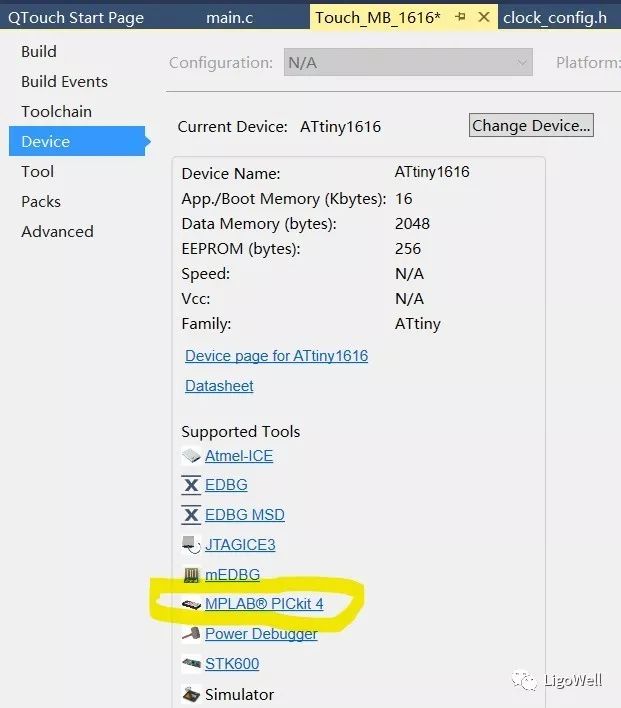
When creating a new AVR series project in the latest version of AS7, you will find that it now supports the low-cost development tool PICKIT 4. This is great news as it solves many developers’ issues.
Although PICKIT 4 is low-cost, it has a rich debugging interface, and its features are continuously being upgraded and improved.
It supports downloading and debugging for PIC, AVR, and SAM (ARM) series hardware interfaces.
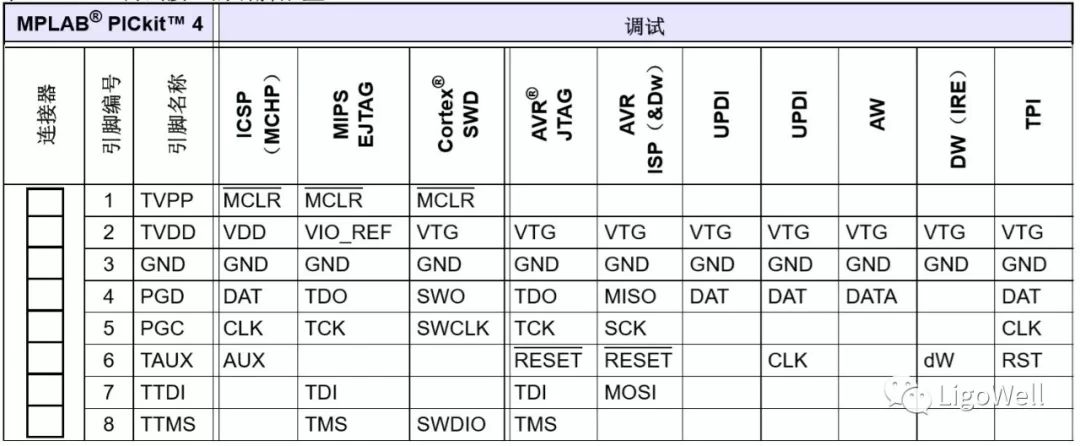
It also provides a practical data stream interface.
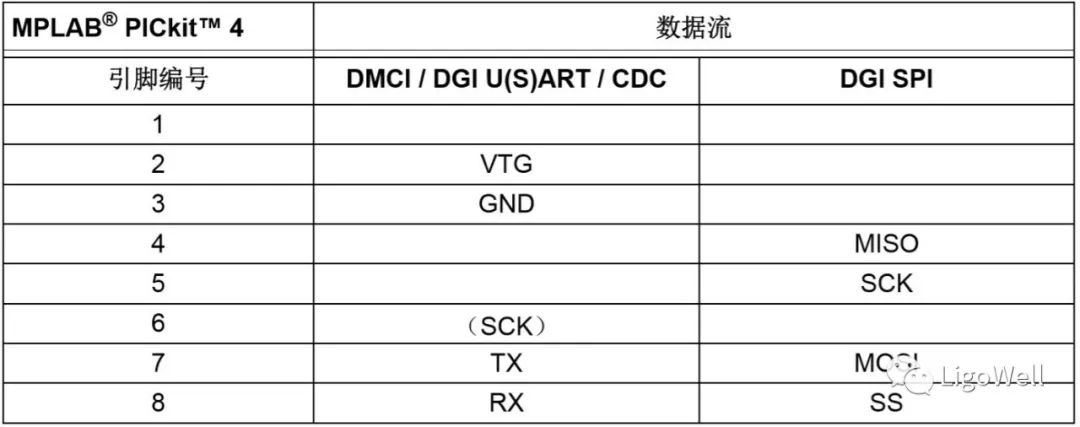
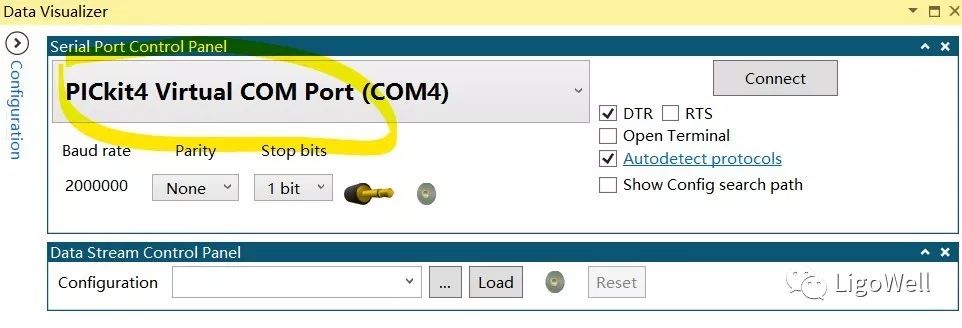
It can be combined with Data Visualizer to view data streams in real-time.
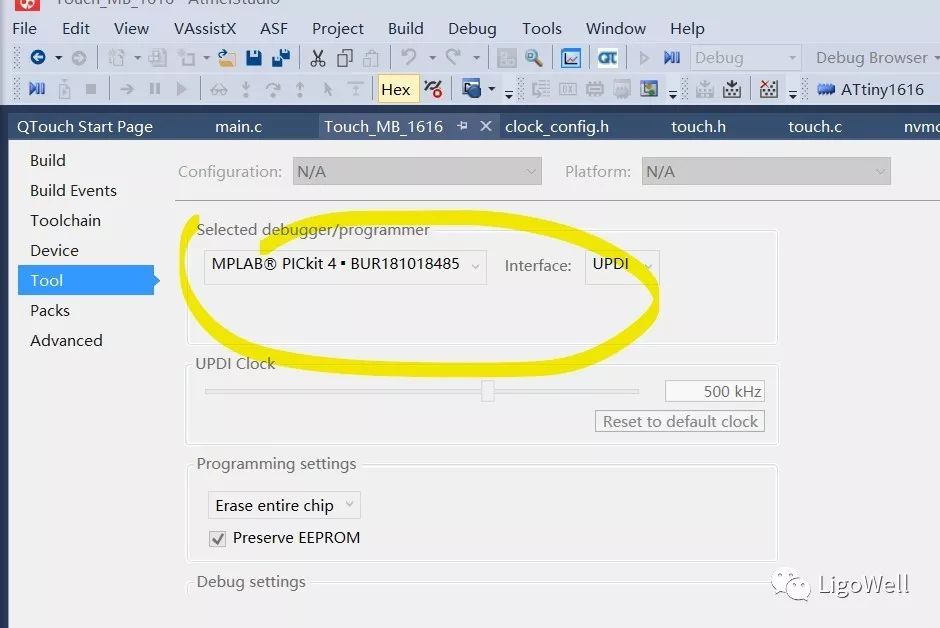
You can select PICKIT 4 to enter online debugging mode.
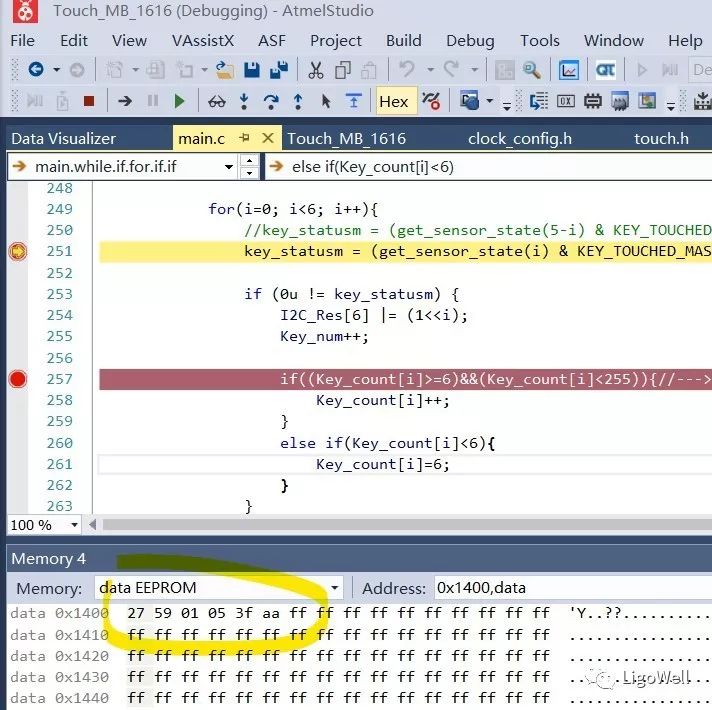
The actual debugging functionality is similar to atmel-ICE and power debugger, allowing developers seamless integration.
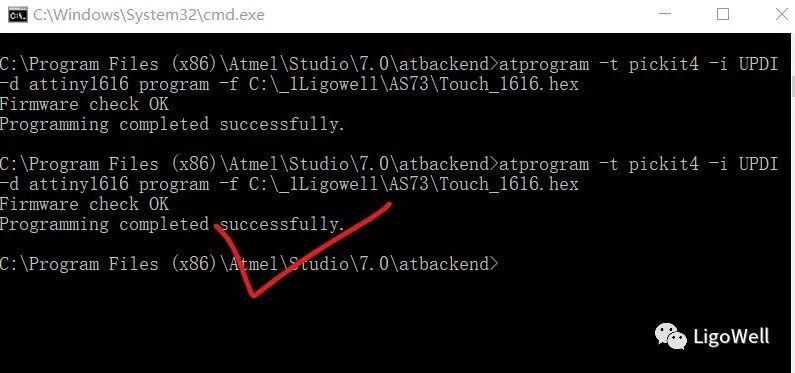
Of course, you can also use the command line in Atmel Studio to achieve unattended downloading and programming processes.
====================
Previously, in the article “At the Last Moment, How Can Programmers Correctly Convert Project Code into Production Files?” it was mentioned that converting project code into production files in AS7 can be confusing for some friends. Here, I will go over it in detail again:
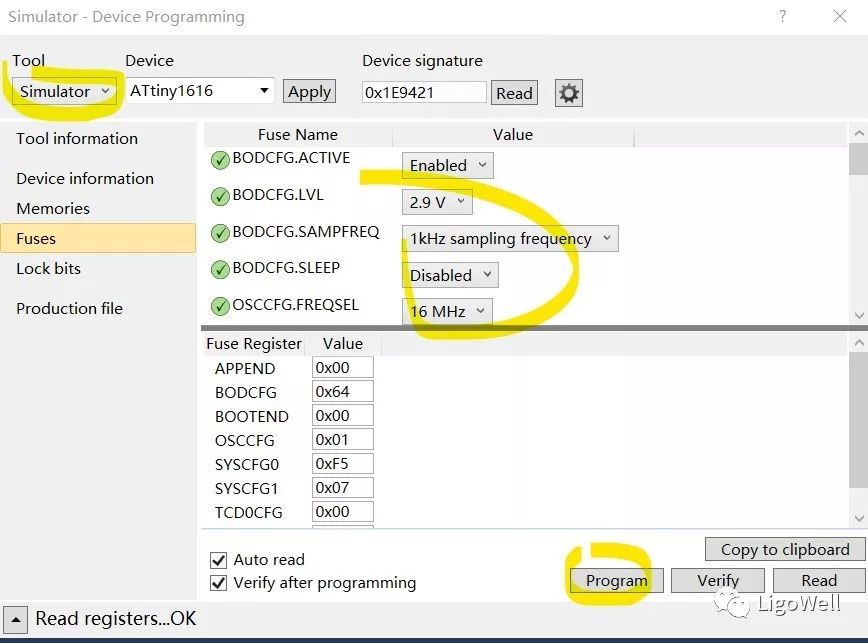
First, set the Tool to Simulator, then click Apply. You can change the Fuses as needed, and after making the changes, click Program.
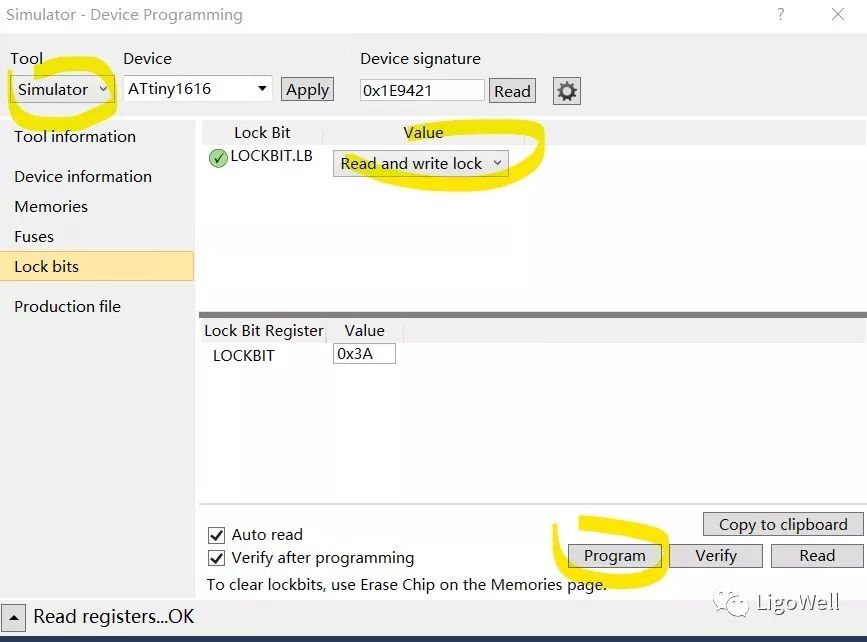
Open the Lock bits option, select as needed, and click Program. Here, select “Read/Write Lock”.
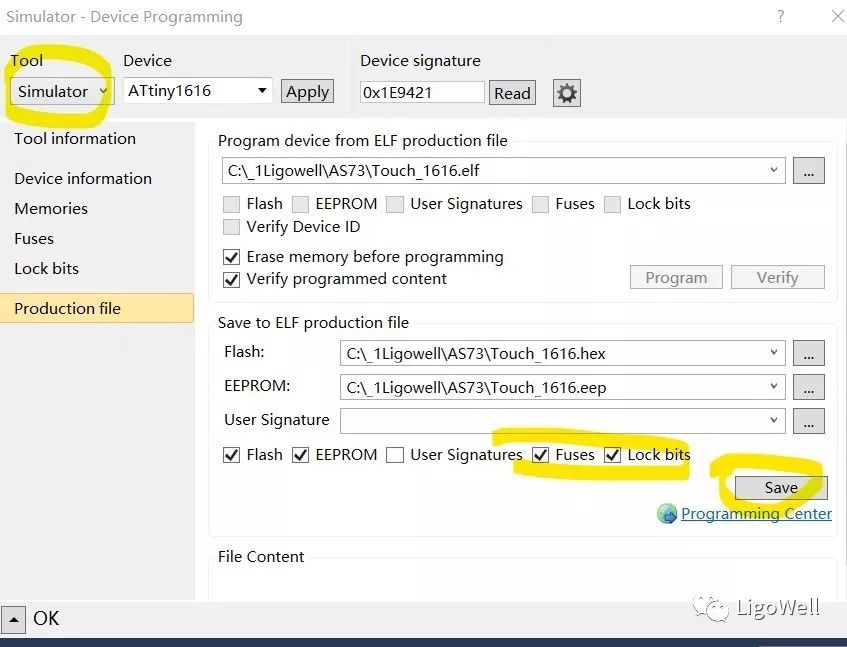
Open the Production file option, in the lower part of the dialog, select Flash, EEPROM, Fuses, Lock bits, etc. as needed, then click Save to package the ELF file.
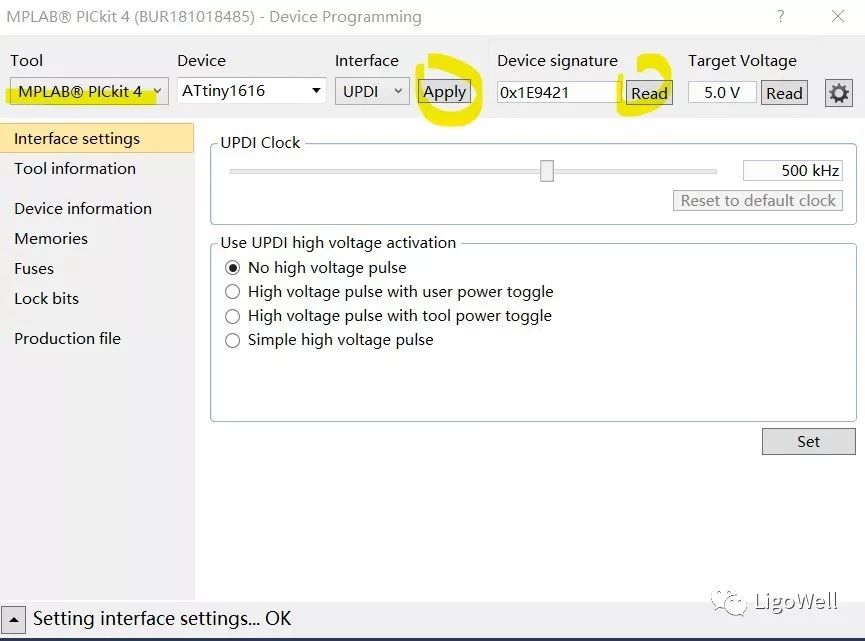
Select the Tool as Hardware Tool for programming or verification. Here, select the latest supported PICKIT 4 for testing.
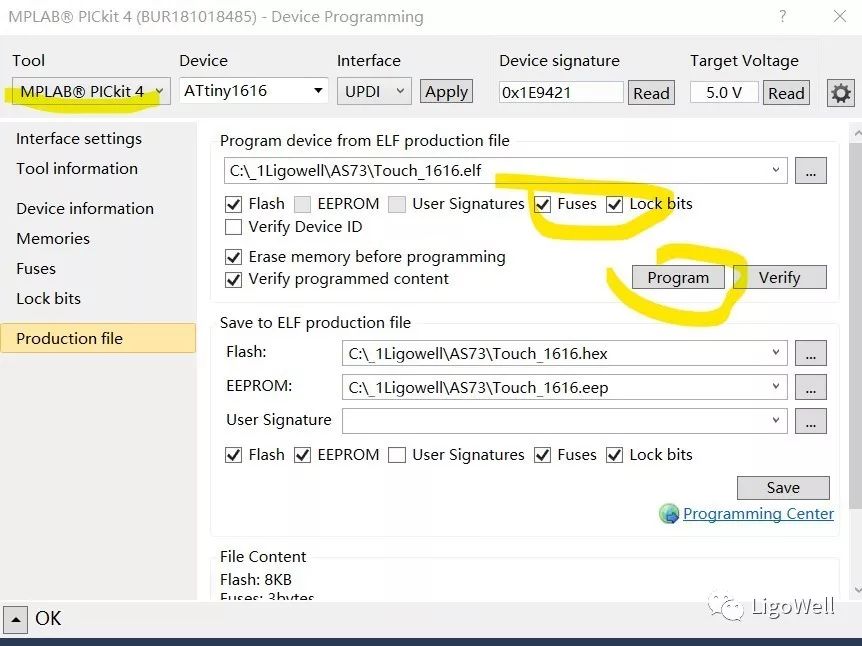
Open the Production file option, select the ELF file generated earlier that contains Fuses and Lock bits information, and click Program. Once it prompts OK, the download is complete.
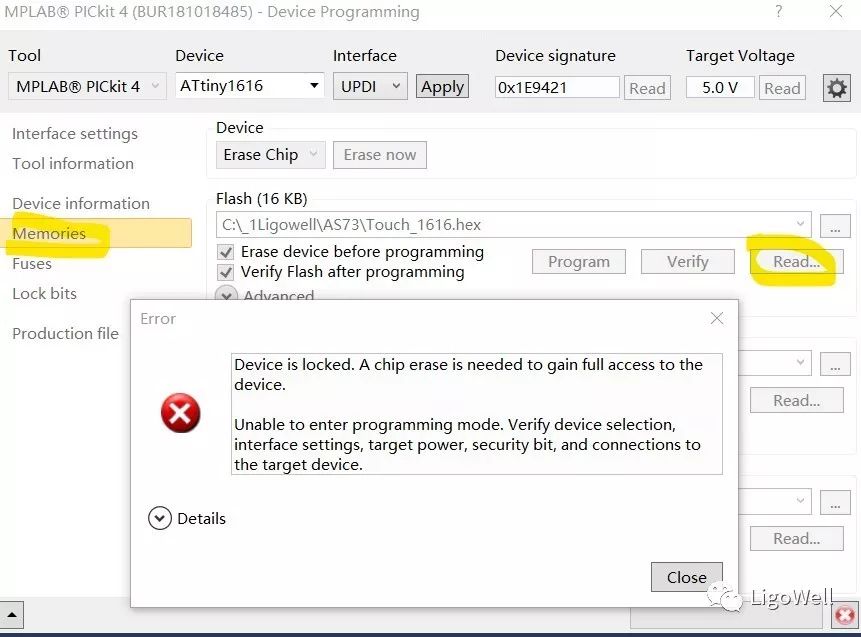
The generated ELF file contains read/write lock functionality; let’s try to read it and see the lock prompt.
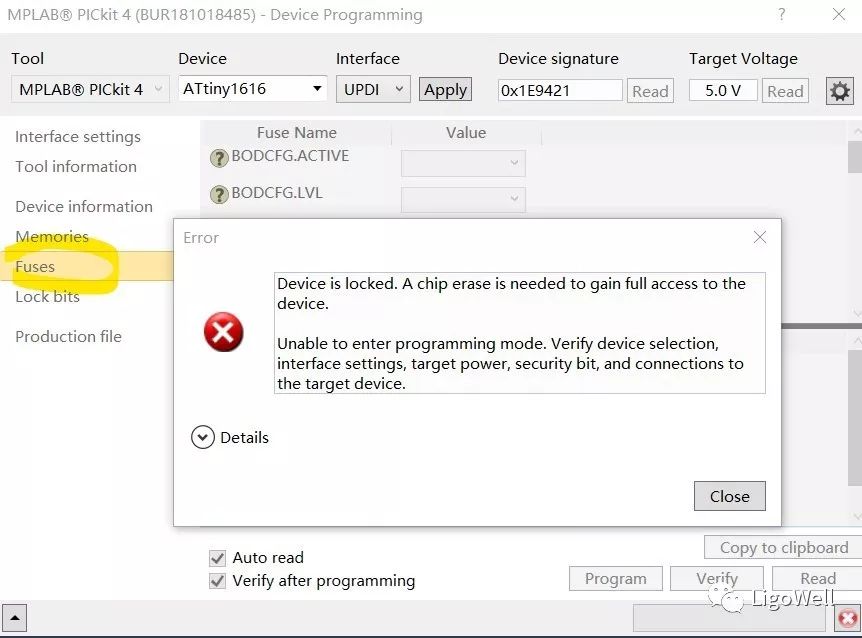
Next, let’s check the Fuses content, which also prompts that it is locked.
As for the Lock bits? It still prompts that it cannot be read.
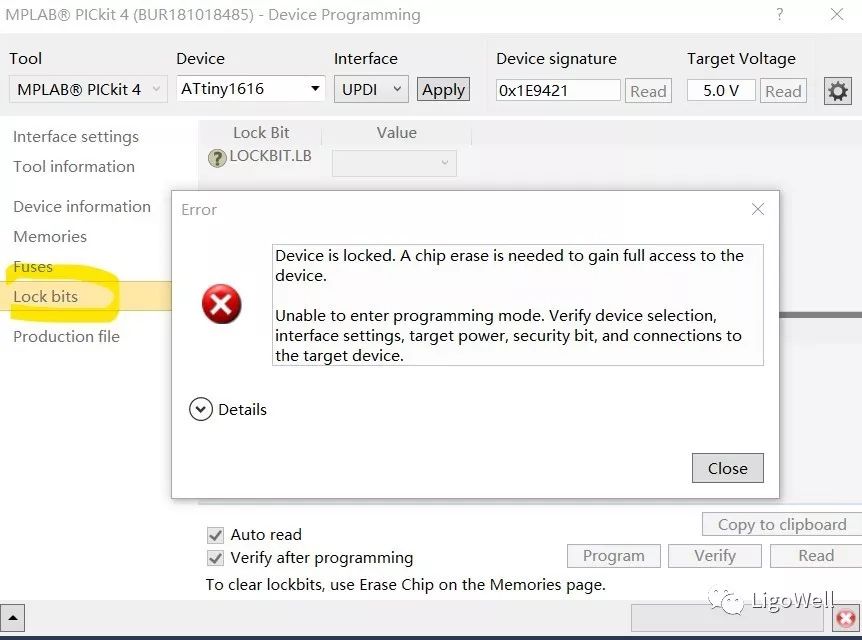
After checking the program functionality on the board, everything is normal, indicating that the ELF file packaging is complete.
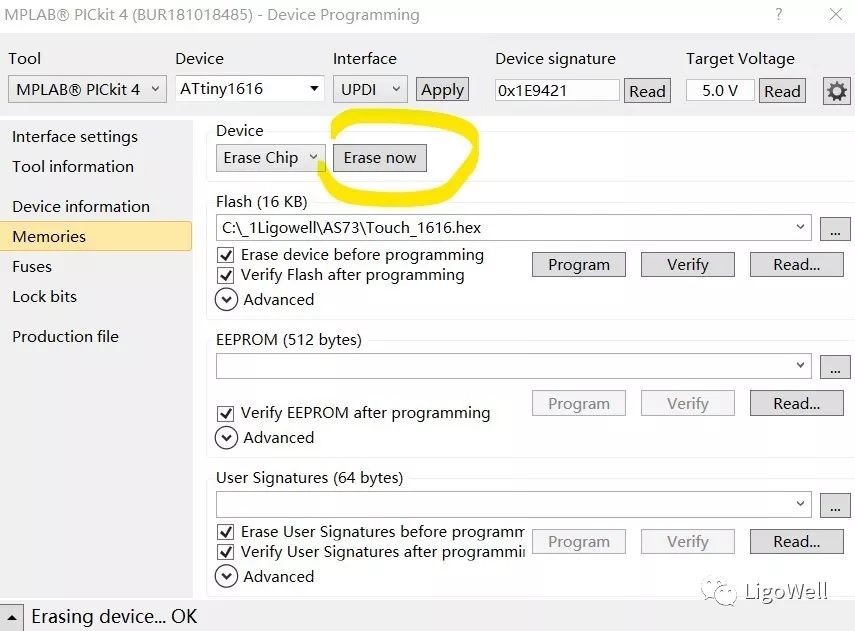
If you want to unlock the Lock bits, you can use the Erase Chip command to erase it, but this will also clear the program.
Related Articles: “At the Last Moment, How Can Programmers Correctly Convert Project Code into Production Files?”
OK, this concludes this session..
Welcome to discuss.