Modetest is a testing program provided by libdrm that can query the characteristics of display devices, perform basic display tests, and set display modes.
We can use this tool to learn about Linux DRM application programming. Additionally, to analyze the Rockchip DRM driver in depth, it is necessary to first understand how to use this tool and its internal implementation.
Table of Contents:
1. Preparation Work

2. Modetest Usage Examples
  1. View Help Information
  2. View Component Information
  3. Display on HDMI
  4. Display on eDP

3. Write the Simplest DRM Application

4. How Does the DRM Application Call the Rockchip DRM Driver?

5. Related References
1. Preparation Work
On NanoPC T4 + Linux-4.4:
-
Connect the eDP screen and HDMI monitor properly;
-
Exit all programs occupying /dev/dri/card0;
-
Compile modetest
$ git clone https://gitlab.freedesktop.org/mesa/drm
$ apt-get install meson
$ meson builddir/
$ ninja -C builddir/ install
2. Modetest Usage Examples
1. View Help Information
$ modetest -h
usage: modetest [-acDdefMPpsCvrw]

Query options:

-c      list connectors
-e      list encoders
-f      list framebuffers
-p      list CRTCs and planes (pipes)

Test options:
    ...
Generic options:

-d      drop master after mode set
-M module       use the given driver
-D device       use the given device

Default is to dump all info.
2. View Component Information
$ modetest -M rockchip
Encoders:
id      crtc    type    possible crtcs  possible clones
76      54      TMDS    0x00000001      0x00000000
78      0       TMDS    0x00000003      0x00000000
80      65      TMDS    0x00000002      0x00000000

Connectors:
    ...
Parameter Description:
-M: Used to specify access to the rockchip DRM driver
Key Content:
-
The id of Encoders / Connectors / CRTCs / Planes, modetest uses the id to reference these components.
-
Modes/props of Connectors:
-
prop: Any parameter you want to set can be made into a property, which is the most flexible and convenient mode-setting mechanism in the DRM driver;
-
modes: Display modes, which contain information related to display such as resolution and refresh rate;
-
Props of CRTCs;
-
Formats/props of Planes;
Component IDs:
$ modetest -M rockchip | cut -f1 | grep -E ^[0-9A-Z]\|id

Encoders:
 id
 90, edp encoder
 92, hdmi encoder
 100, dp encoder
Connectors:
 id
 91, edp connector
 93, hdmi connector
 101, dp connector
CRTCs:
 id
 64, vop crtc
 83, vop crtc
Planes:
 id
 58
 61
 65
 68
 80
 84
Frame buffers:
 id
3. Display on HDMI
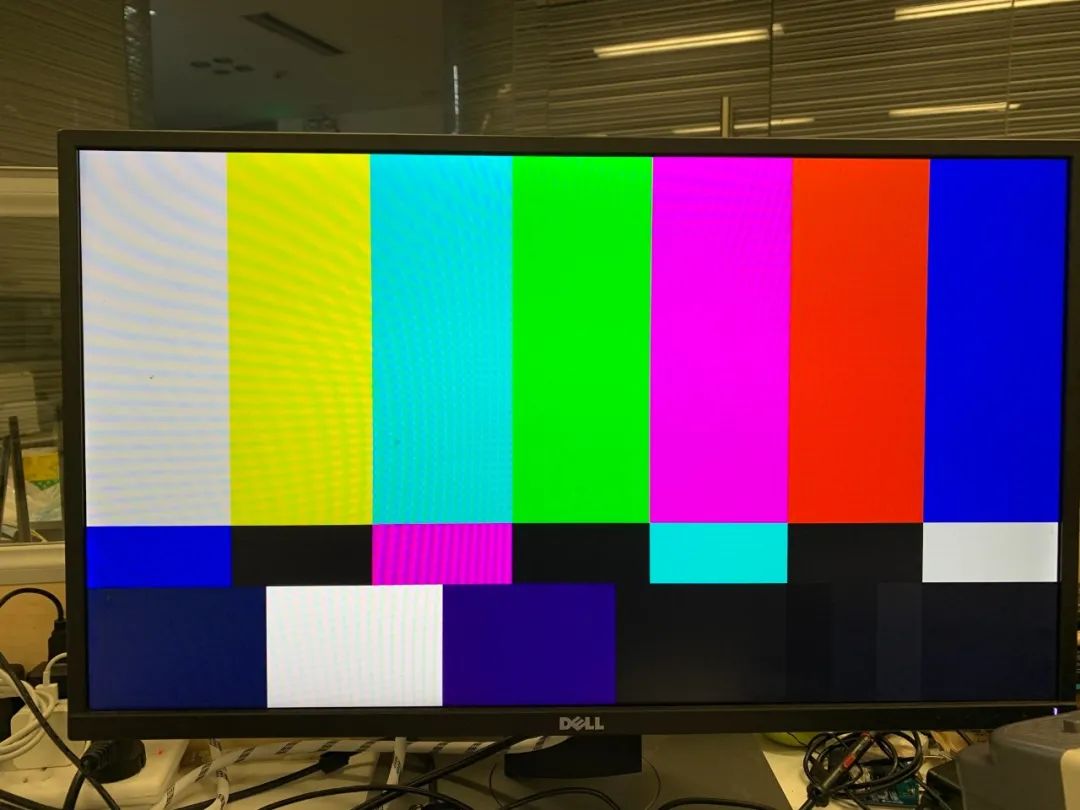
$ modetest -M rockchip -s 93@64:1920x1080
$ modetest -M rockchip -s 93@64:#1   // Same effect
Parameter Description:
-
-s <connector_id>[,<connector_id>][@<crtc_id>]:[#<mode index>]<mode>[-<vrefresh>][@<format>]: Used to display a certain pattern on a specified pipeline in a certain mode. -
93: HDMI connector id -
64: A certain VOP’s crtc id -
1920x1080: Display mode;
Other Optional Modes under HDMI Connector:
#0 1920x1080 60.00
#1 1920x1080 59.94
#2 1920x1080i 30.00
#3 1920x1080i 29.97
...
#24 640x480 60.00
#25 640x480 59.94
#26 720x400 70.08
Display Effect:
4. Display on eDP
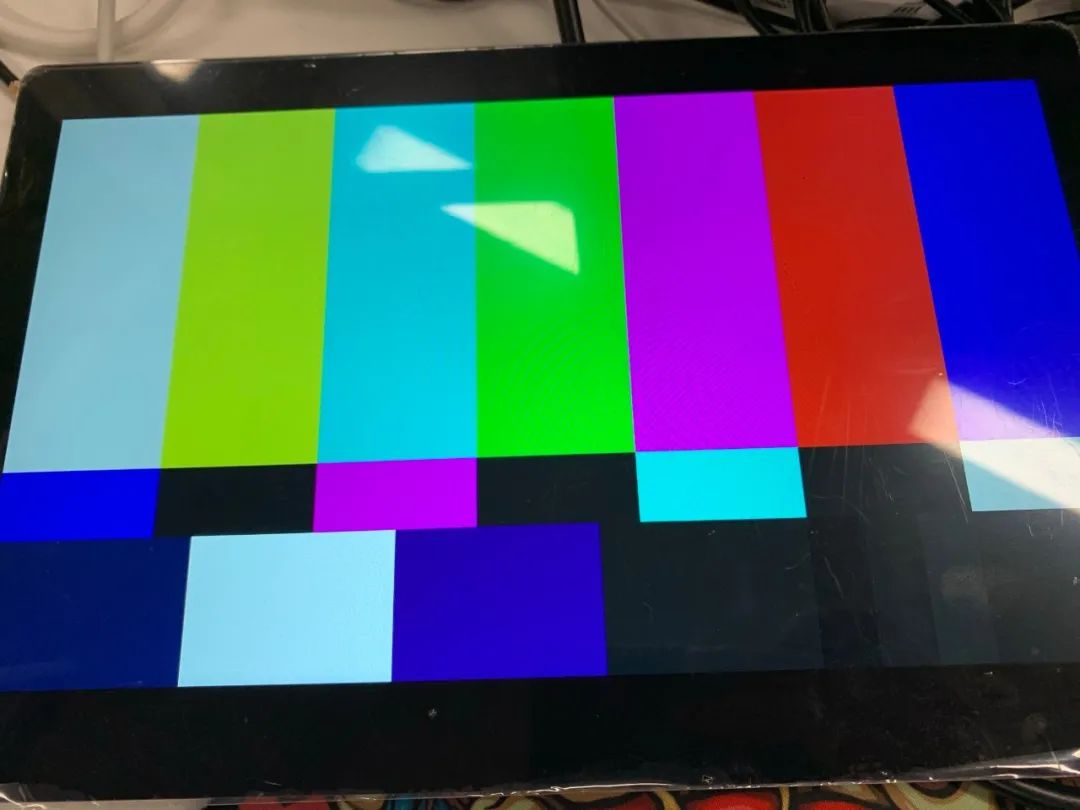
$ modetest -M rockchip -s 91@83:1920x1080
Parameter Description:
-
91: eDP connector id -
83: Another VOP’s crtc id -
1920x1080: Display mode;
Display Effect:
3. Write the Simplest DRM Application
Main Program:
int main(int argc, char **argv)
{
 int fd;
 drmModeConnector *conn;
 drmModeRes *res;
 uint32_t conn_id;
 uint32_t crtc_id;

    // 1. Open device
 fd = open("/dev/dri/card0", O_RDWR | O_CLOEXEC);

    // 2. Get crtc and connector ids
 res = drmModeGetResources(fd);
 crtc_id = res->crtcs[0];
 conn_id = res->connectors[0];

    // 3. Get connector
 conn = drmModeGetConnector(fd, conn_id);
 buf.width = conn->modes[0].hdisplay;
 buf.height = conn->modes[0].vdisplay;

    // 4. Create framebuffer
 modeset_create_fb(fd, &buf);

    // 5. Sets a CRTC configuration, after which it will start outputting display on crtc0 + connector0 pipeline in mode0
 drmModeSetCrtc(fd, crtc_id, buf.fb_id, 0, 0, &conn_id, 1, &conn->modes[0]);

 getchar();

 // 6. cleanup
 ...

 return 0;
}
modeset_create_fb():
This function is used to allocate a framebuffer, currently, it does not need too much attention, basically, it consists of 3 steps:
- Allocating memory;
- Preparing a mapping;
- Mapping memory;
Running Effect:
After the program runs, the eDP screen displays a full white screen, waiting for user input; when the user presses any key, the program exits, displaying a black screen.
4. How Does the DRM Application Call the Rockchip DRM Driver?
drmModeSetCrtc() to CRTC driver:
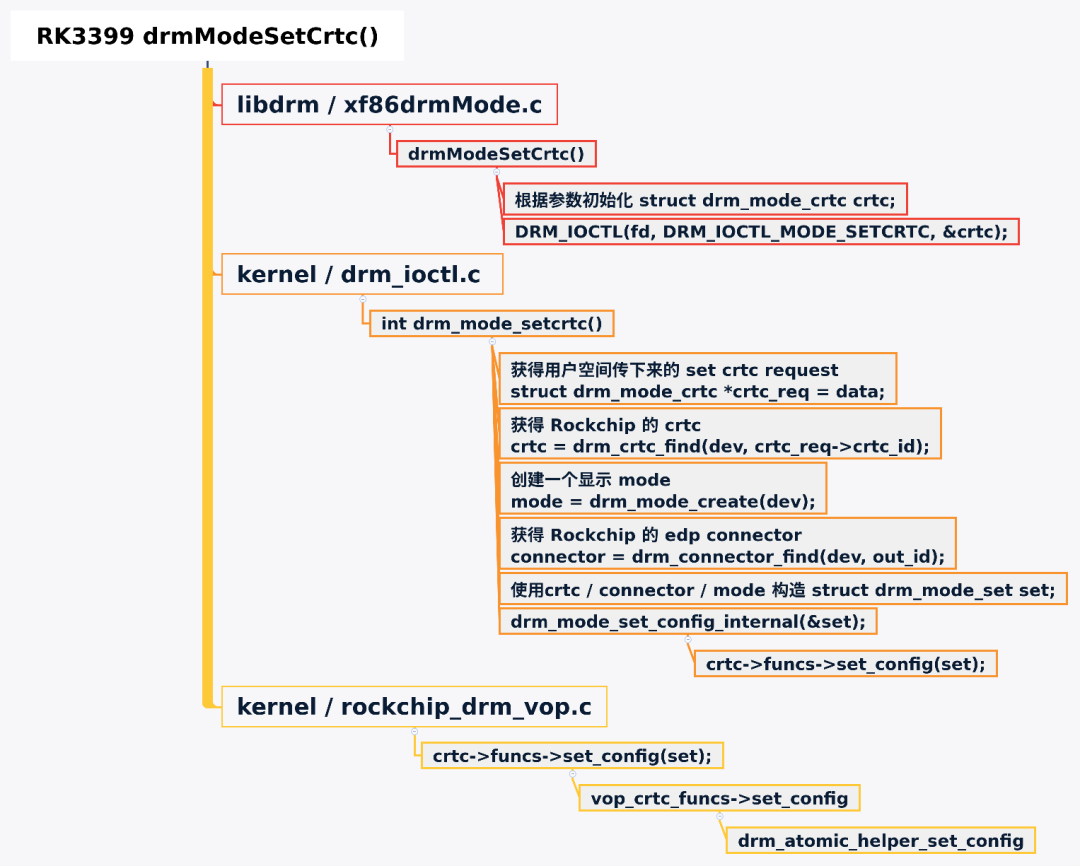
Each DRM CRTC Driver (for example, Rockchip VOP driver) will define a struct drm_crtc_funcs structure, where .set_config points to drm_atomic_helper_set_config(), after which the DRM core starts working.
5. Related References
-
“Exploring RK3399 / Display Subsystem / Basic Concepts”
-
Brother Xiaolong’s Blog: https://blog.csdn.net/hexiaolong2009/article/details/83721242
-
NVIDIA Documentation: https://docs.nvidia.com/drive/nvvib_docs
-
Linux man manual: man 7 drm
Think About Technology, Also Think About Life
To learn technology, but also to learn how to live.
You and I each have an apple, if we exchange apples, we still only have one apple. But when you and I each have an idea, if we exchange ideas, then we both have two ideas.
Interested in embedded systems (Linux, RTOS, OpenWrt, Android) and open-source software, follow the public account: Embedded Hacker.
If you find this article valuable, feel free to click View and Like.